Rubber Stamping Machine
Dev Diary
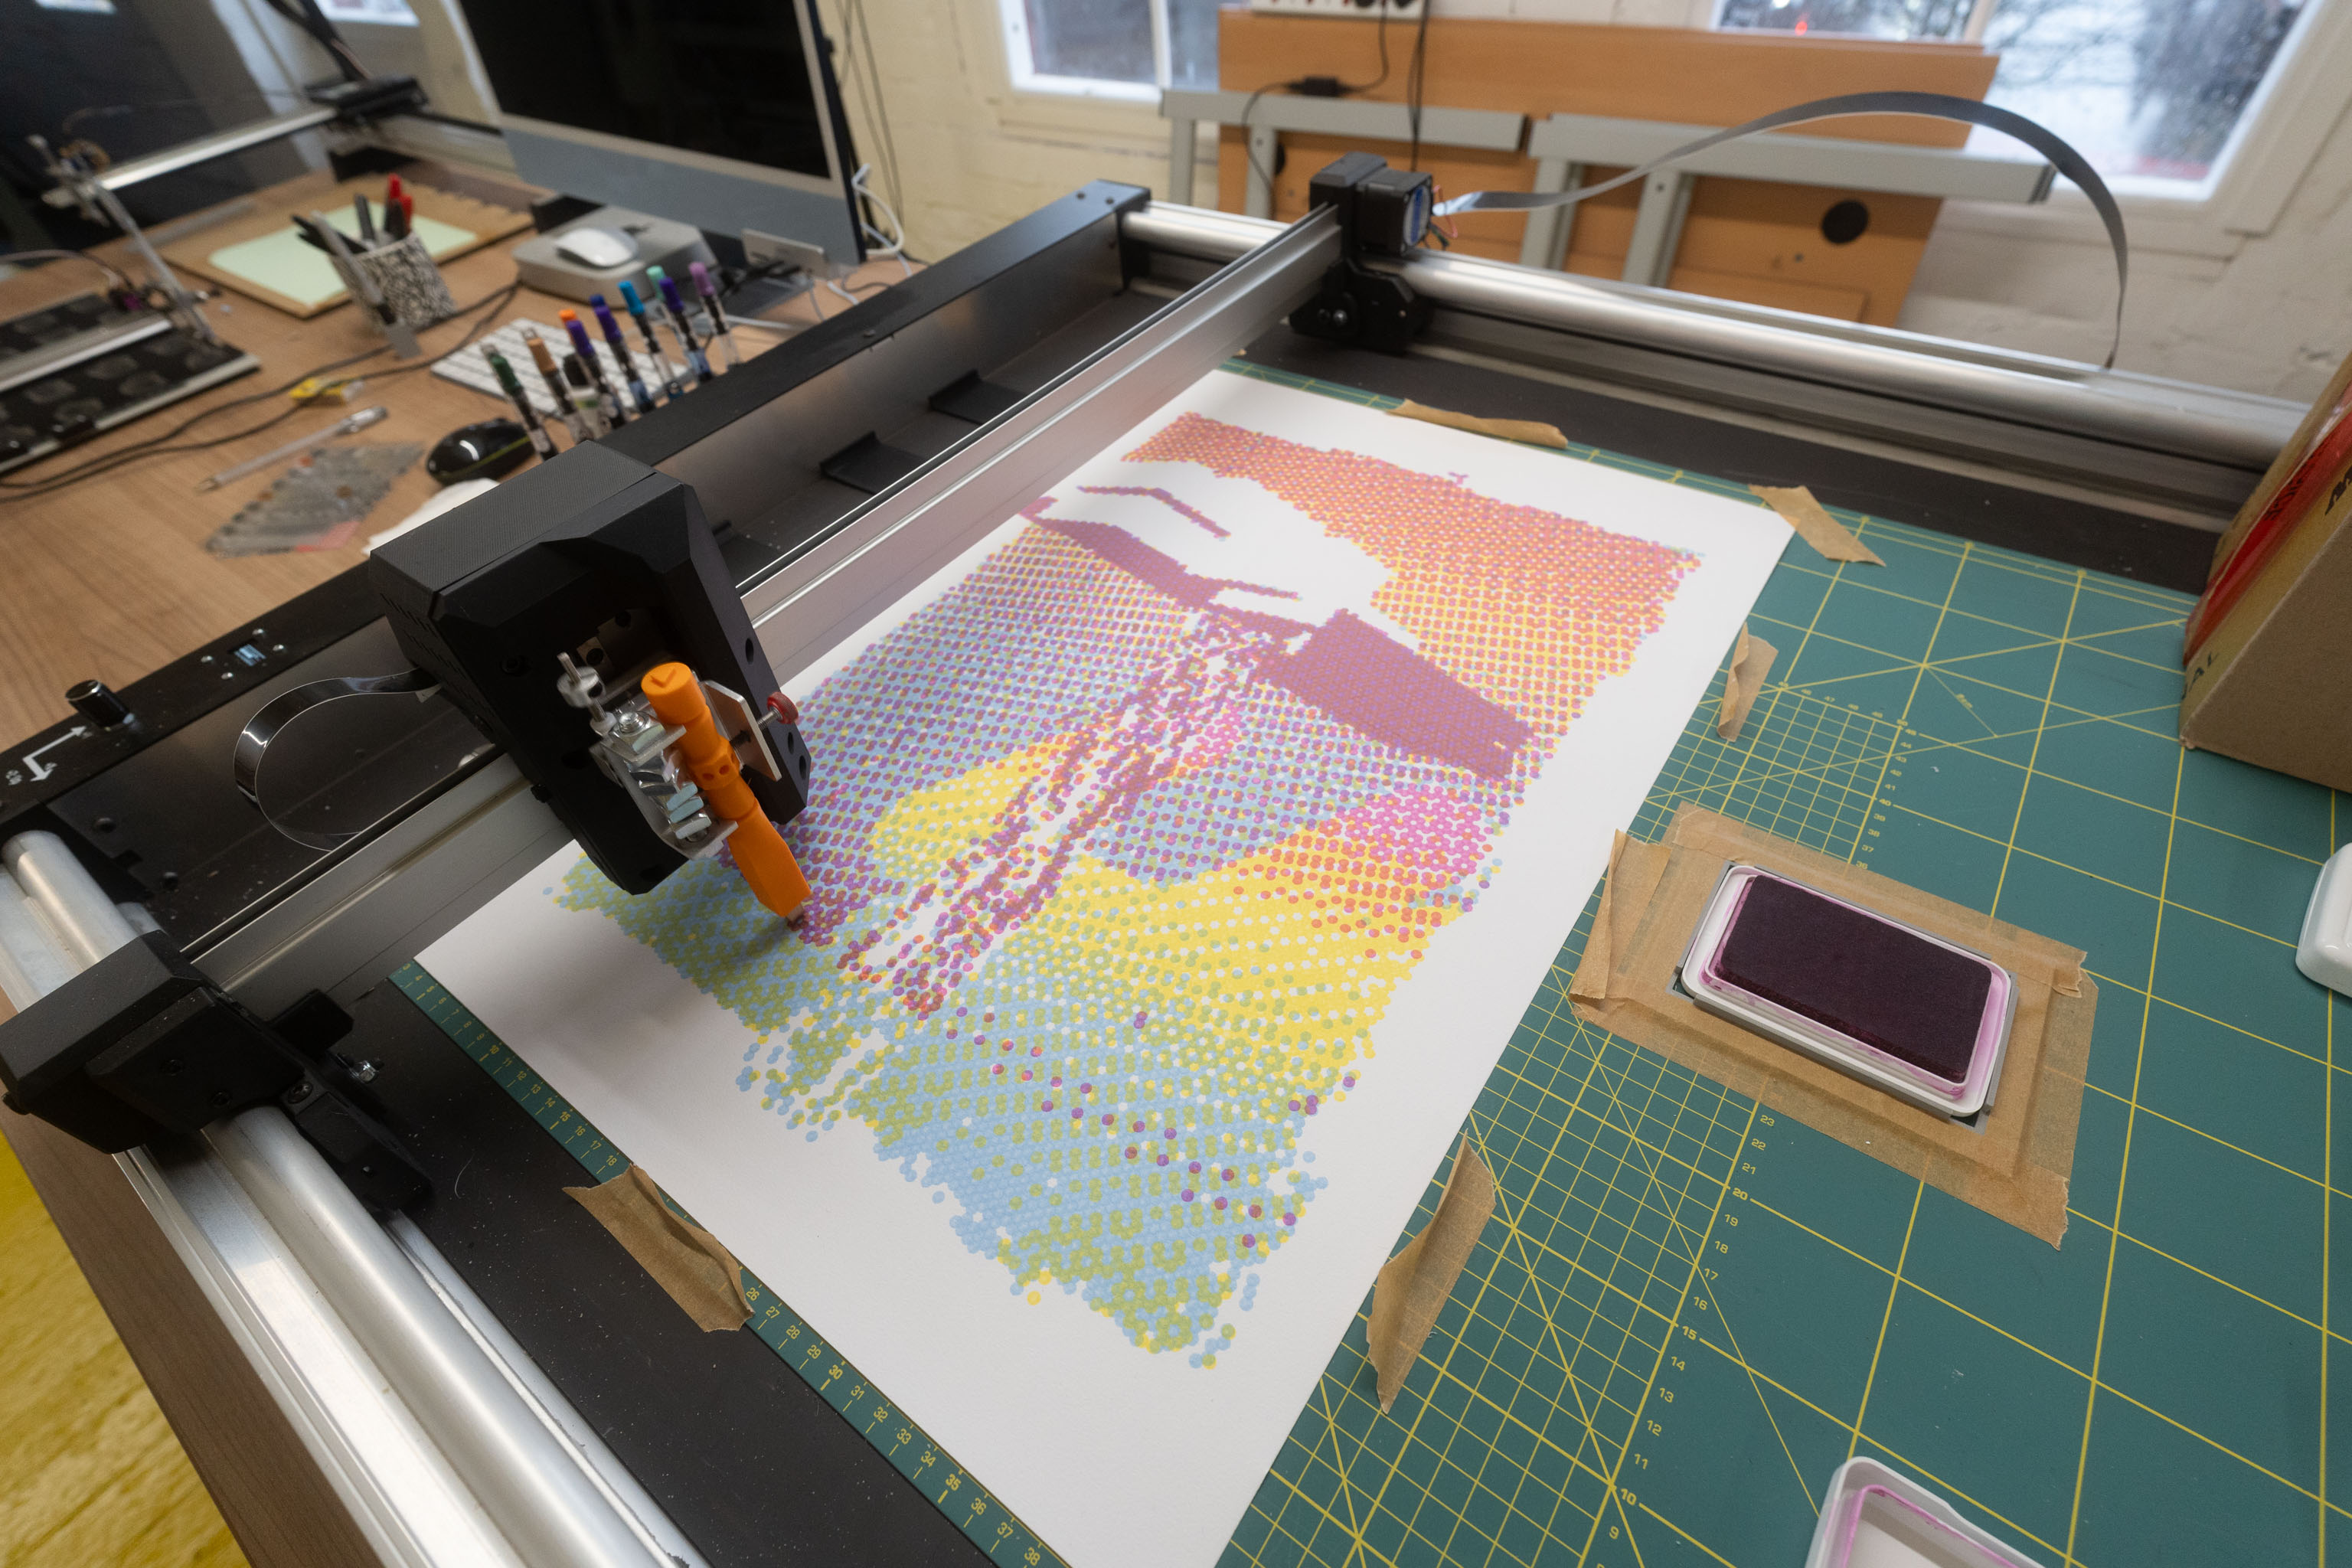
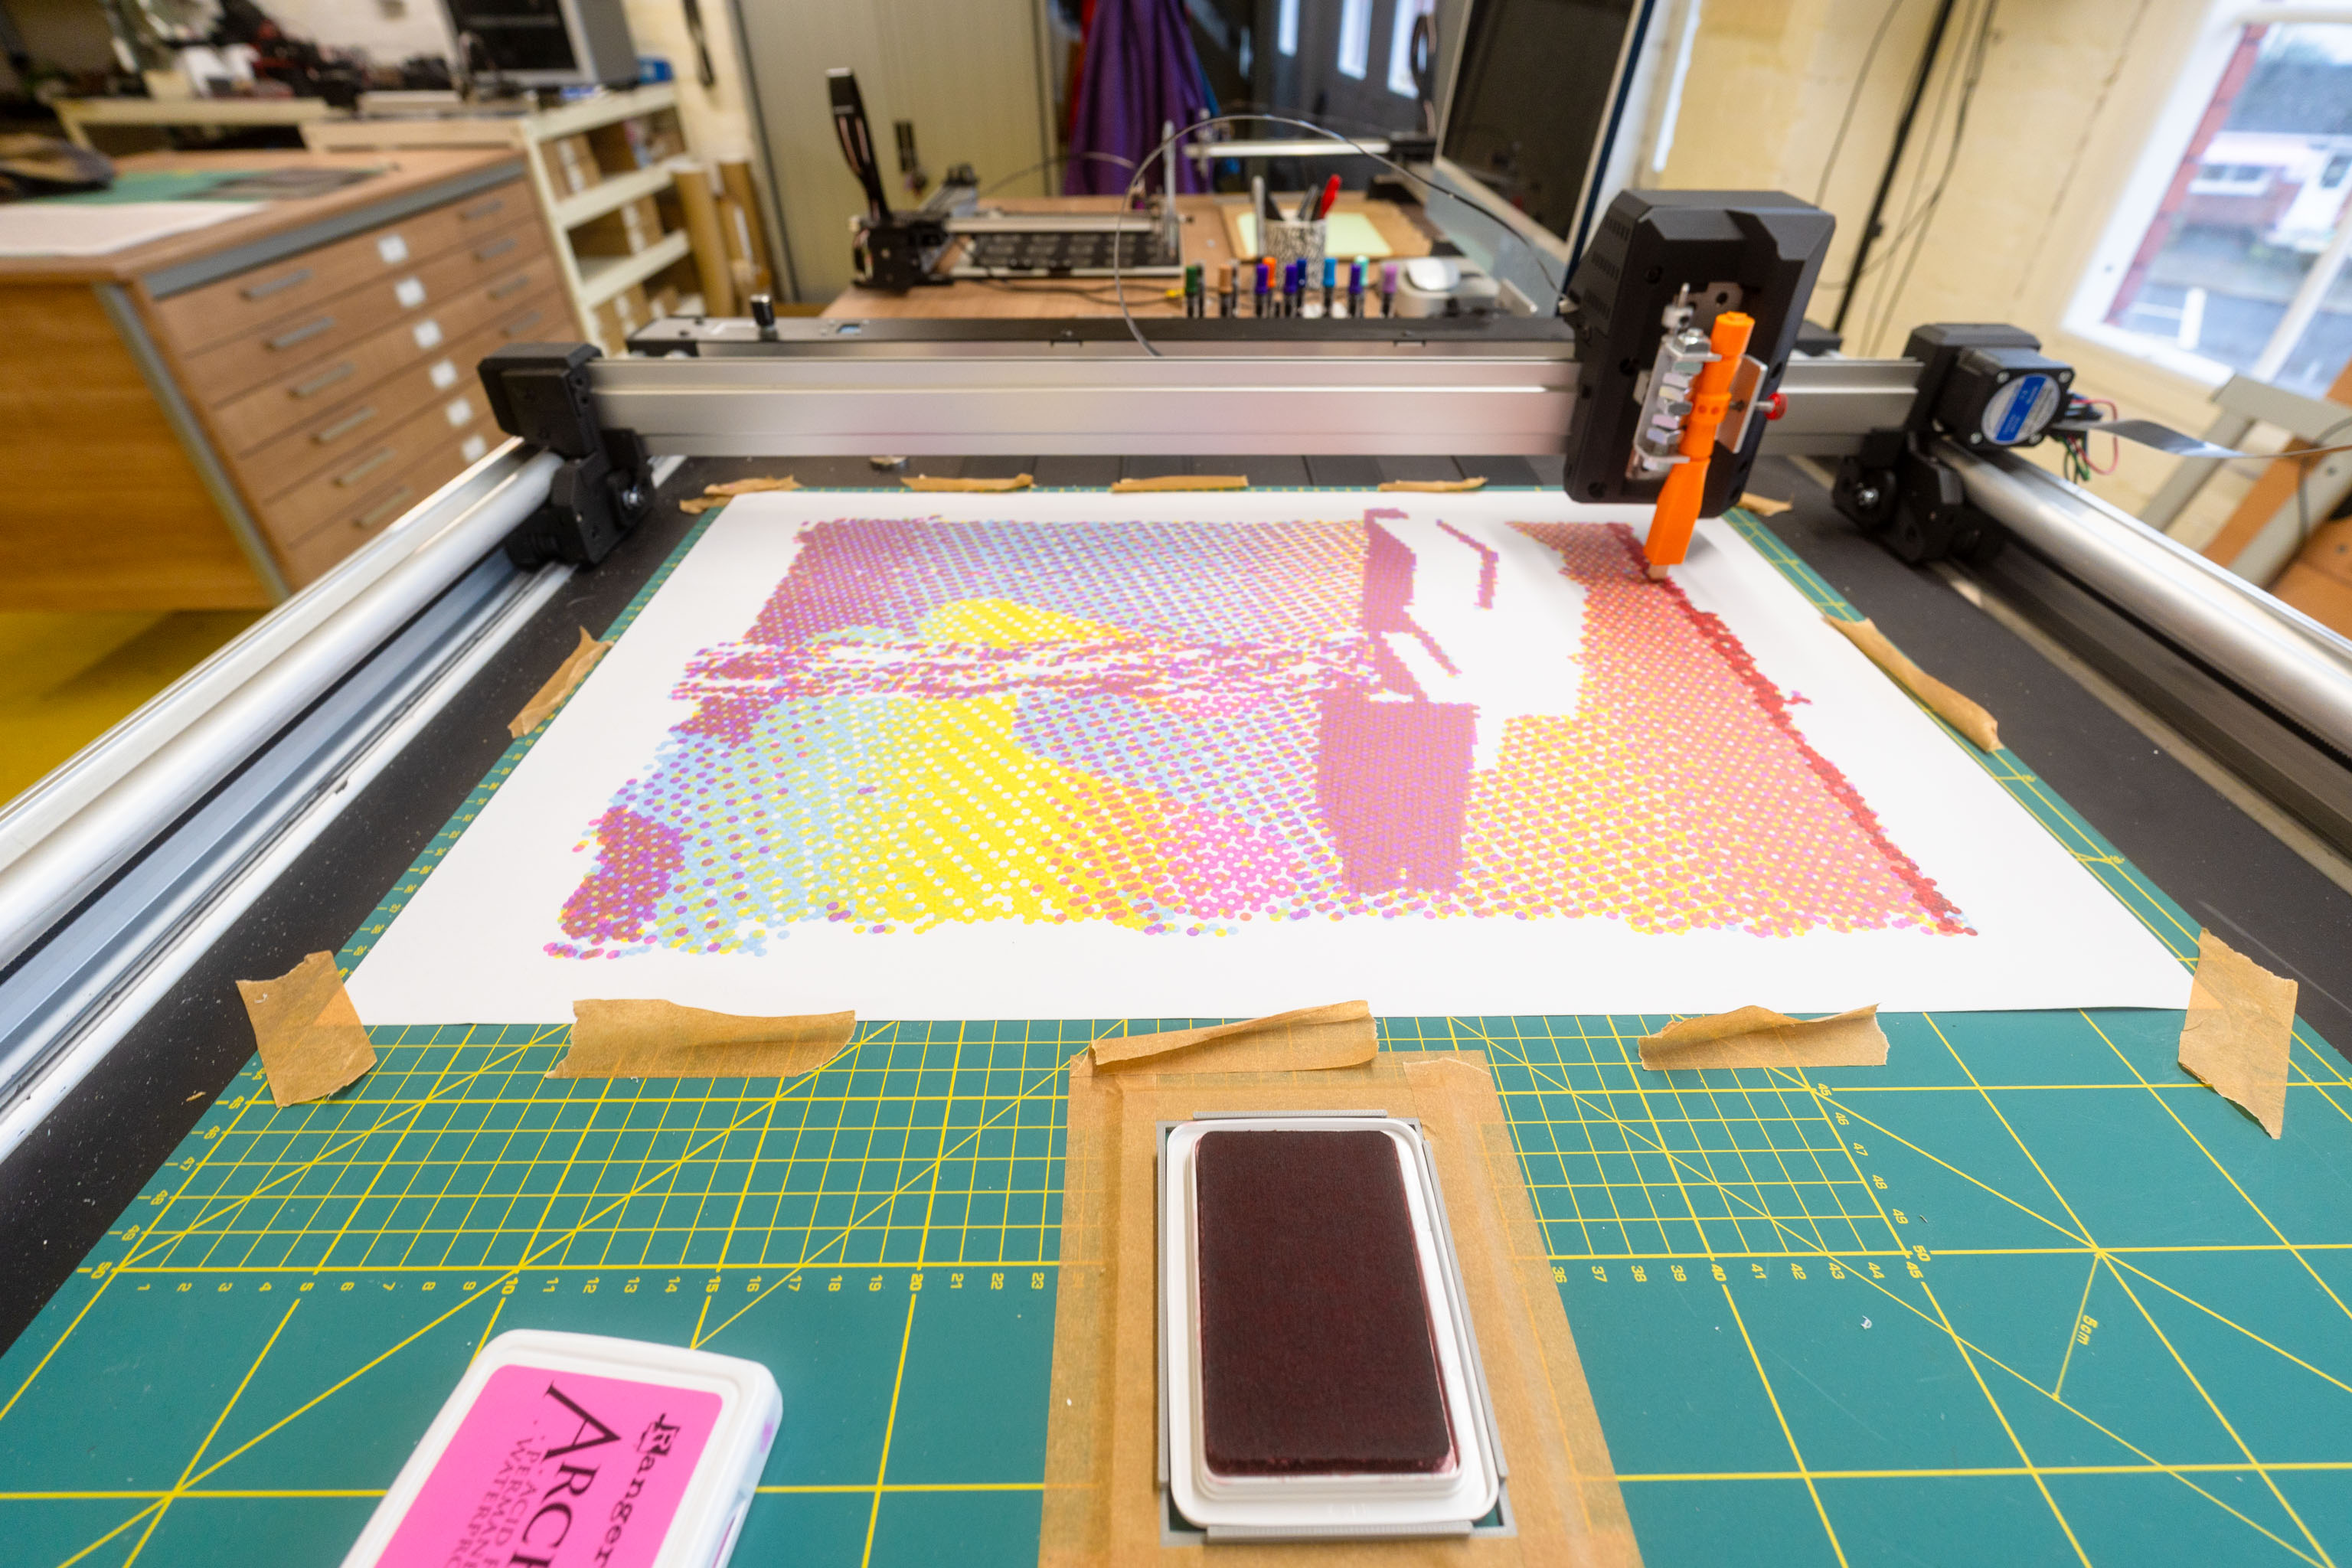
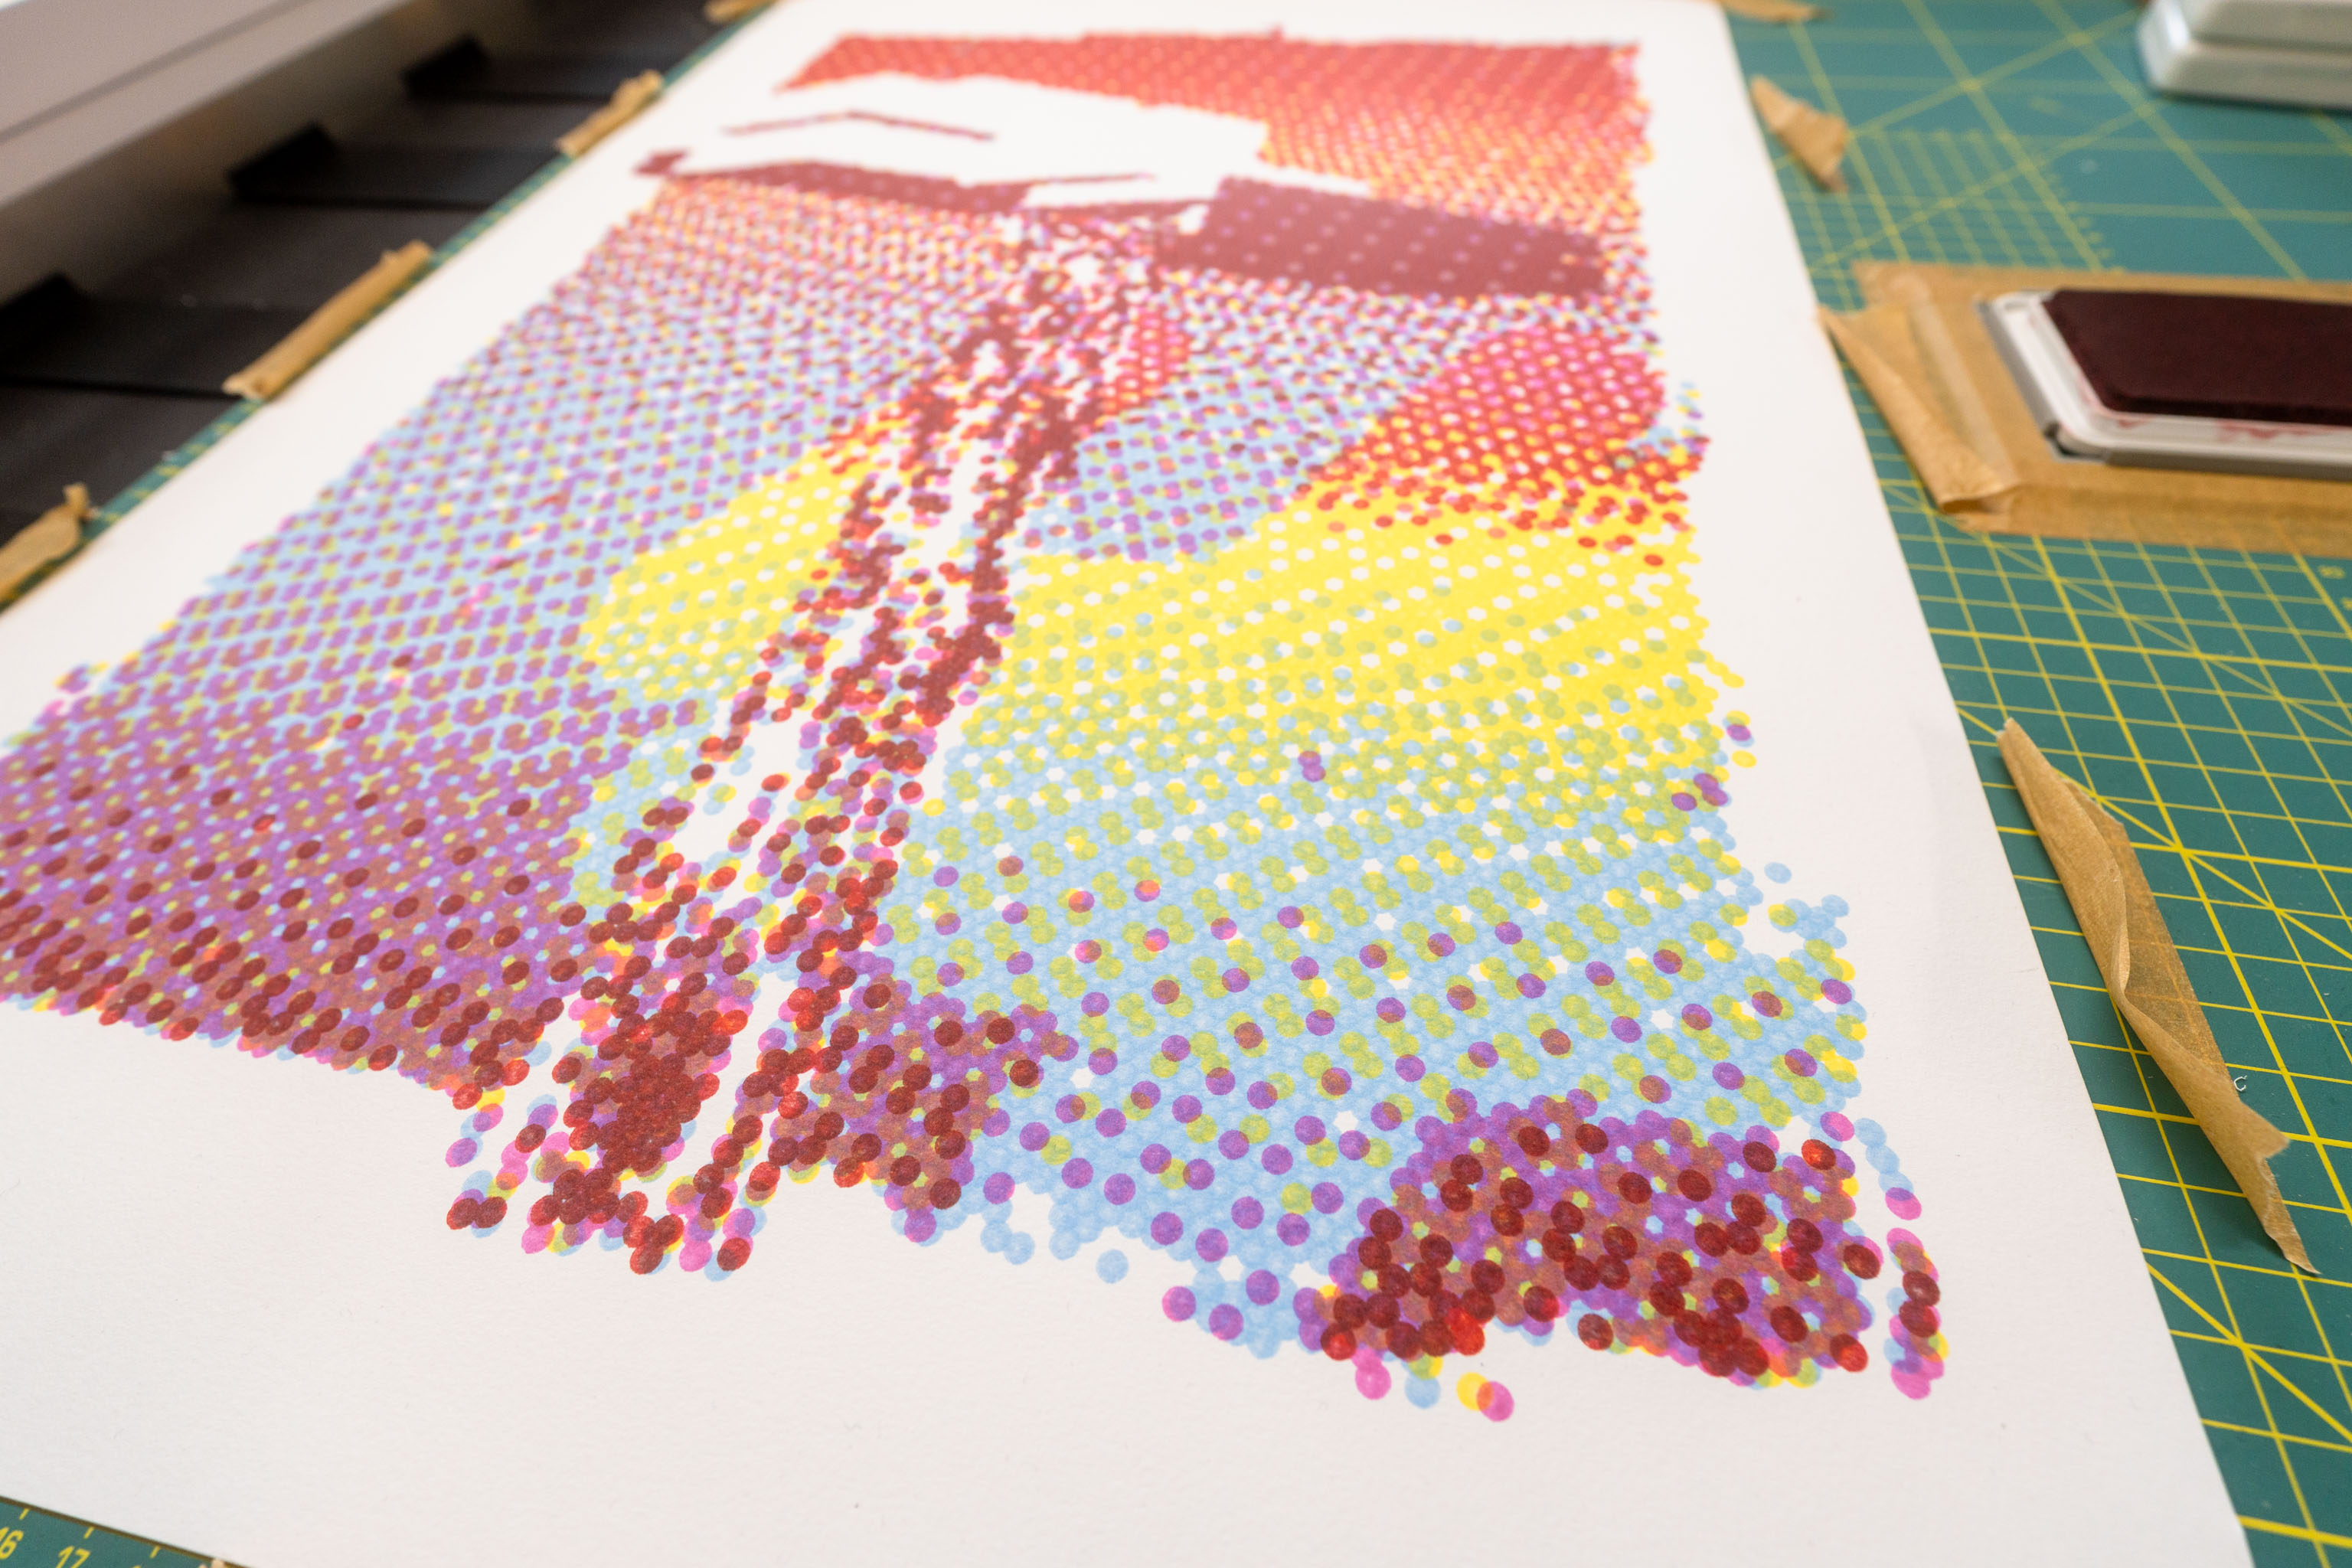
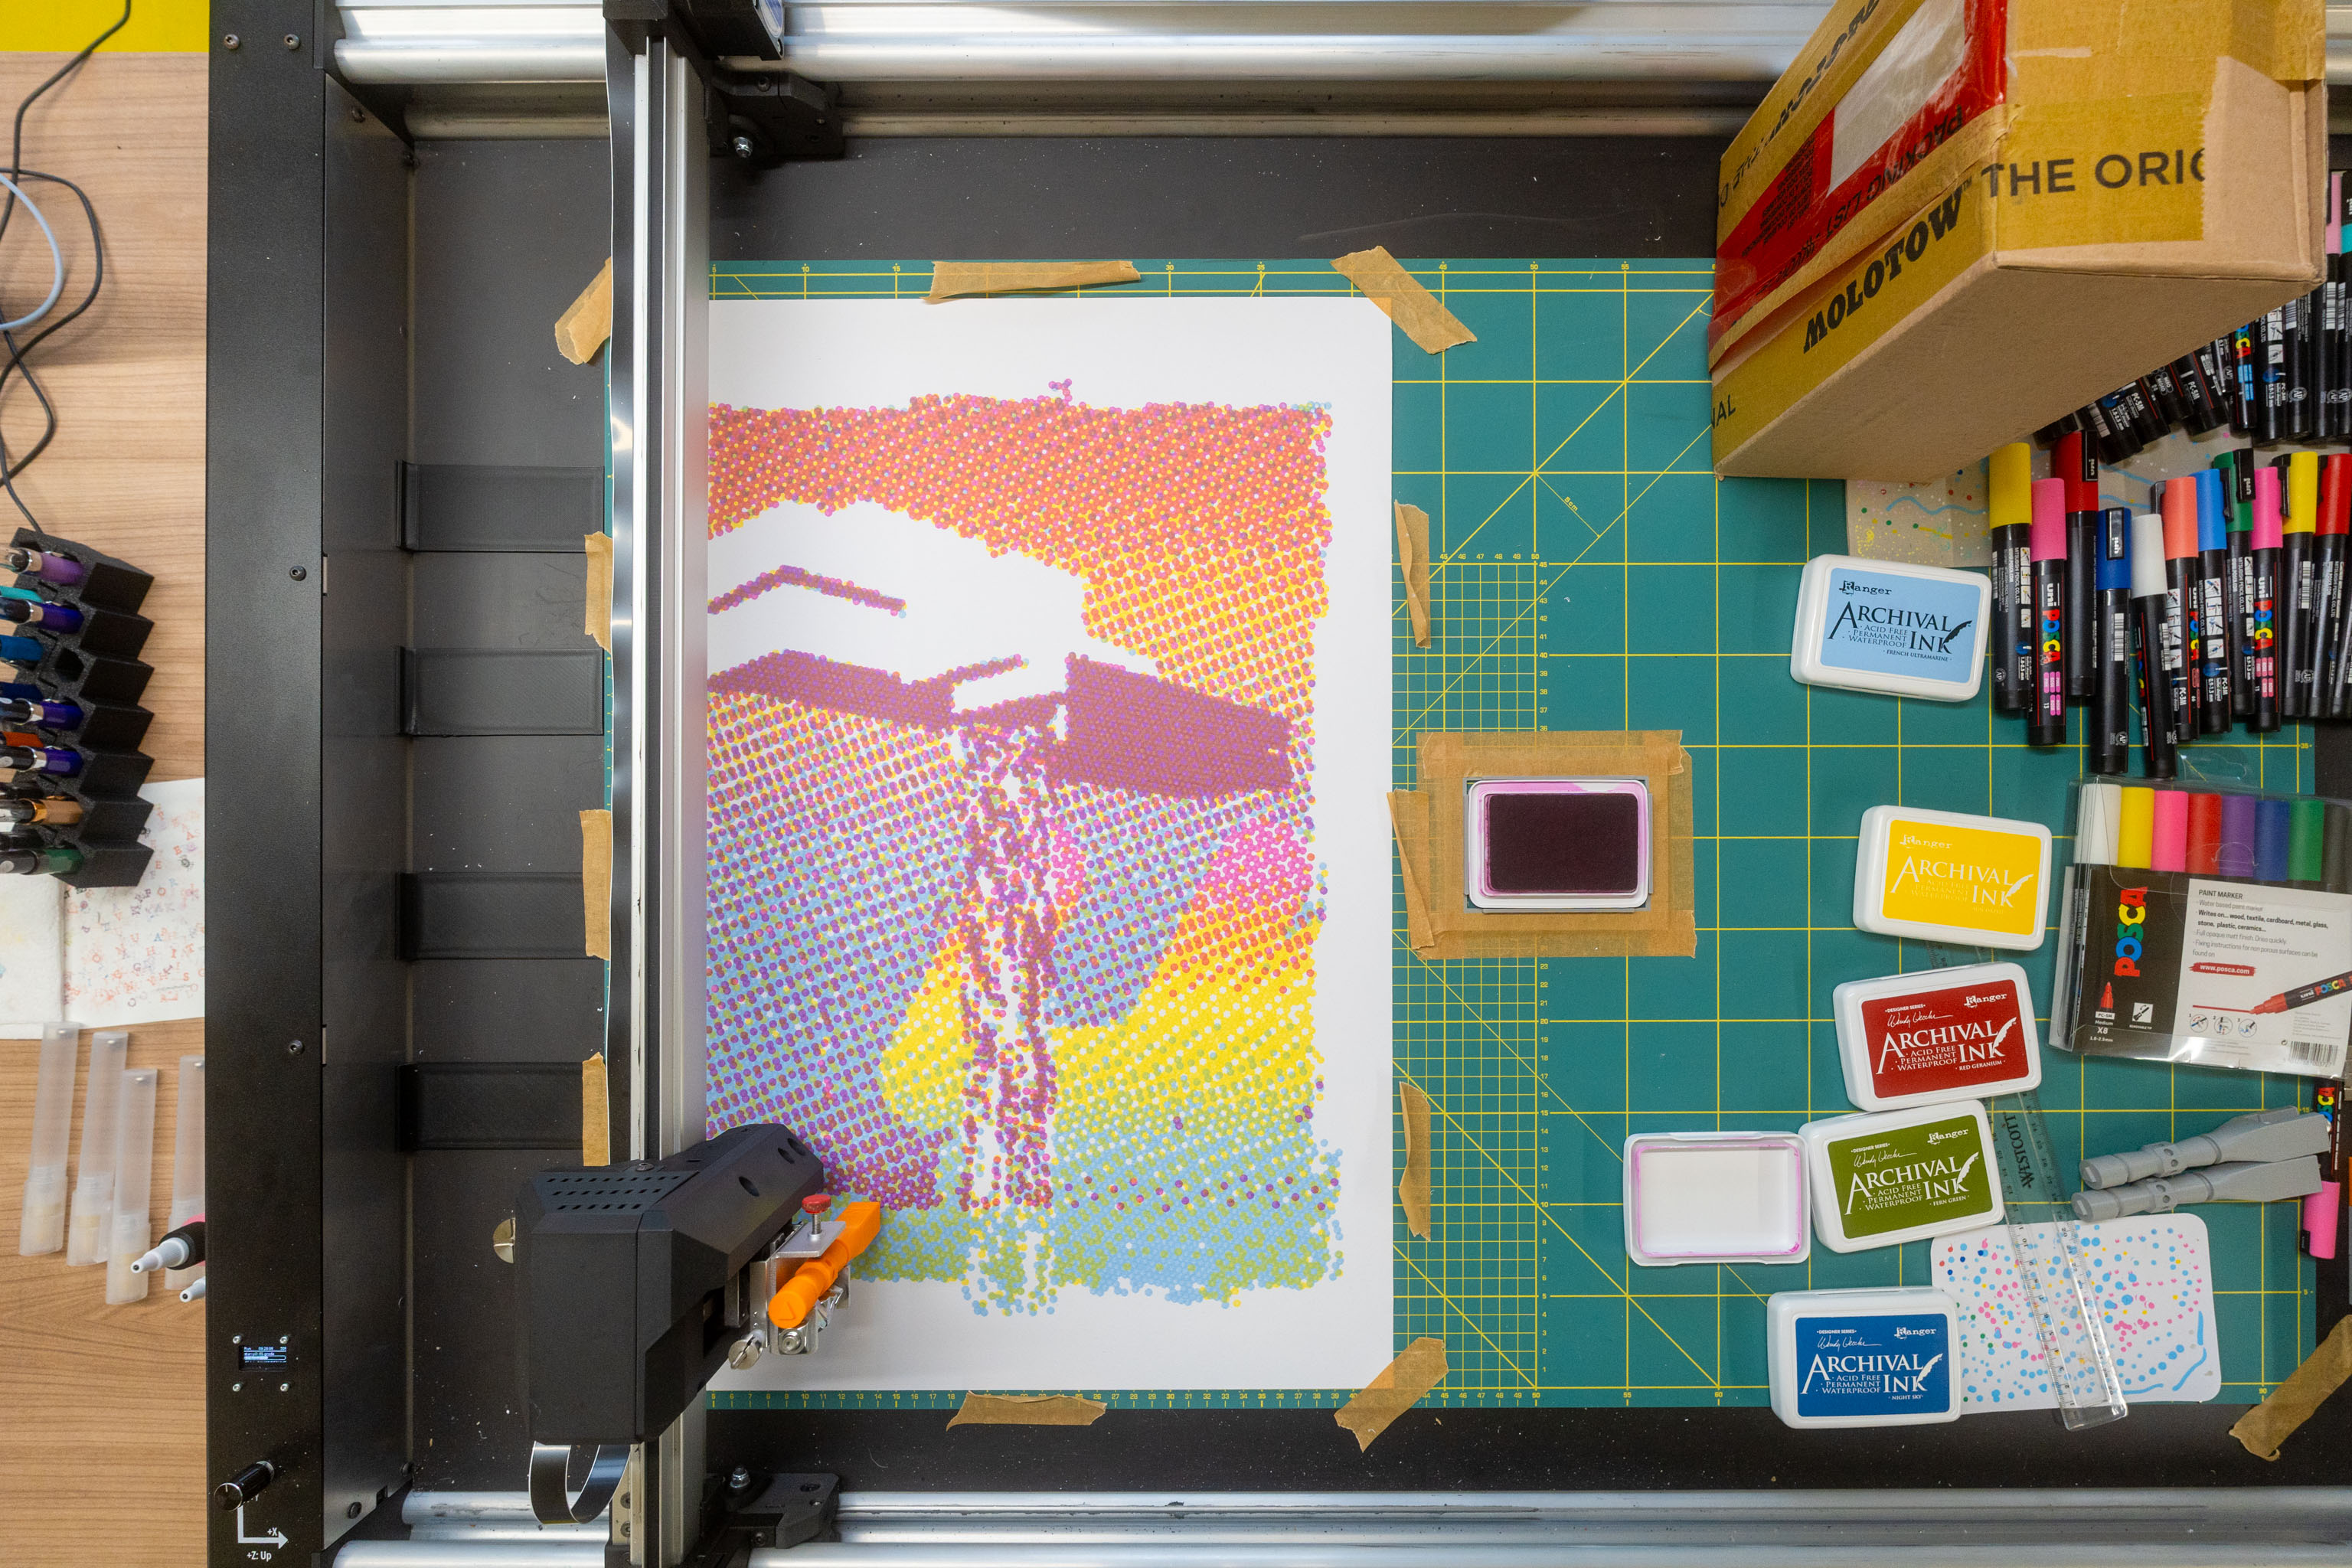
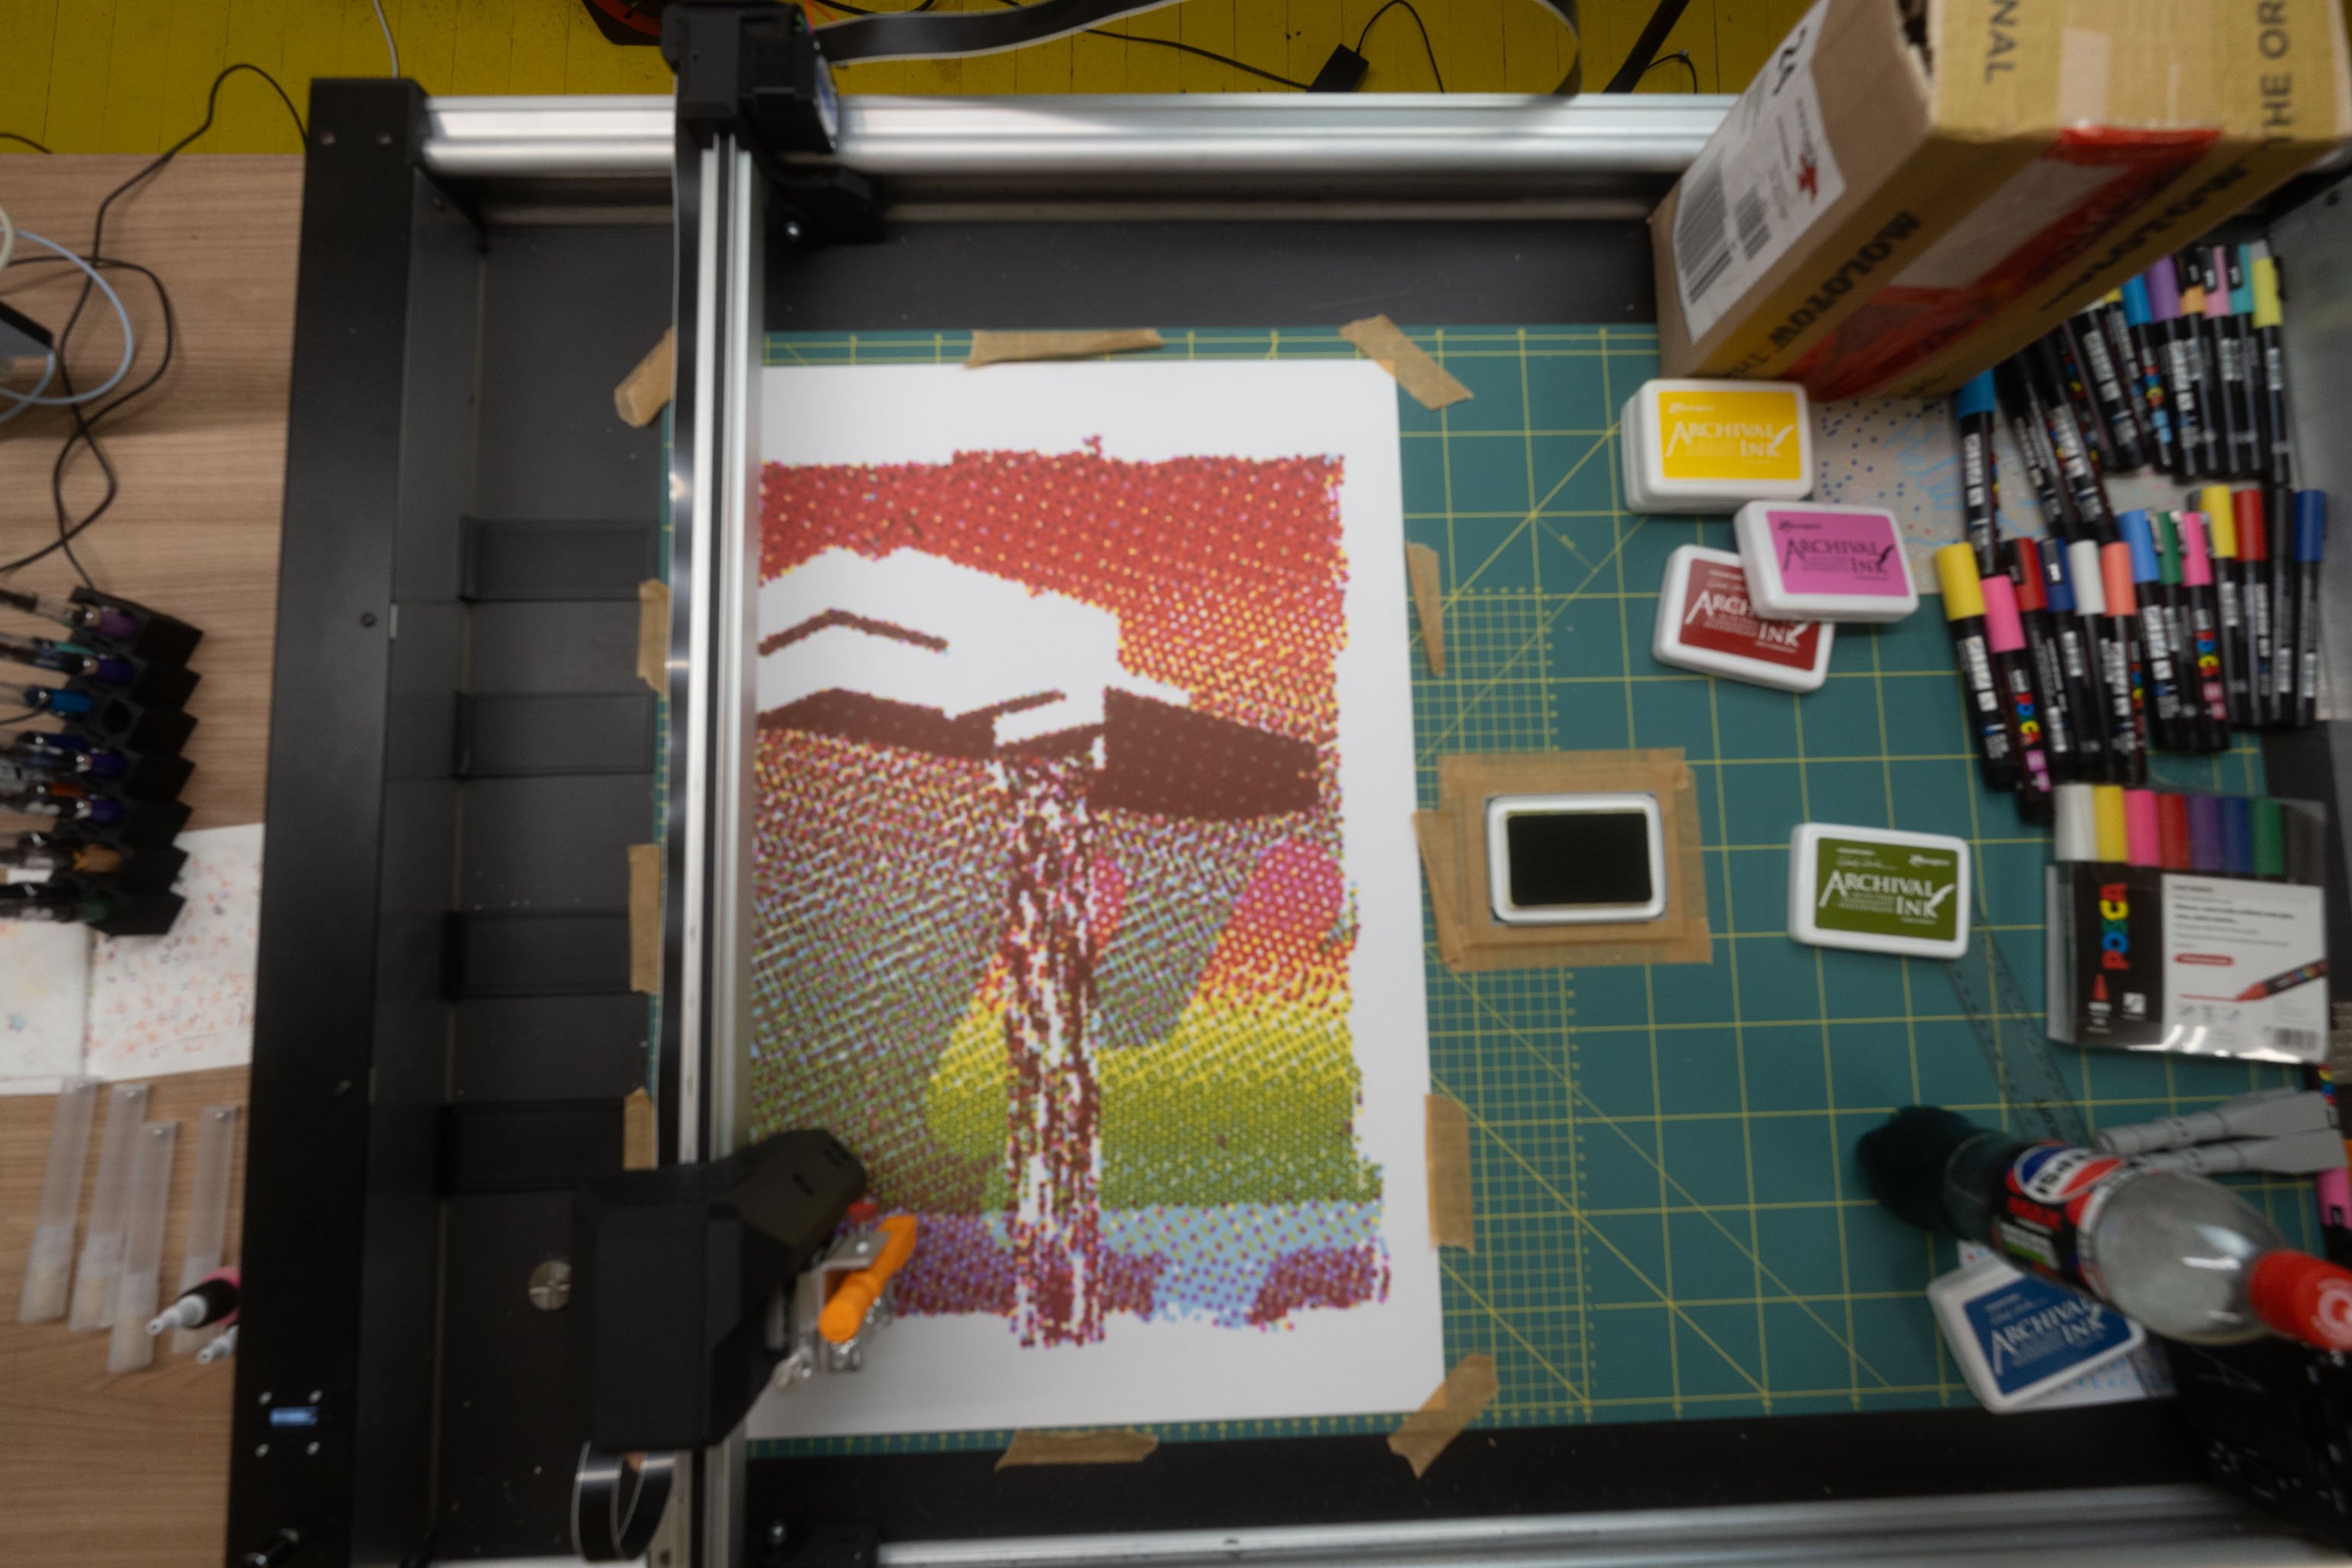
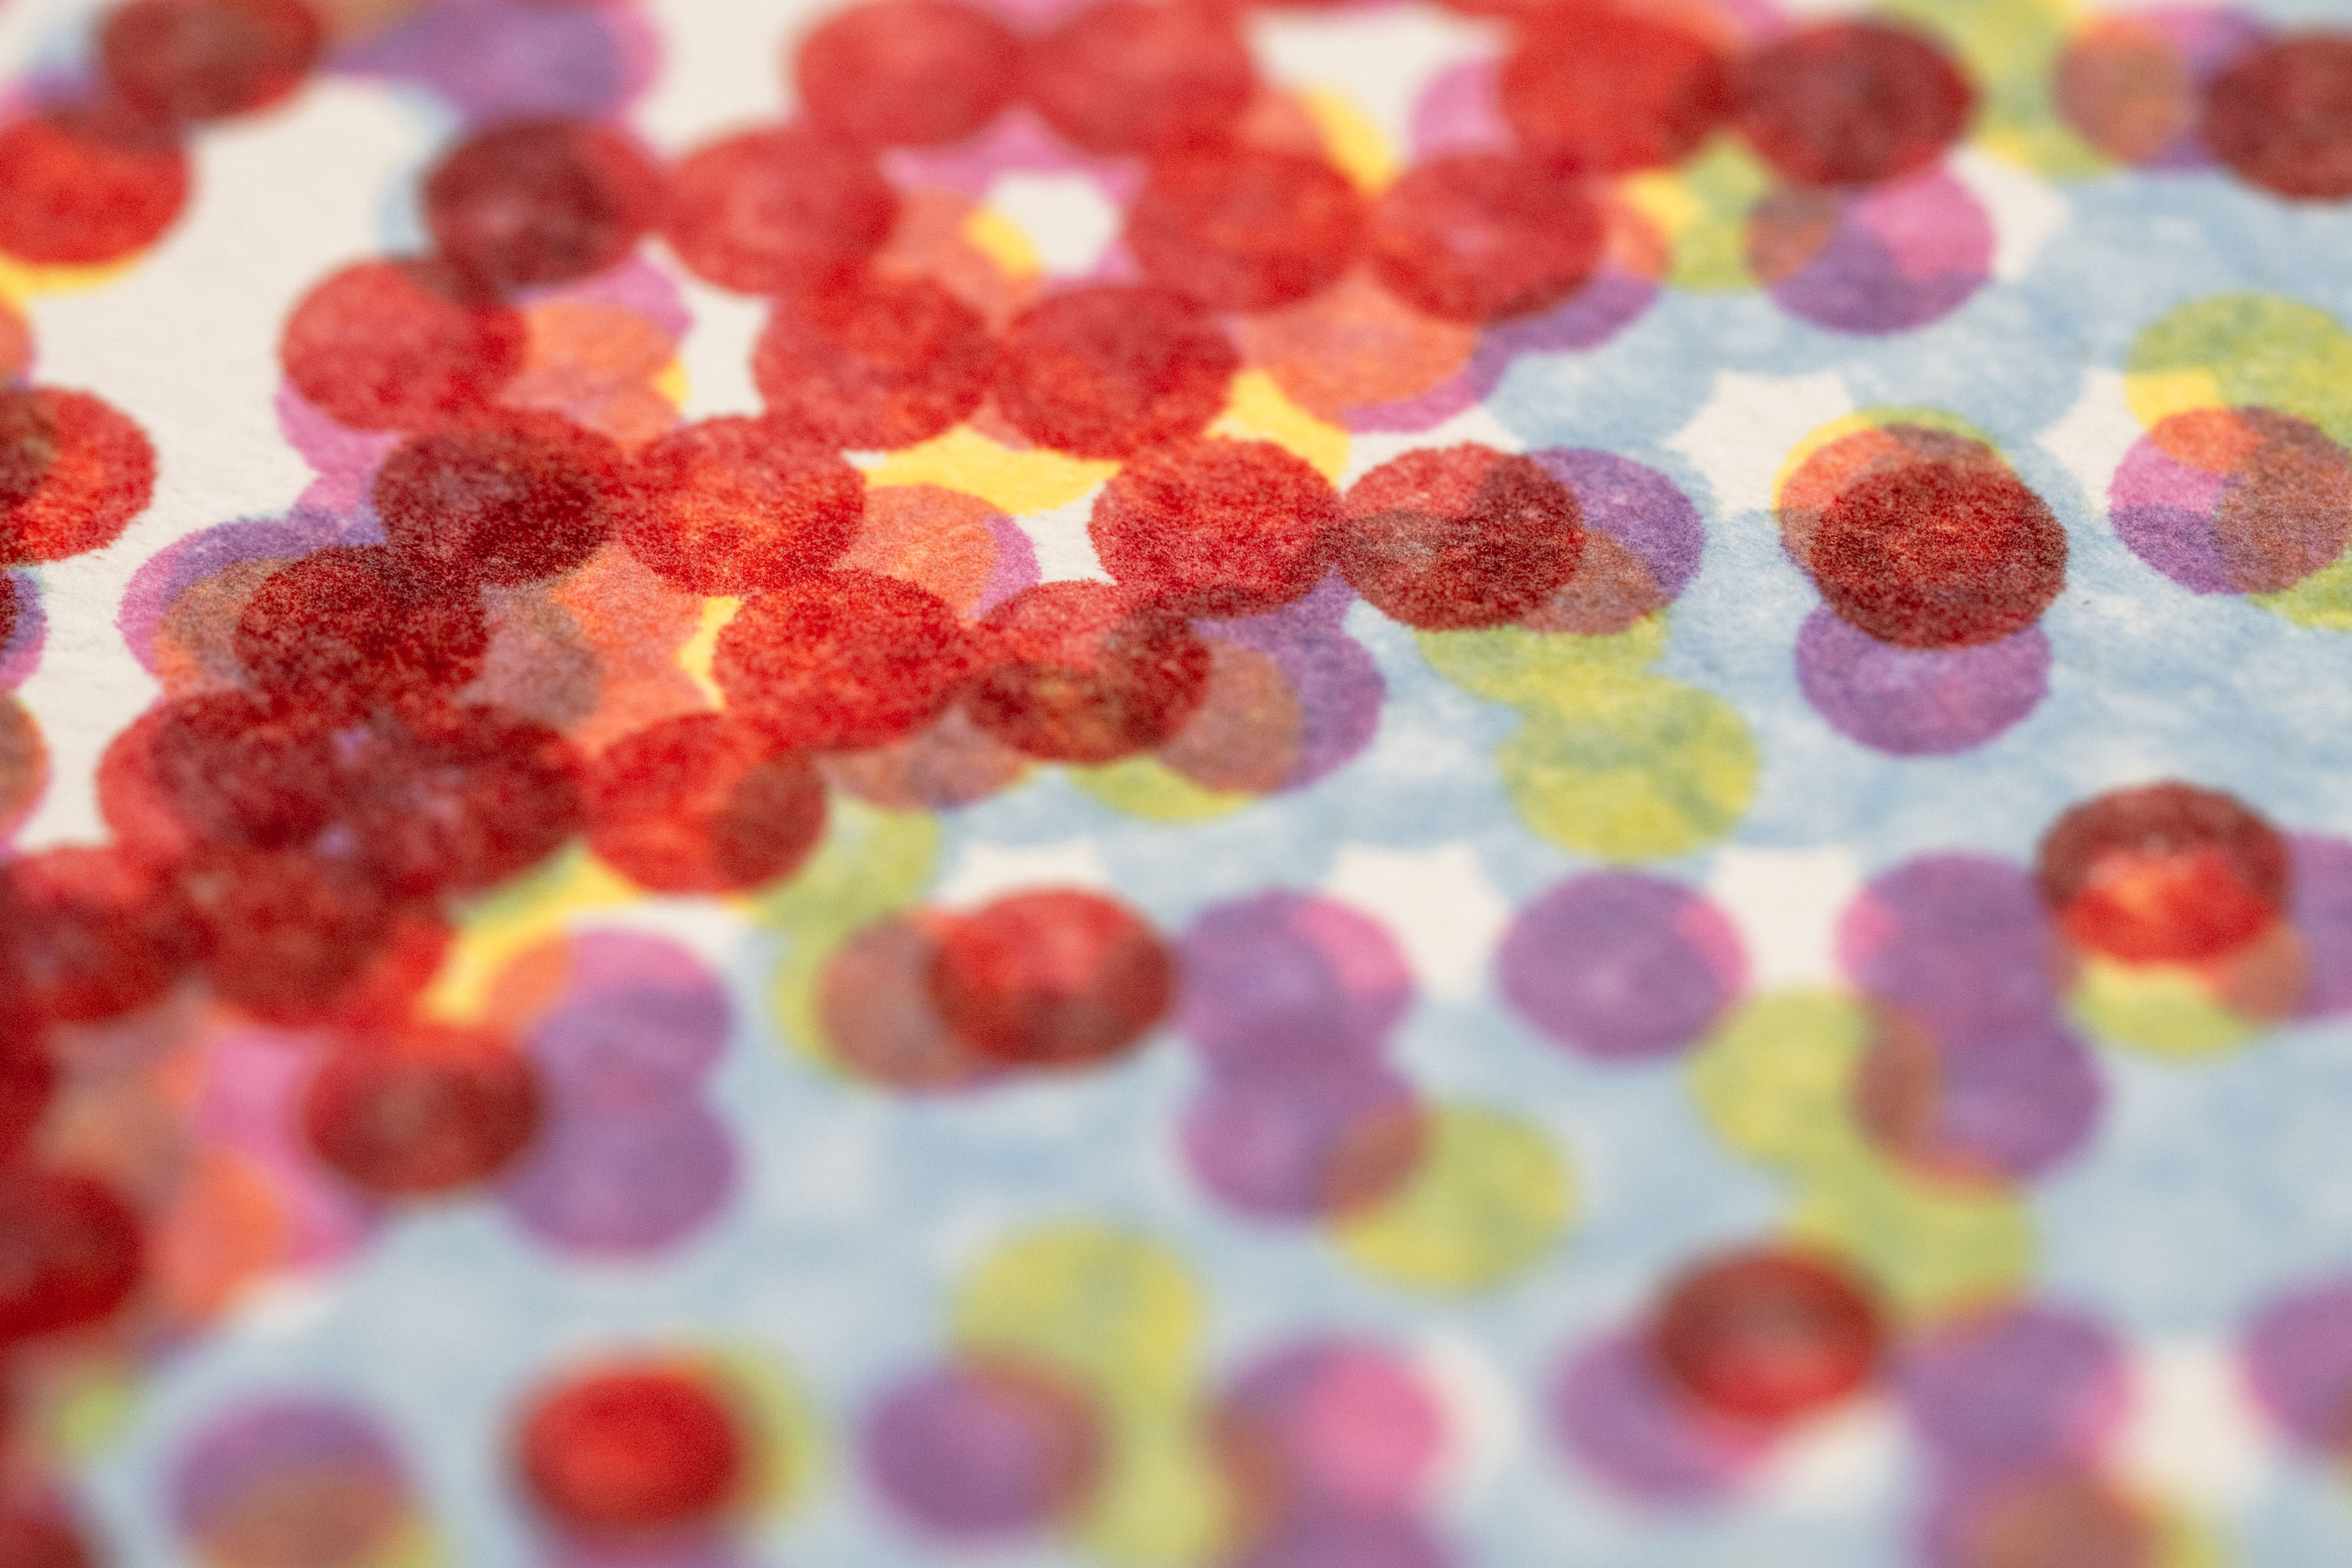
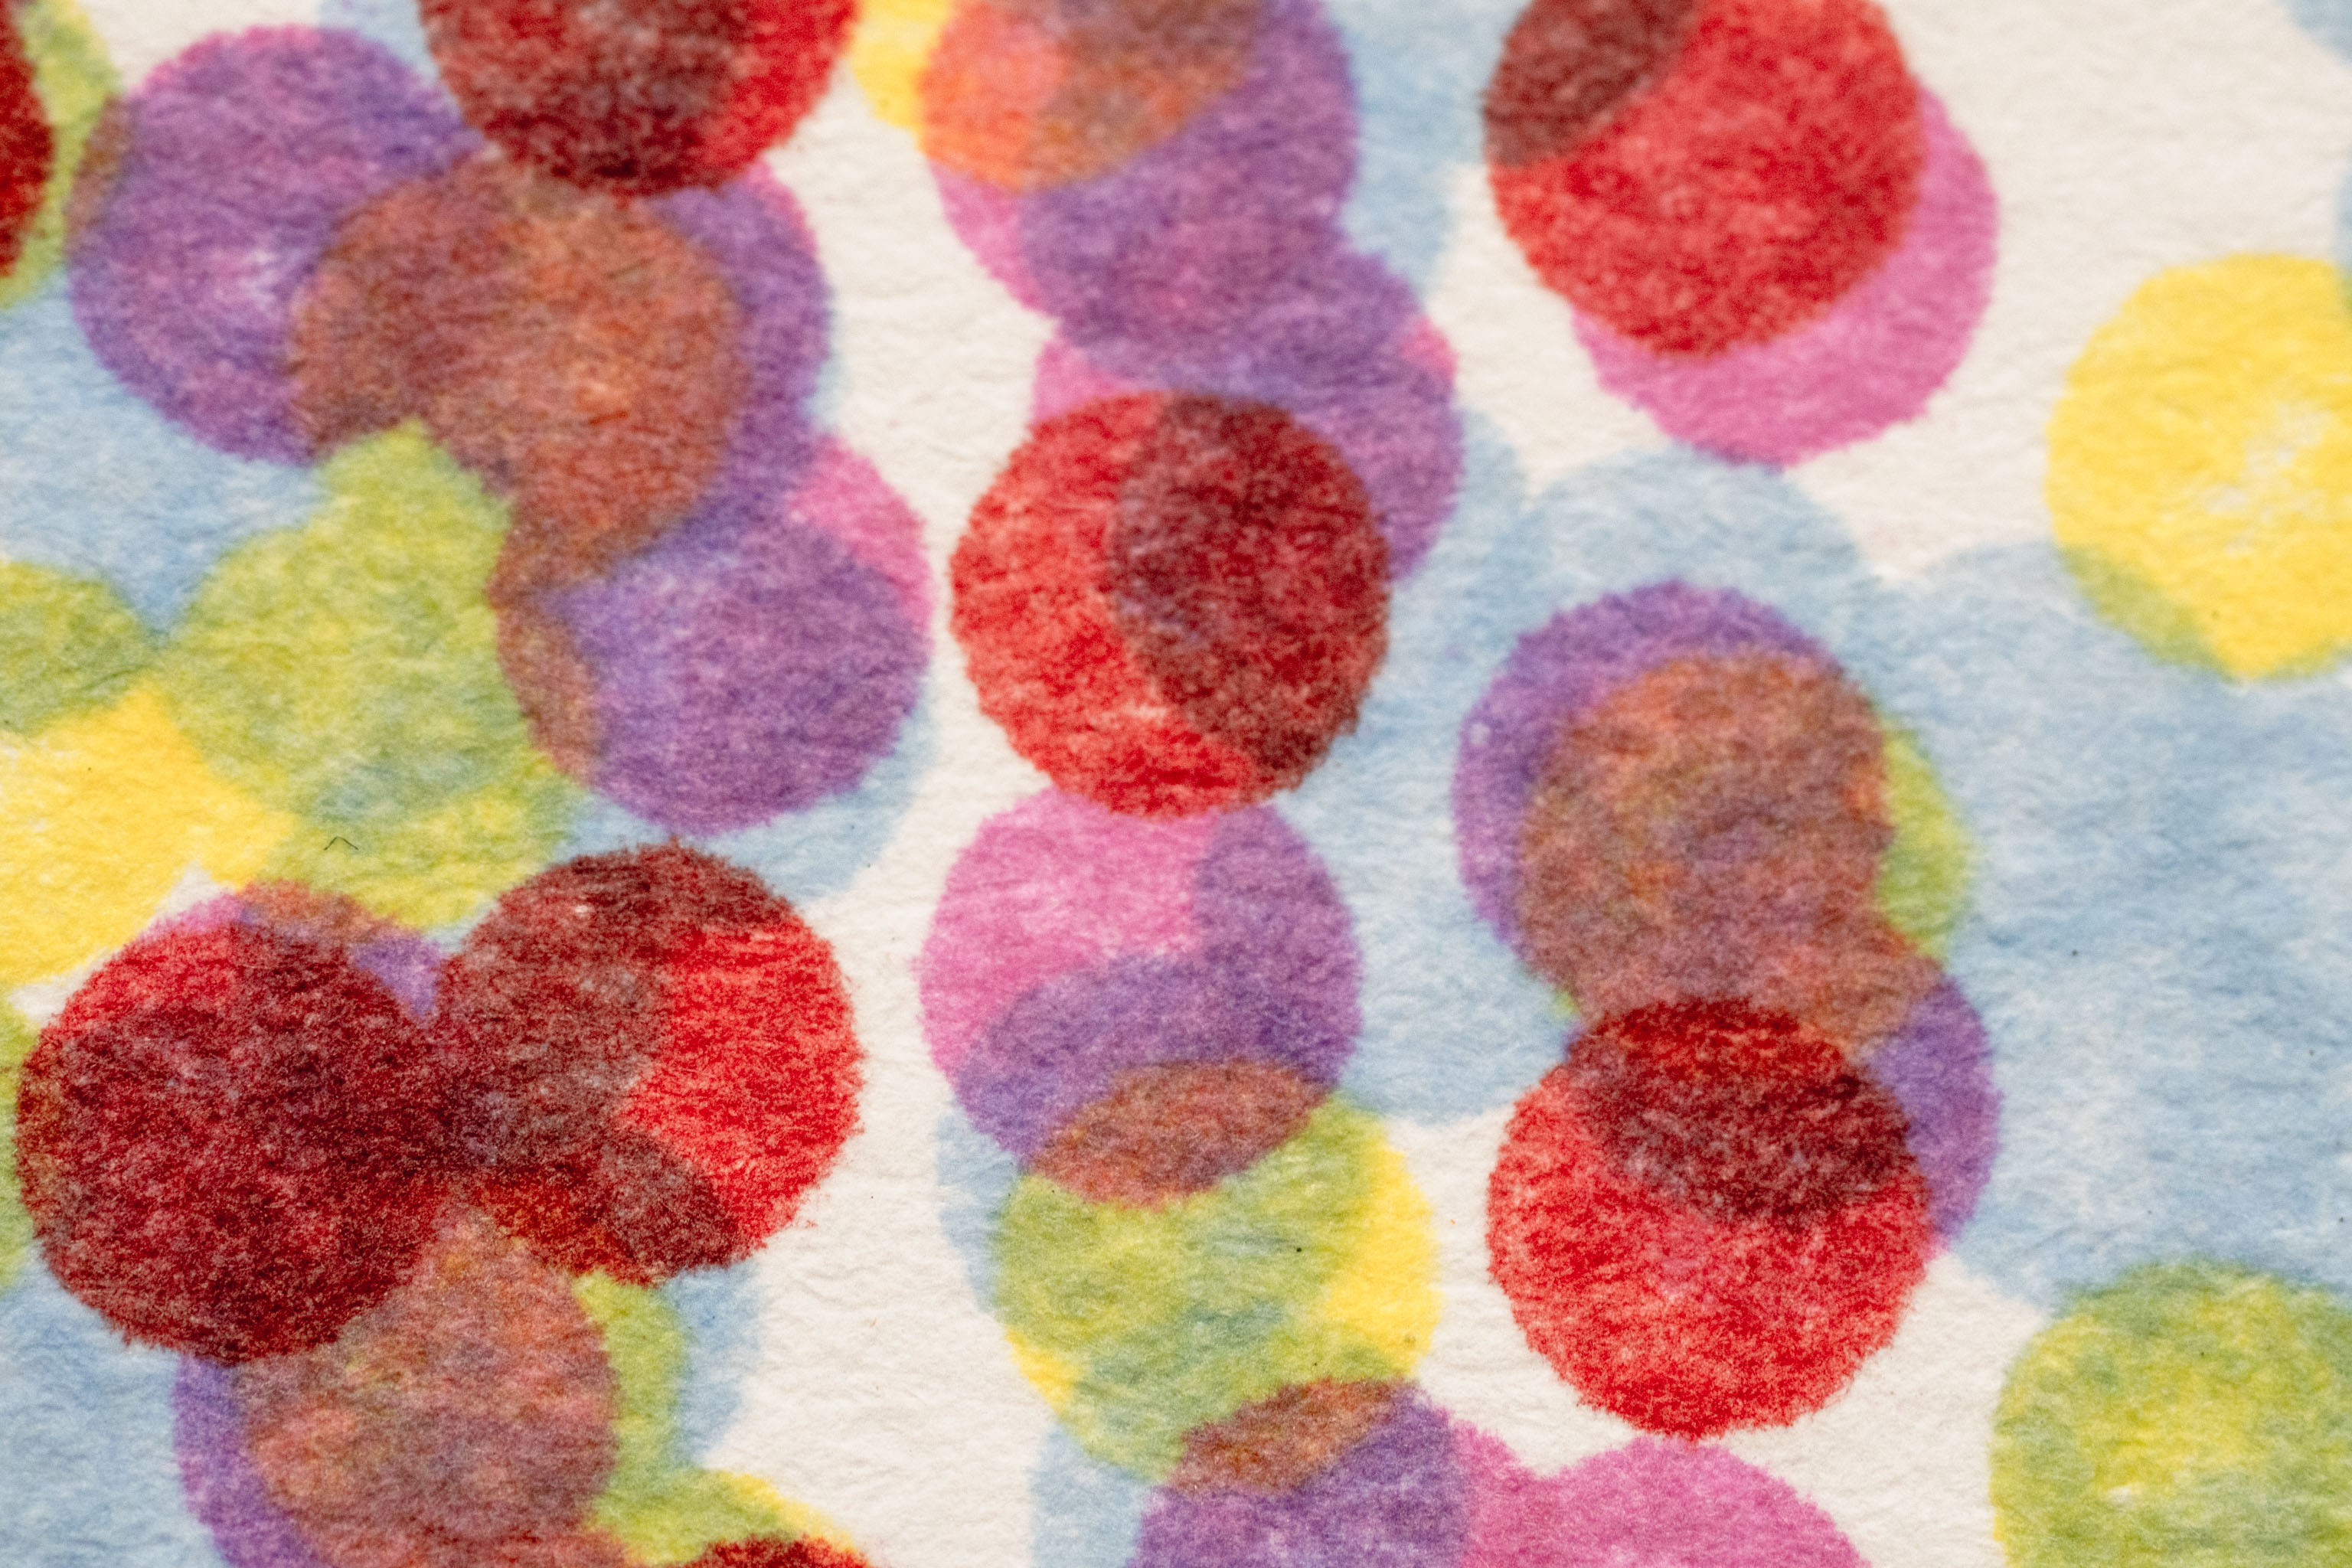
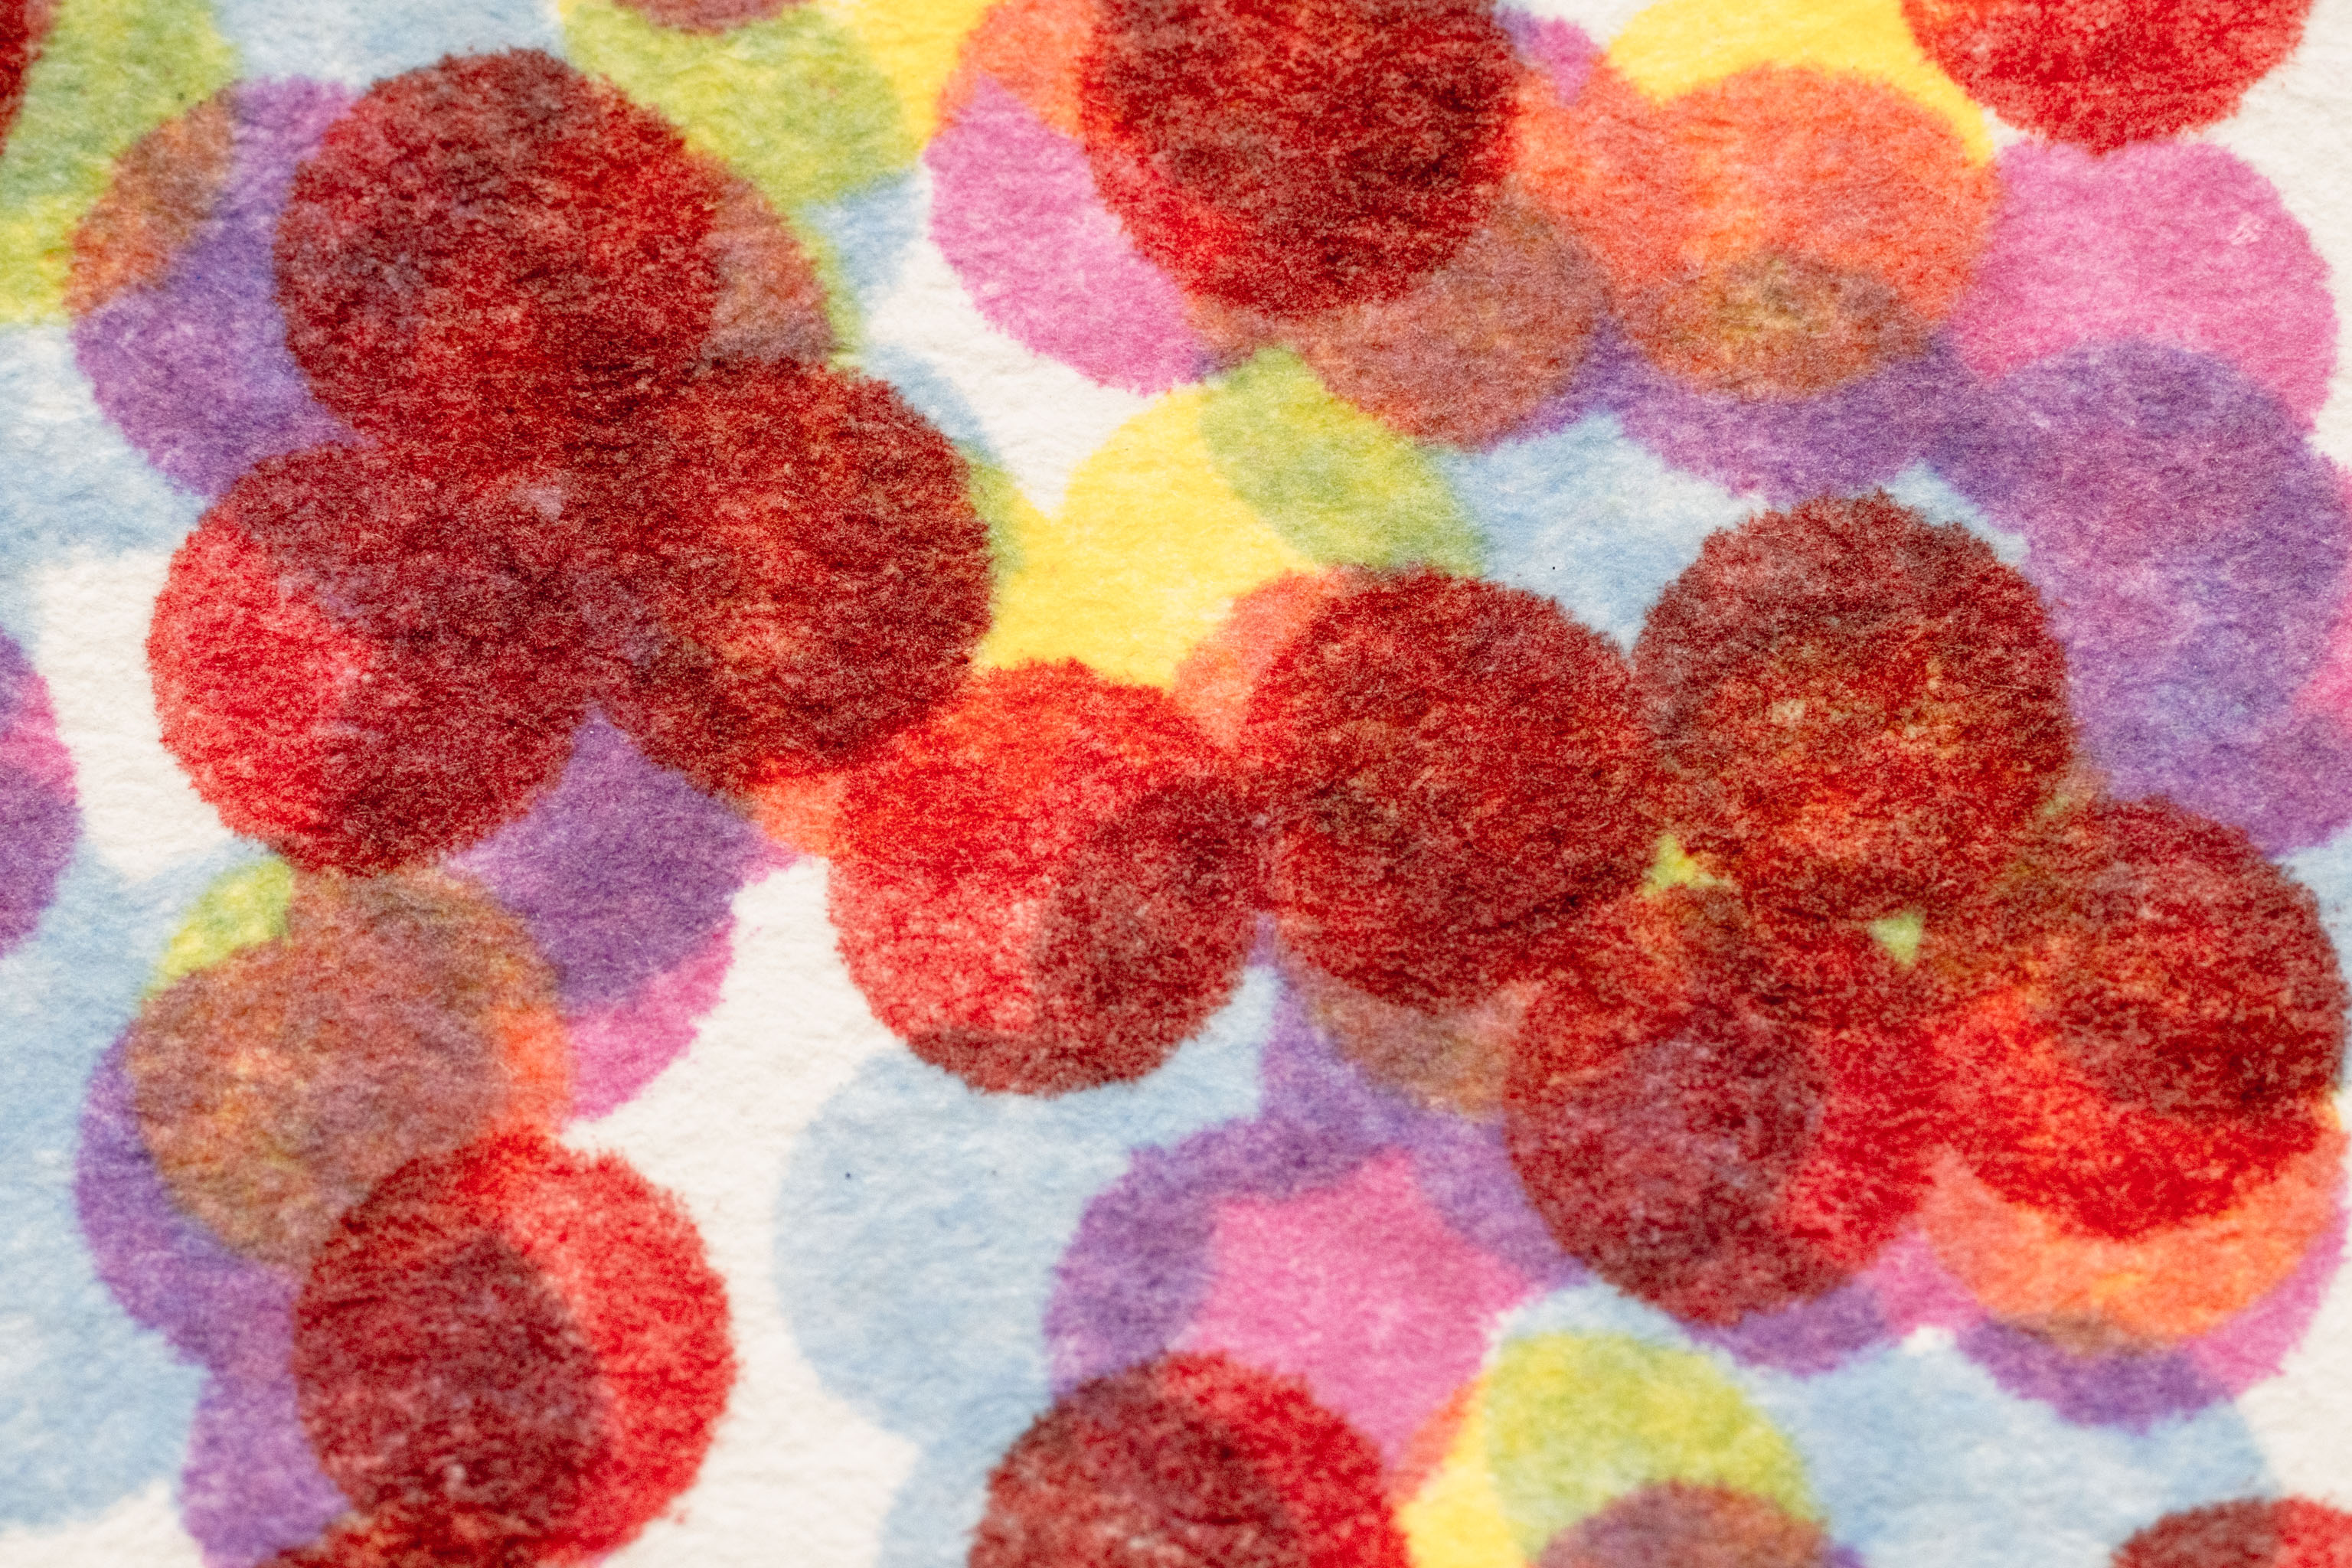
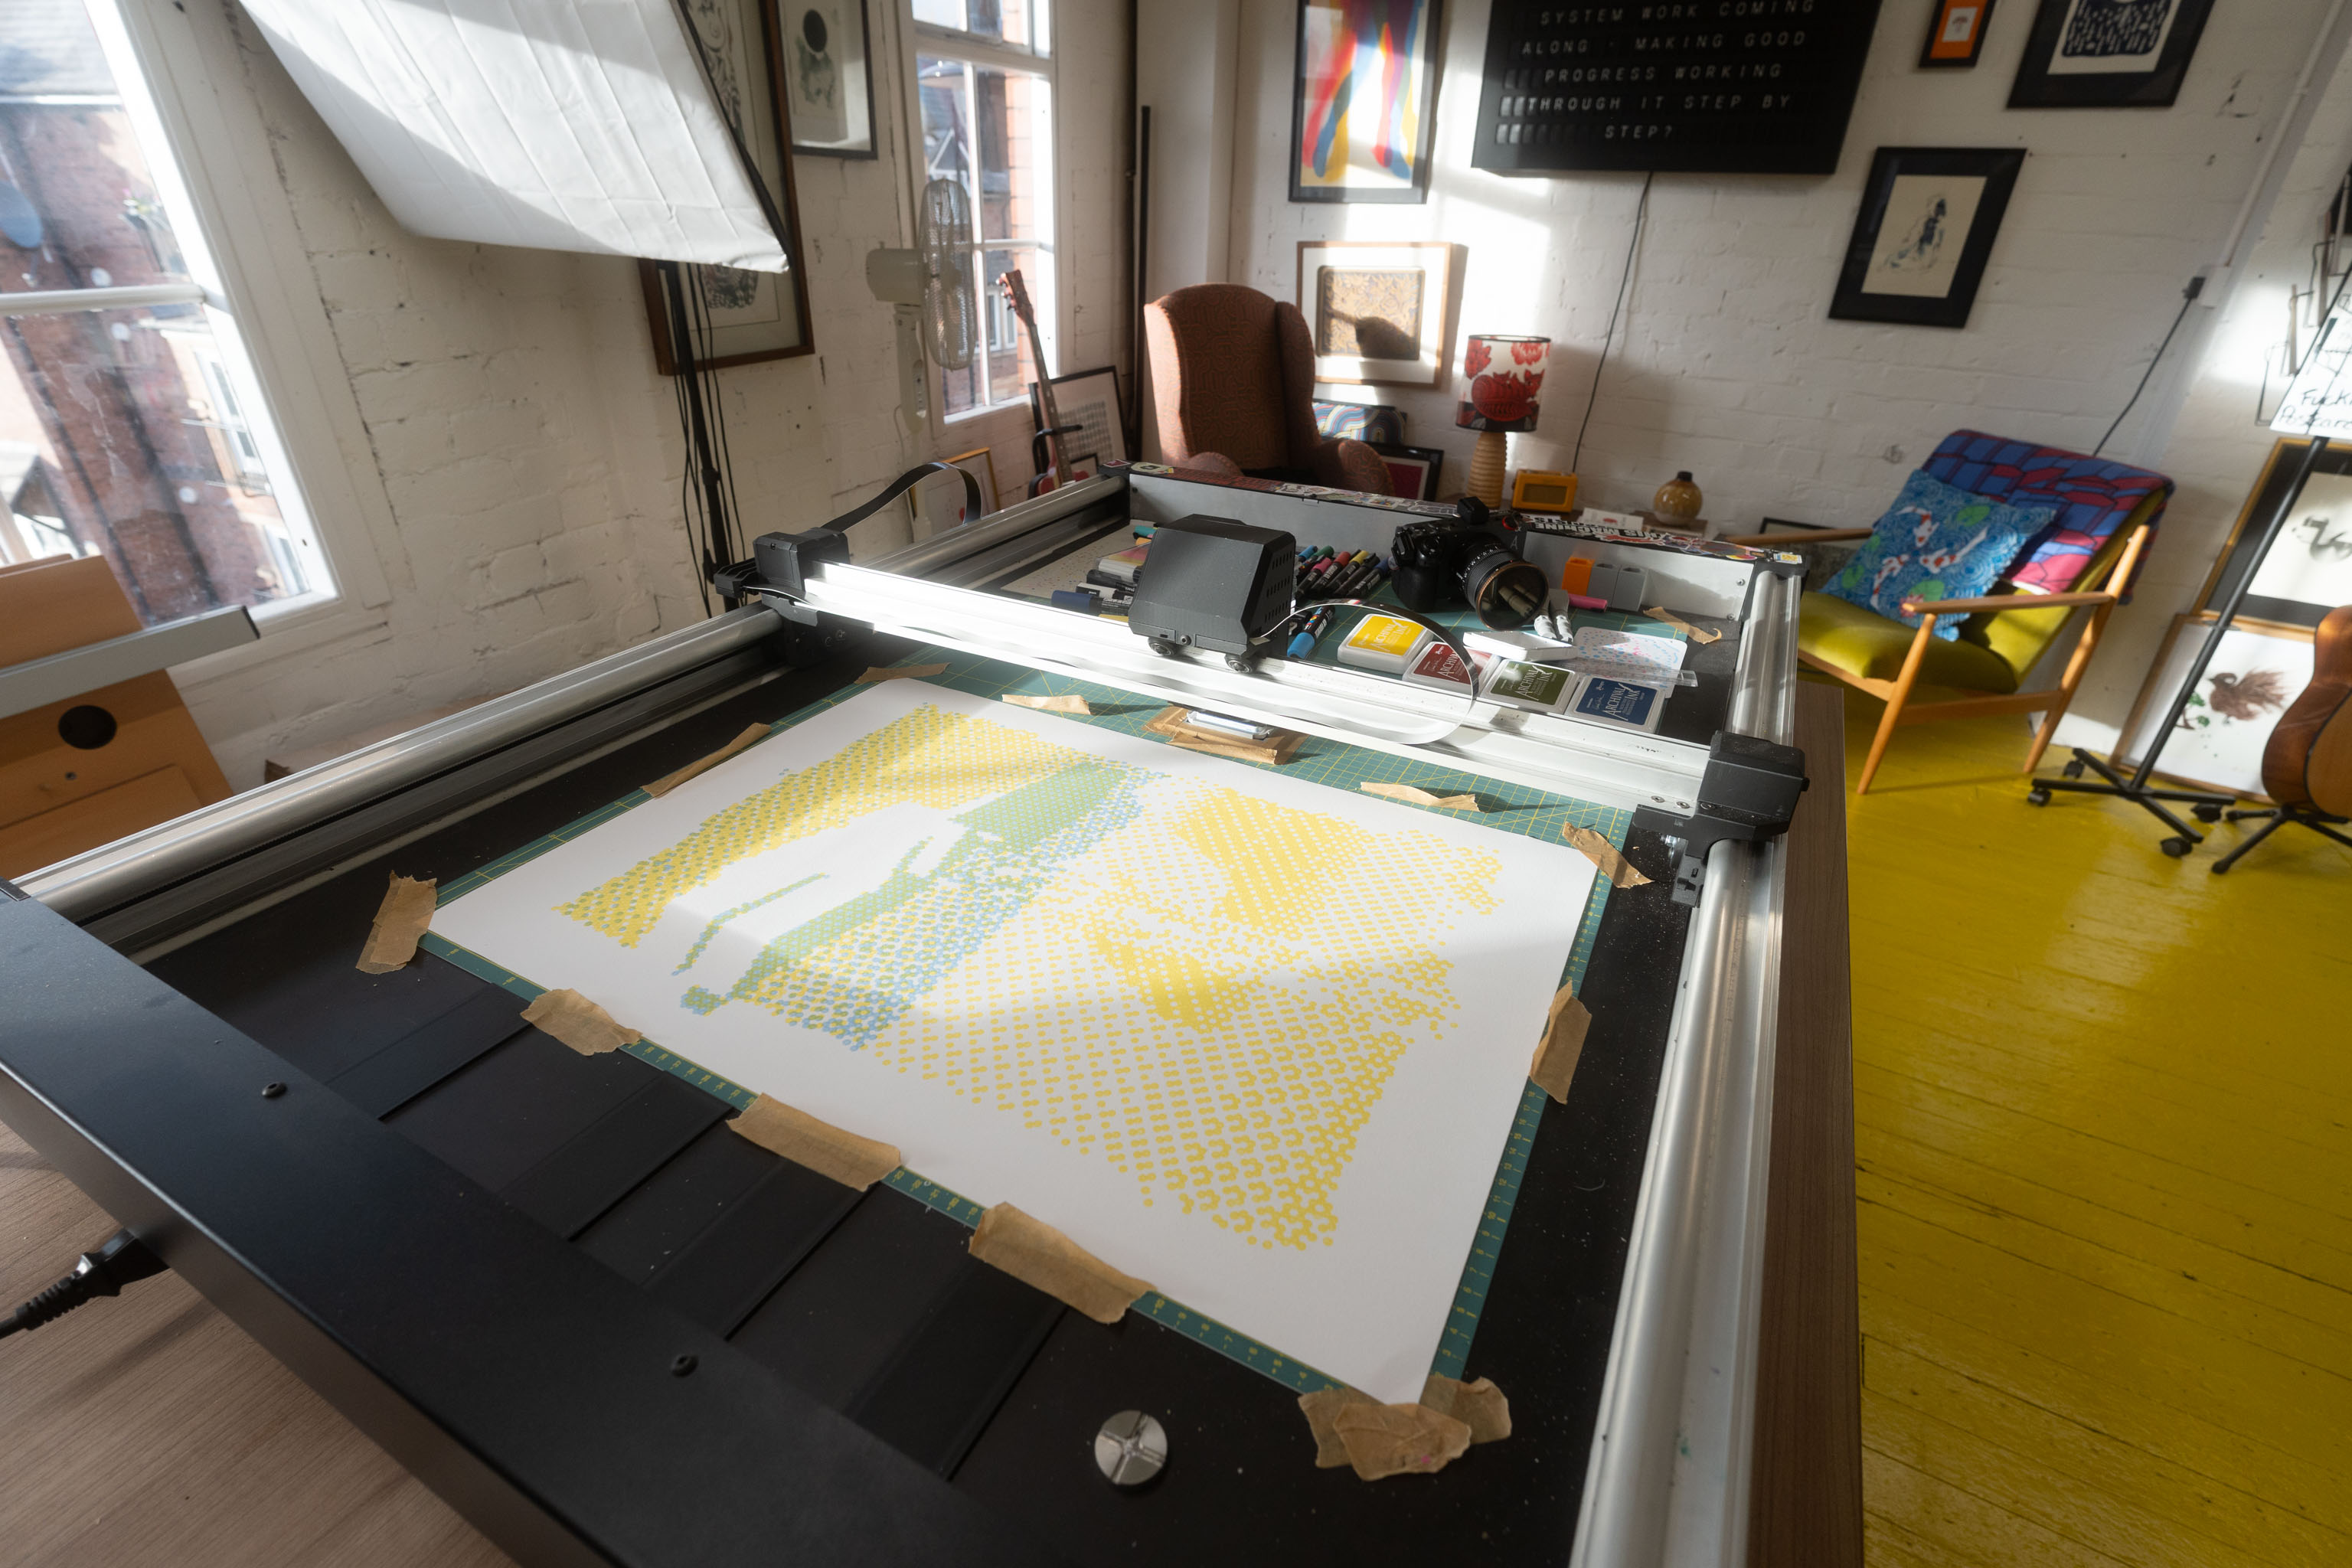
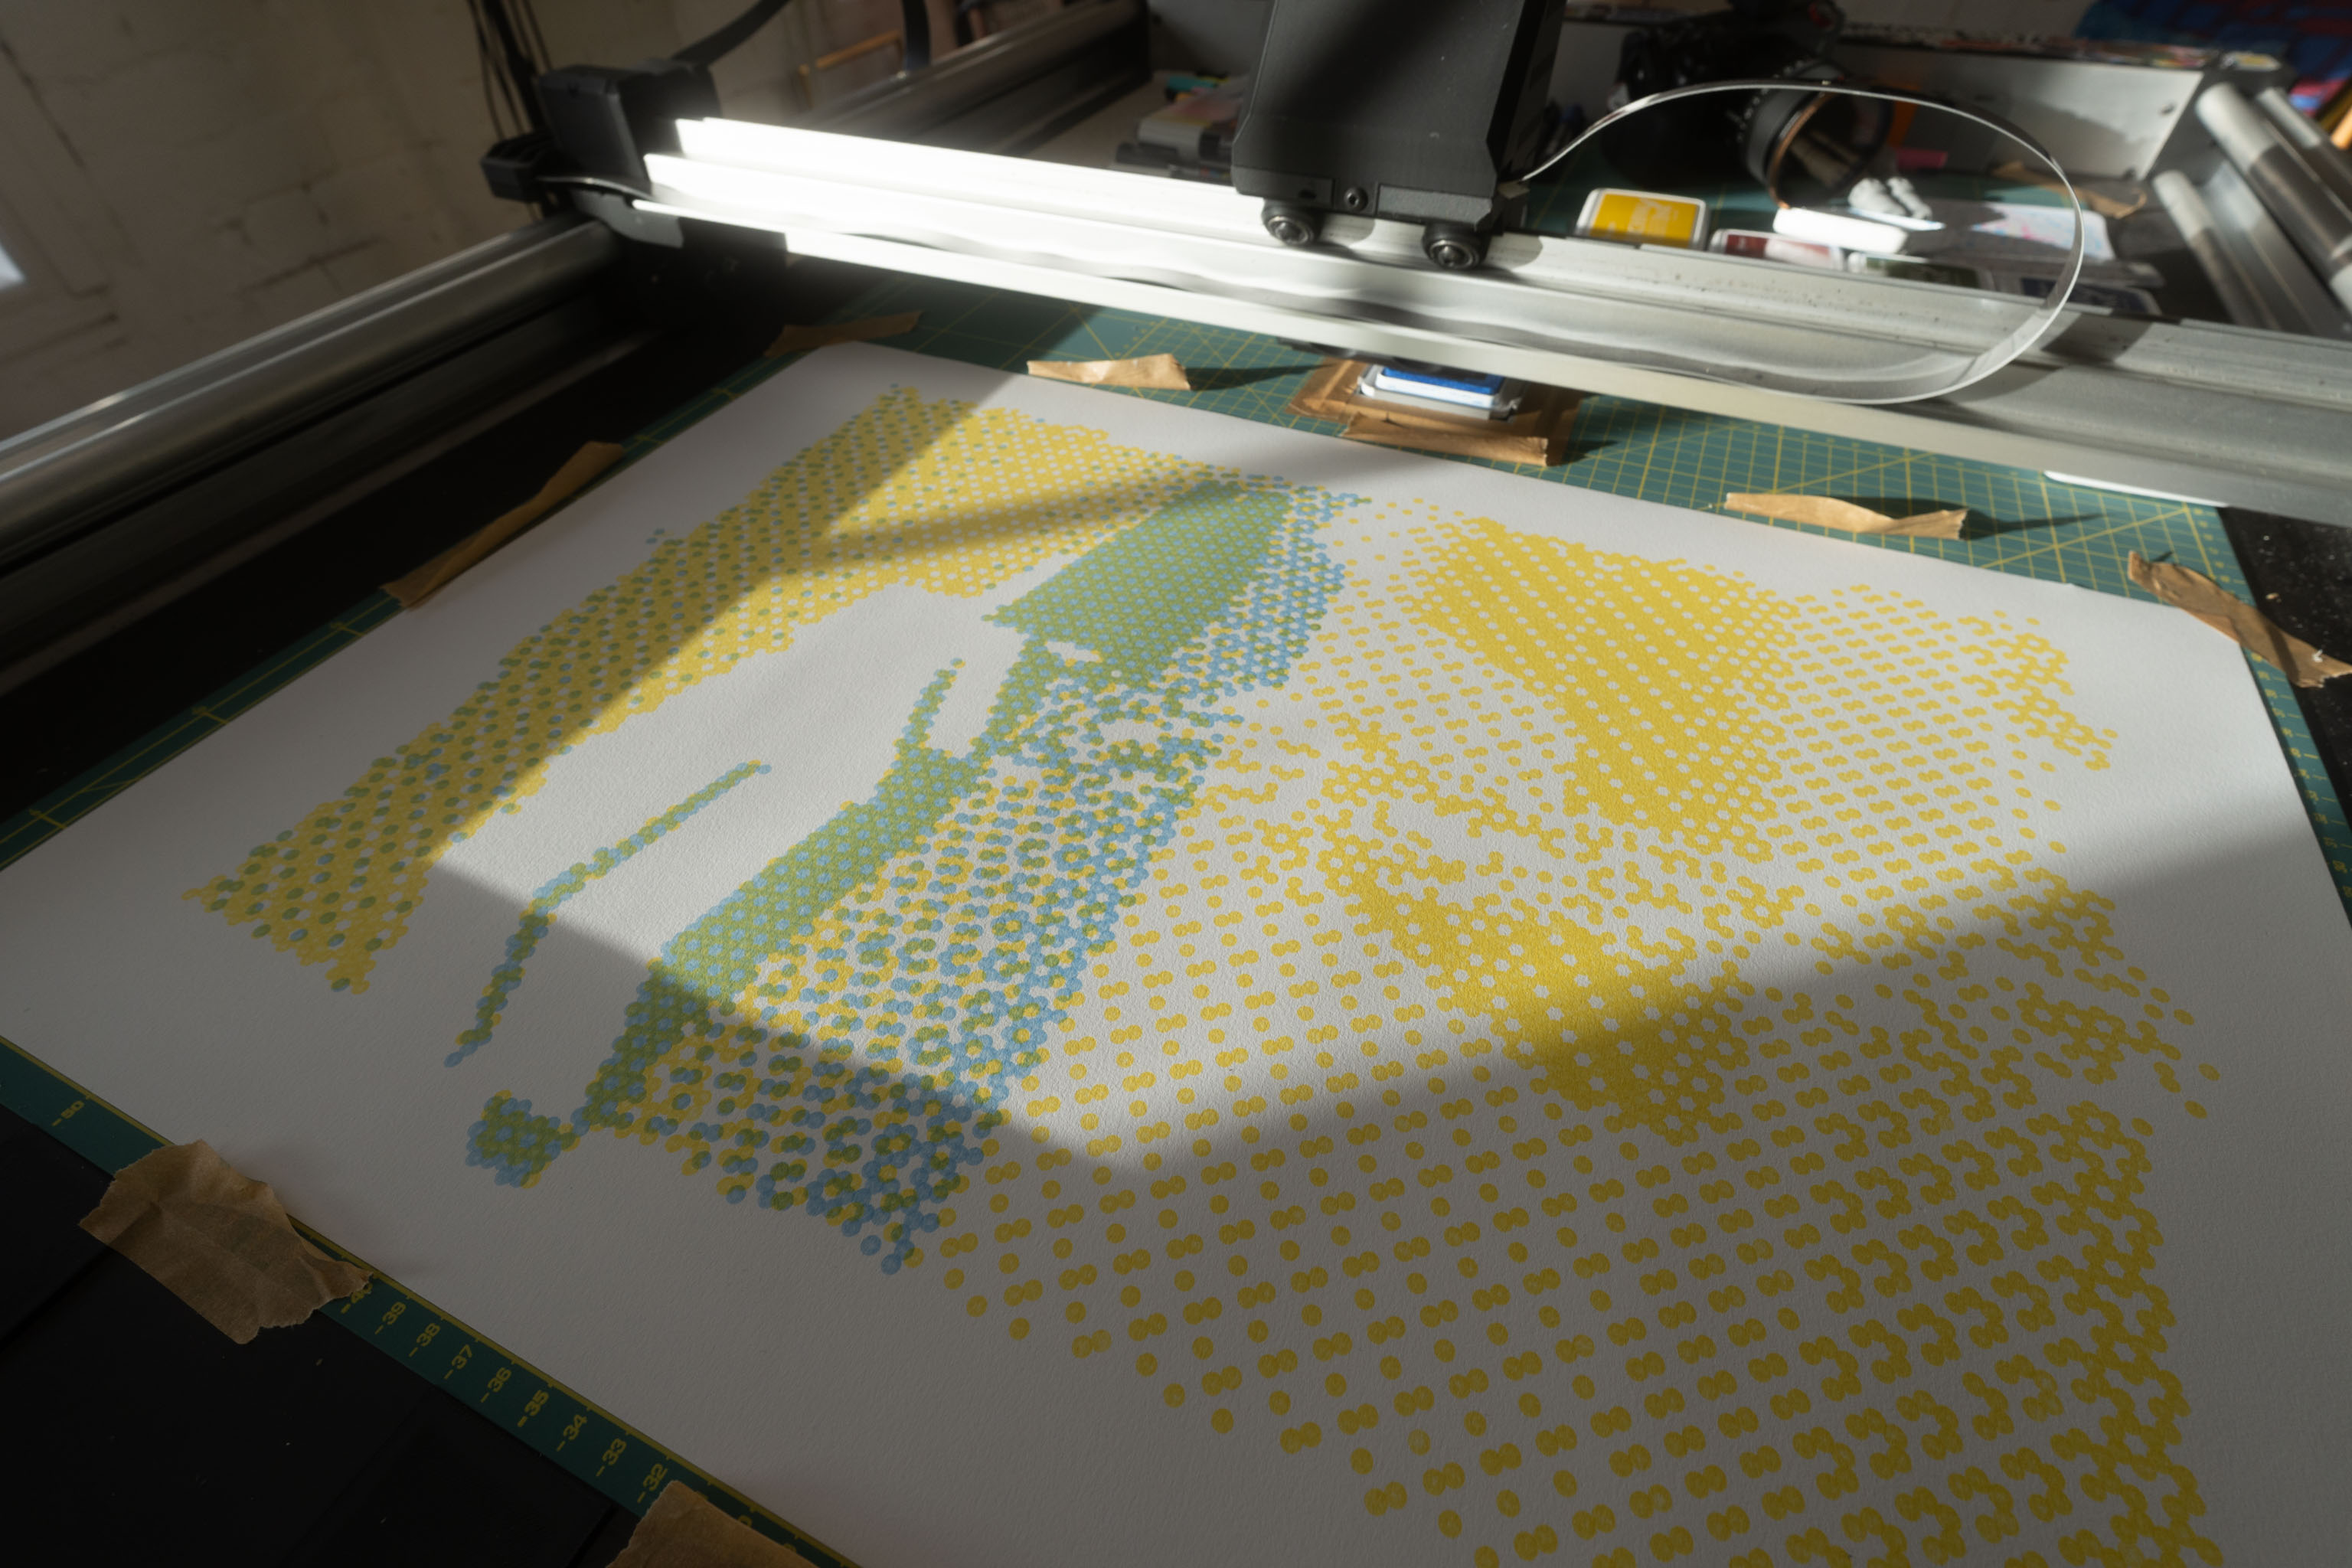
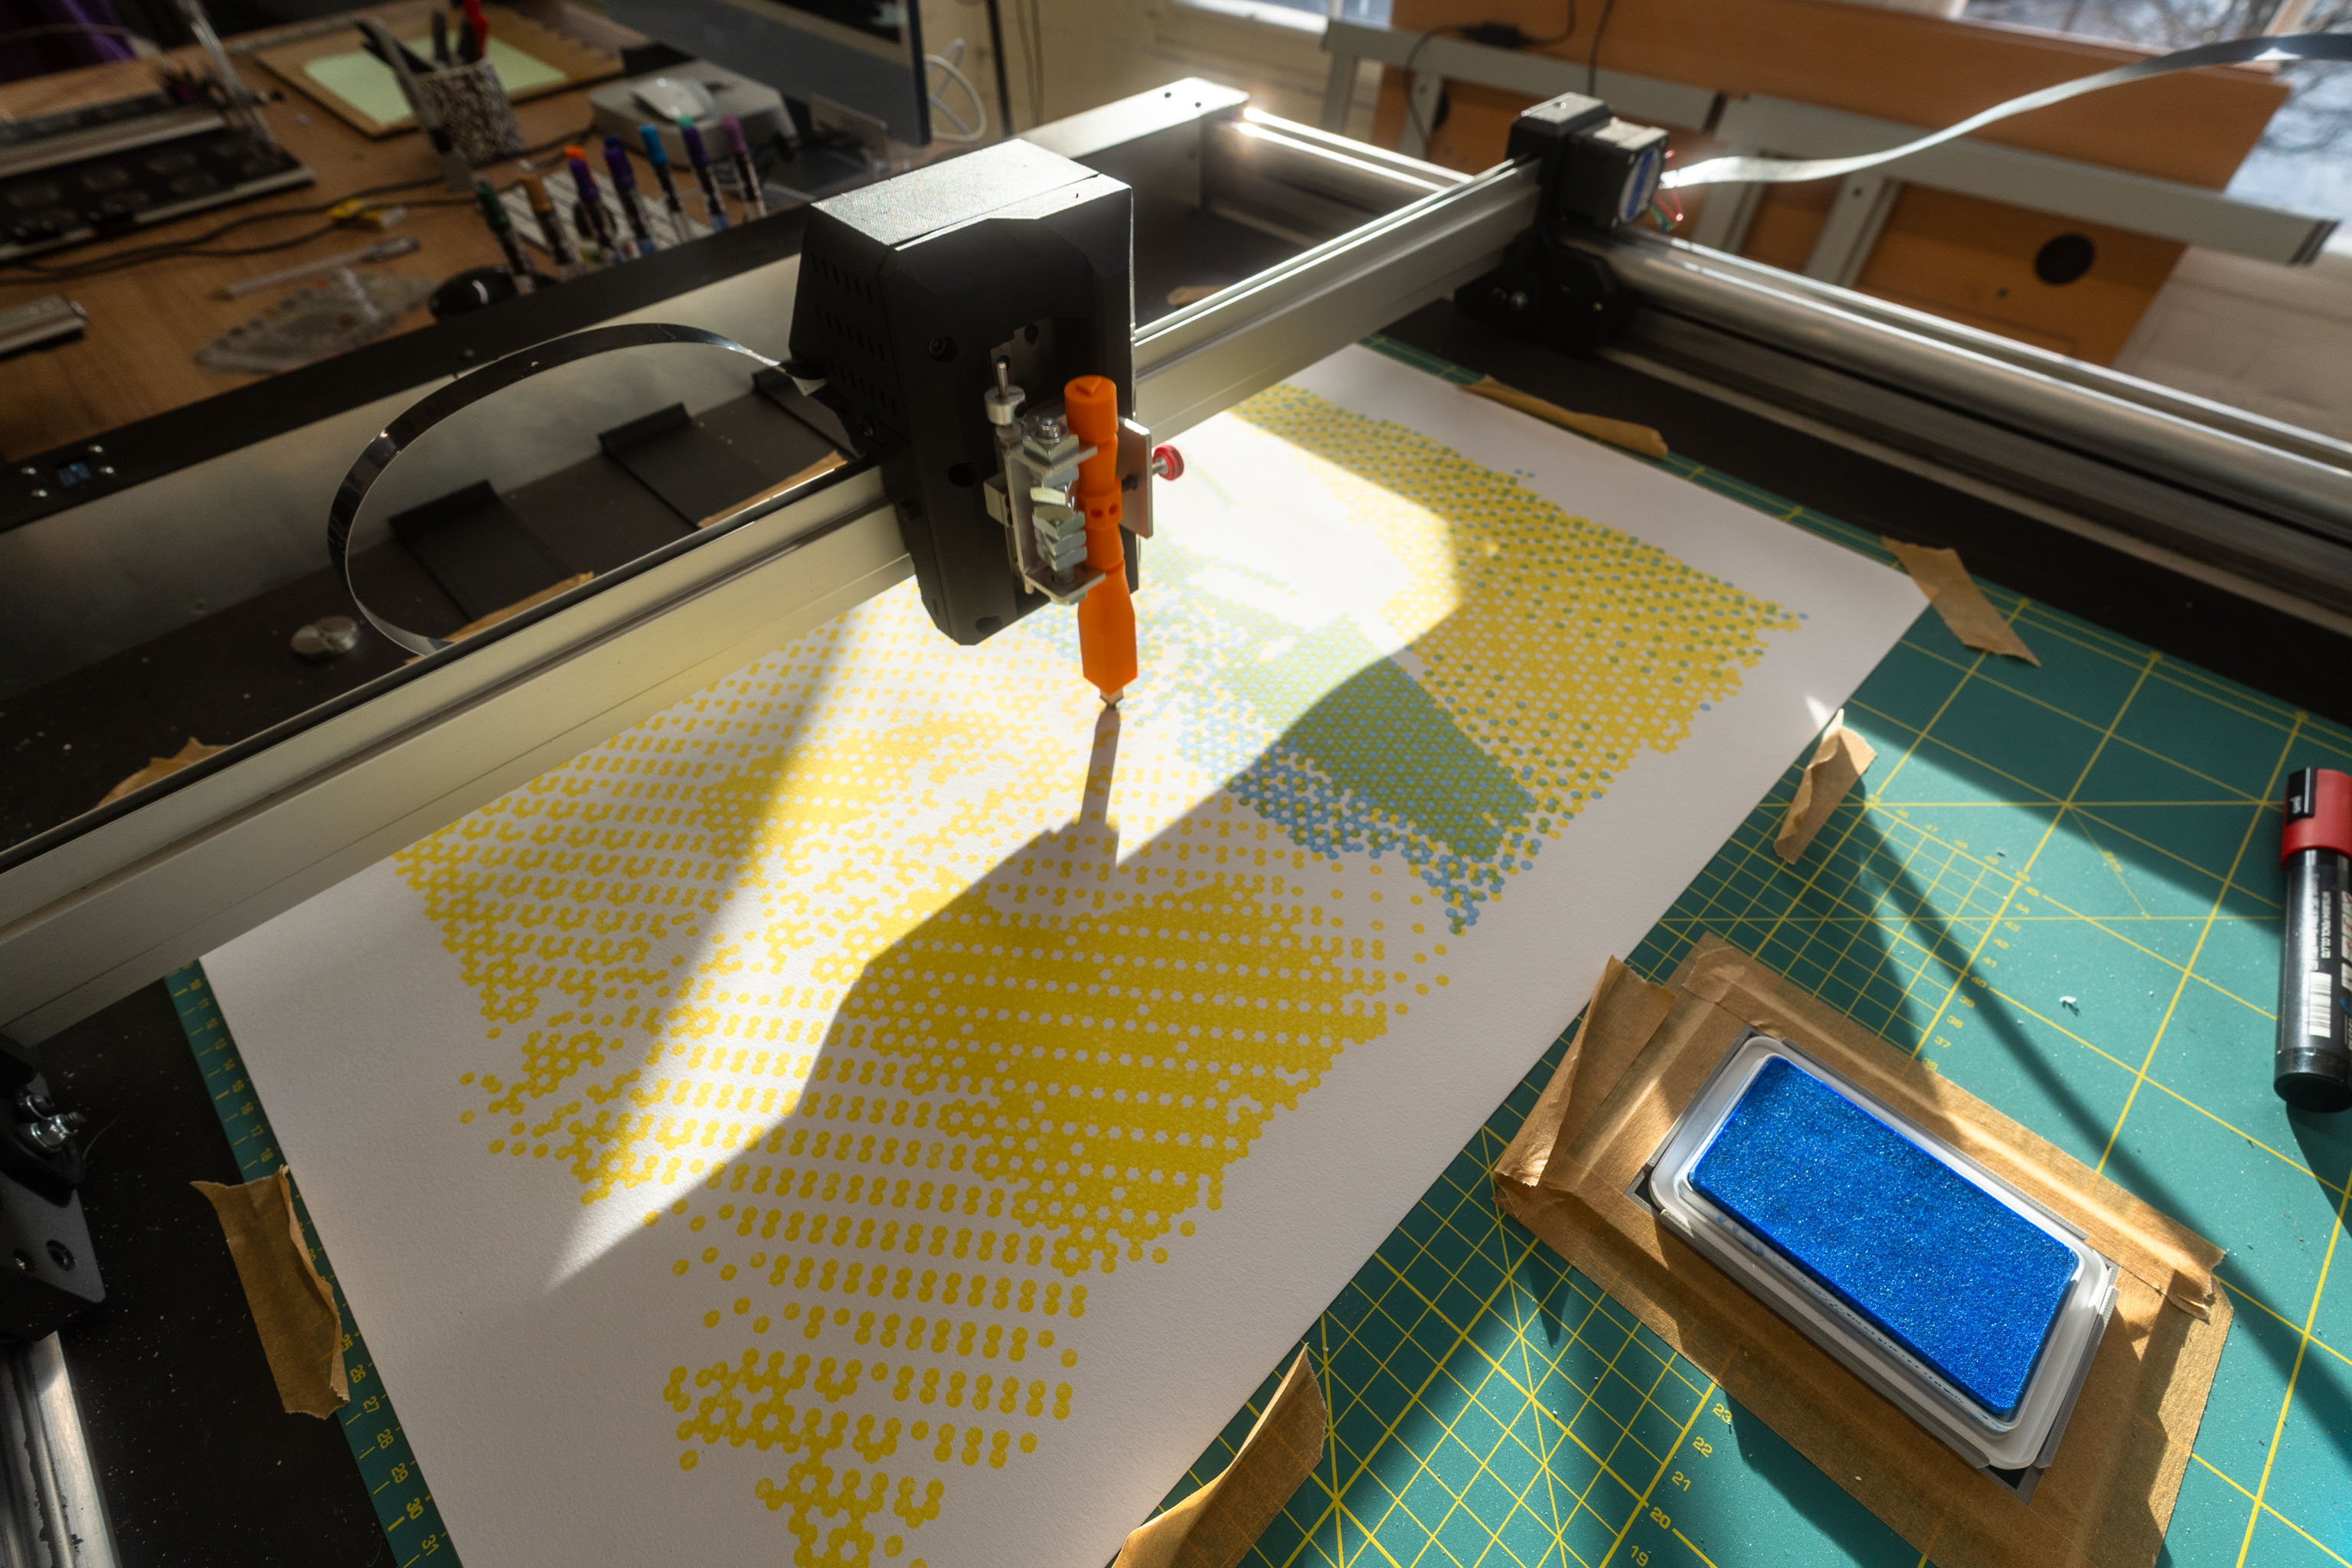
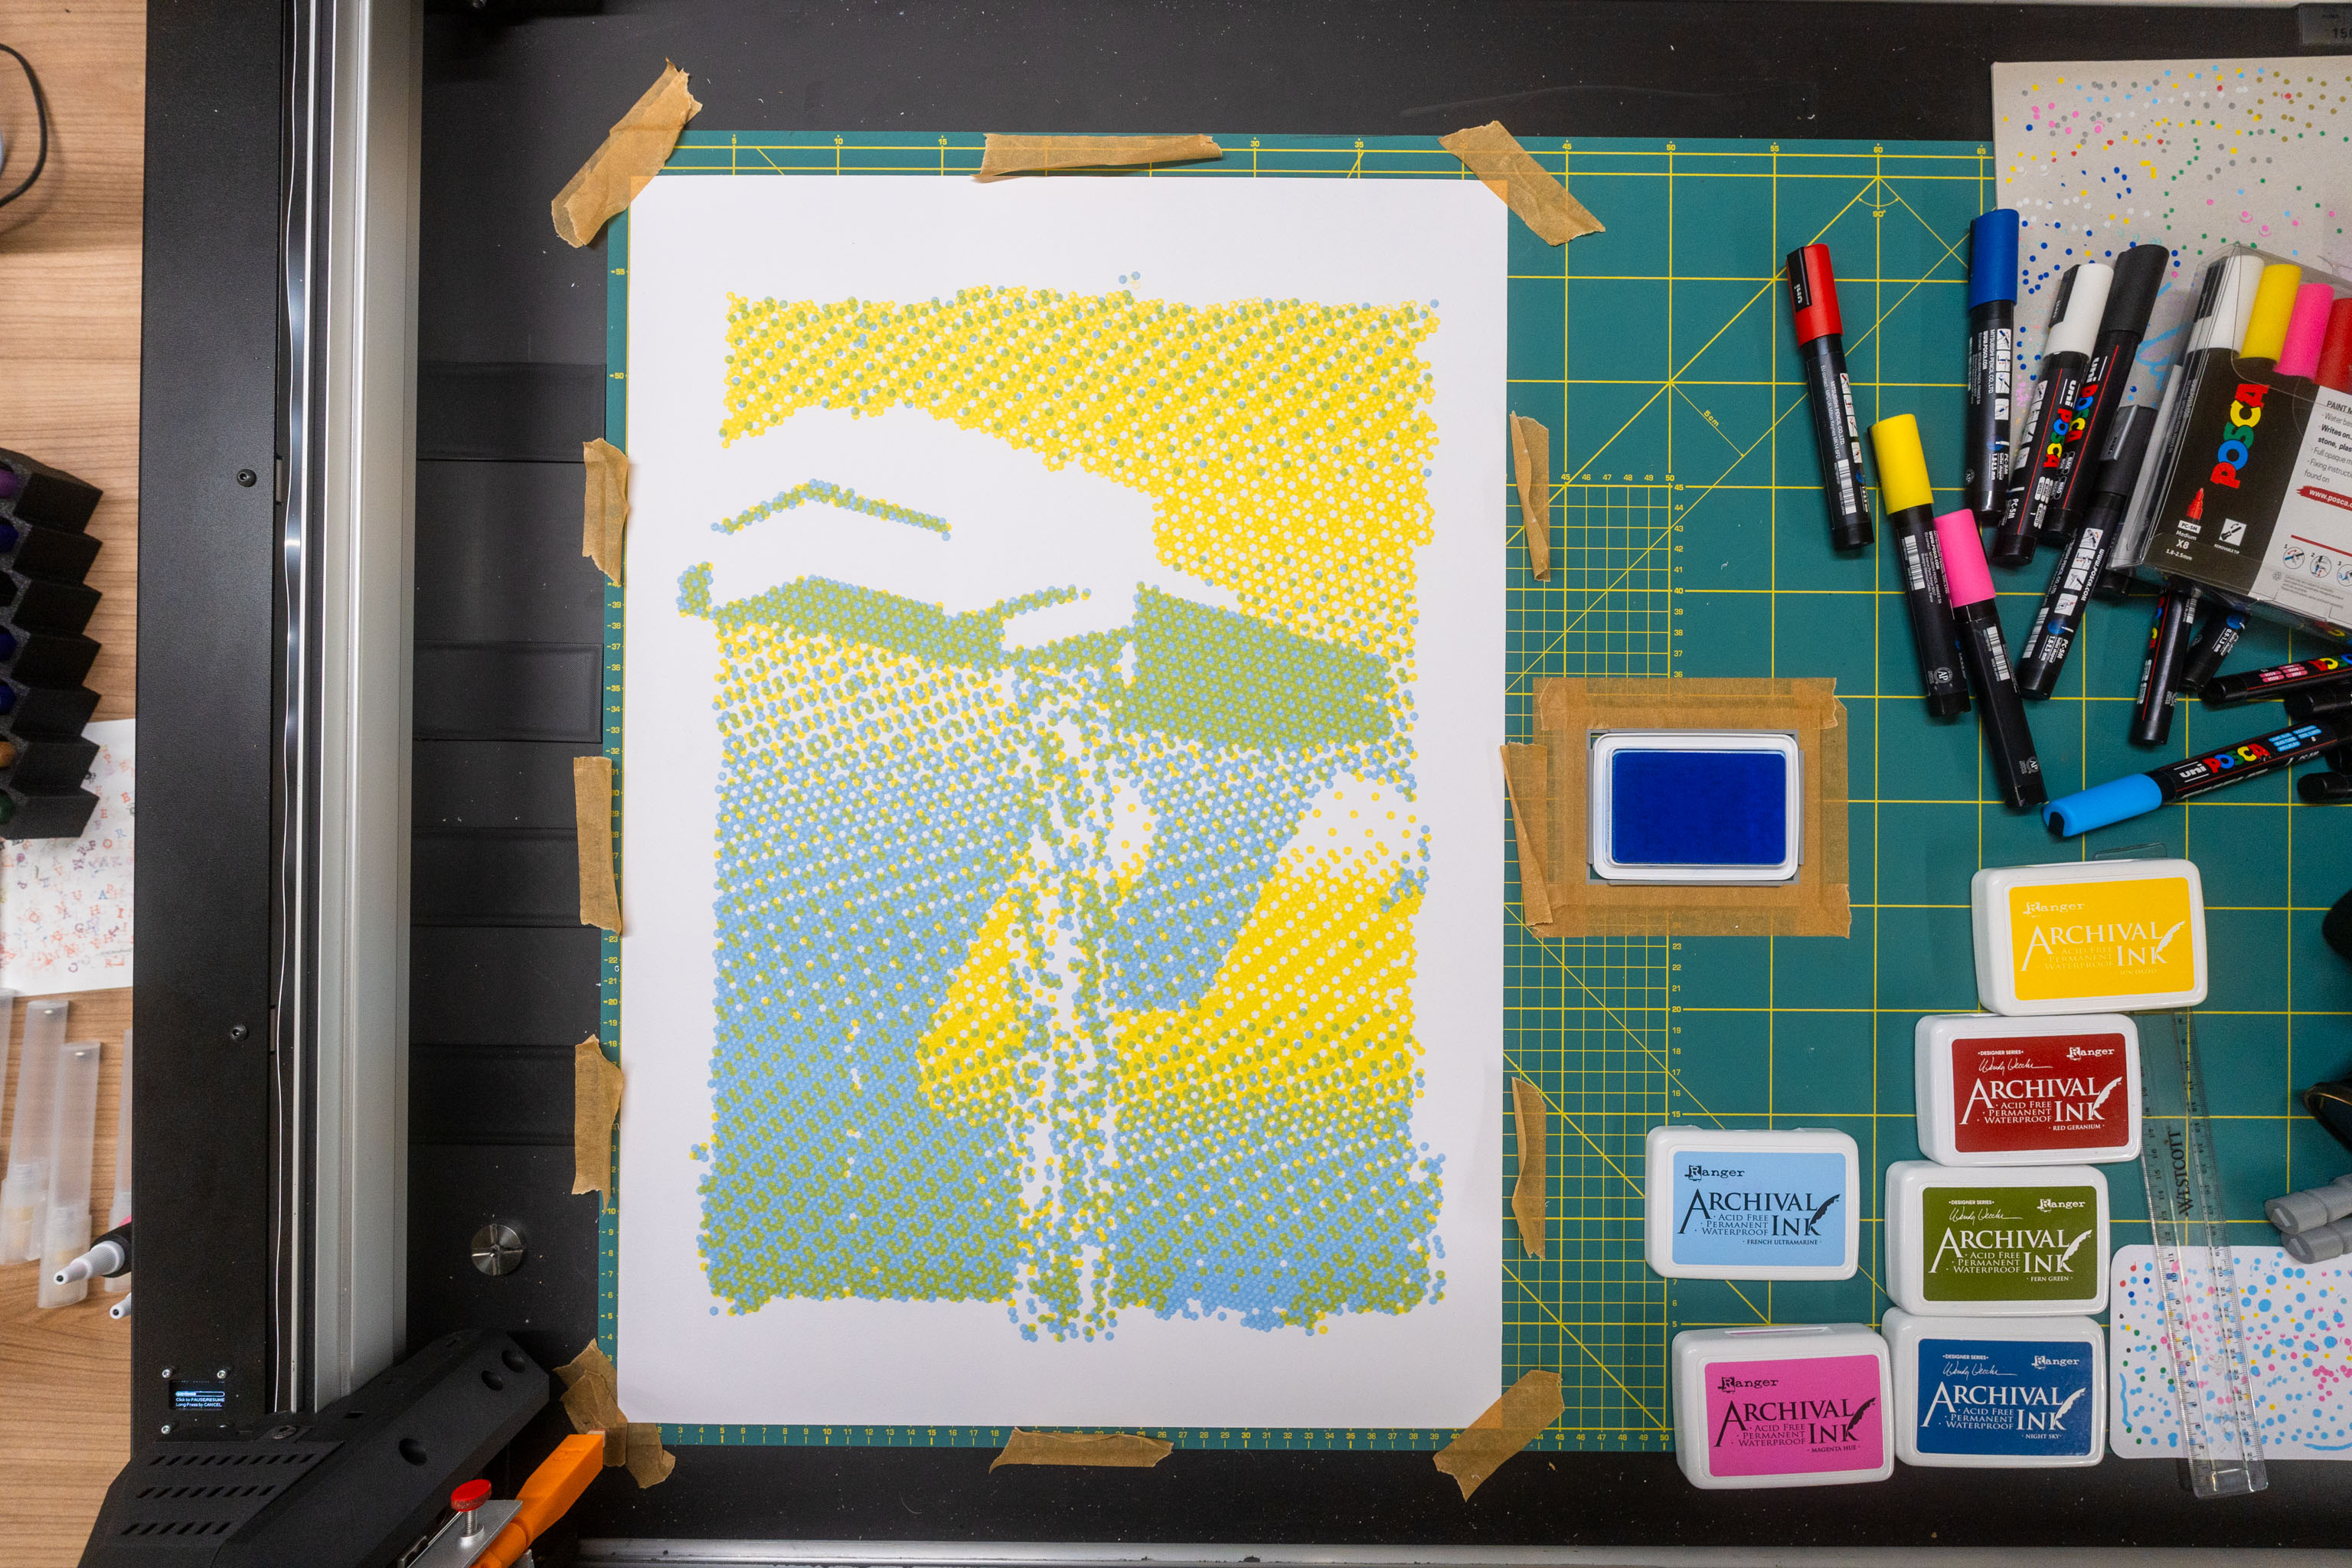
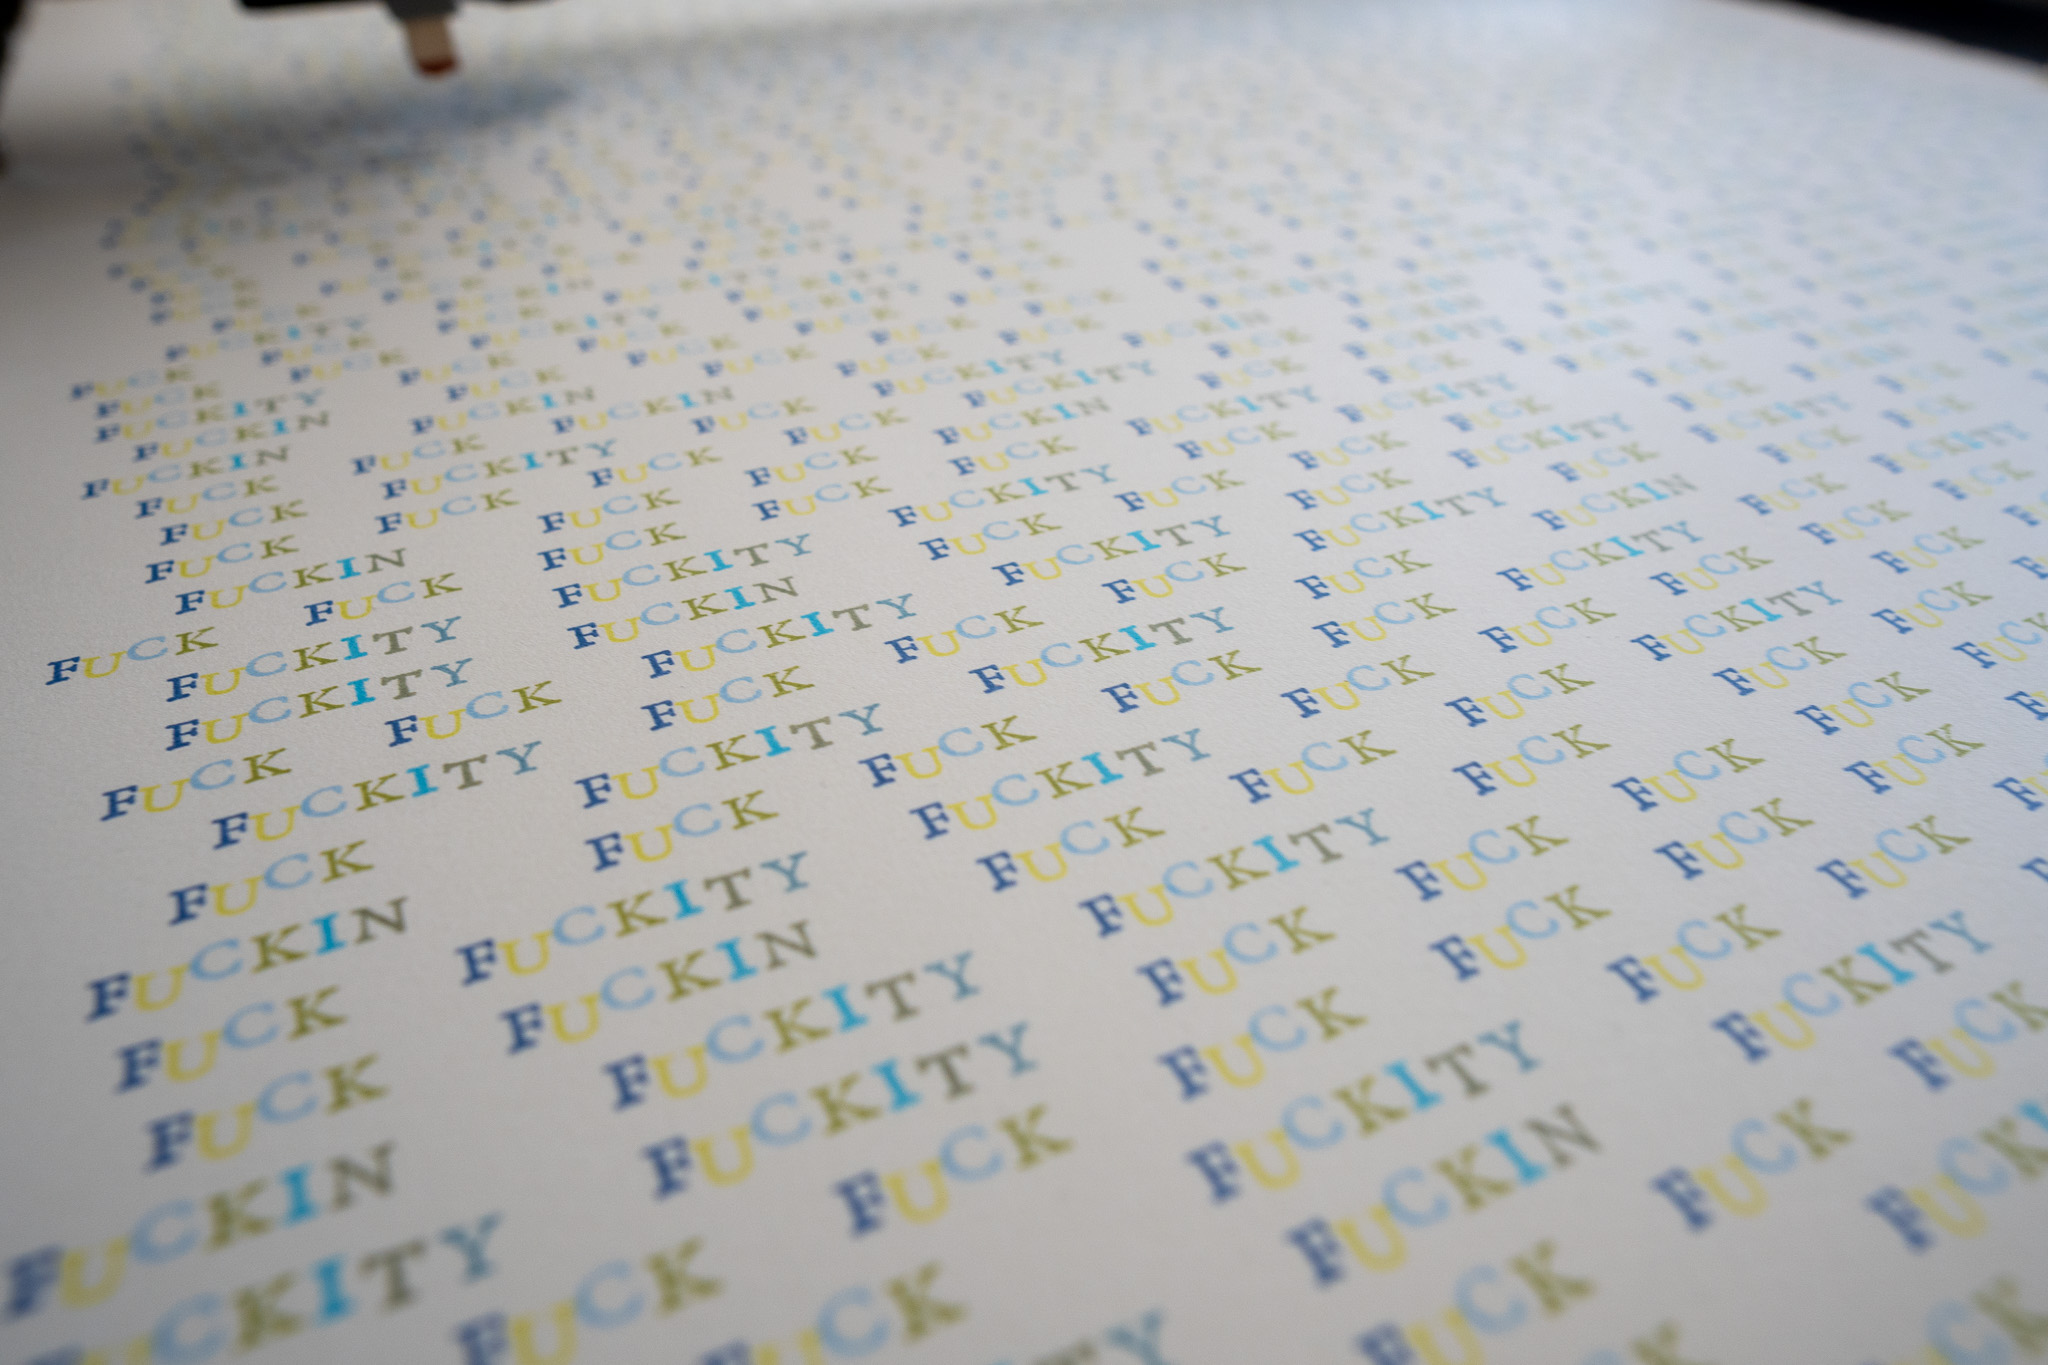
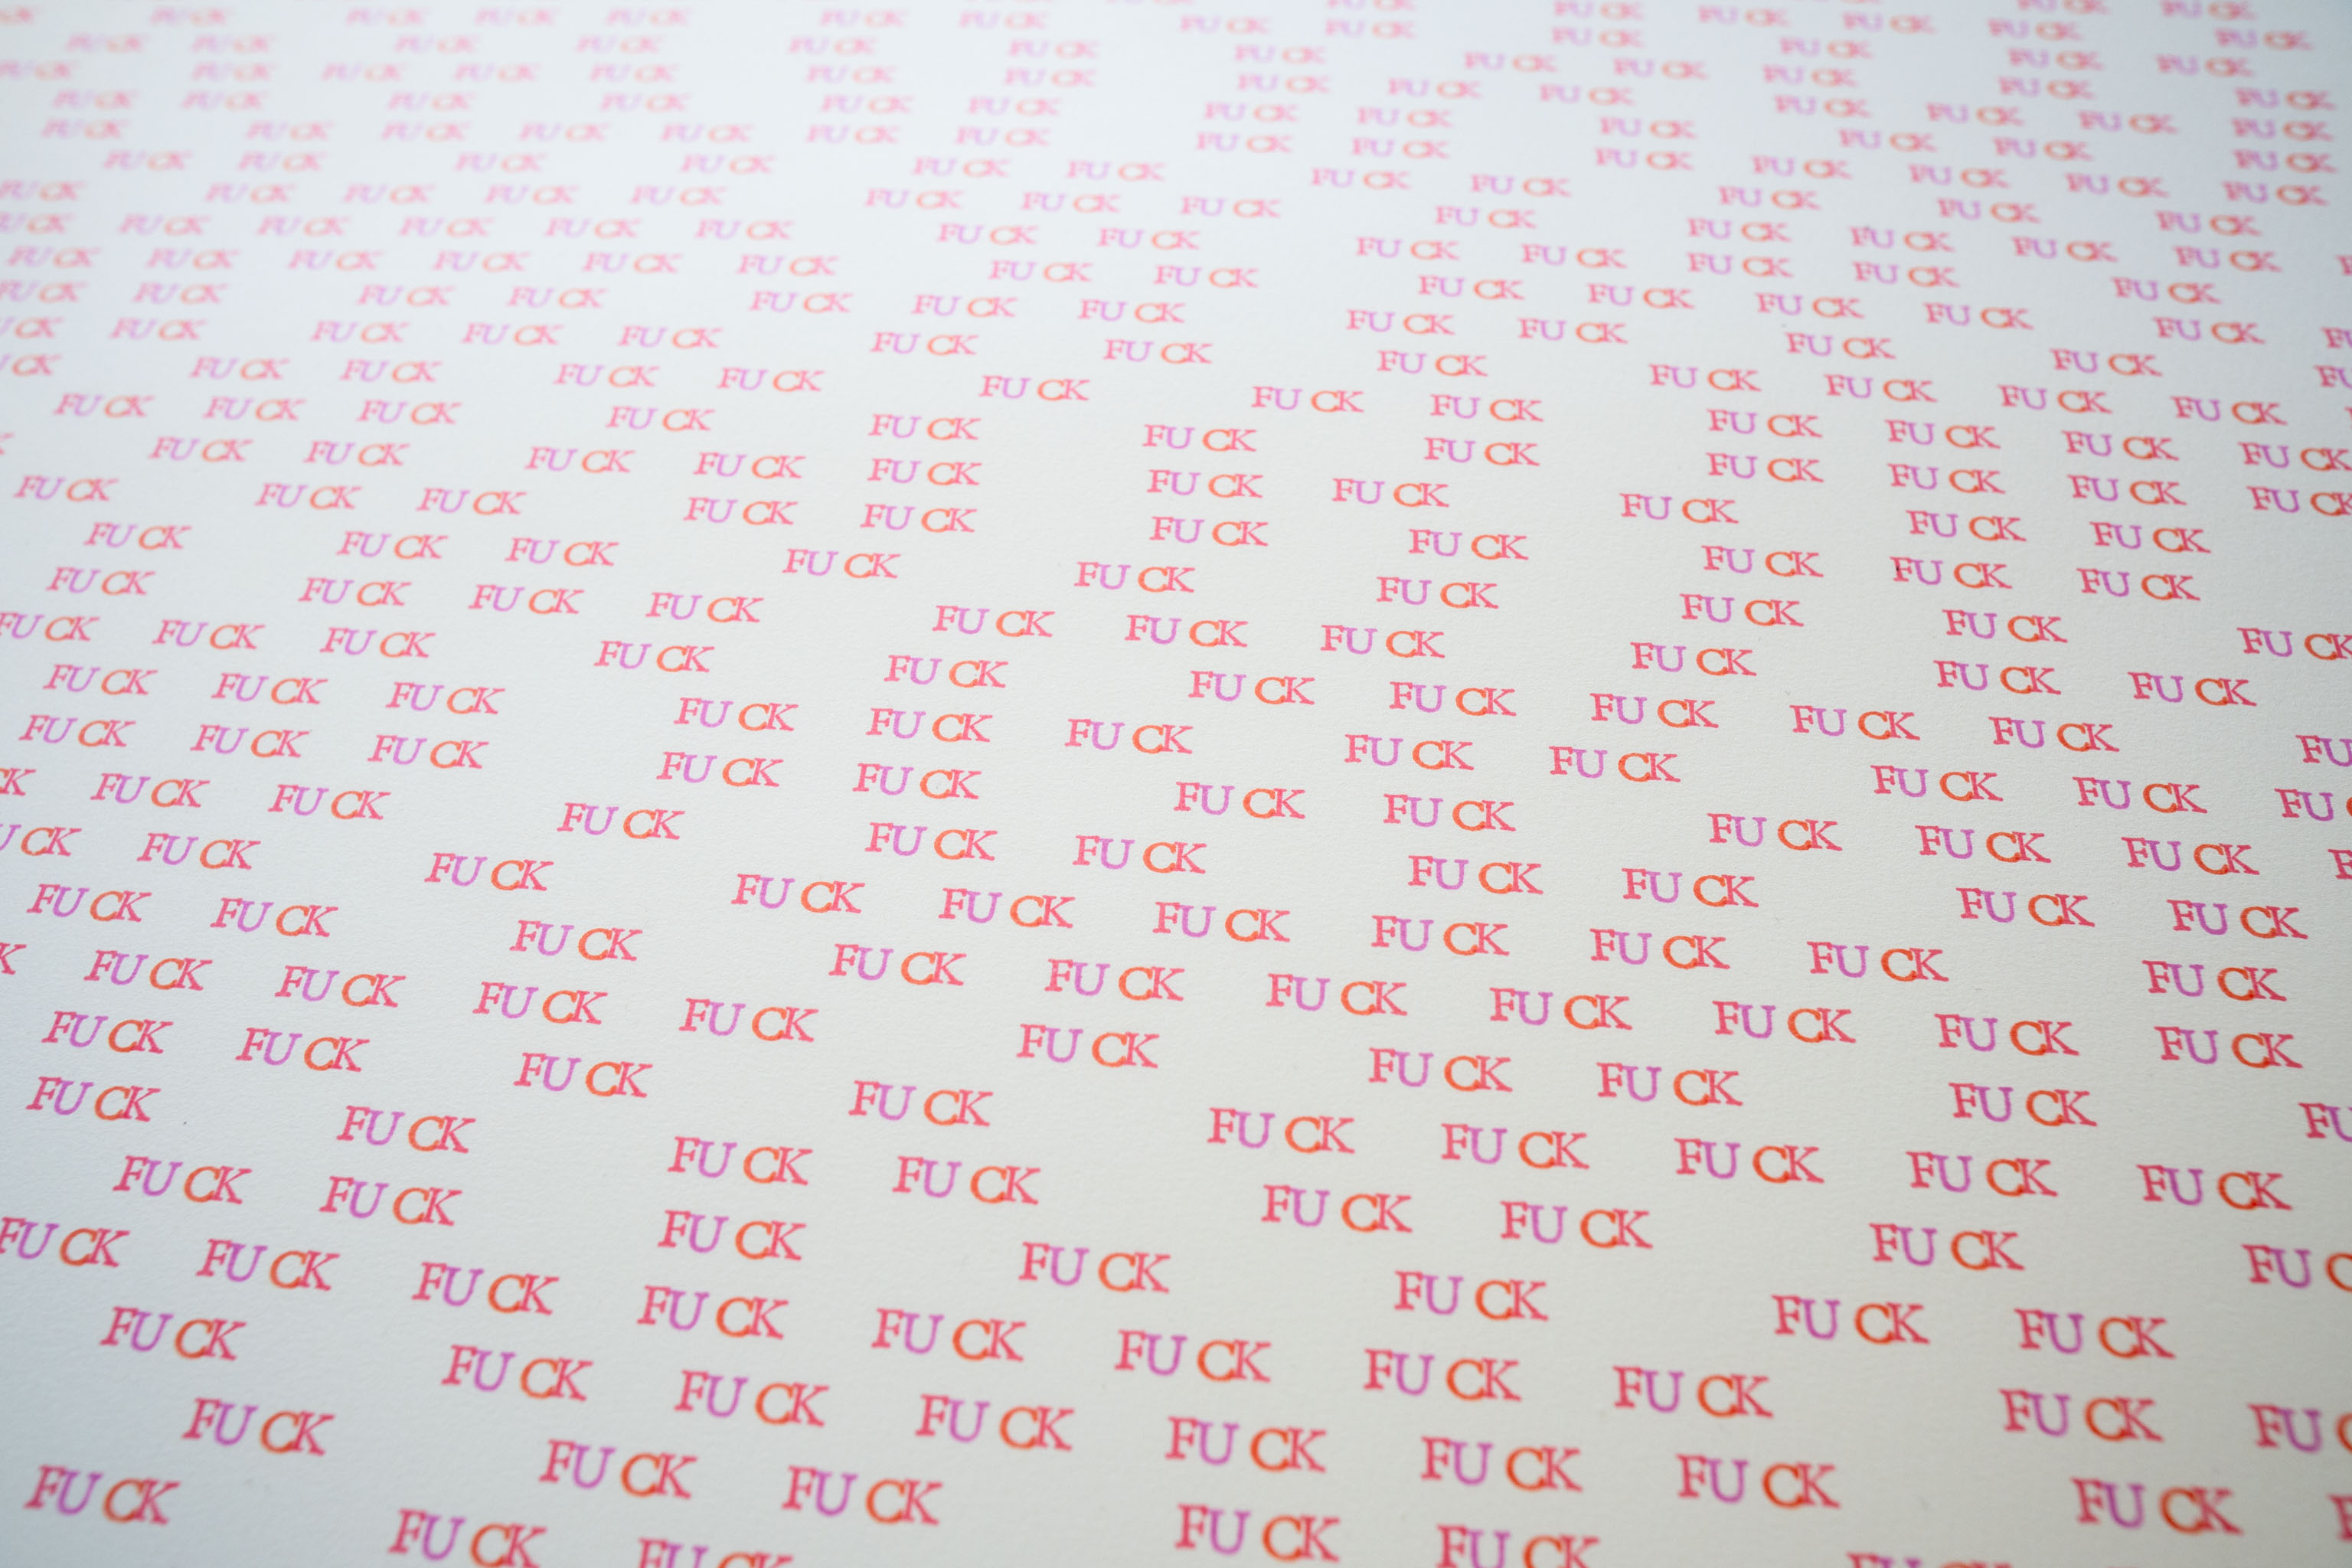
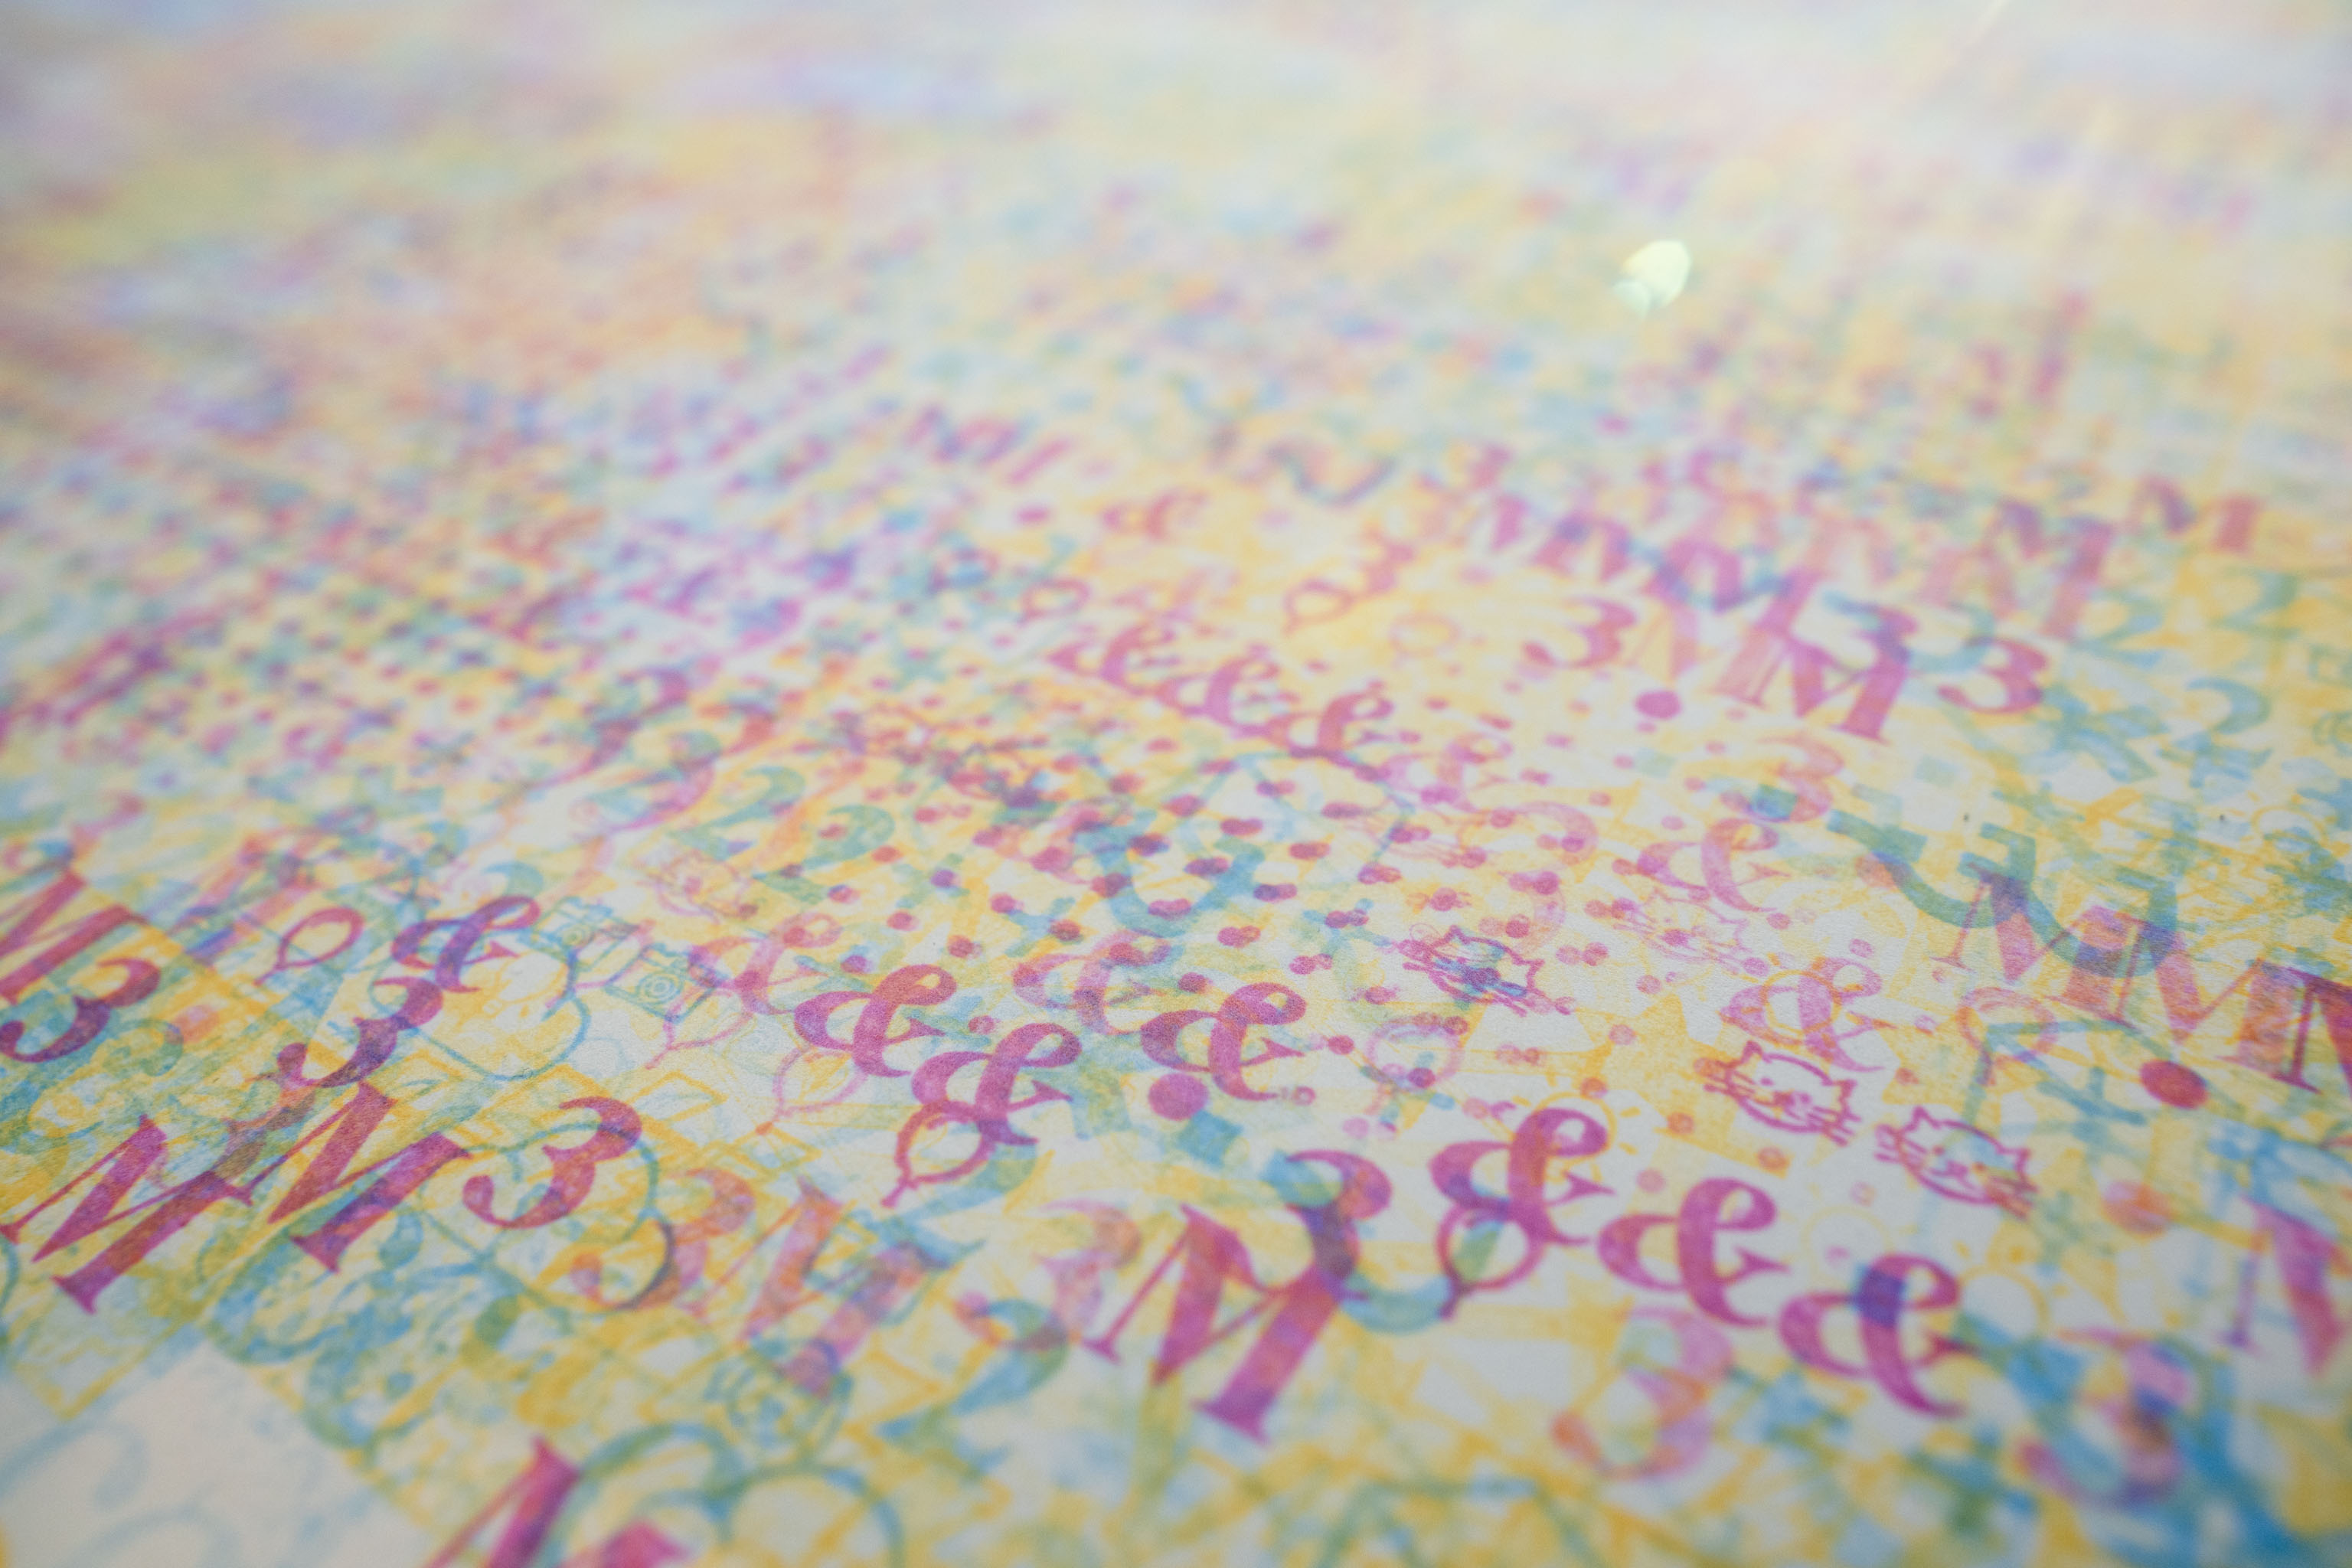
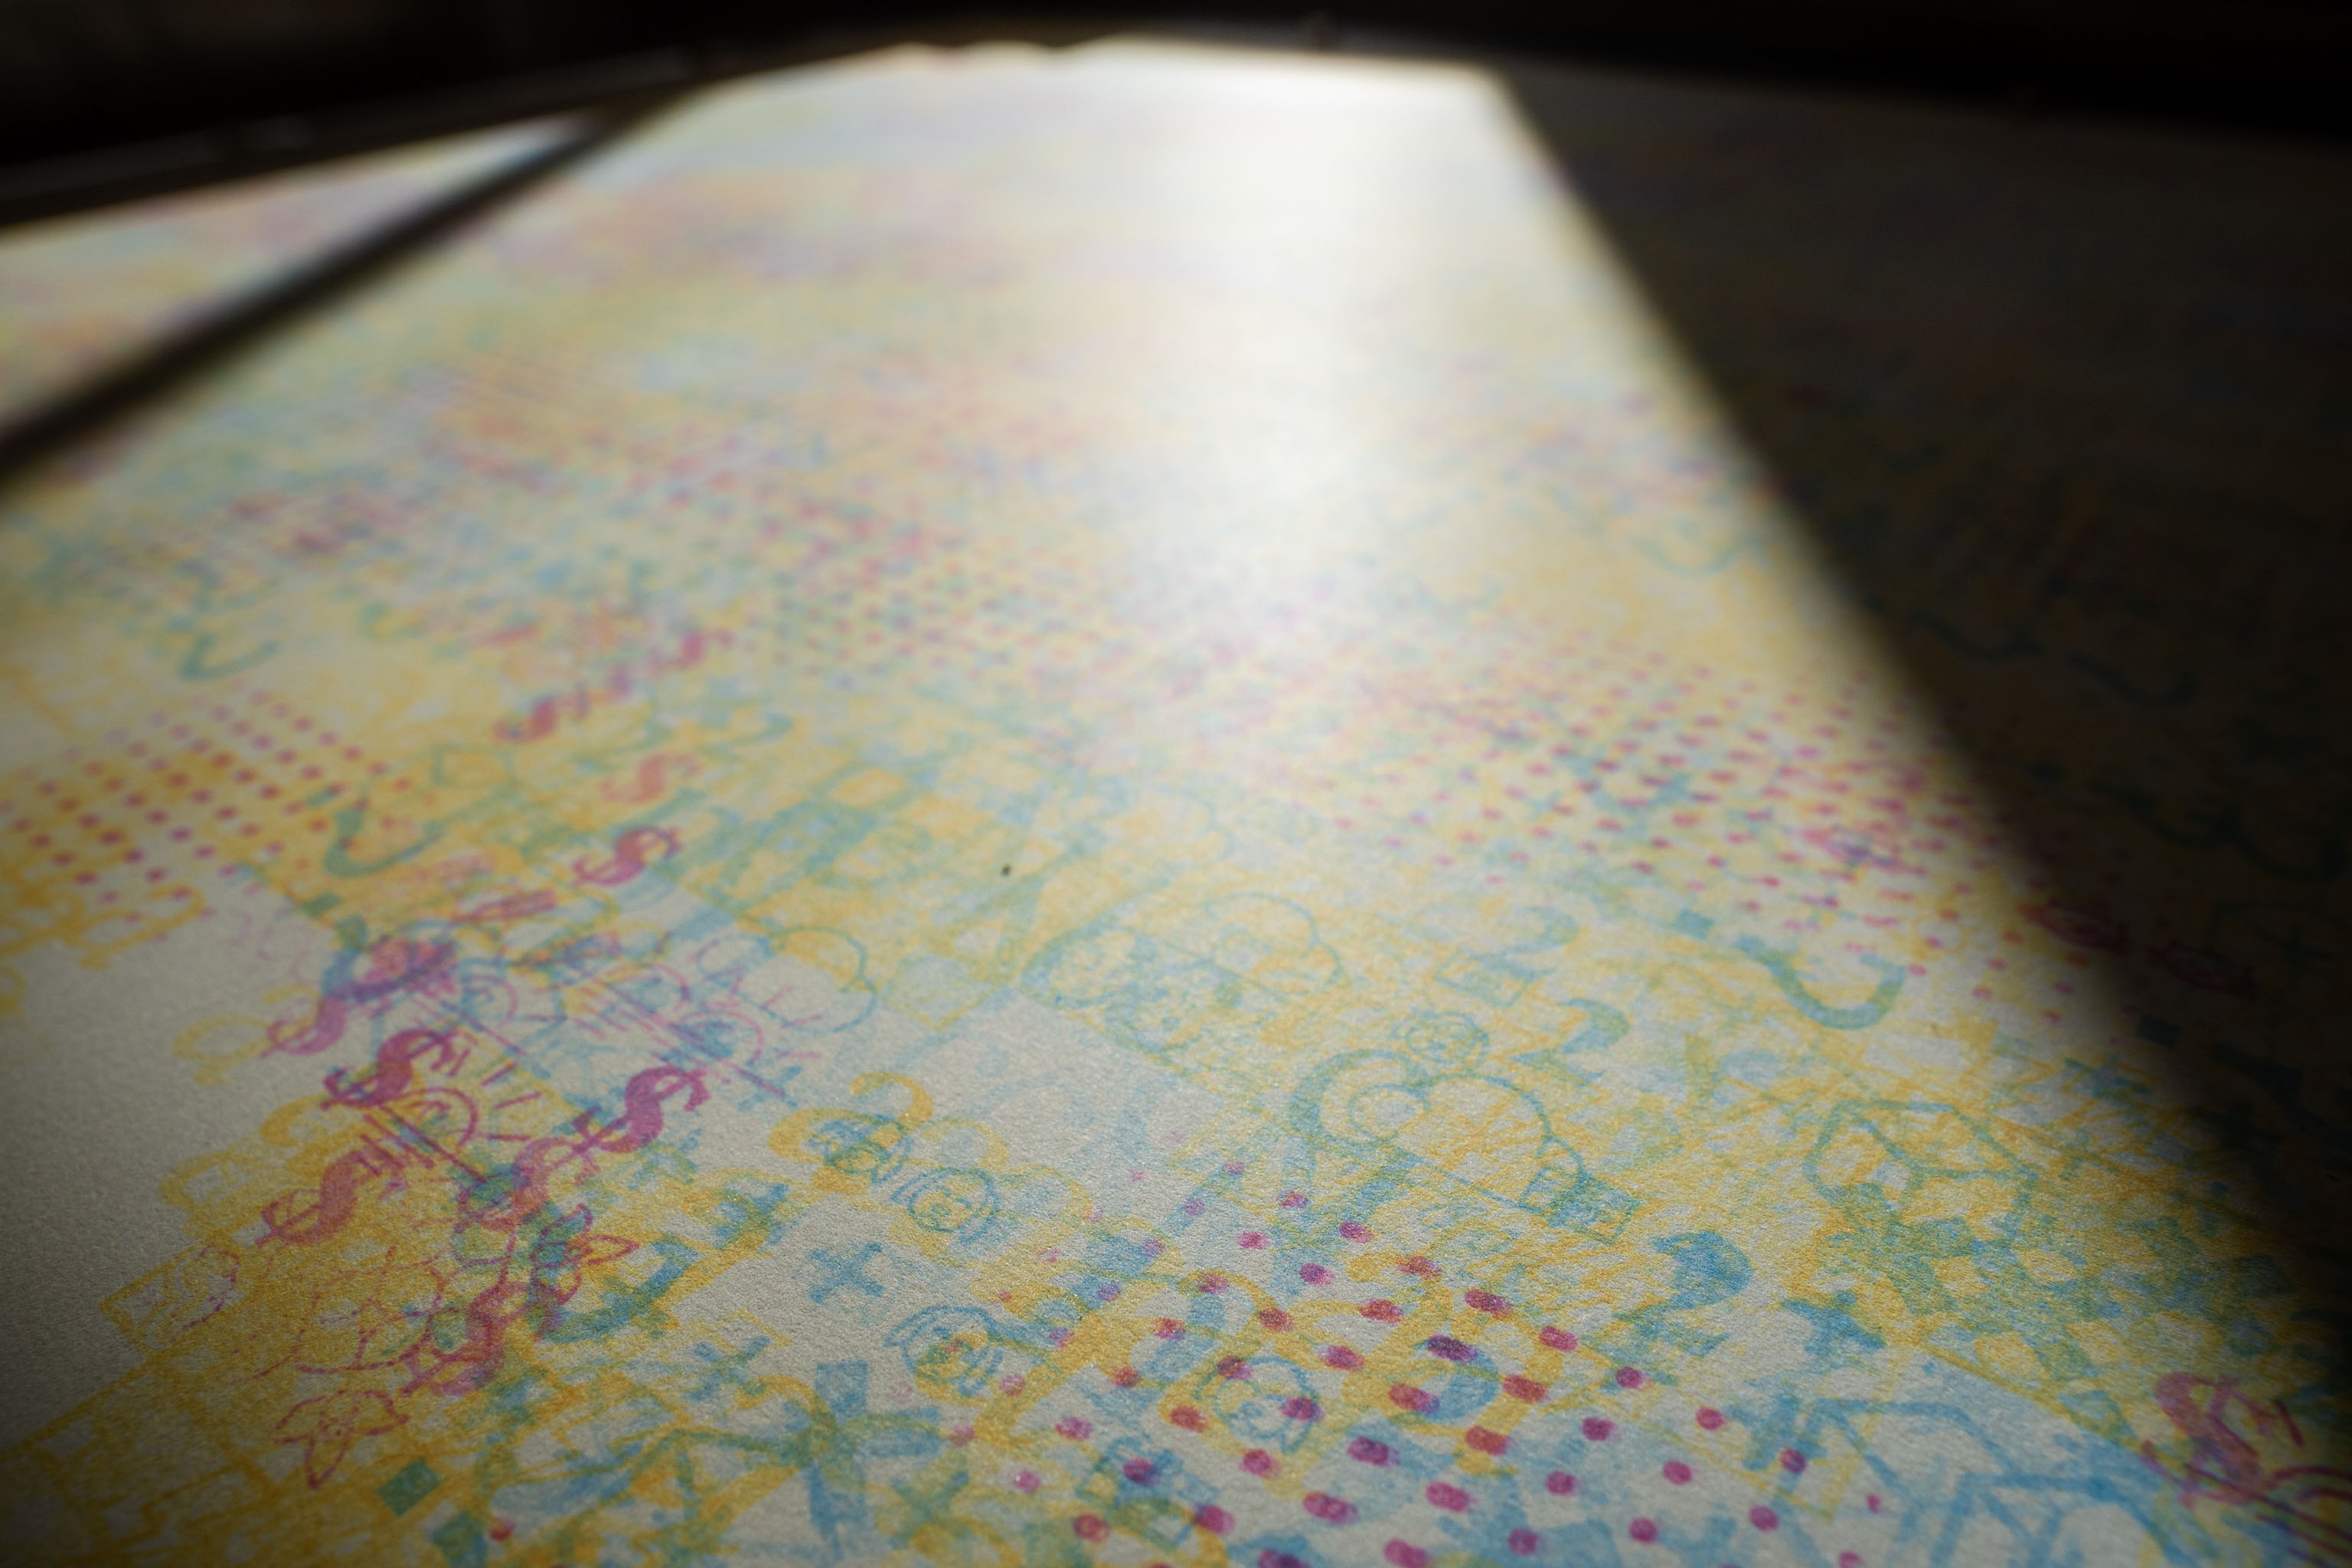
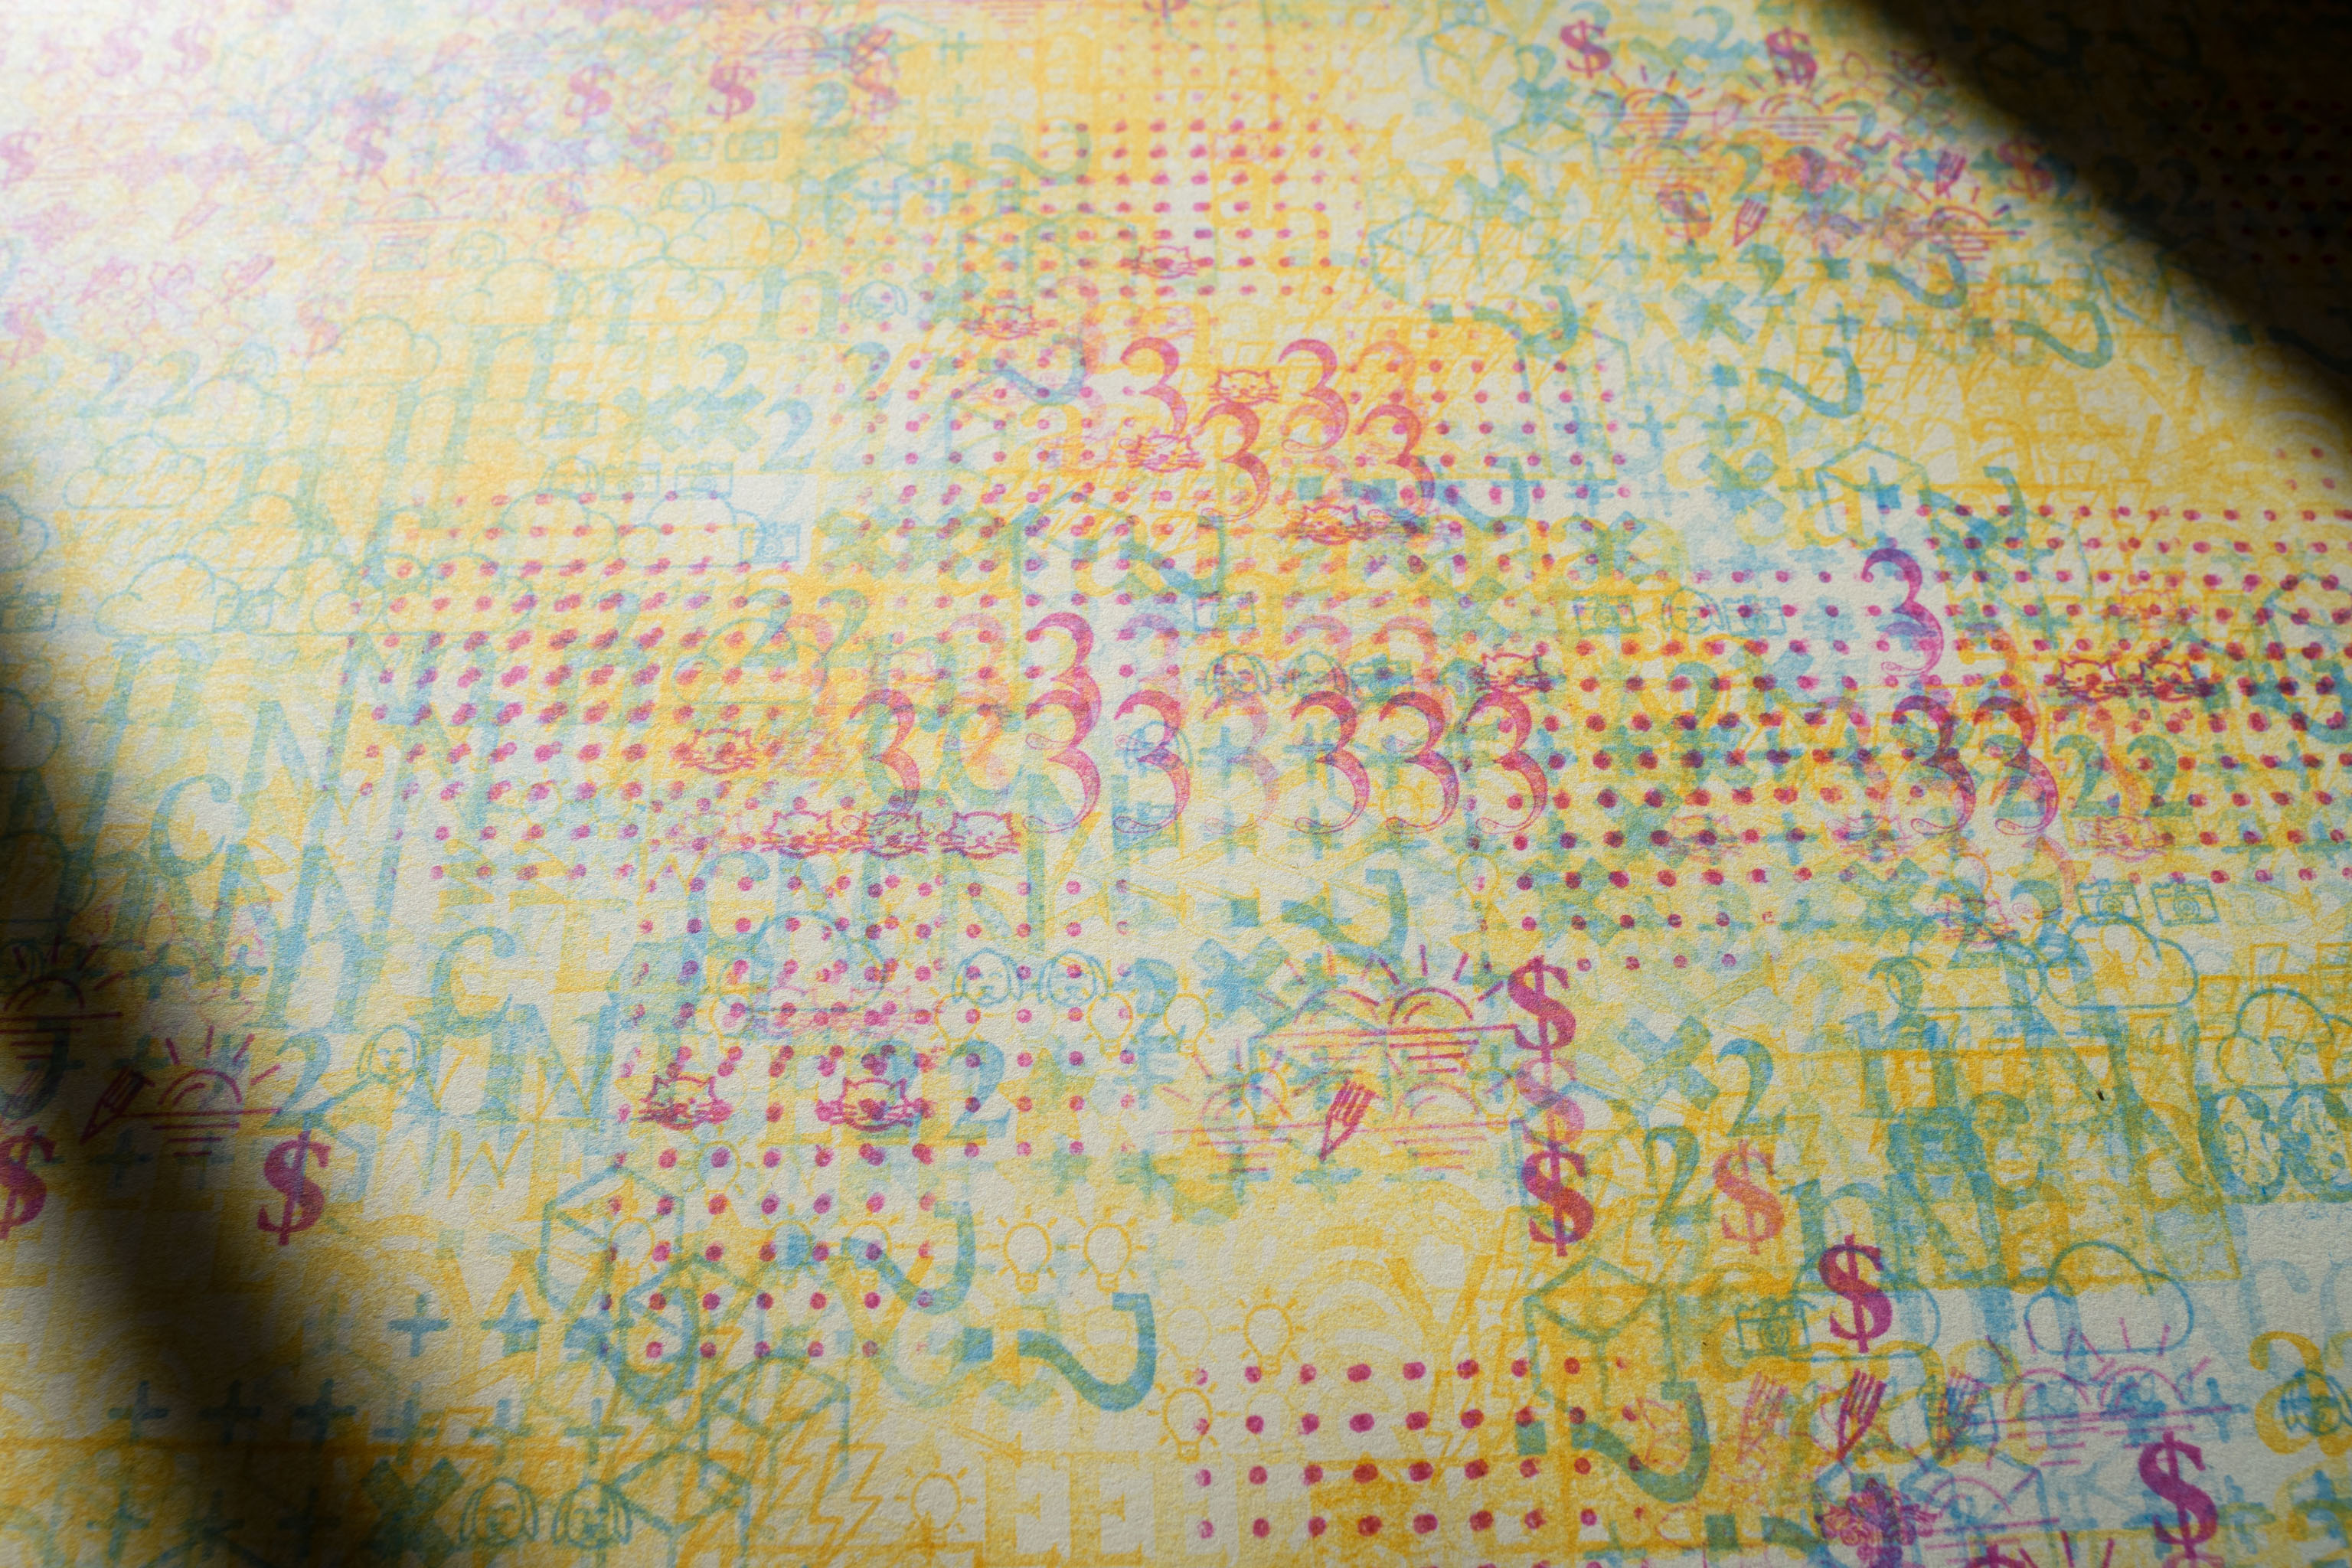
Did the final colour pass, pretty pleased with this one!
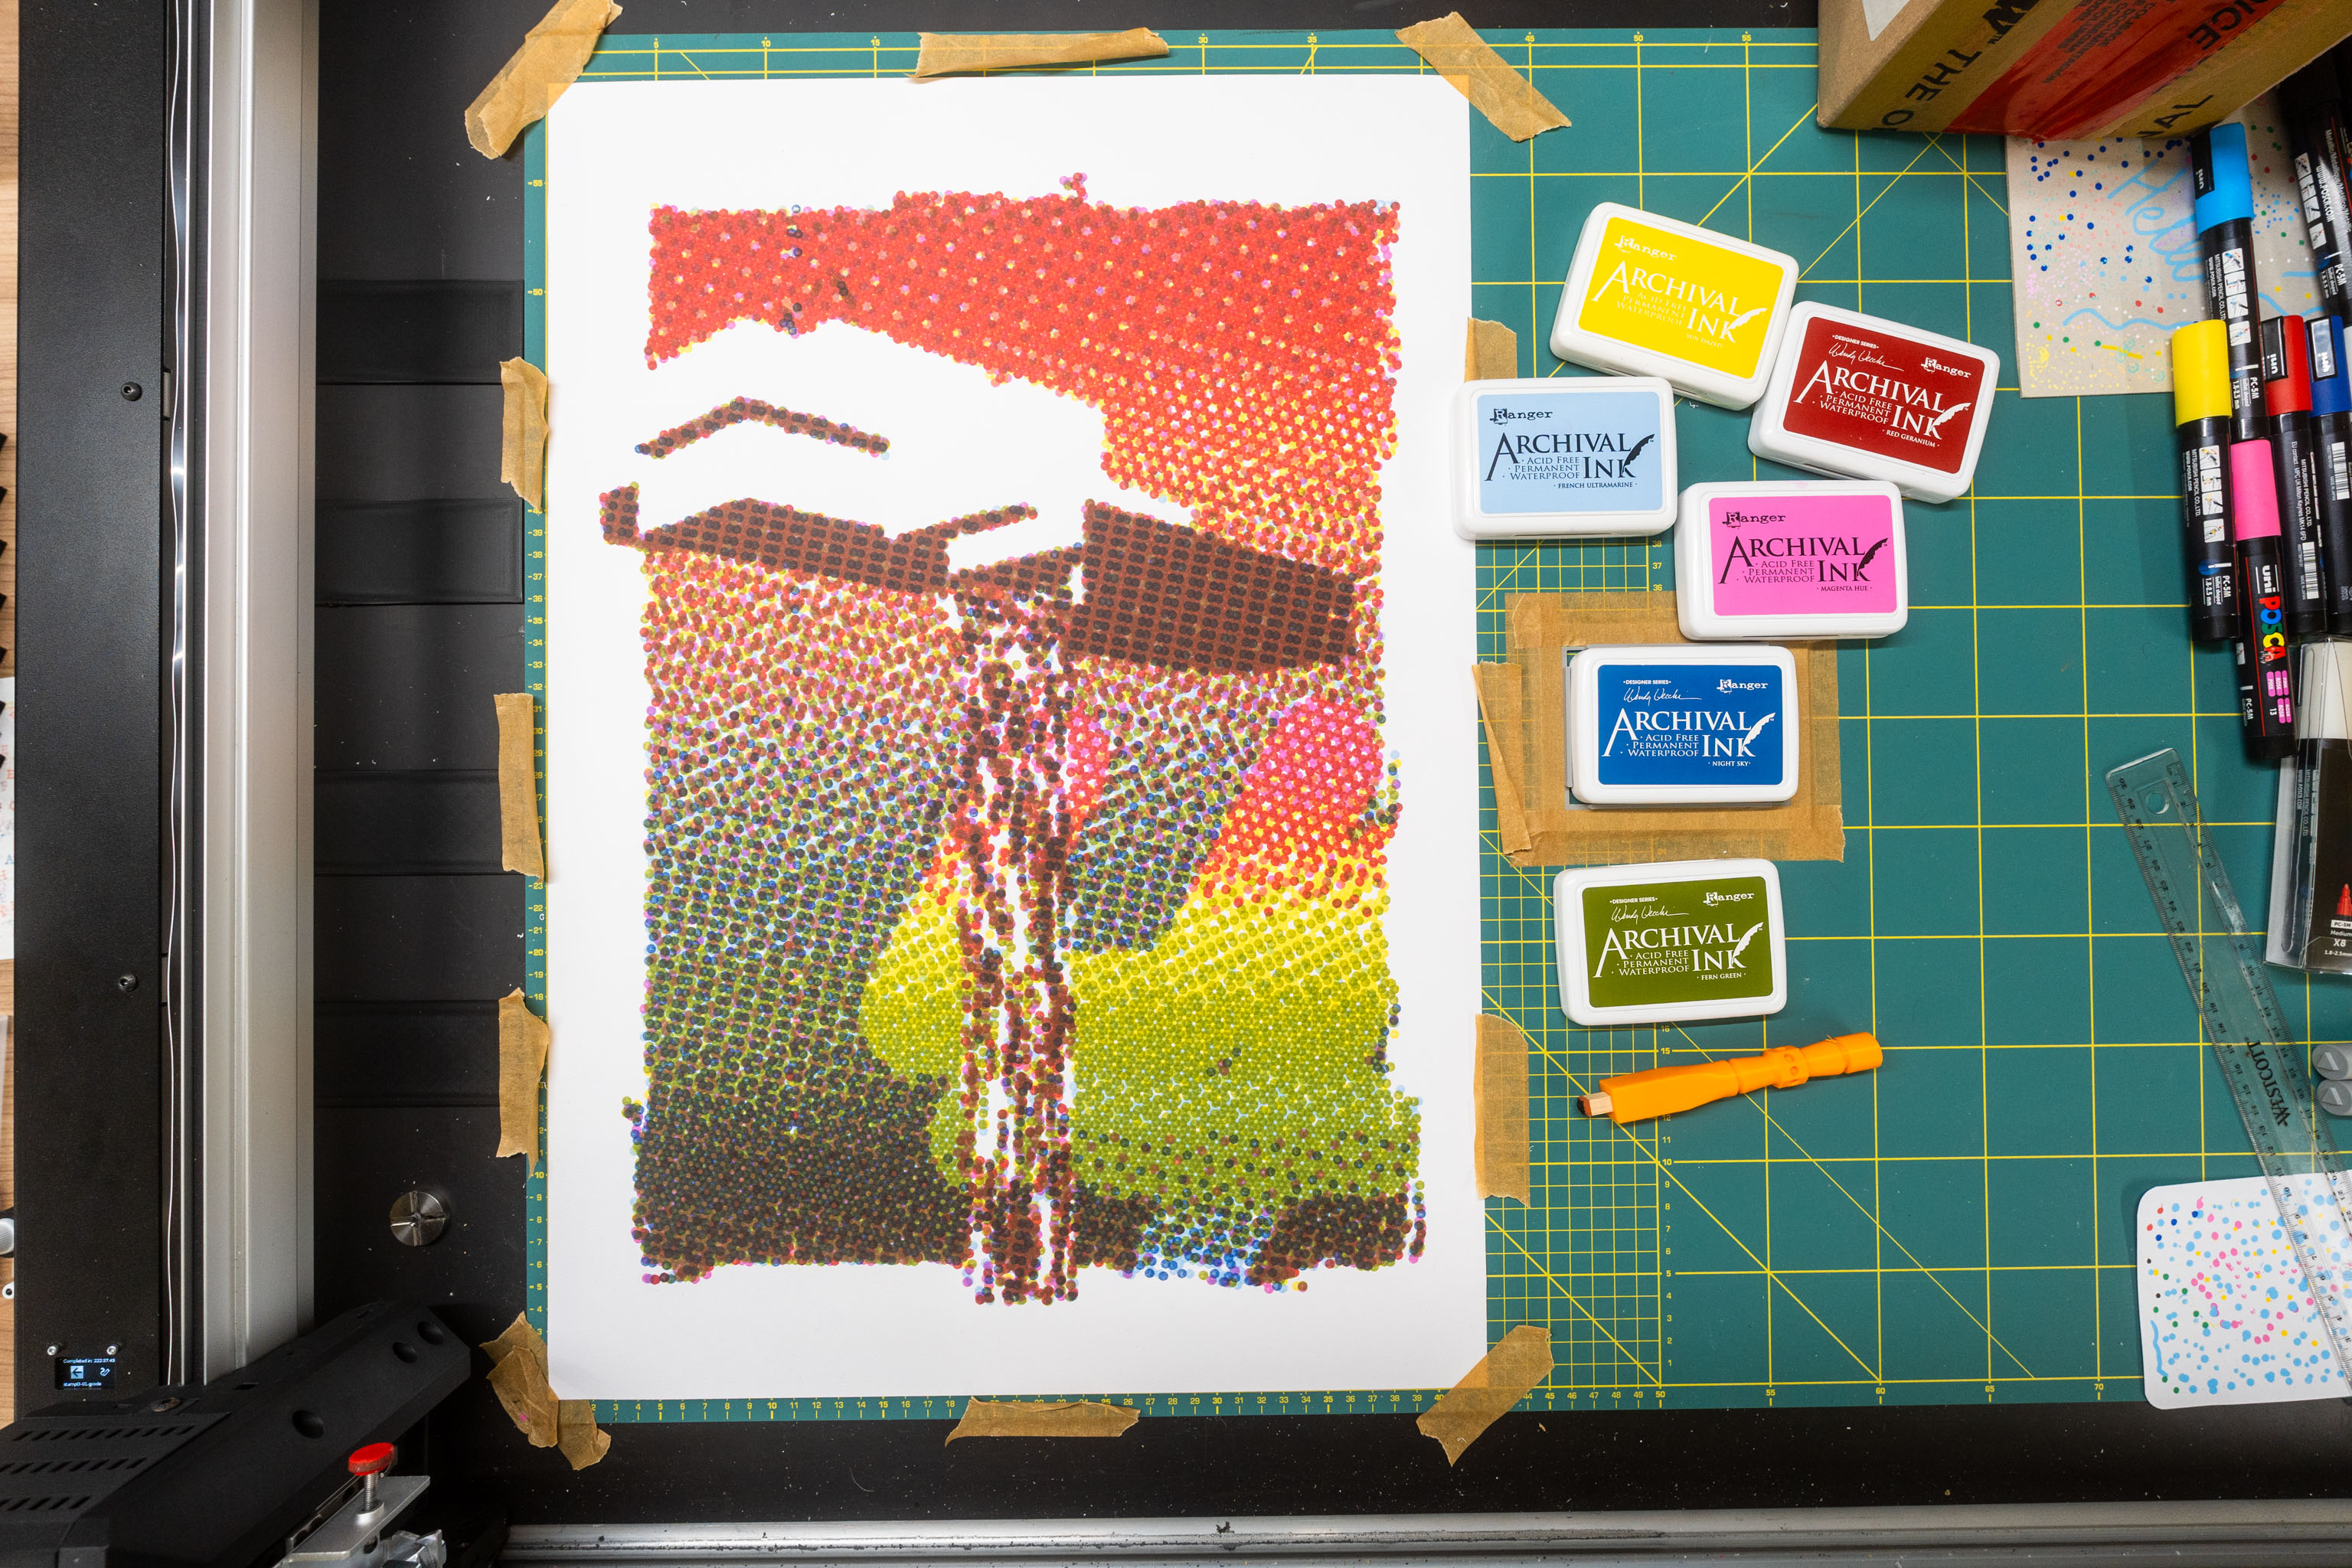
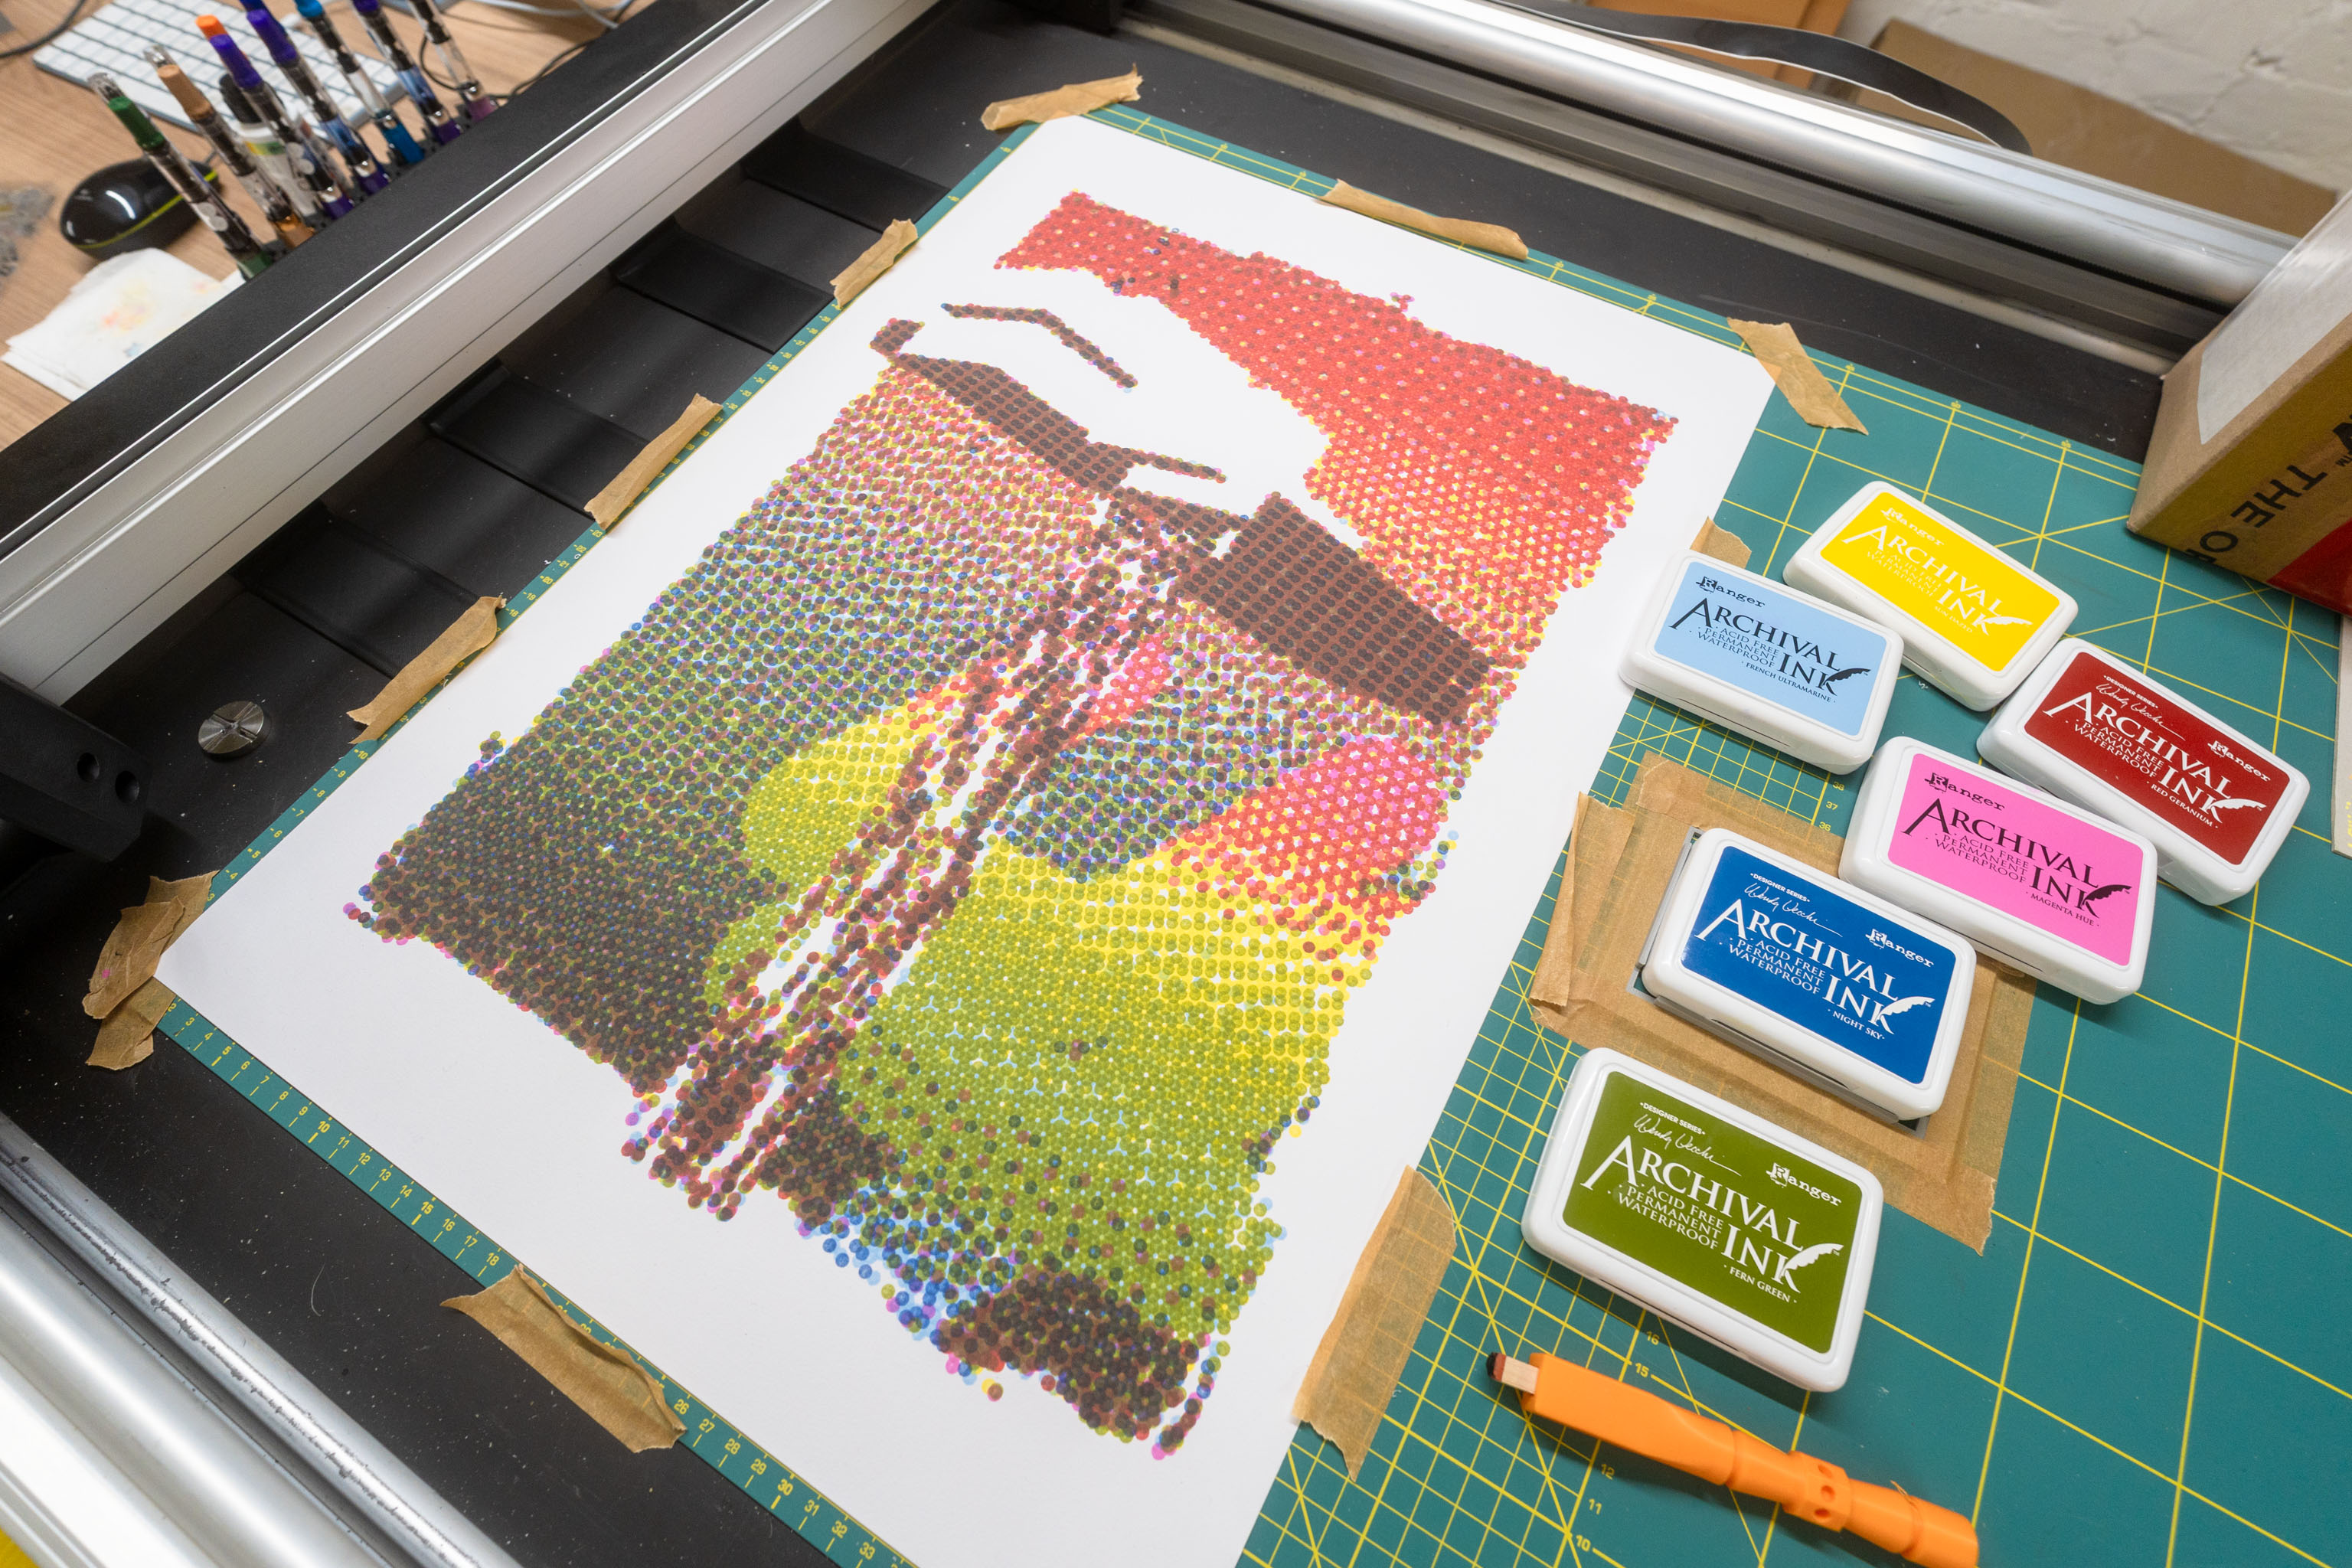
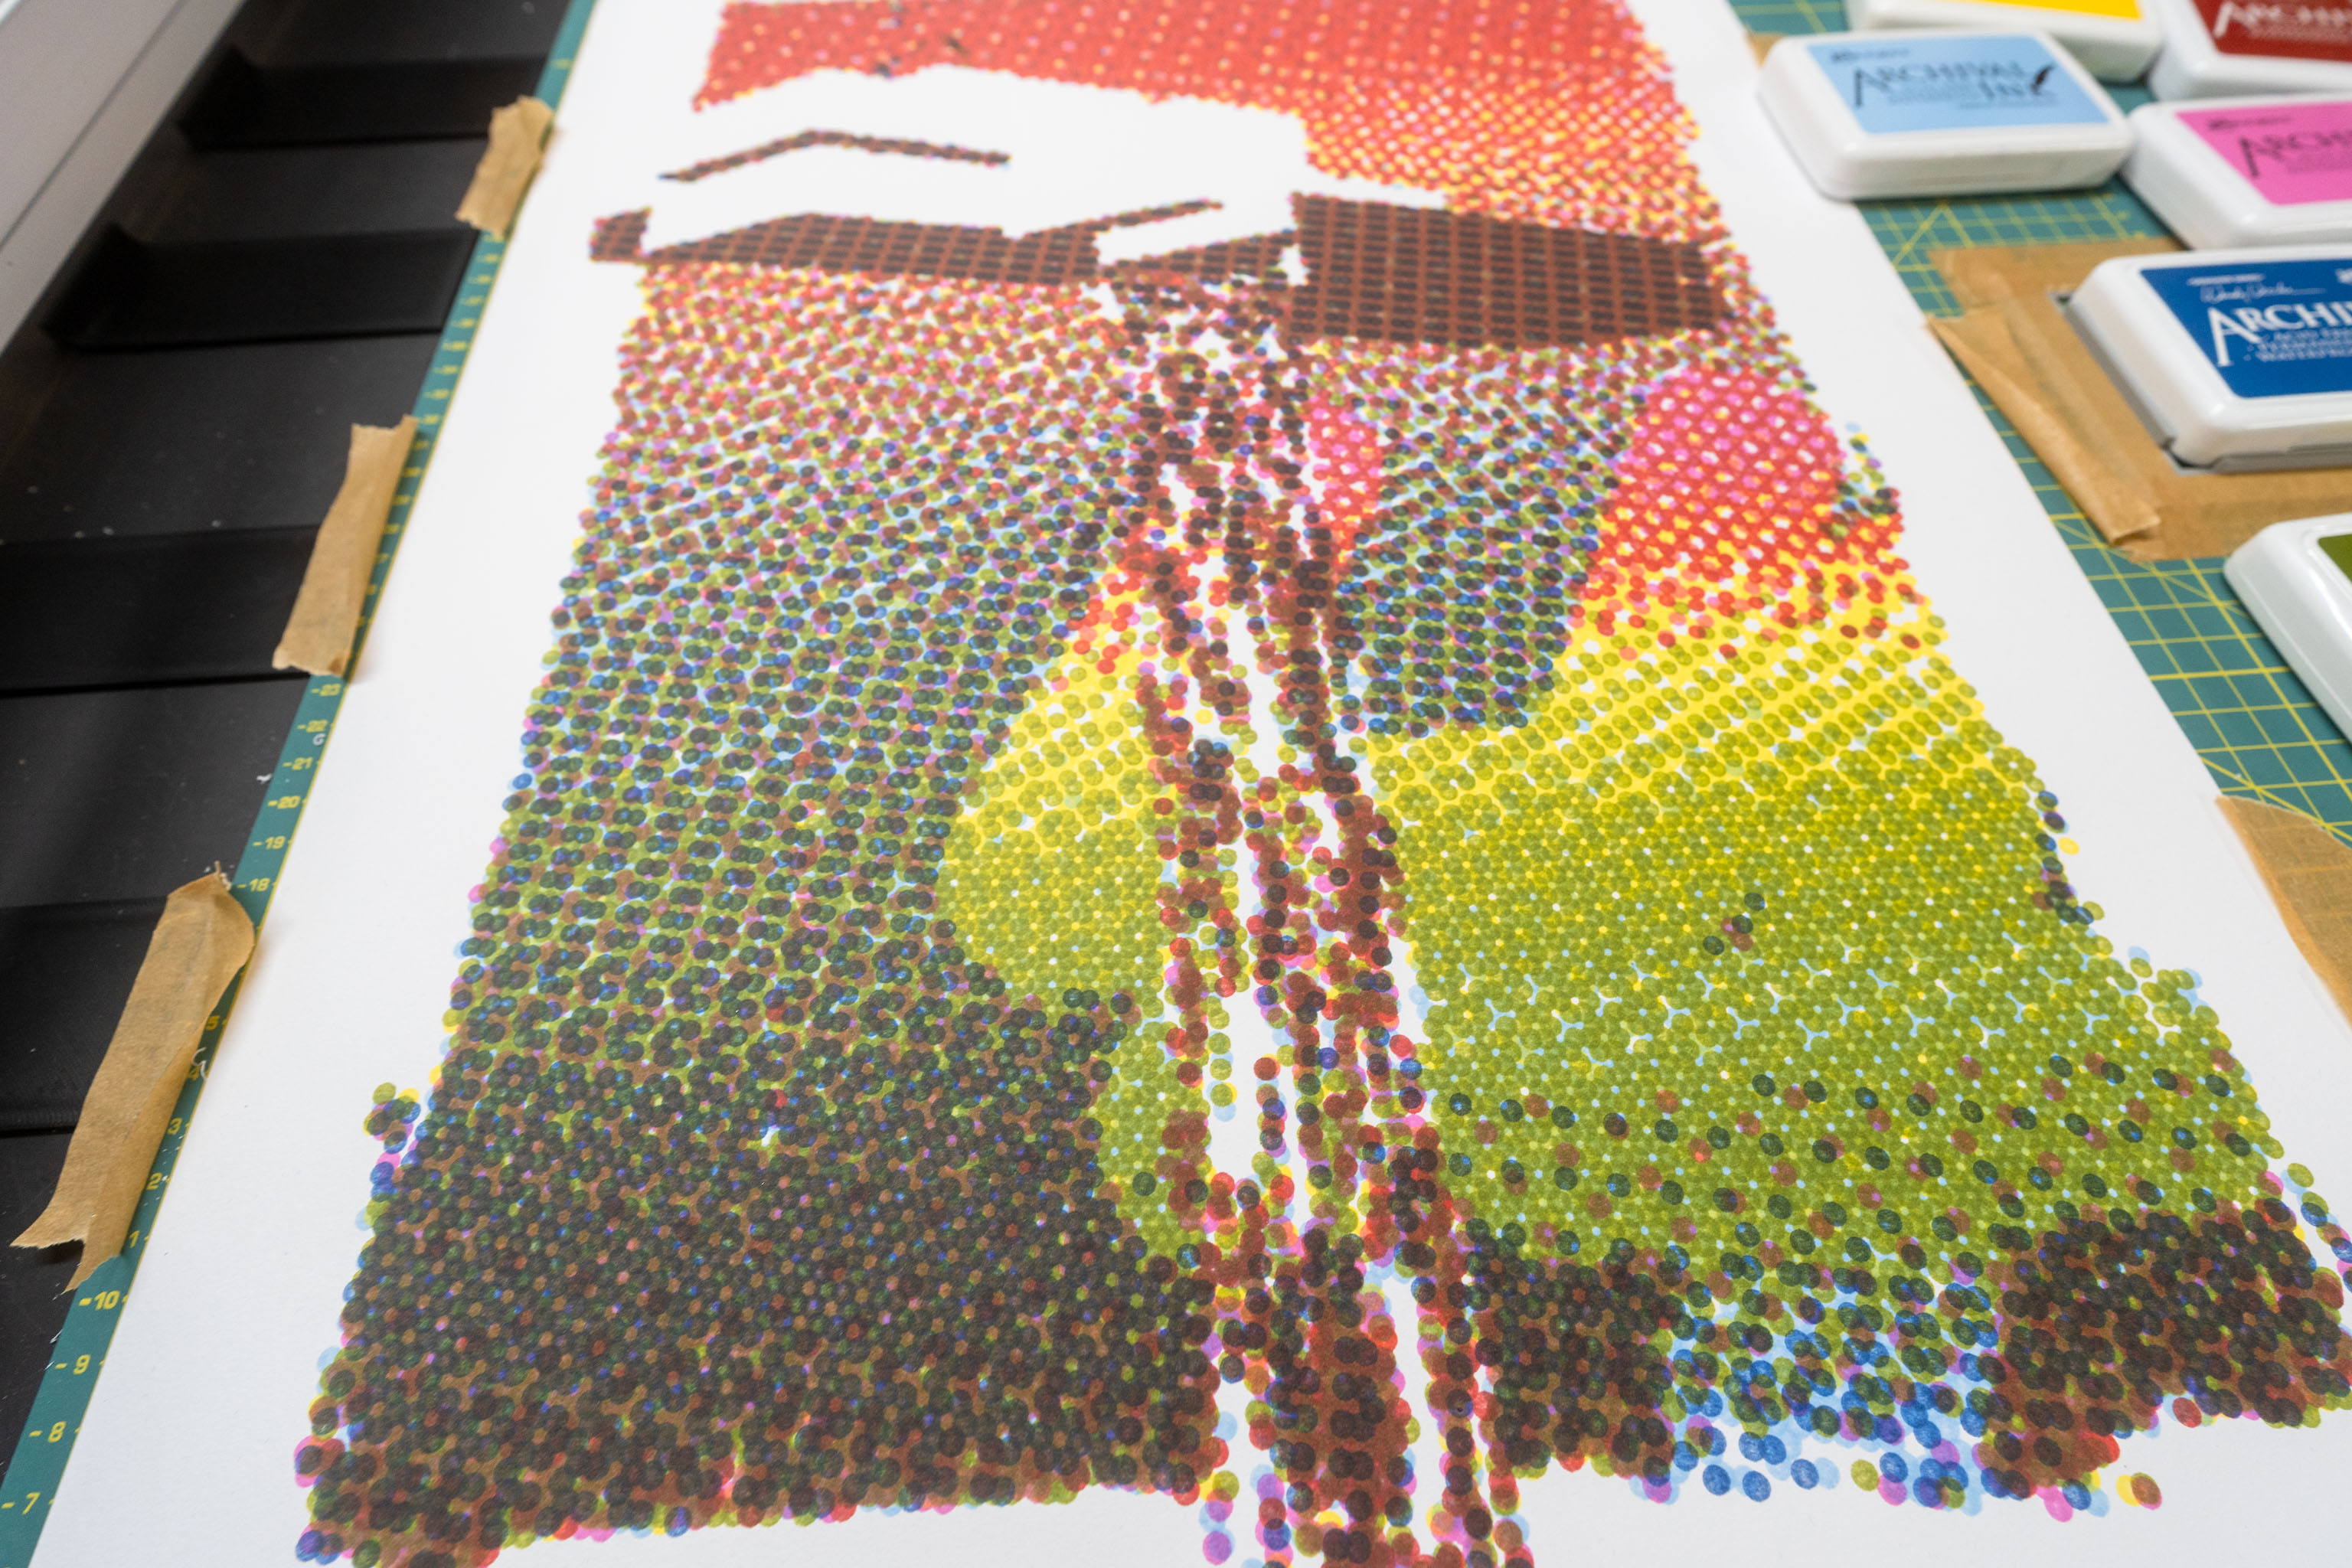
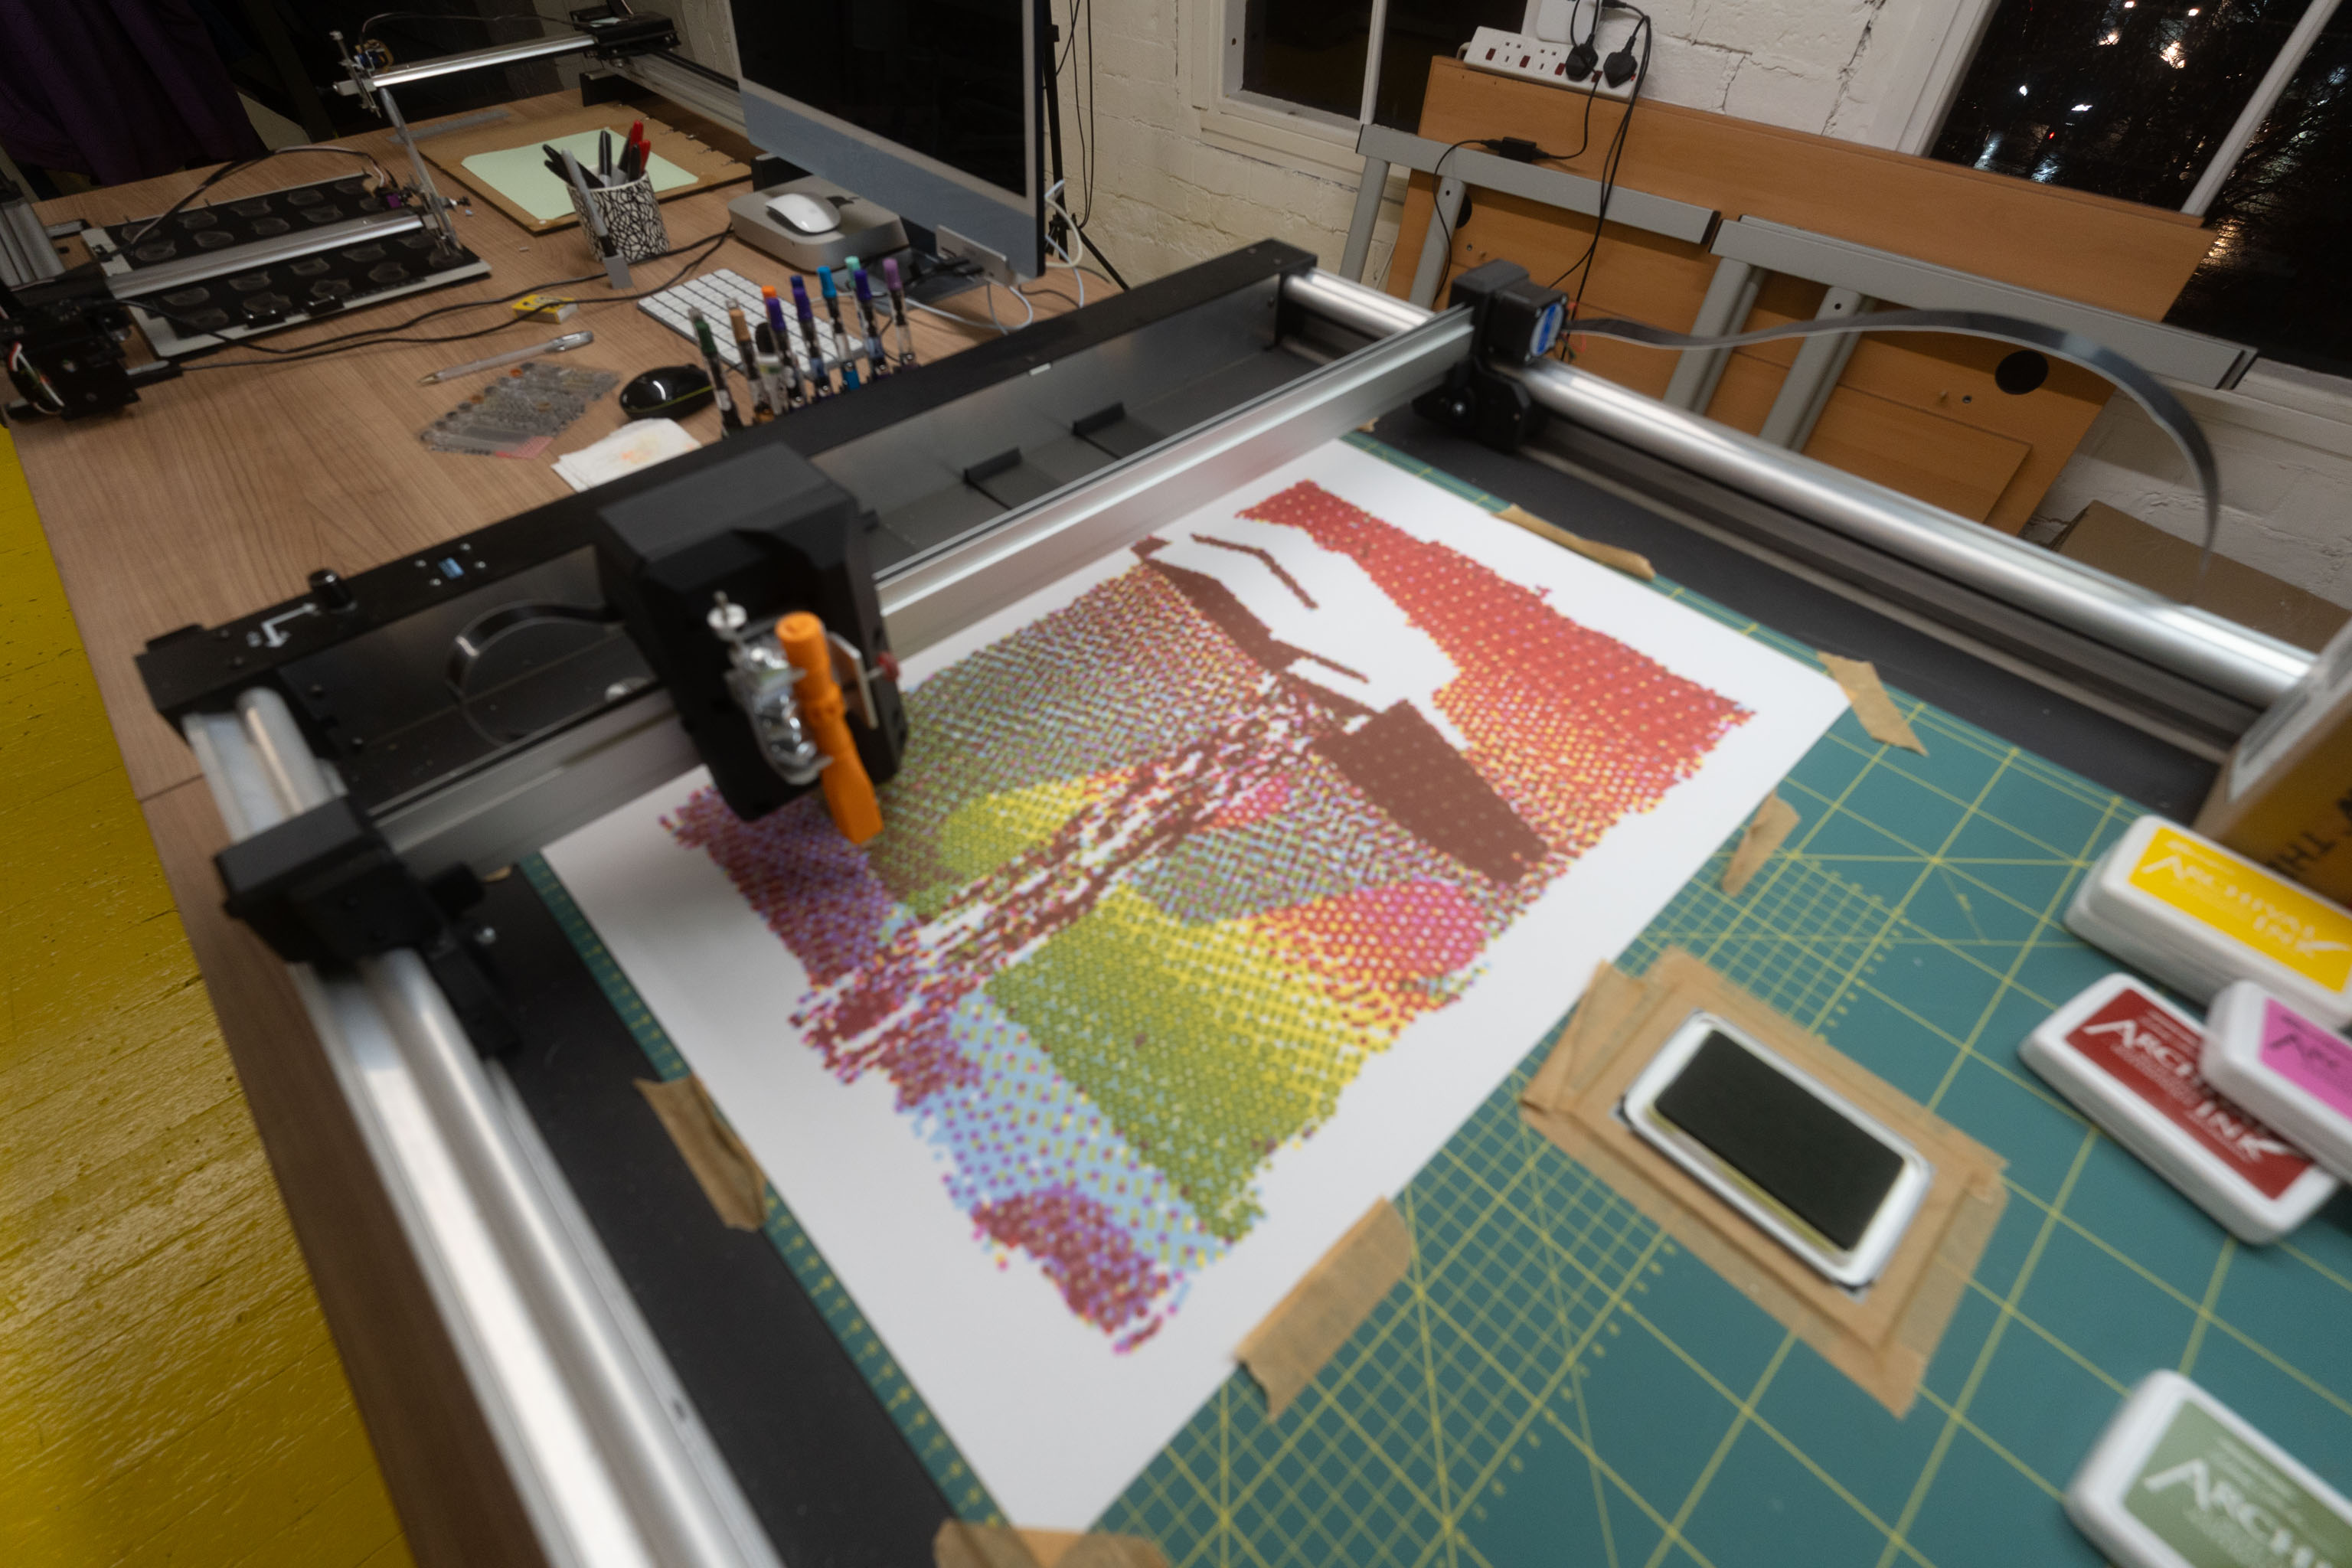
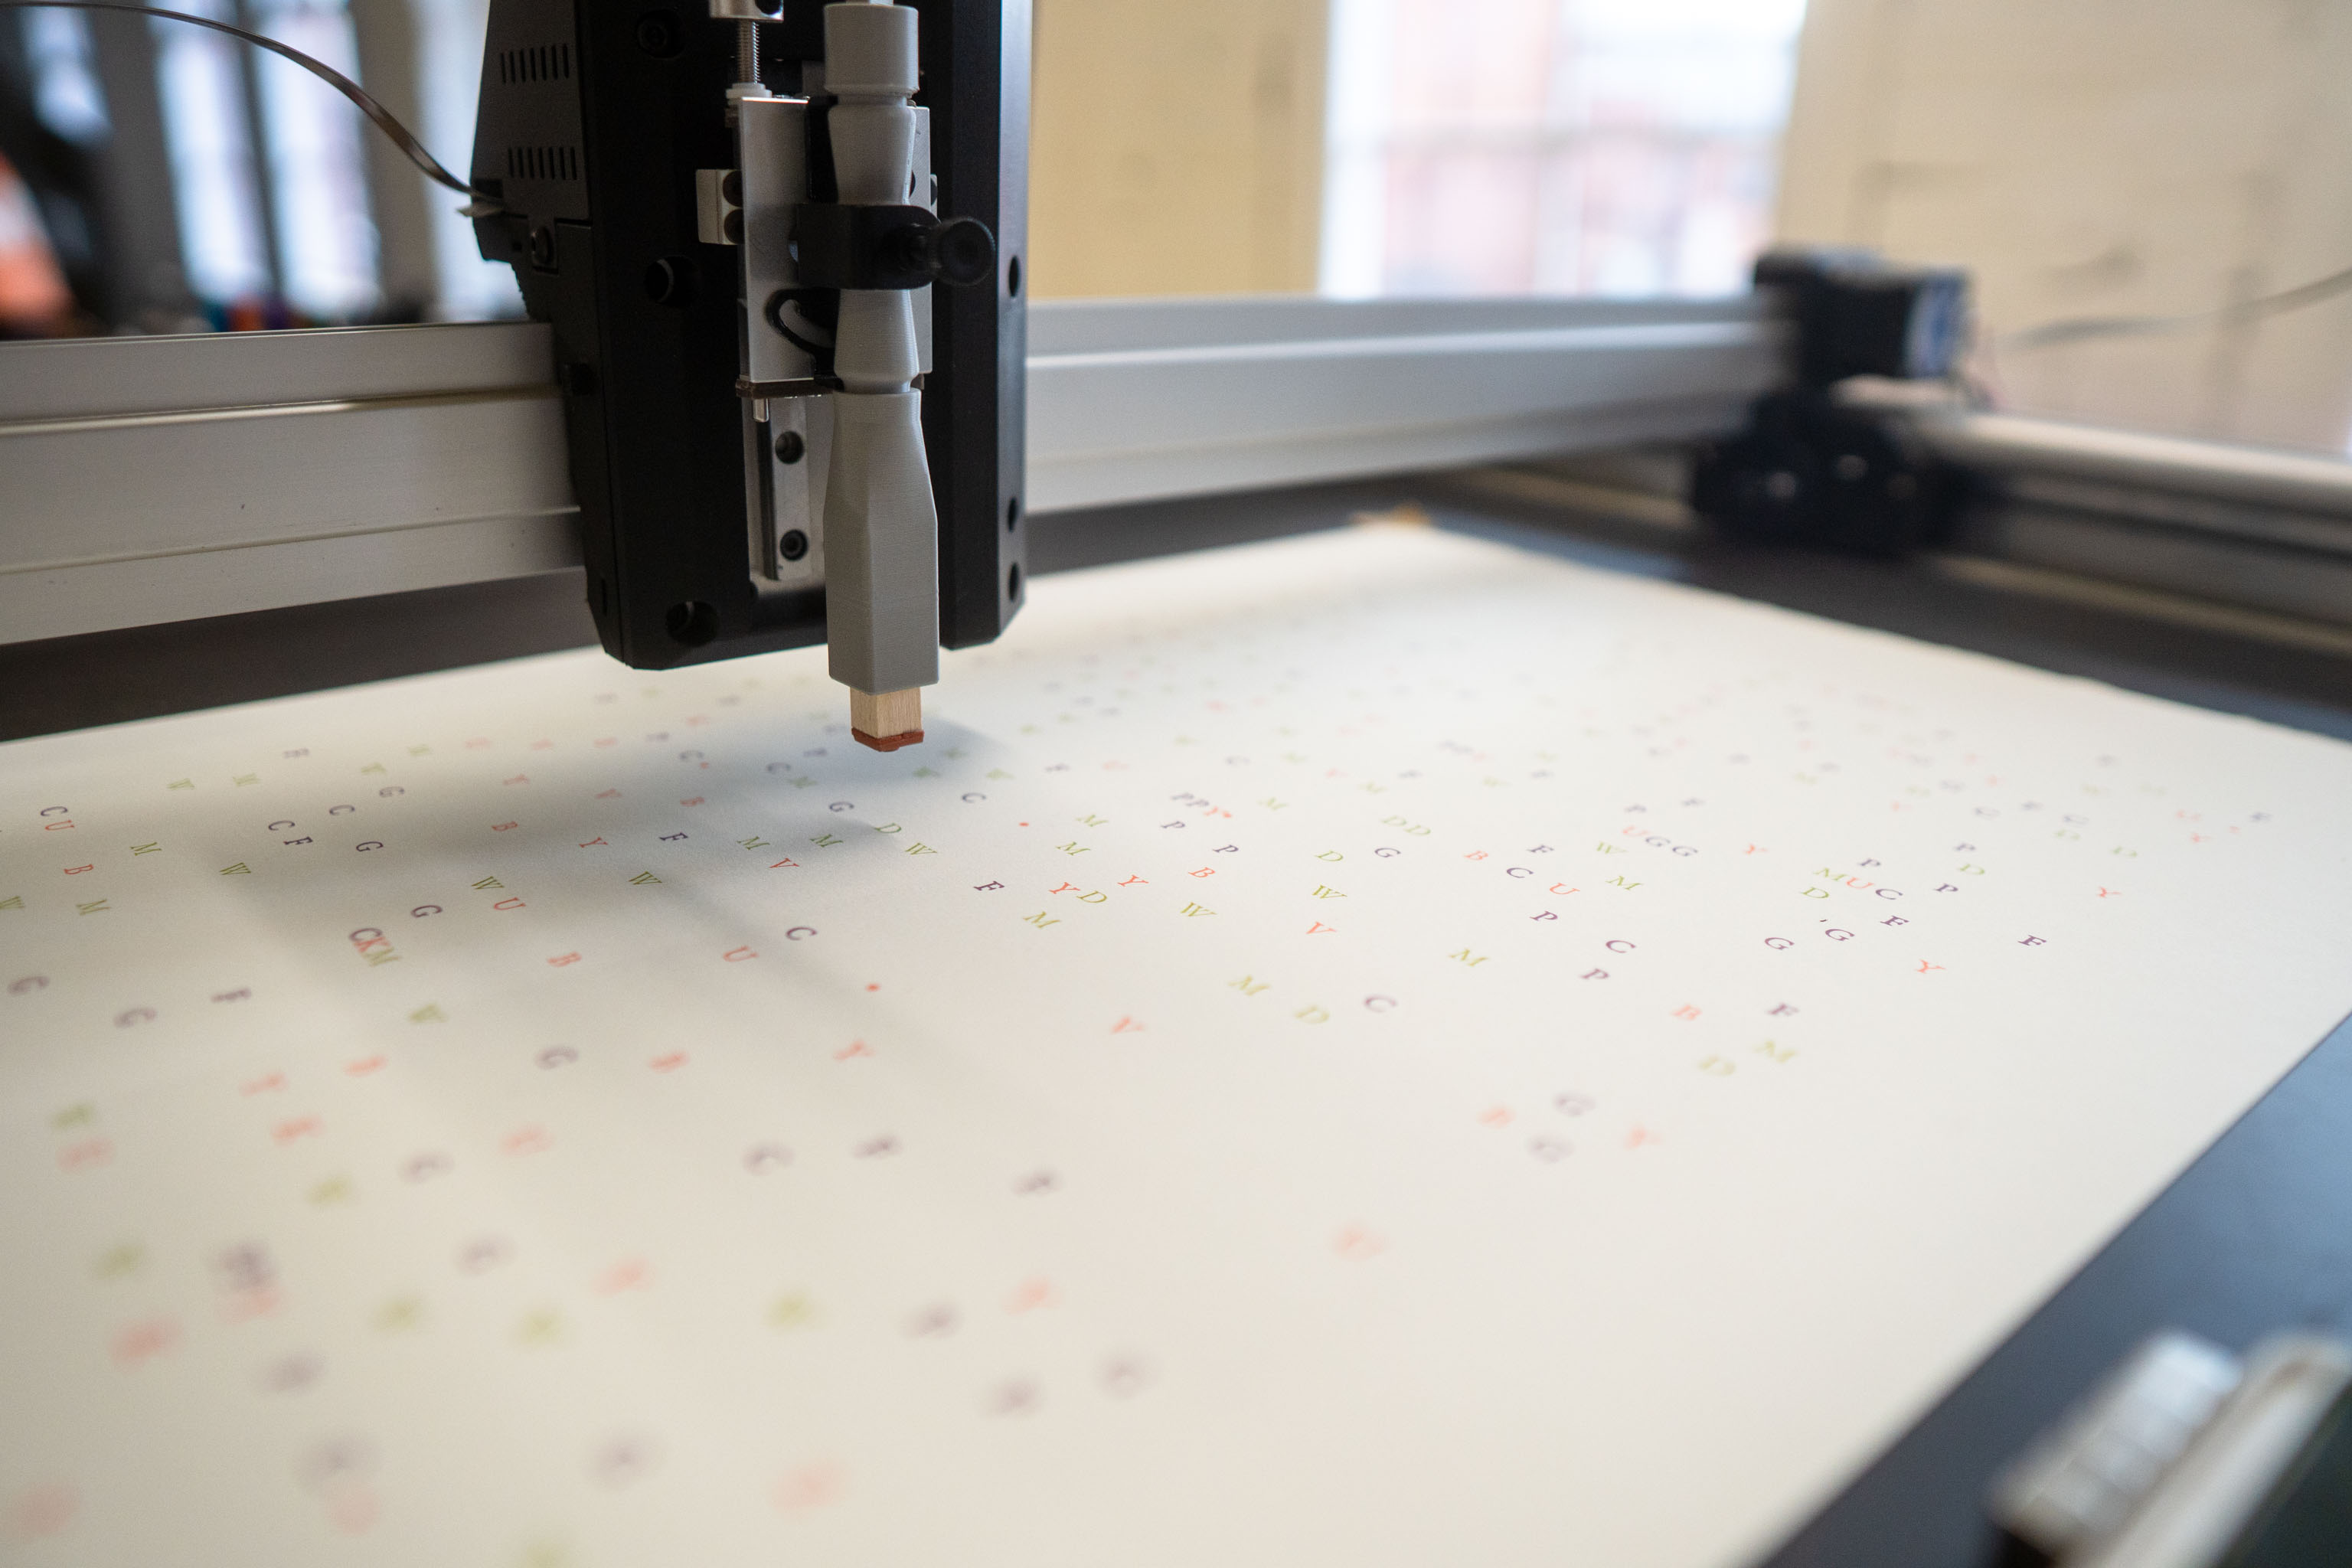
Got to finish this print/plot - it takes a long time to go back and forth and stamp all these dots. I did the first couple of colours the other day, come back to do the last few layers today.

Does this go under the FALLiNGWATER project? Does it go under the Drawing Machine project? Who knows, but I'm going to stick it here under the stamping.
I took the code from the ordered dithering POSCA pen dot making code, and threw the stamping code back up. They're basically the same code only one keeps returning to the ink pad area to re-ink the stamp.
While the POSCA pens made paint drops that where pretty opaque, the nice thing about the rubber stamps is that it's nice and semi-opaque and you get good colour blends.
Will need to come back to this at some point.
The whole point of this was so I could stamps some cards that said "No Need To Reply To Art Mail", which is a semi-fun note to include in things when I send some art, along with a more detailed explanation telling people that they shouldn't feel that they need to reply in a like manner.
Turns out getting post is so unusual that some people then slightly worry that they need to send post back.
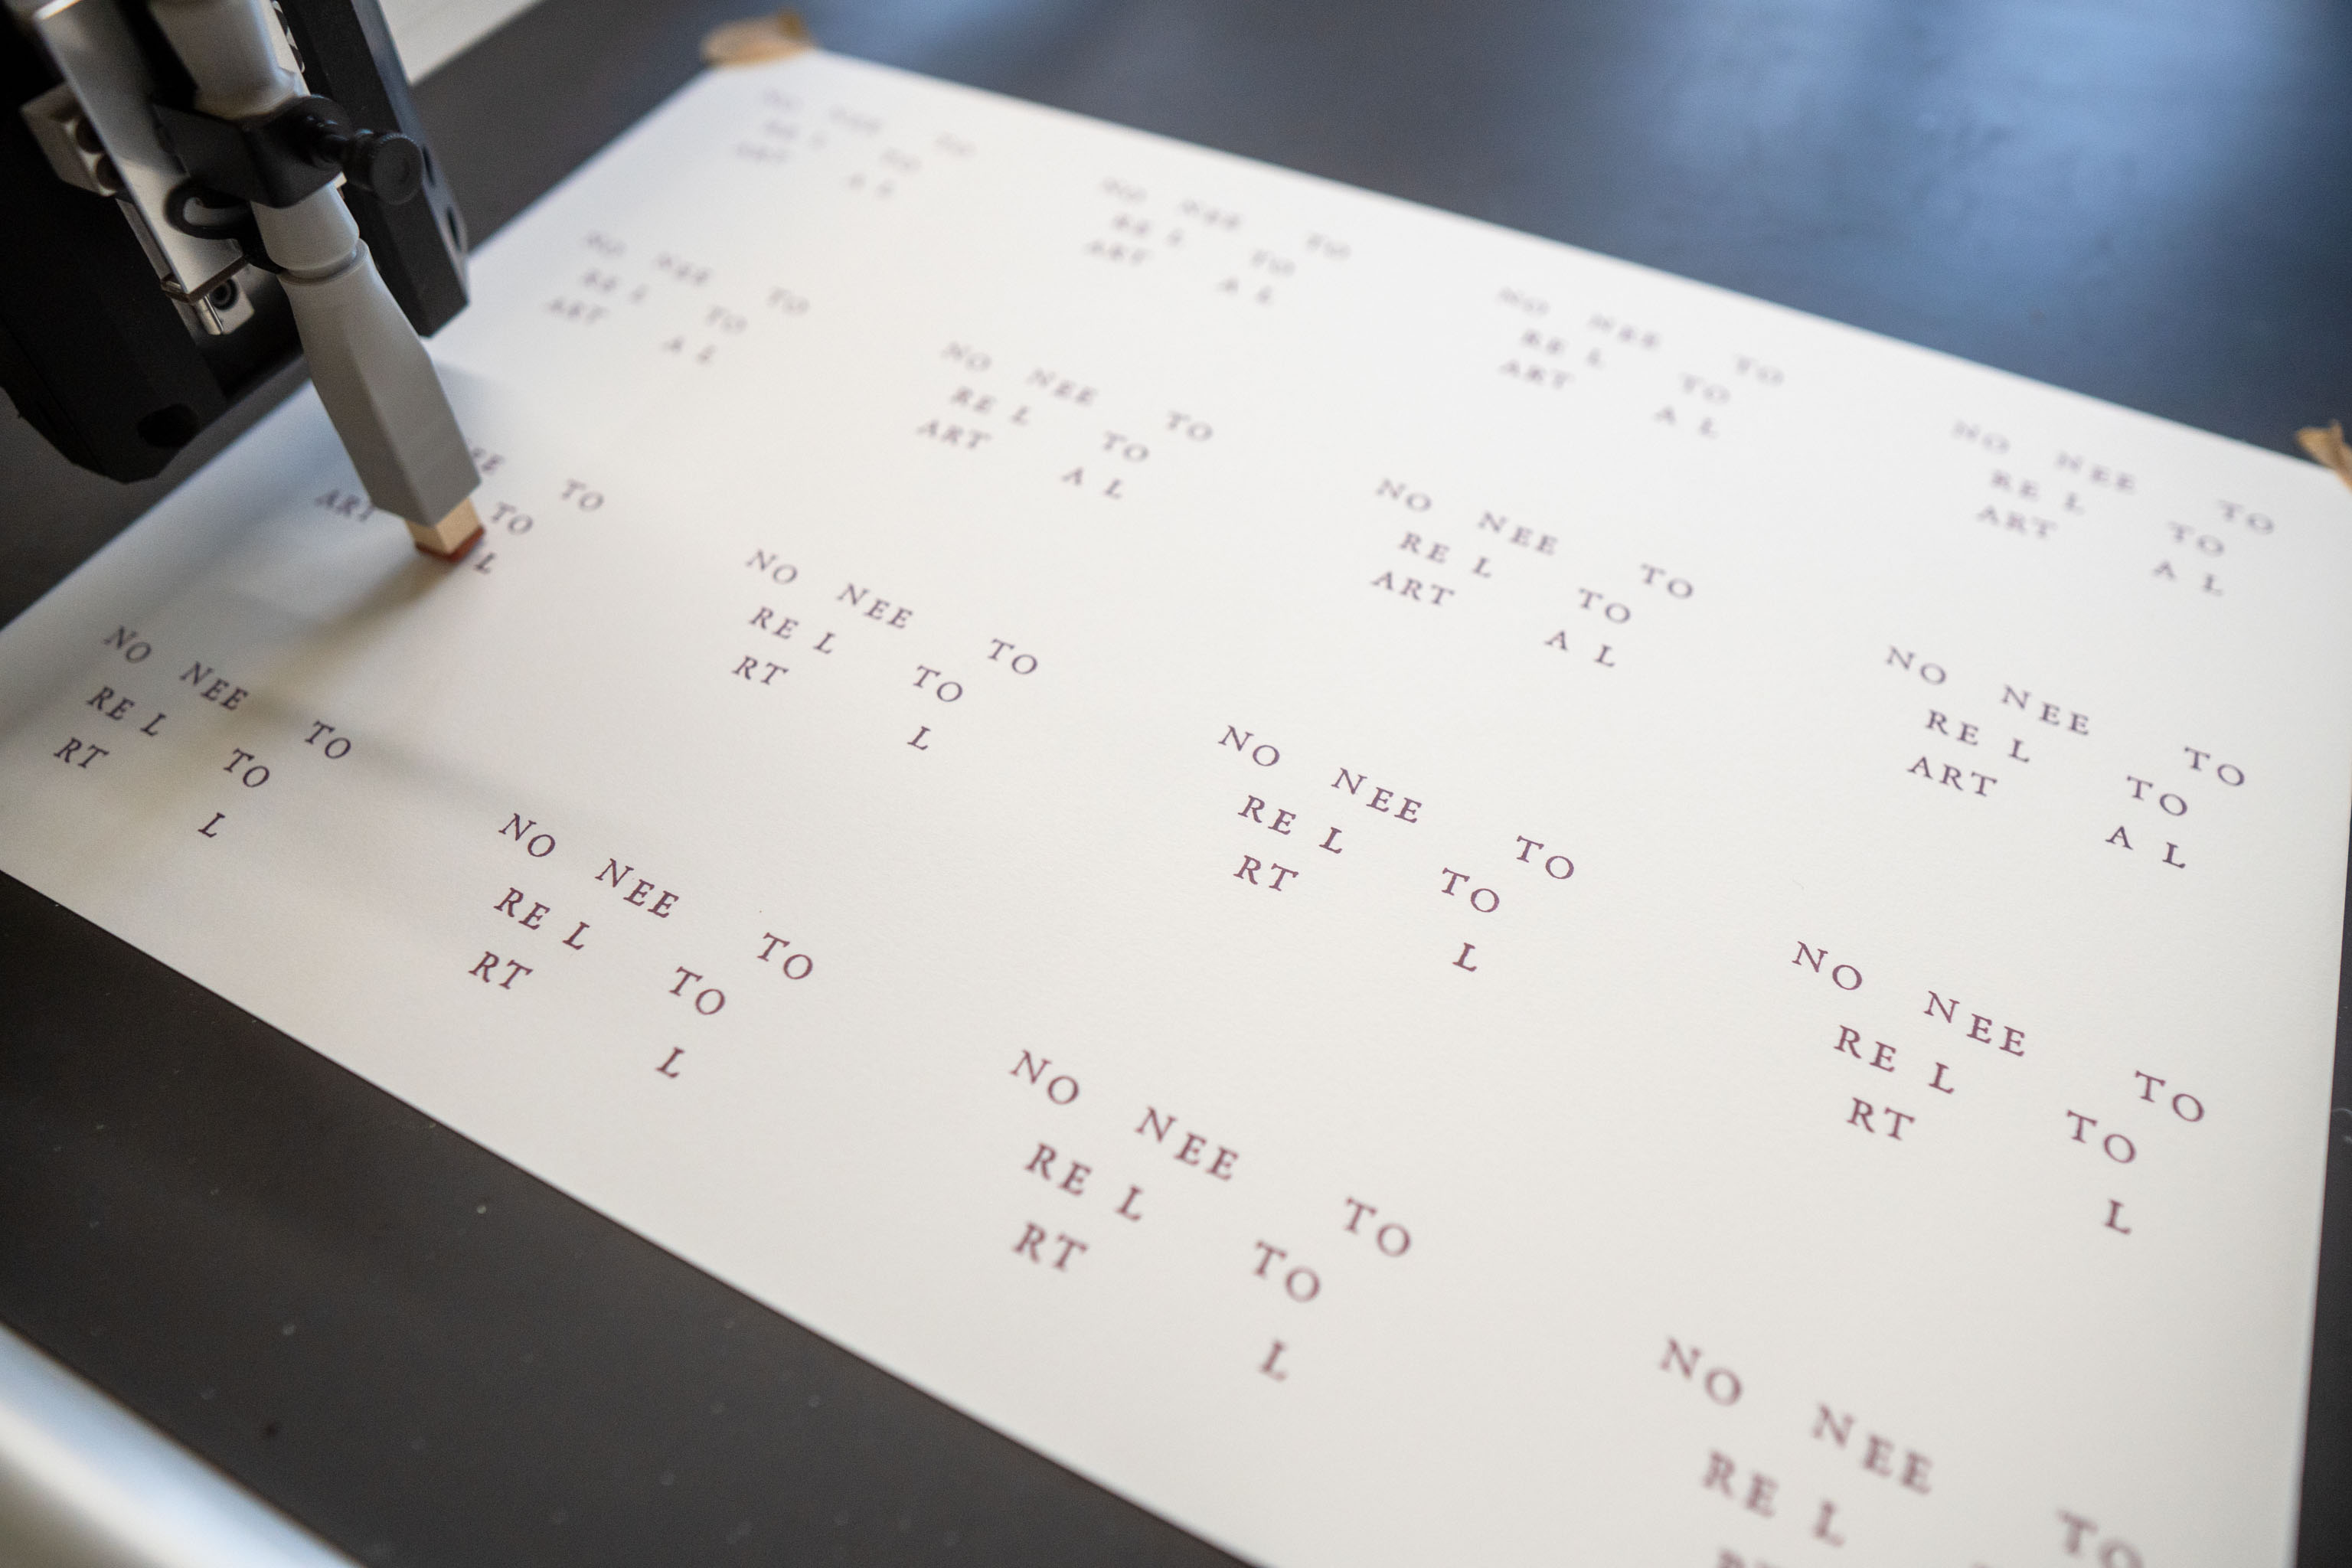
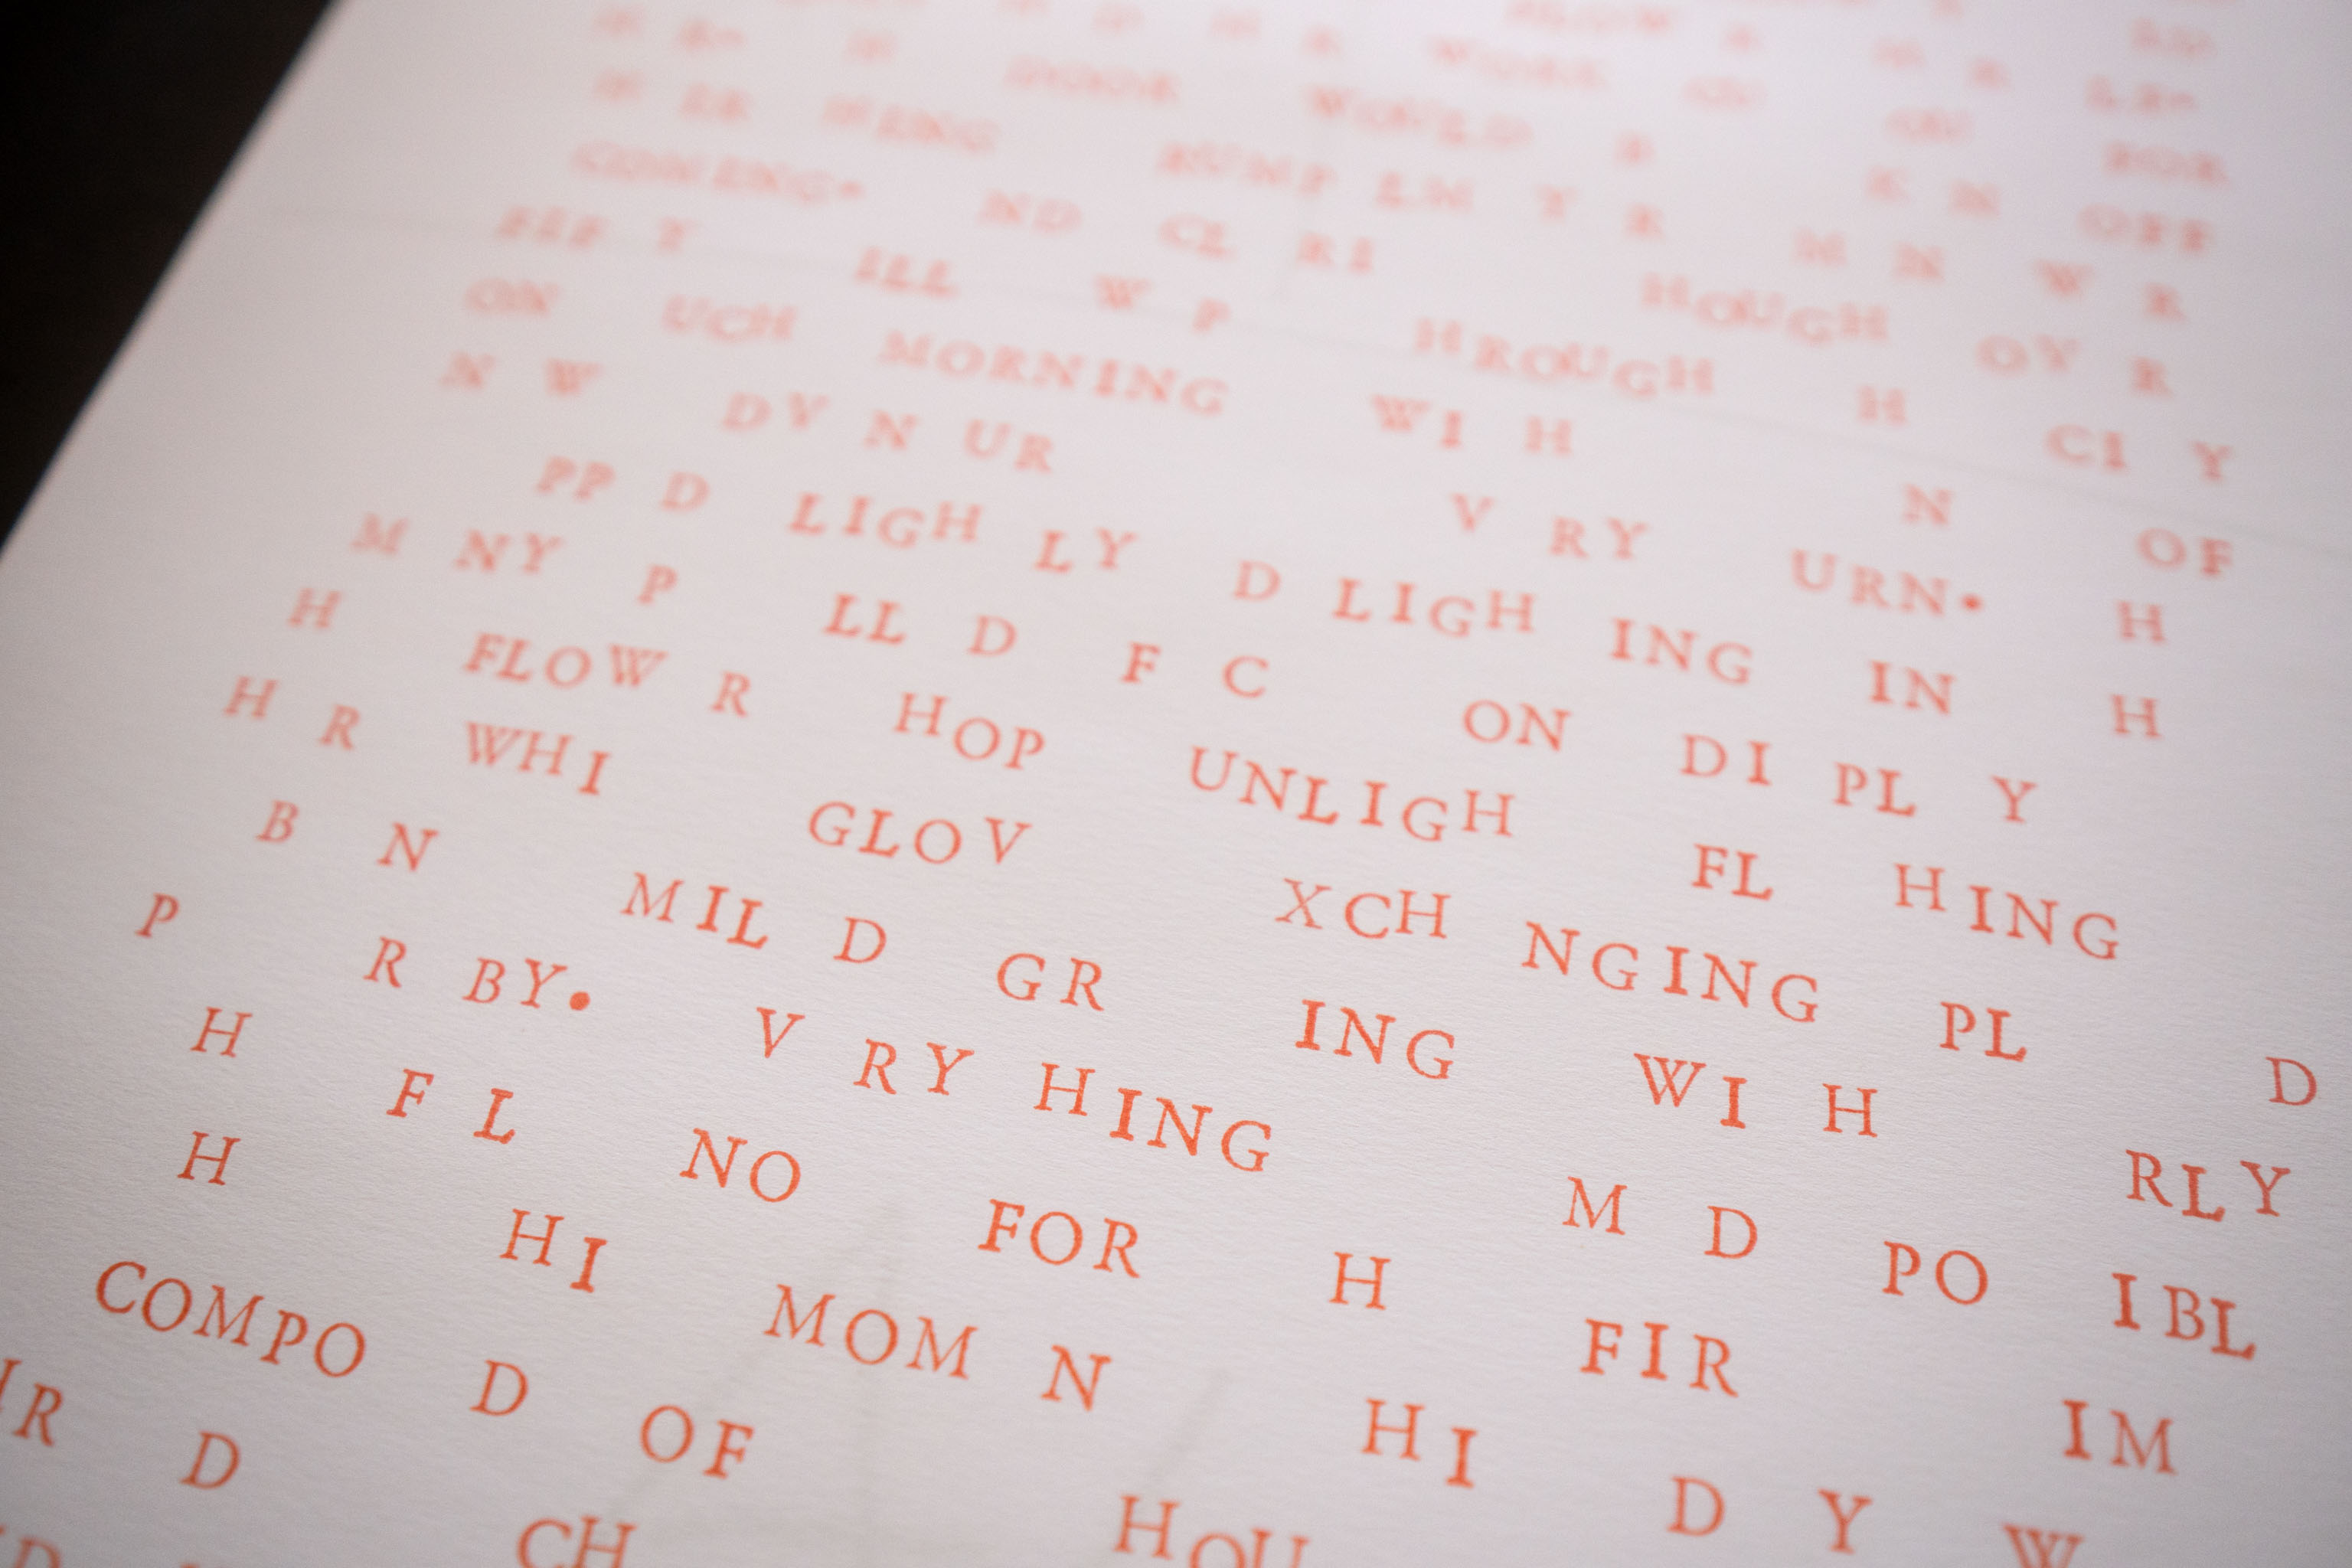
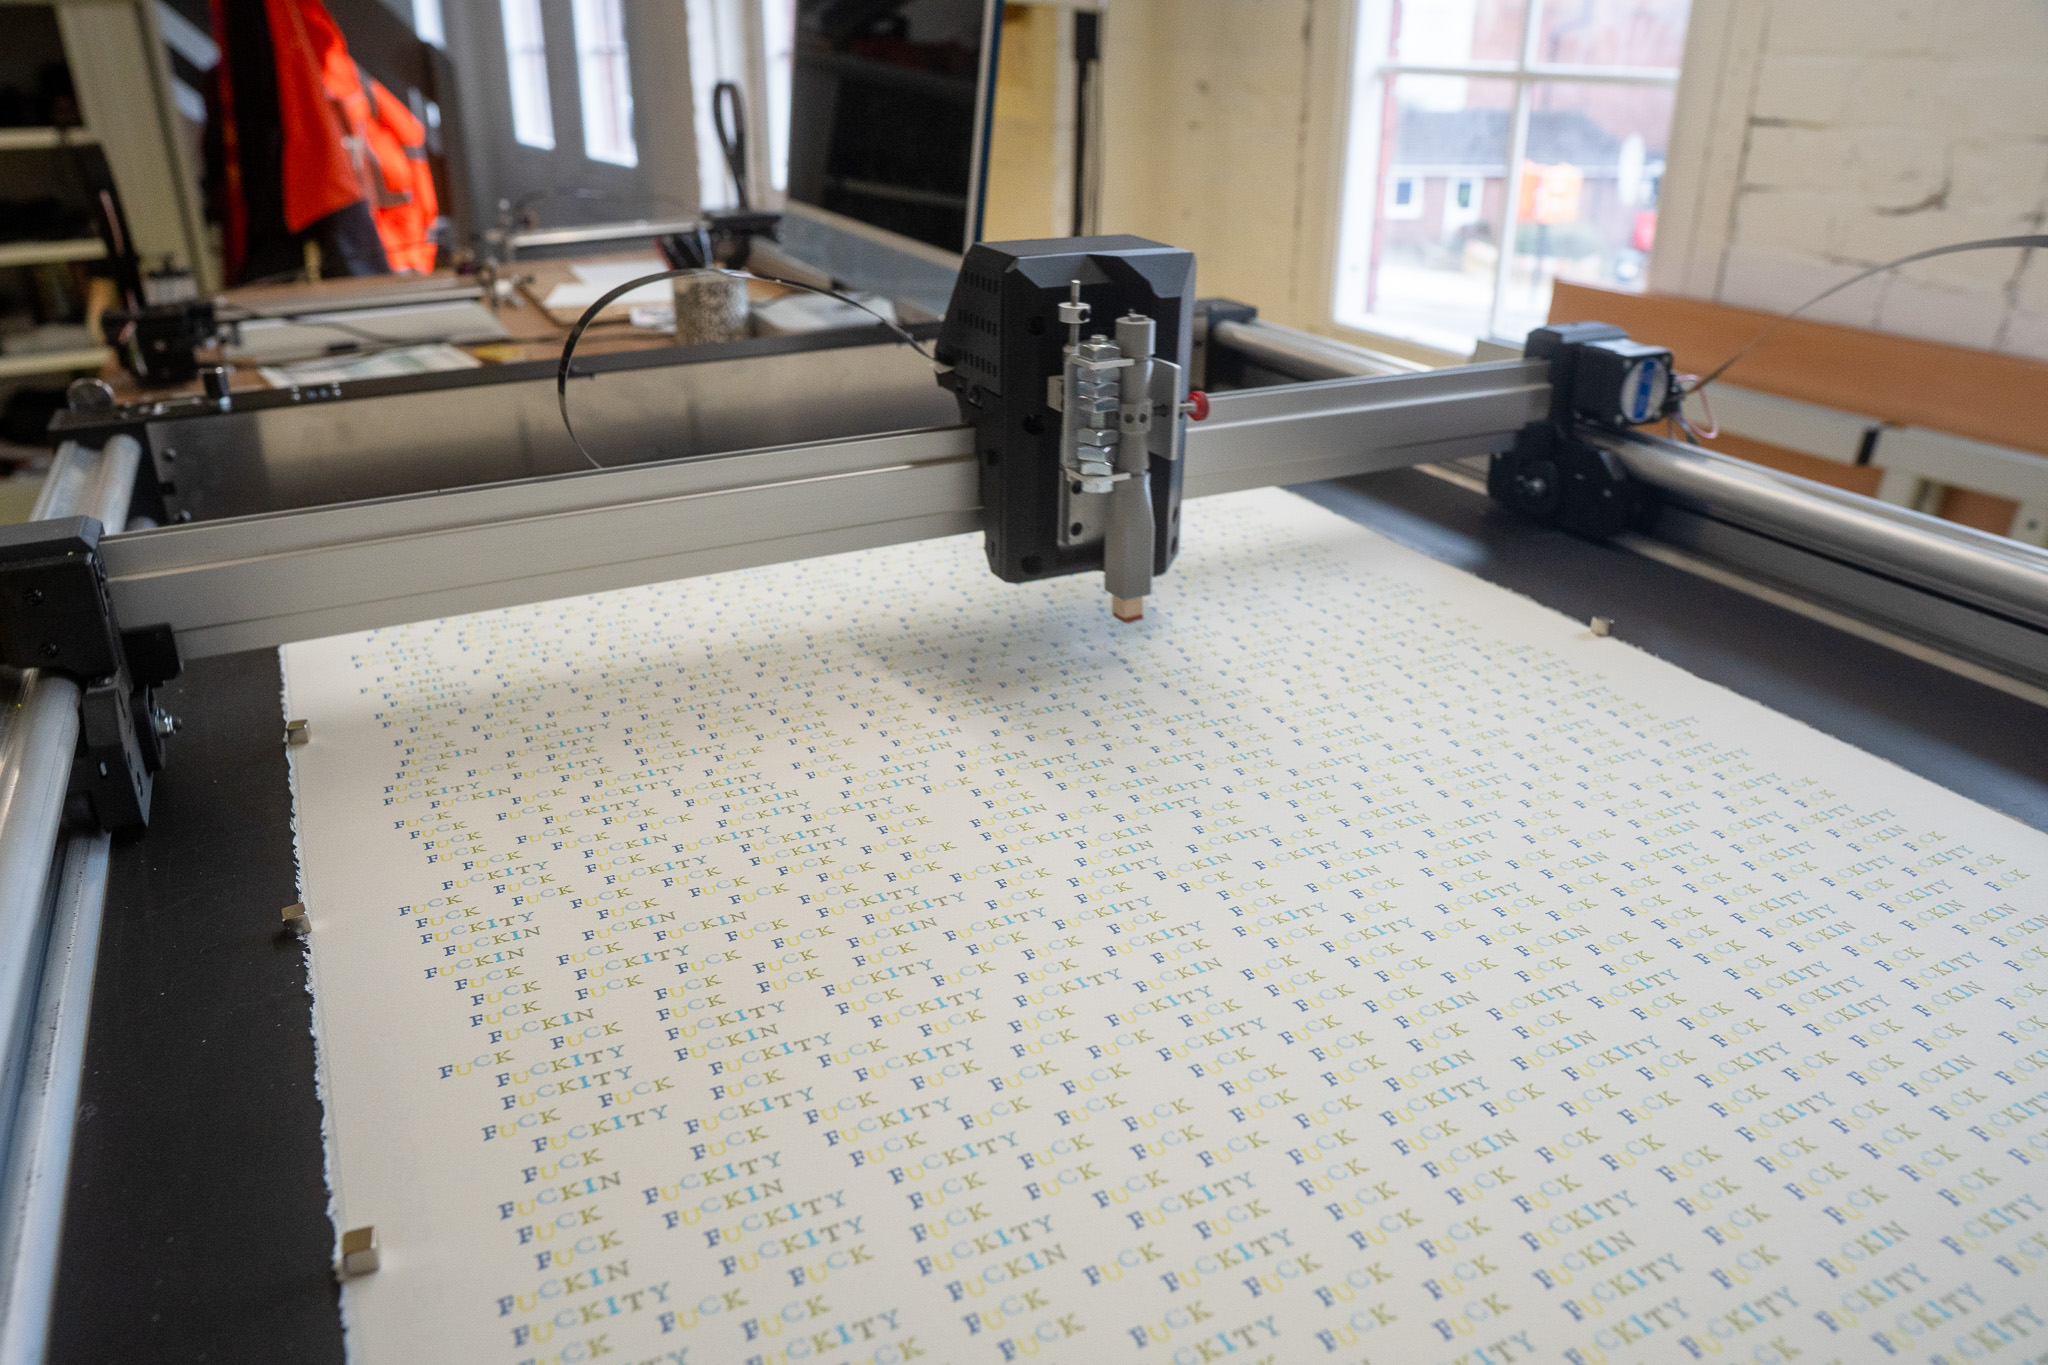
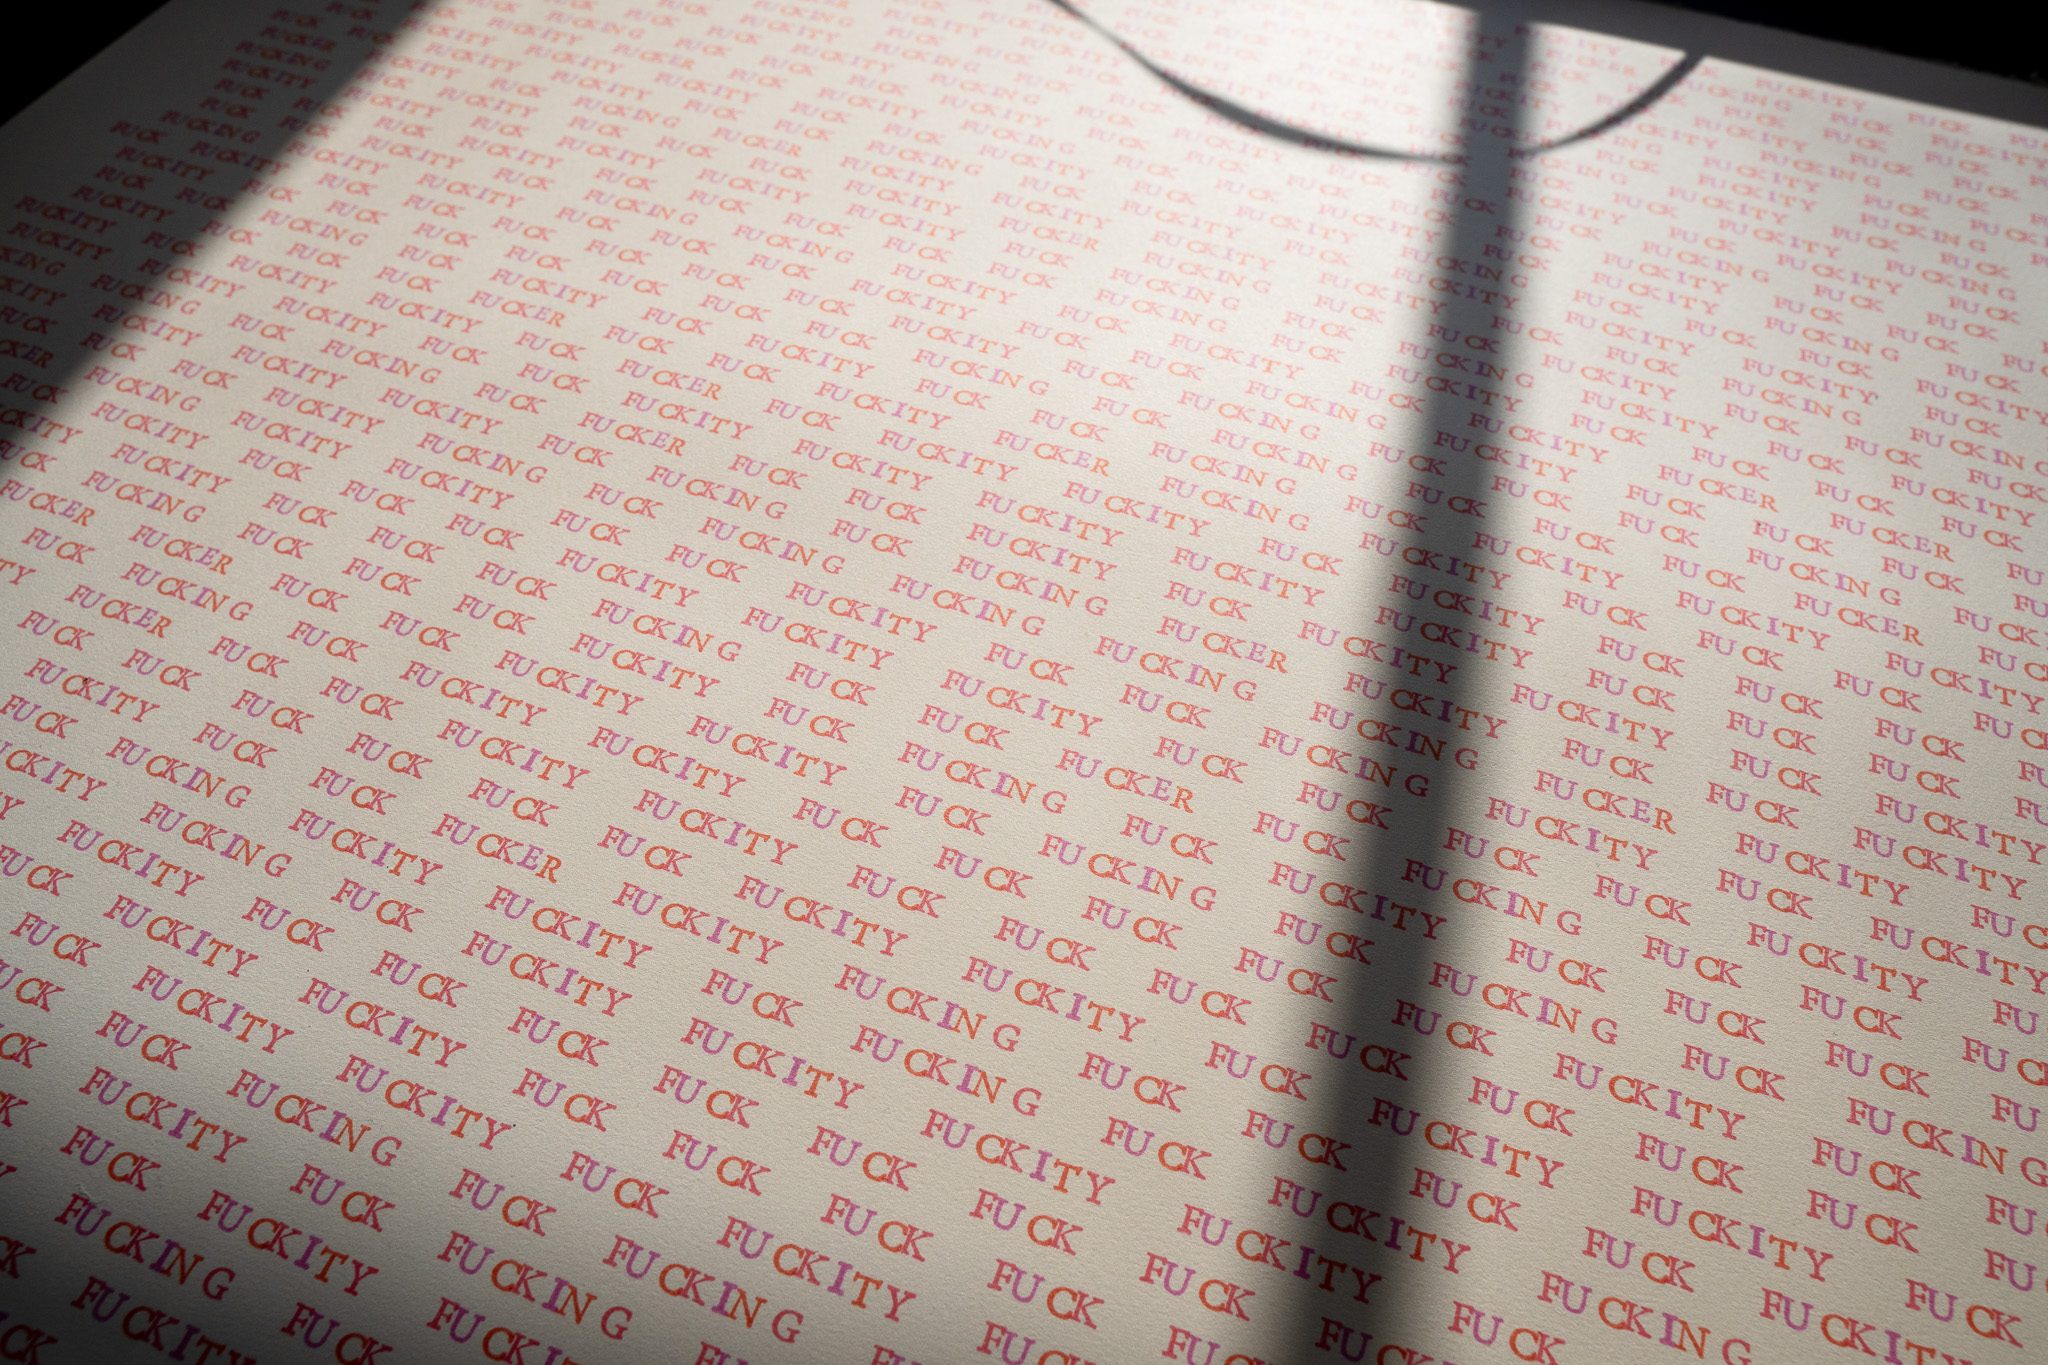
I dusted off the stamping code and improved it, a lot. Before I was kinda giving it a small set of words it'd randomly pick from, and I'd also written some code that'd print someone's name and surround that name with random letters (from the name). But I hadn't yet written some code where I can just hand it some text and it'll turn it into a whole GCODE file that let's me stamp it out.
So that's what I've done now, I can give it a wall of text and it'll do it's best to fit it into the space. Unlike the handwriting where I can make the text bigger or smaller to fit into the space, stamps are fixed in their size, either the text will fit or it won't. But when it does fit the code will do it's best to centre it and so on.
I could easily(ish) add some more code to left, right and justify the text. Currently it centres it, and technically it's left justified before the code centres it, so getting the left justification working would just be the case of commenting out some code.
Anyway, it was nice to get this up and running.
The problem with stamping is you have to keep changing the stamp once you've finished with one letter.
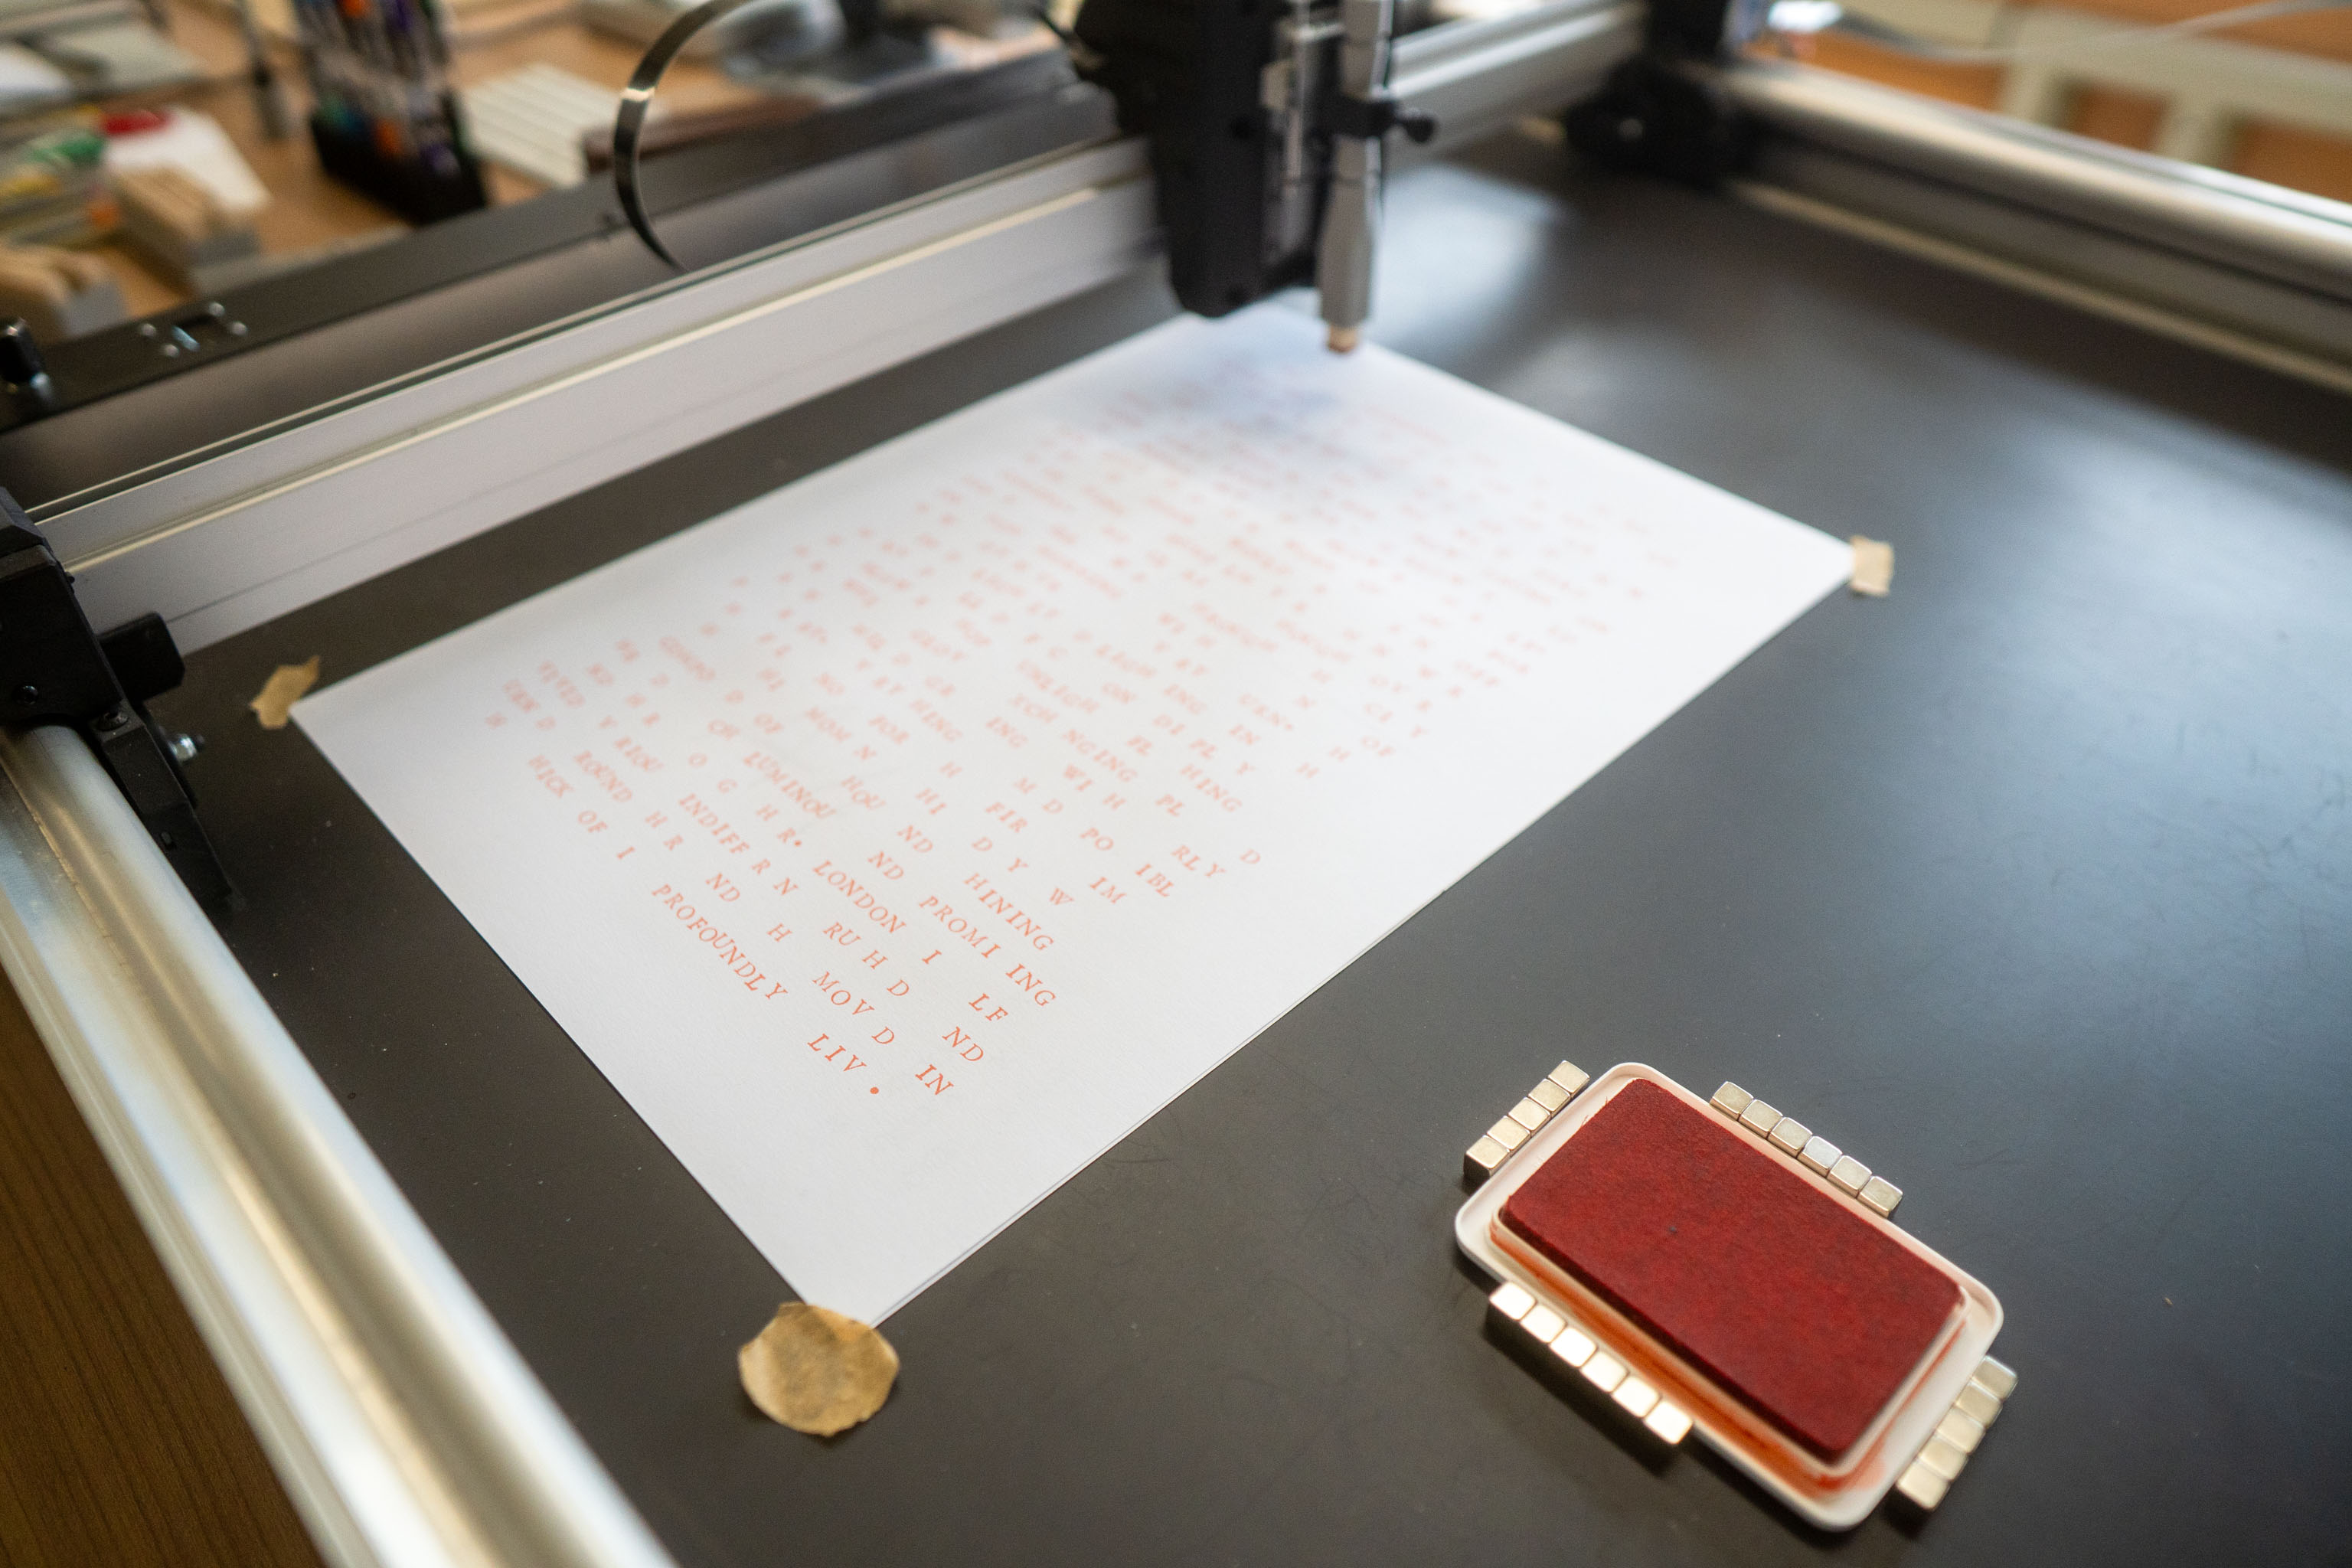
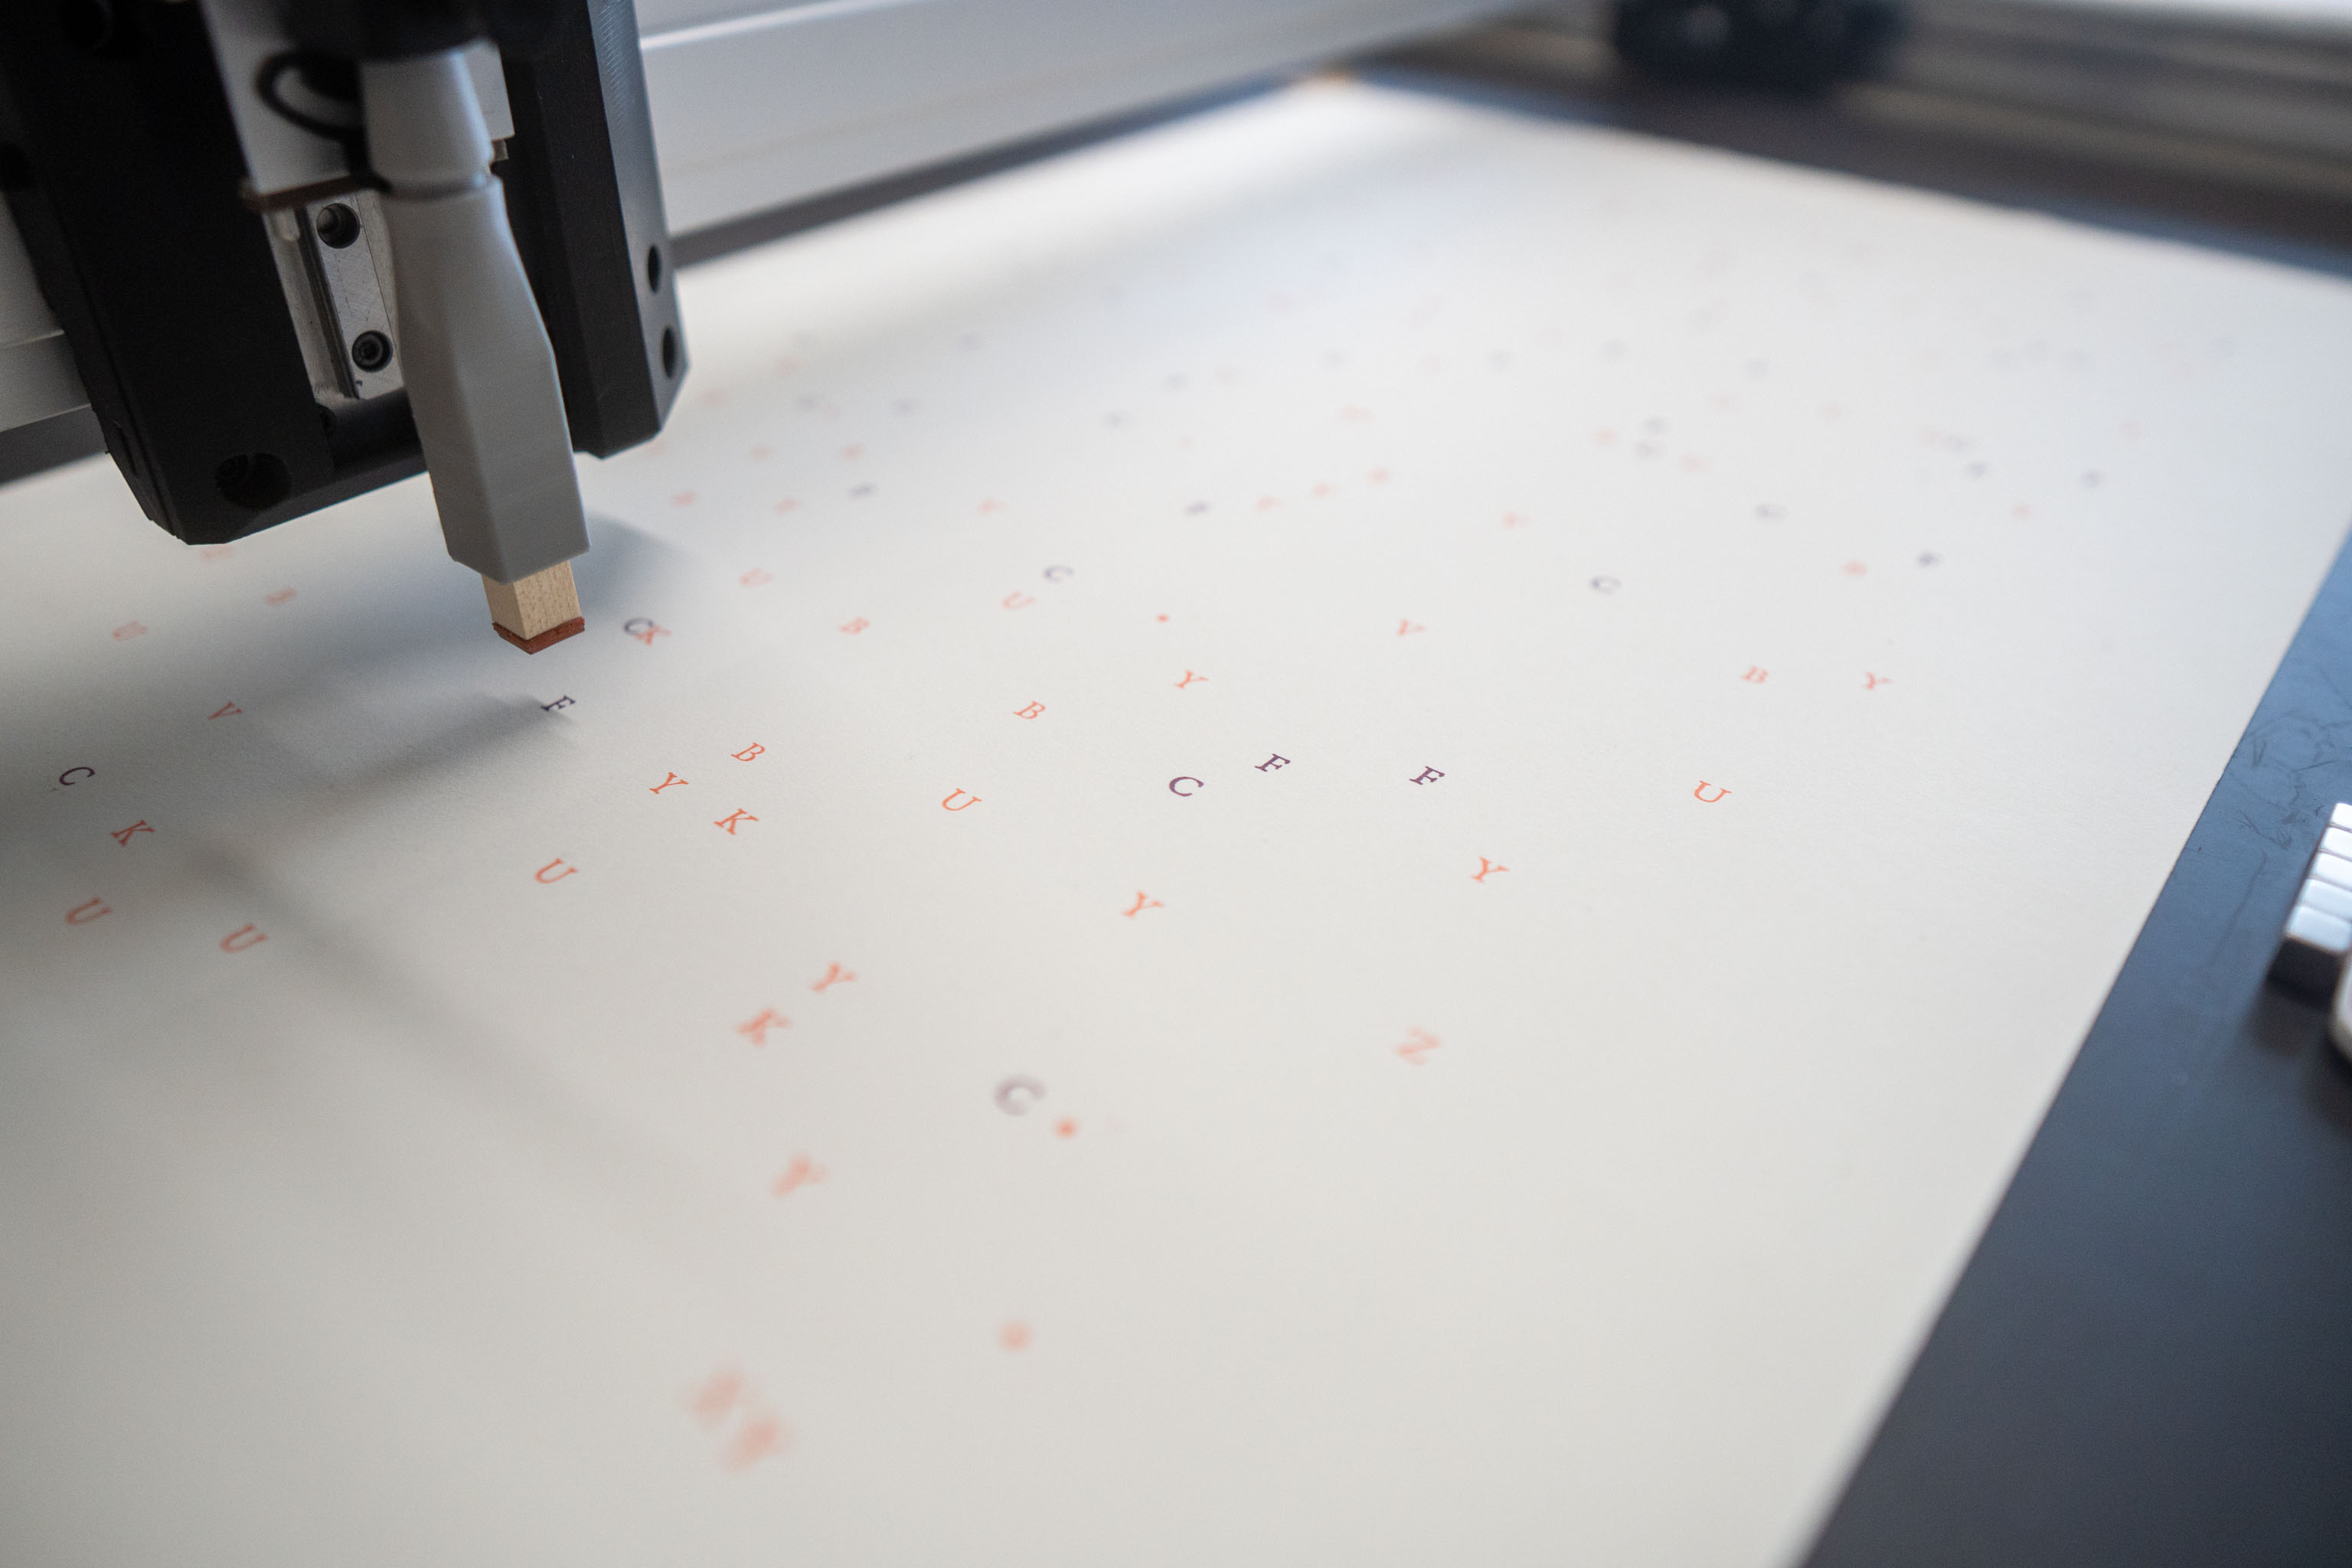
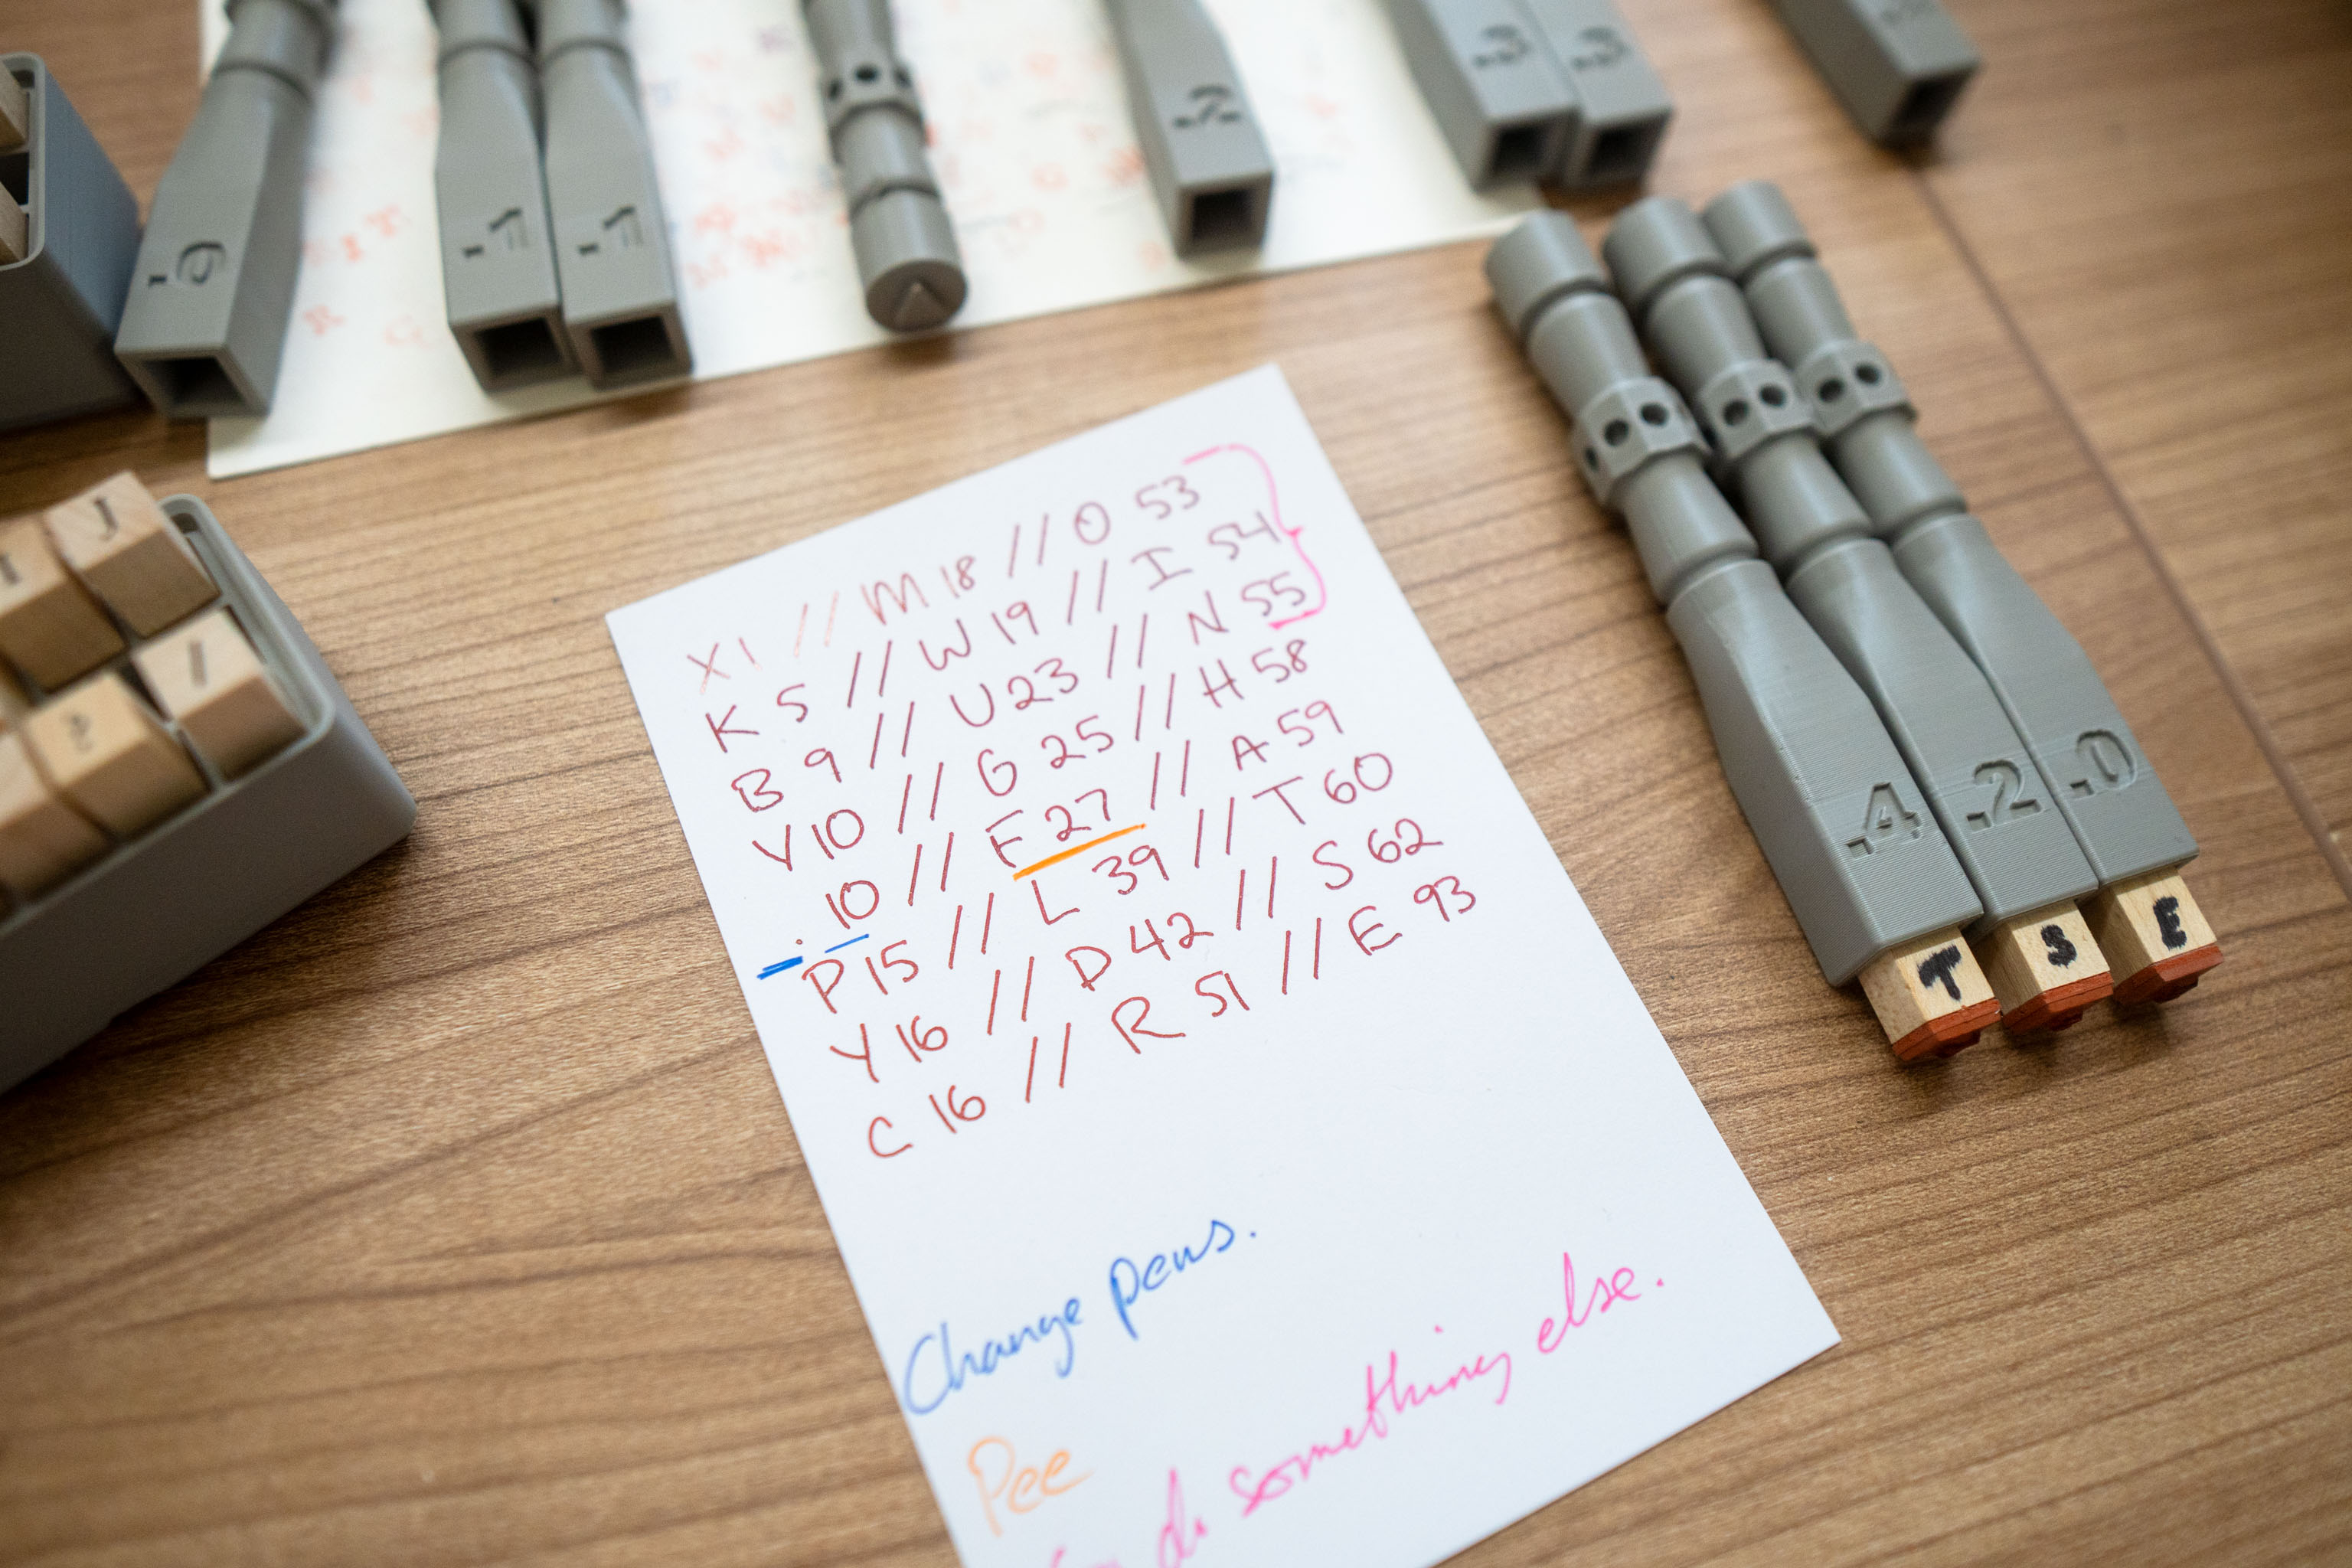
I added some code that sorts the order the letters get stamped in. I can have them alphabetical, which kind of makes it easier to set up the next stamp, as with enough text you'll generally have C after B after A etc.
But I also found it useful to have them in least used order, because you're generally hanging around making sure everything's working when you set things away, so you're around to make the first few changes. Then when you know things are working you've moved onto the ones that need longer between changing.
I discovered that under 10 stamps of each letter you don't even have time to get the next one set up. Over 10 you can get the next one ready while the current one is going. When you get over about 27 you have enough time to go pee before you need to put the next stamp in.
When you get to around 50 stamps of a letter you just about have time to go off and do something else.
I added a couple more orders, mainly for making time-lapses. Does it look better having lots of different letters stamped first, quickly. Or should to do it the reverse way around and stamp all the Es first, them the S, so the page fills up quickly.
A last option is to move the all vowels to the start or end, which again is purely for aesthetic video/photo reasons. Do you want all the letters except the vowels so it's kinda fun to see the shape of words and your mind fills in the gaps. Or is it good to have all the vowels done first and the fill in the rest of the letters?
Either way, knowing if you have enough time to go pee is handy.
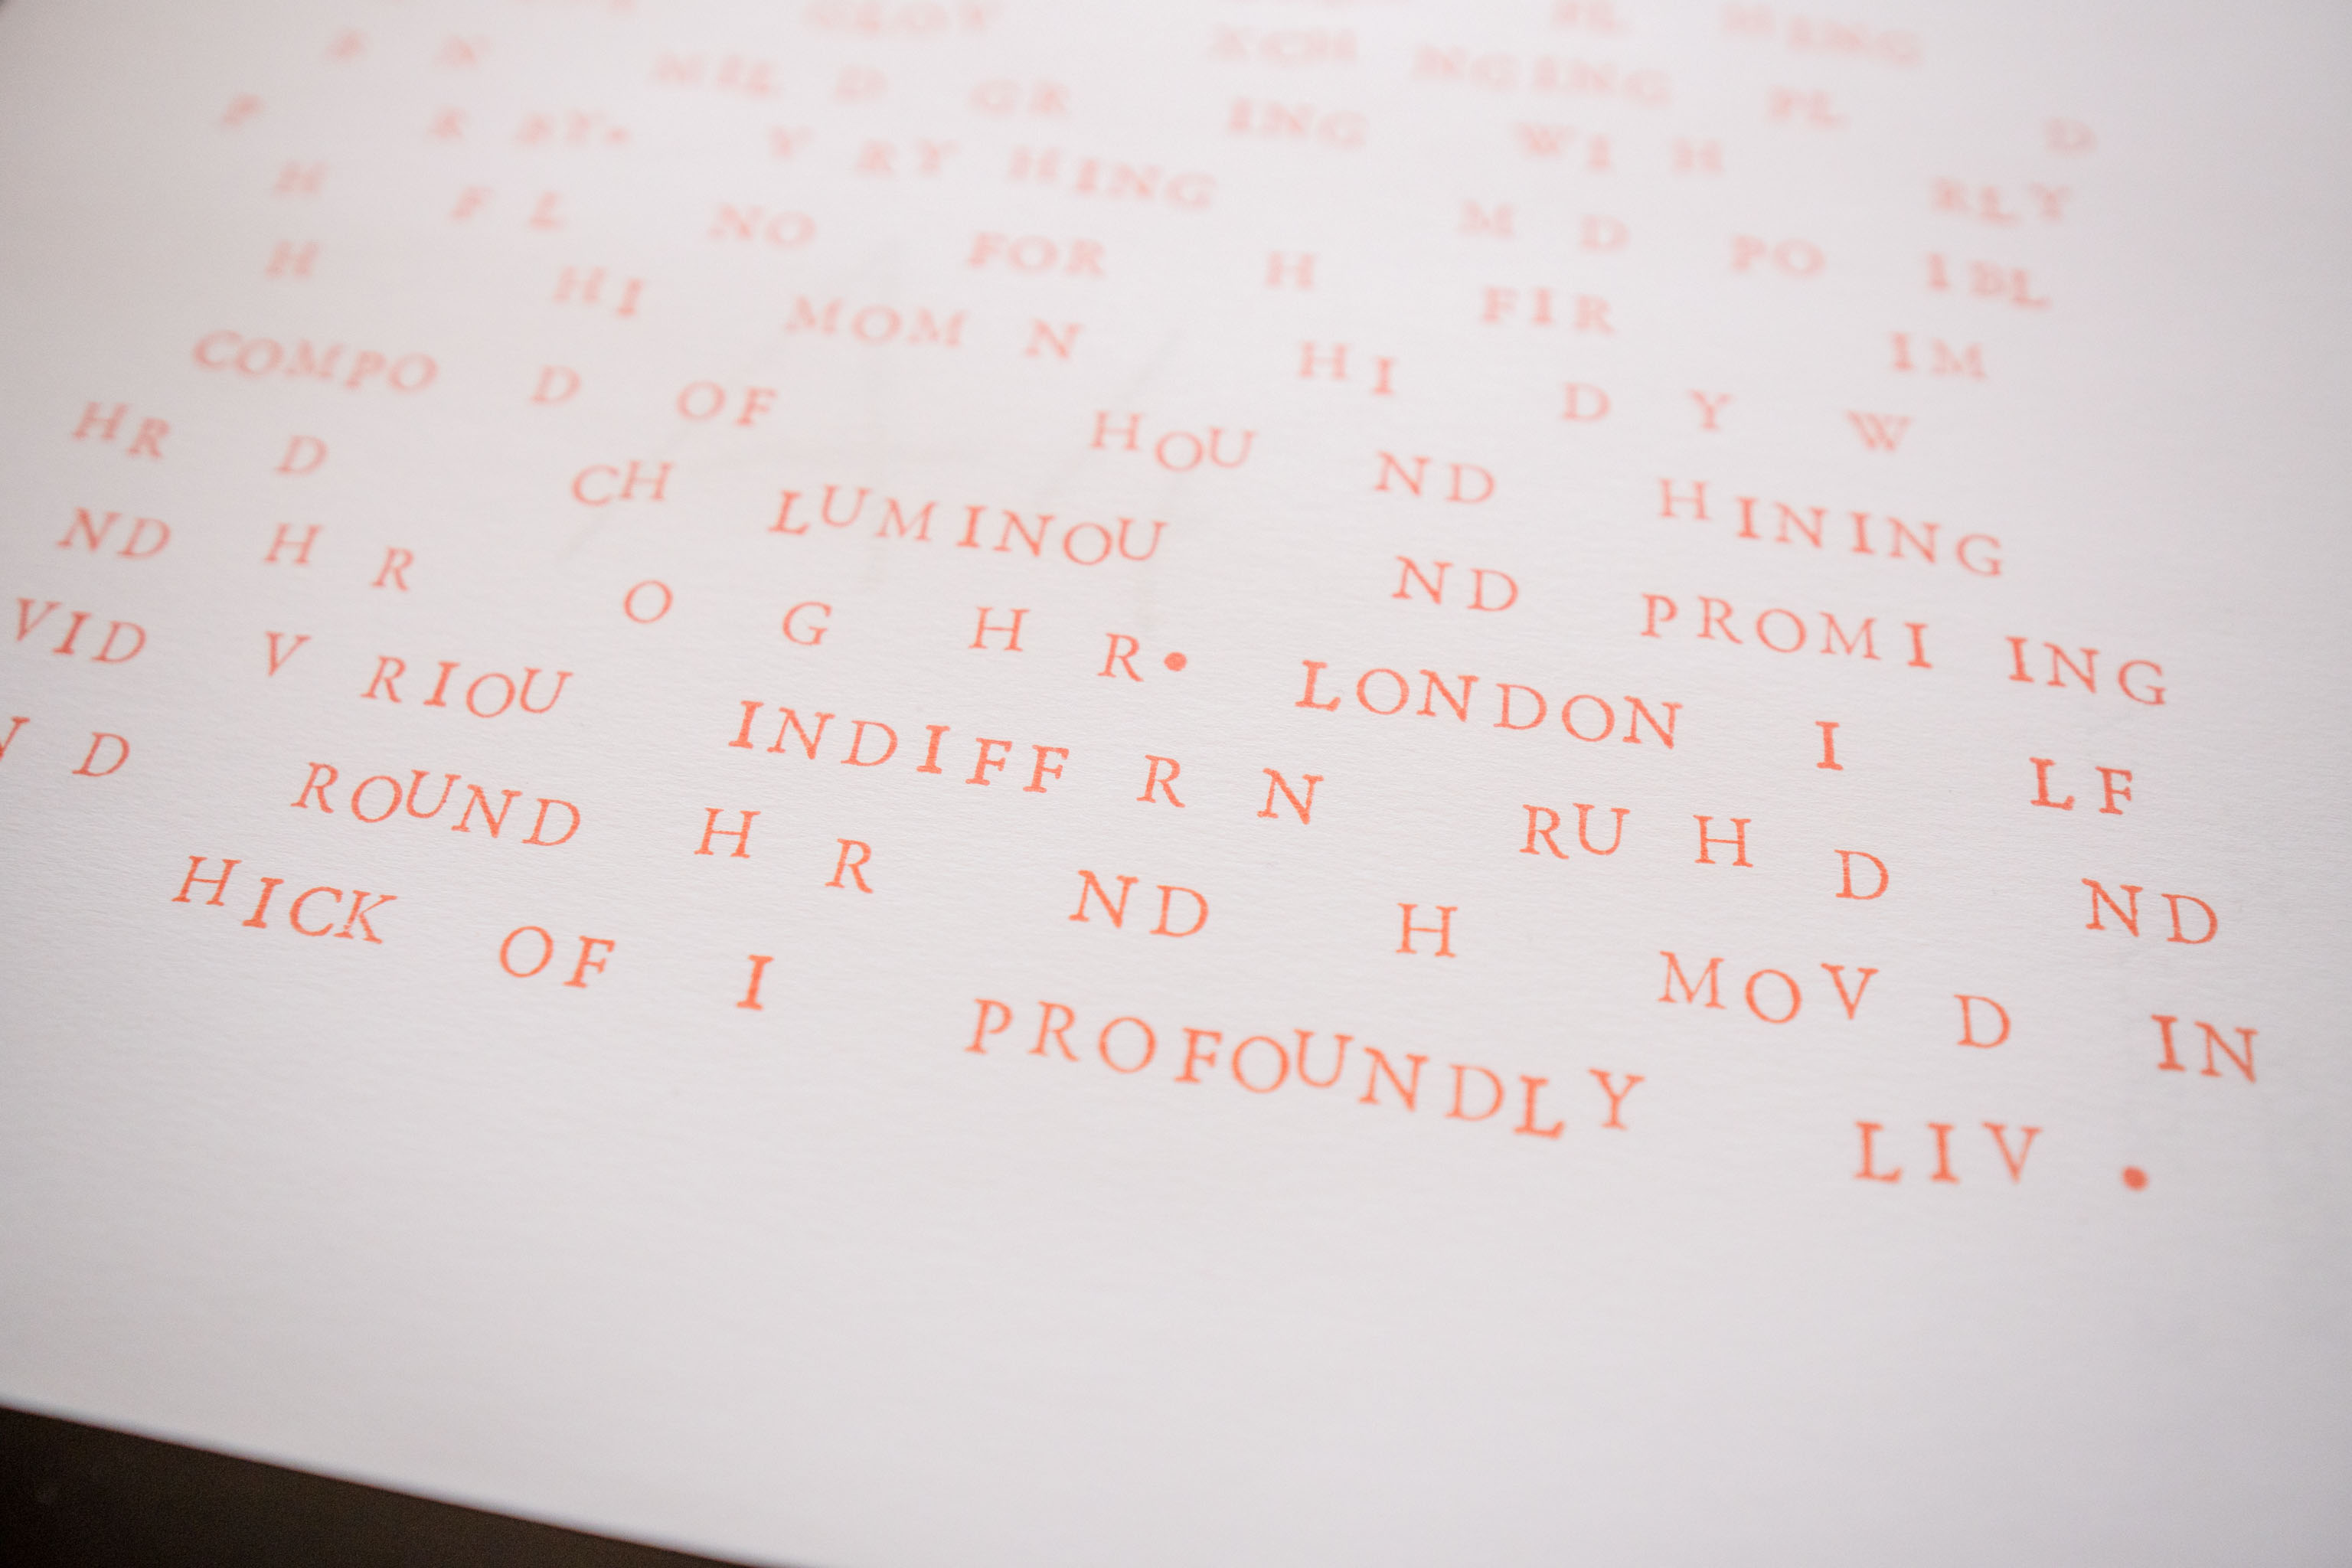
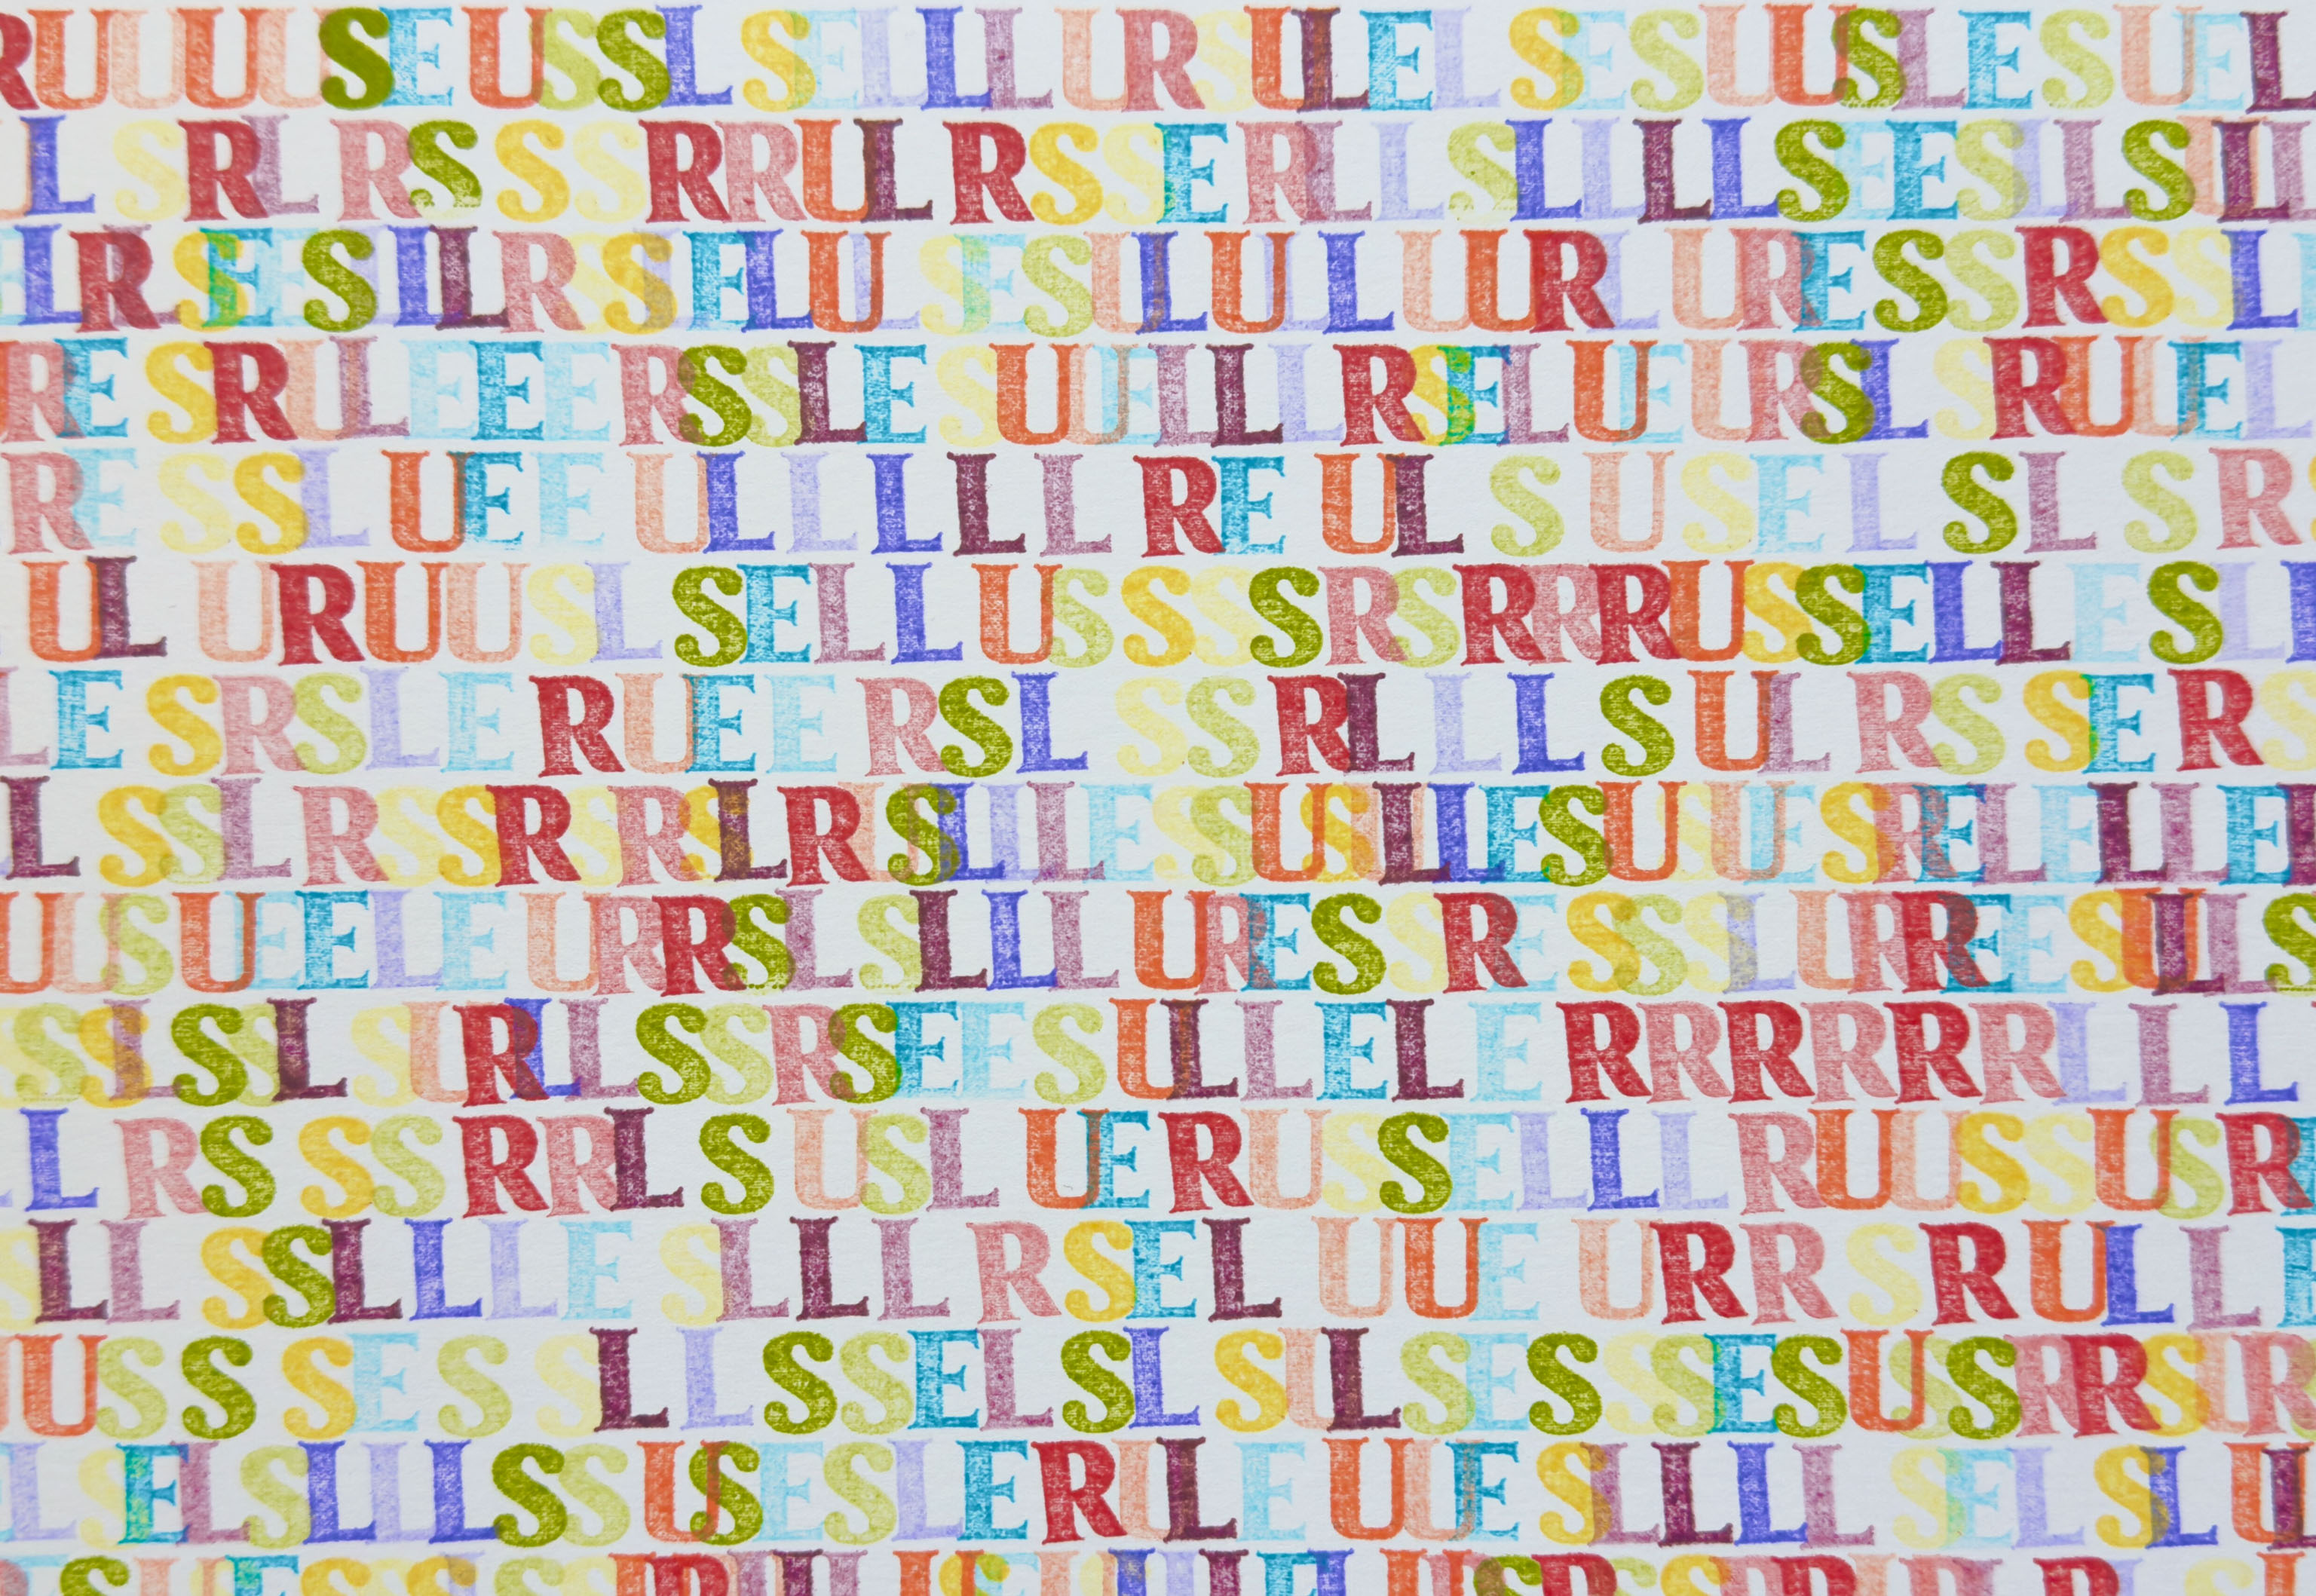
Getting it to stamp a bit of Douglas Adams
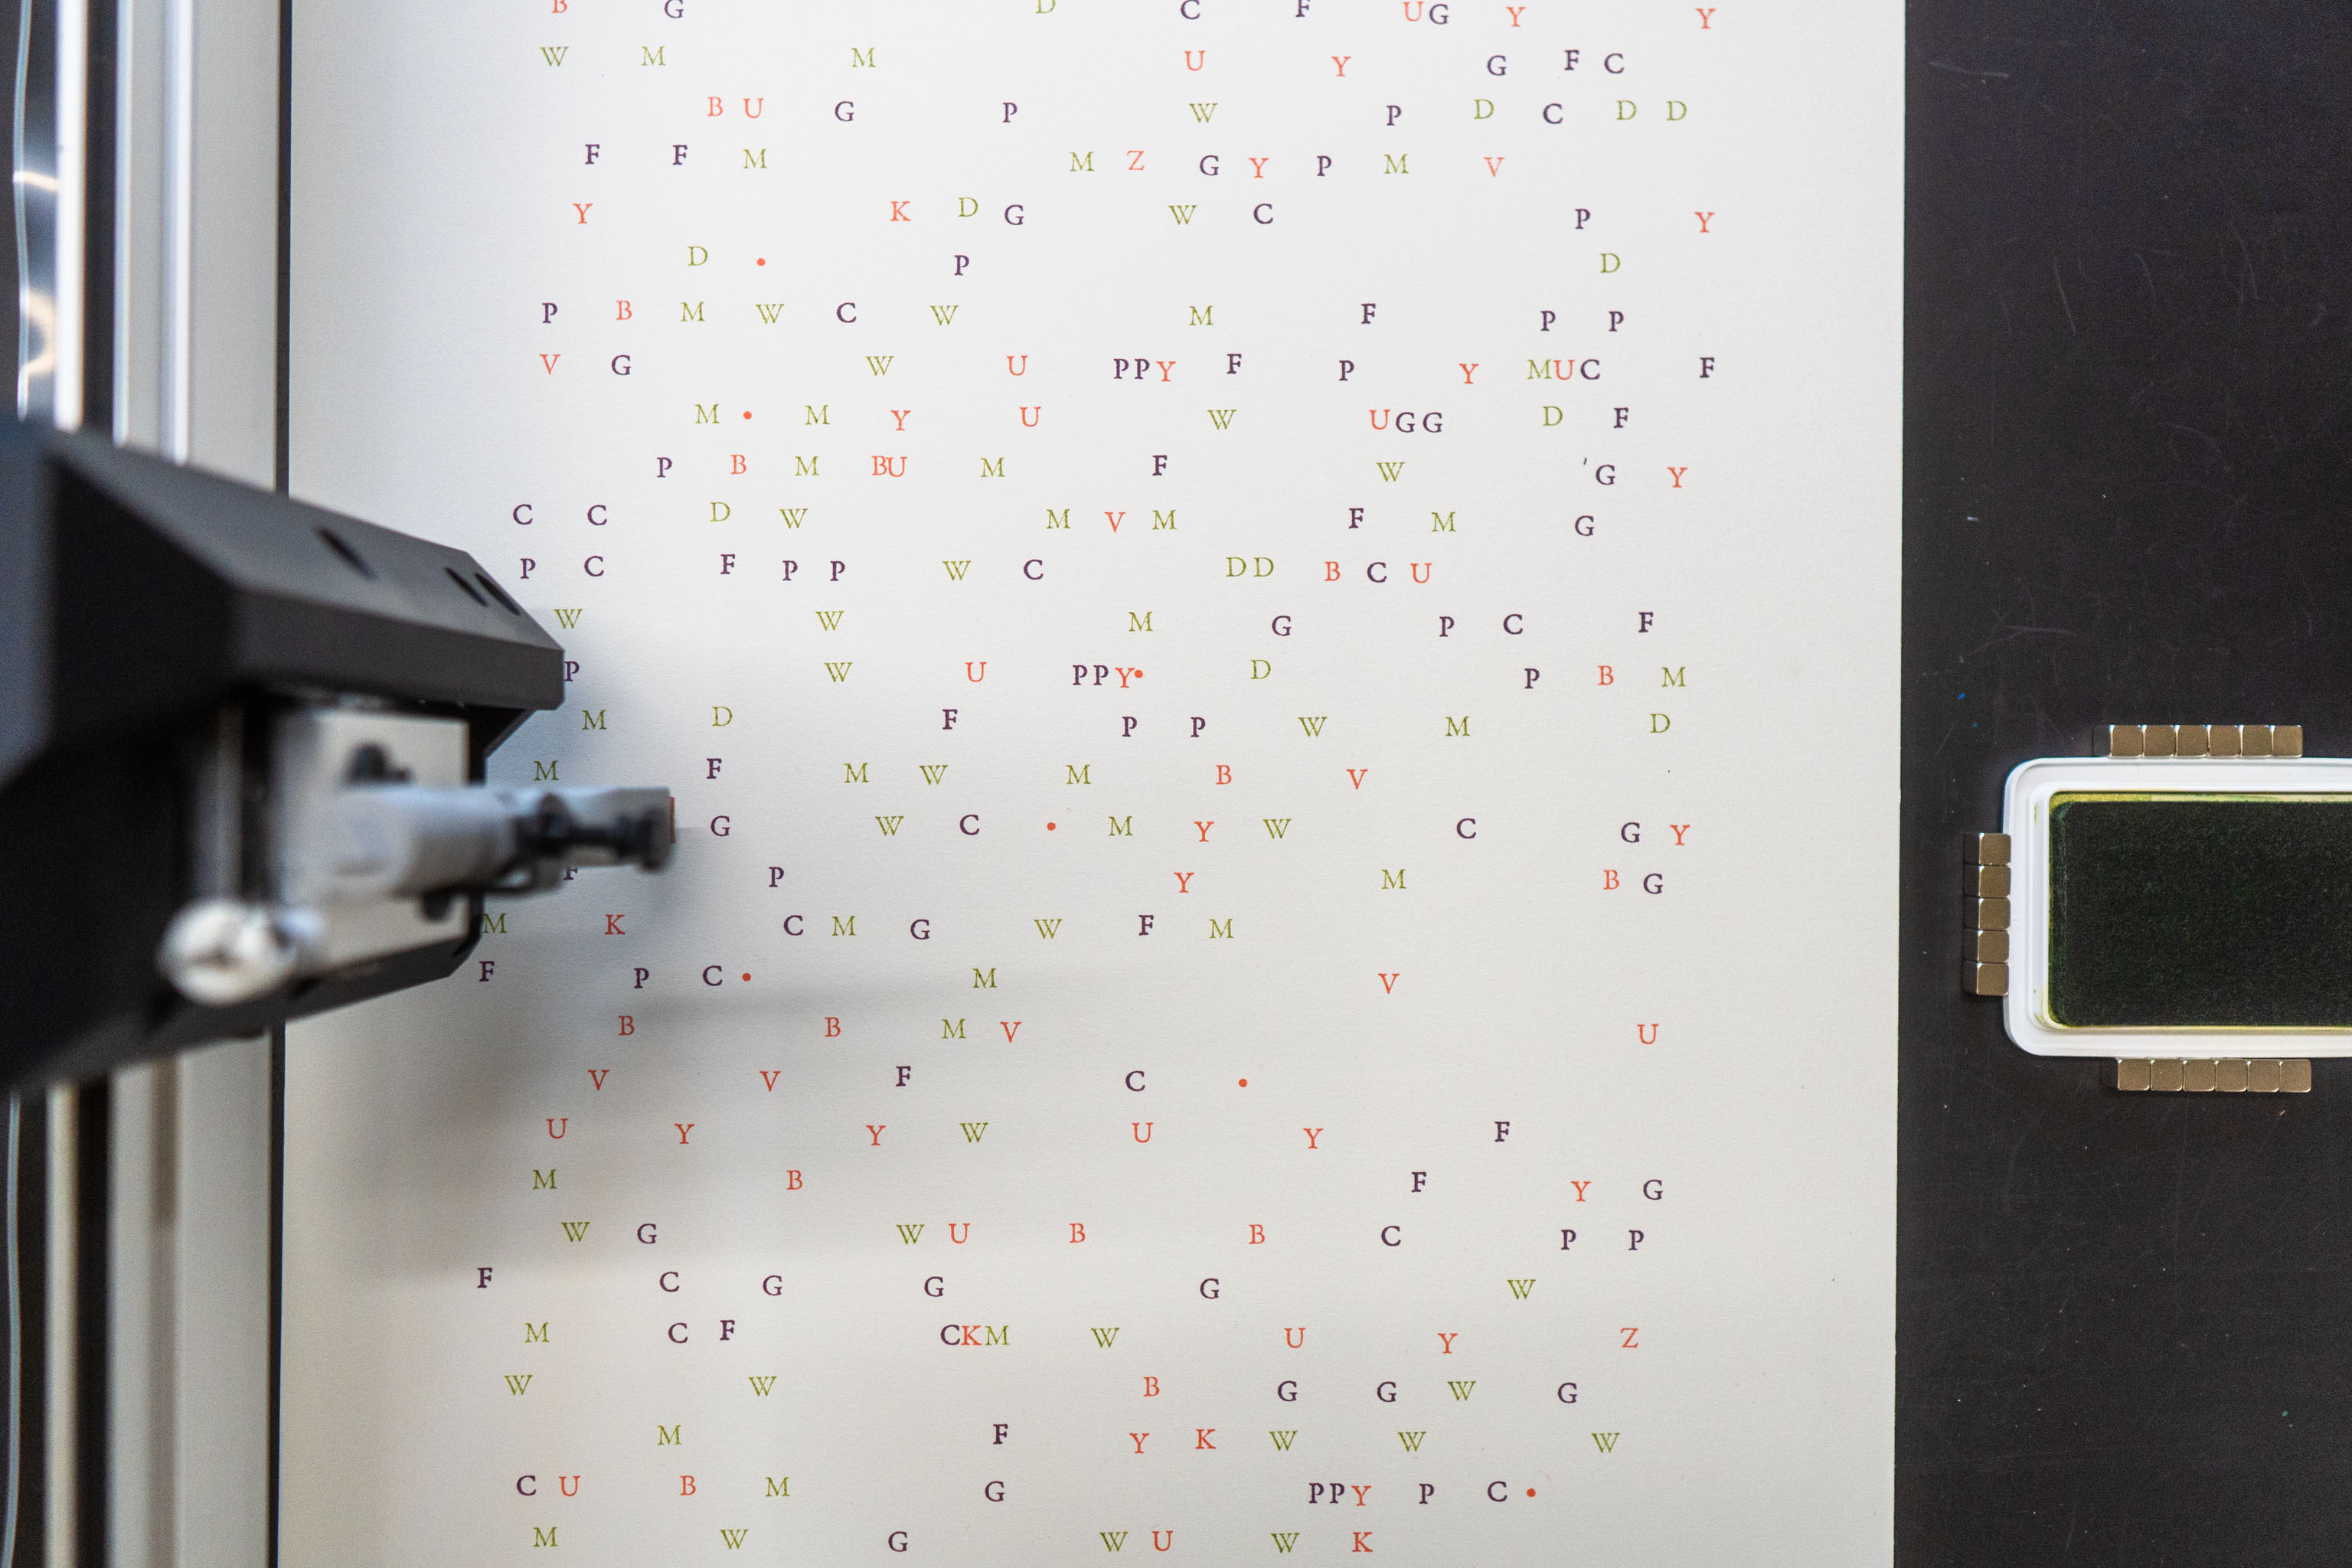
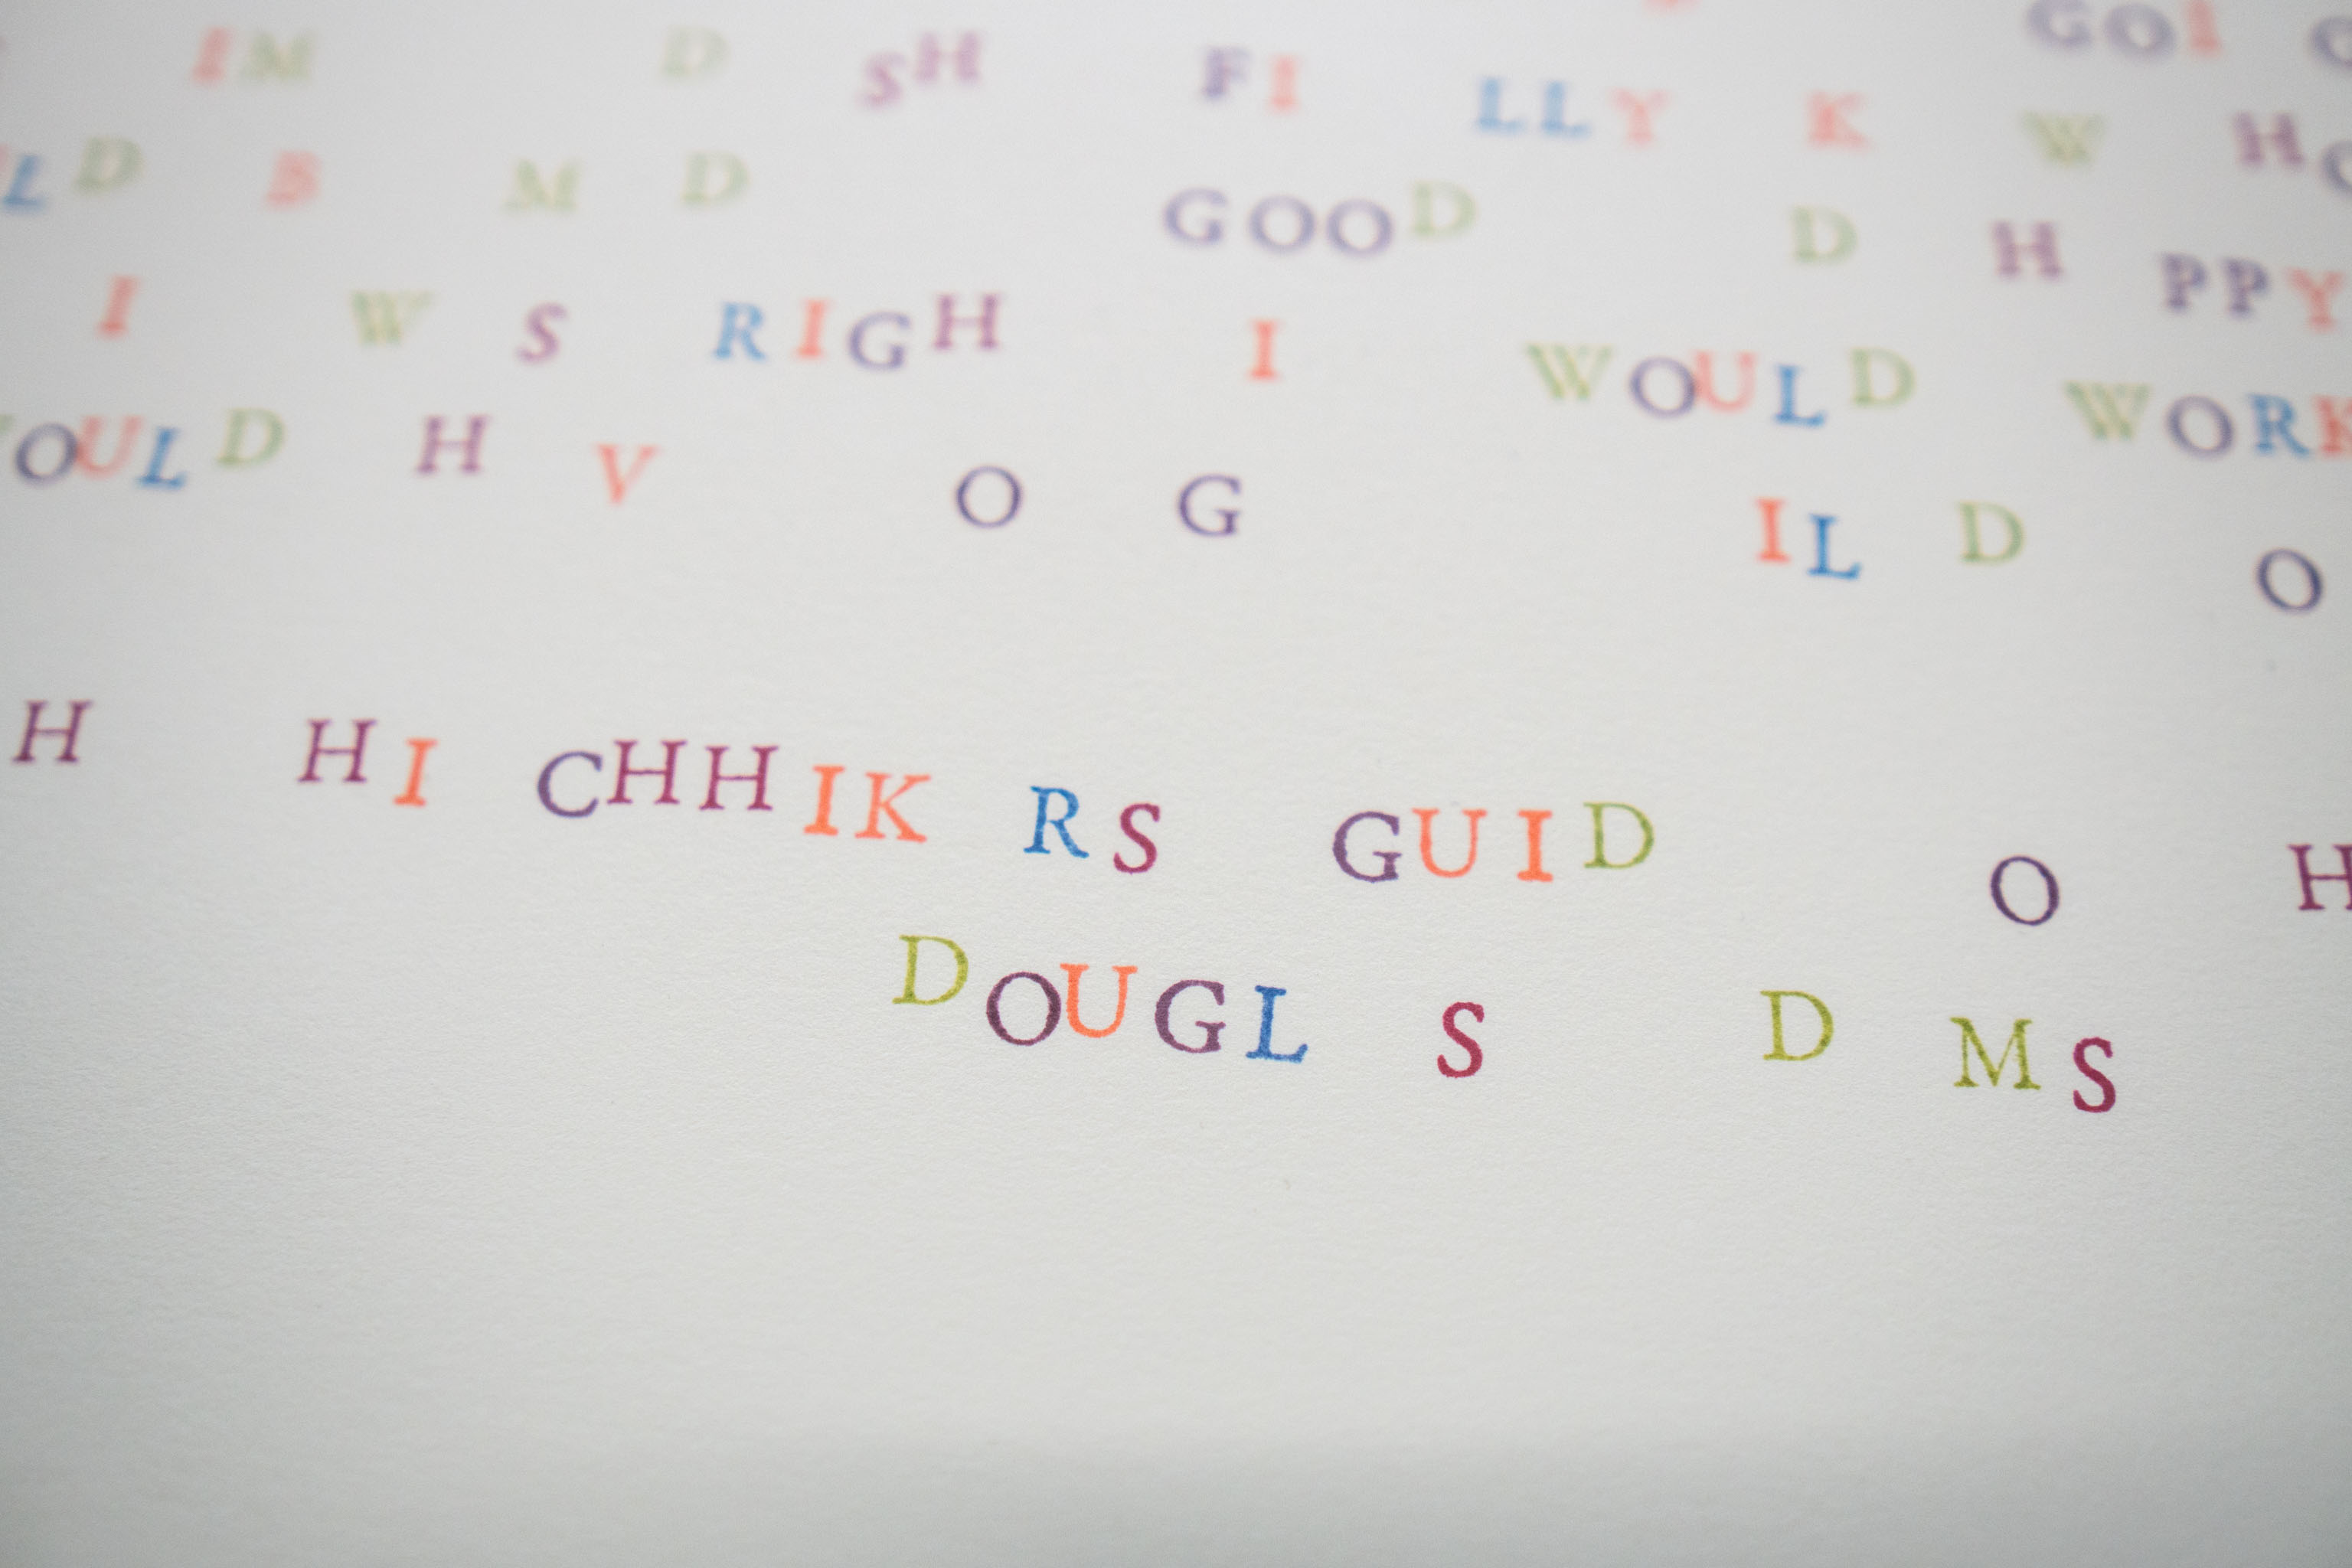
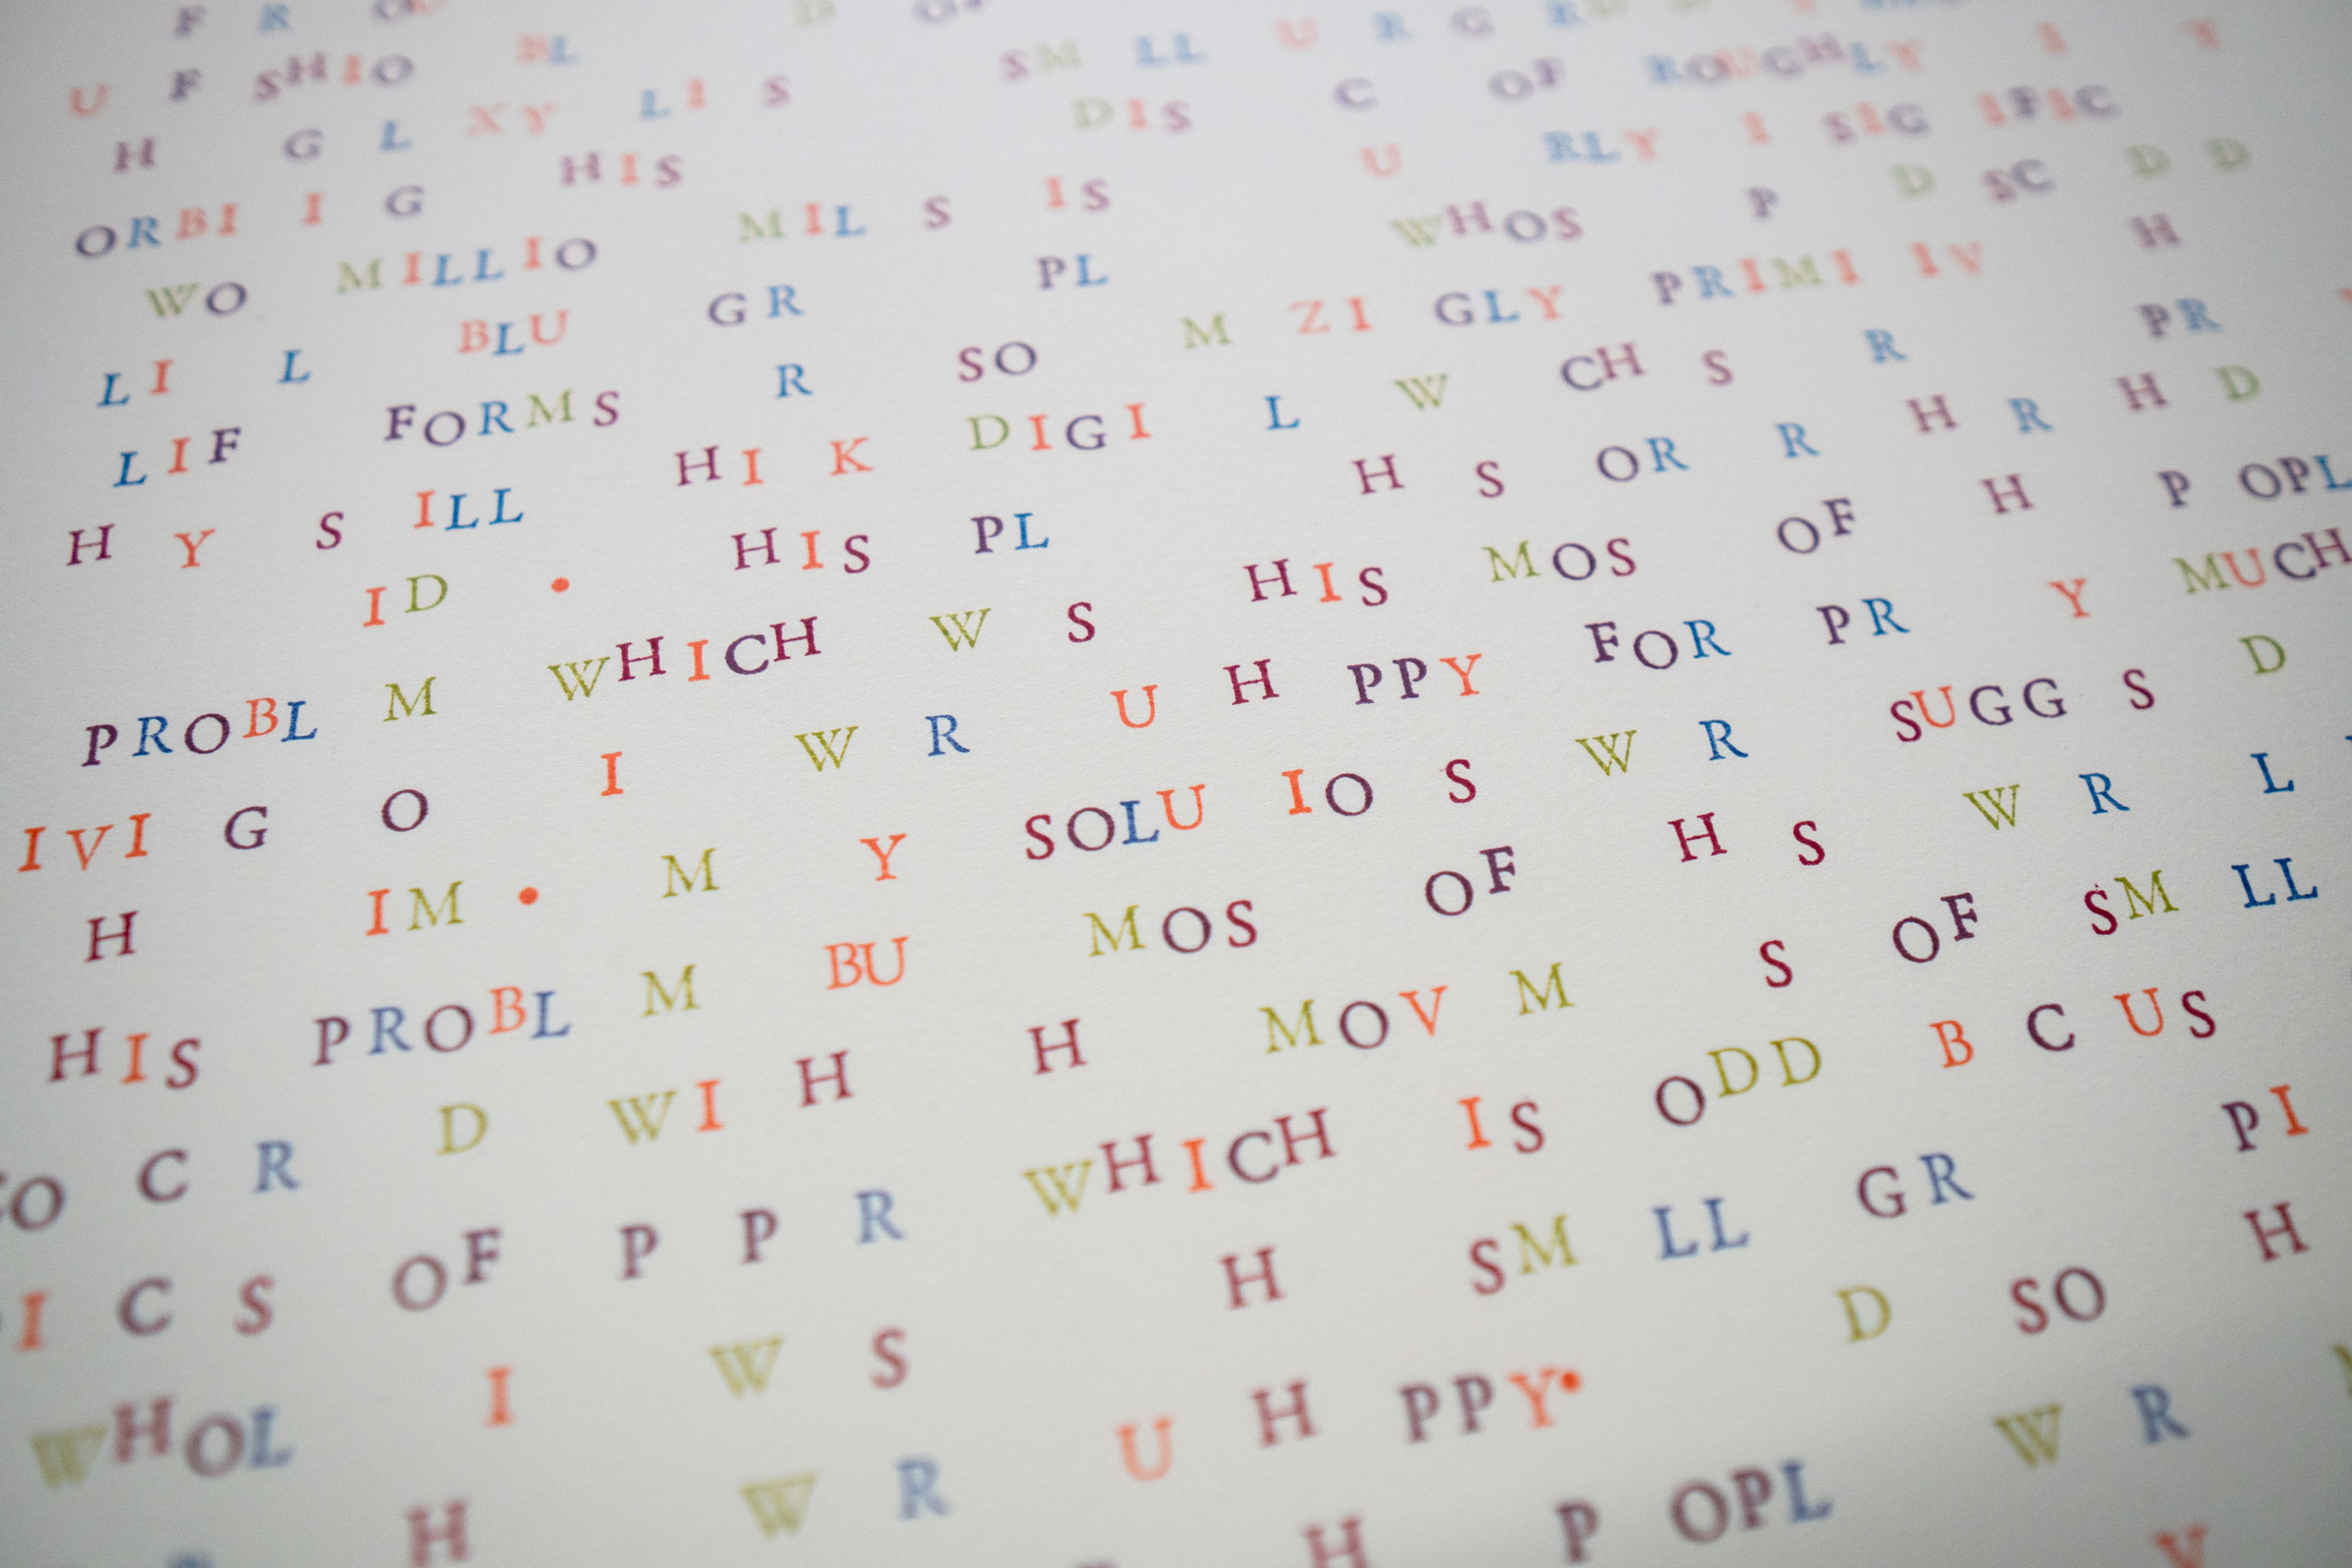
More of The Hitchhikers's Guide to the Galaxy.
Very wonky.
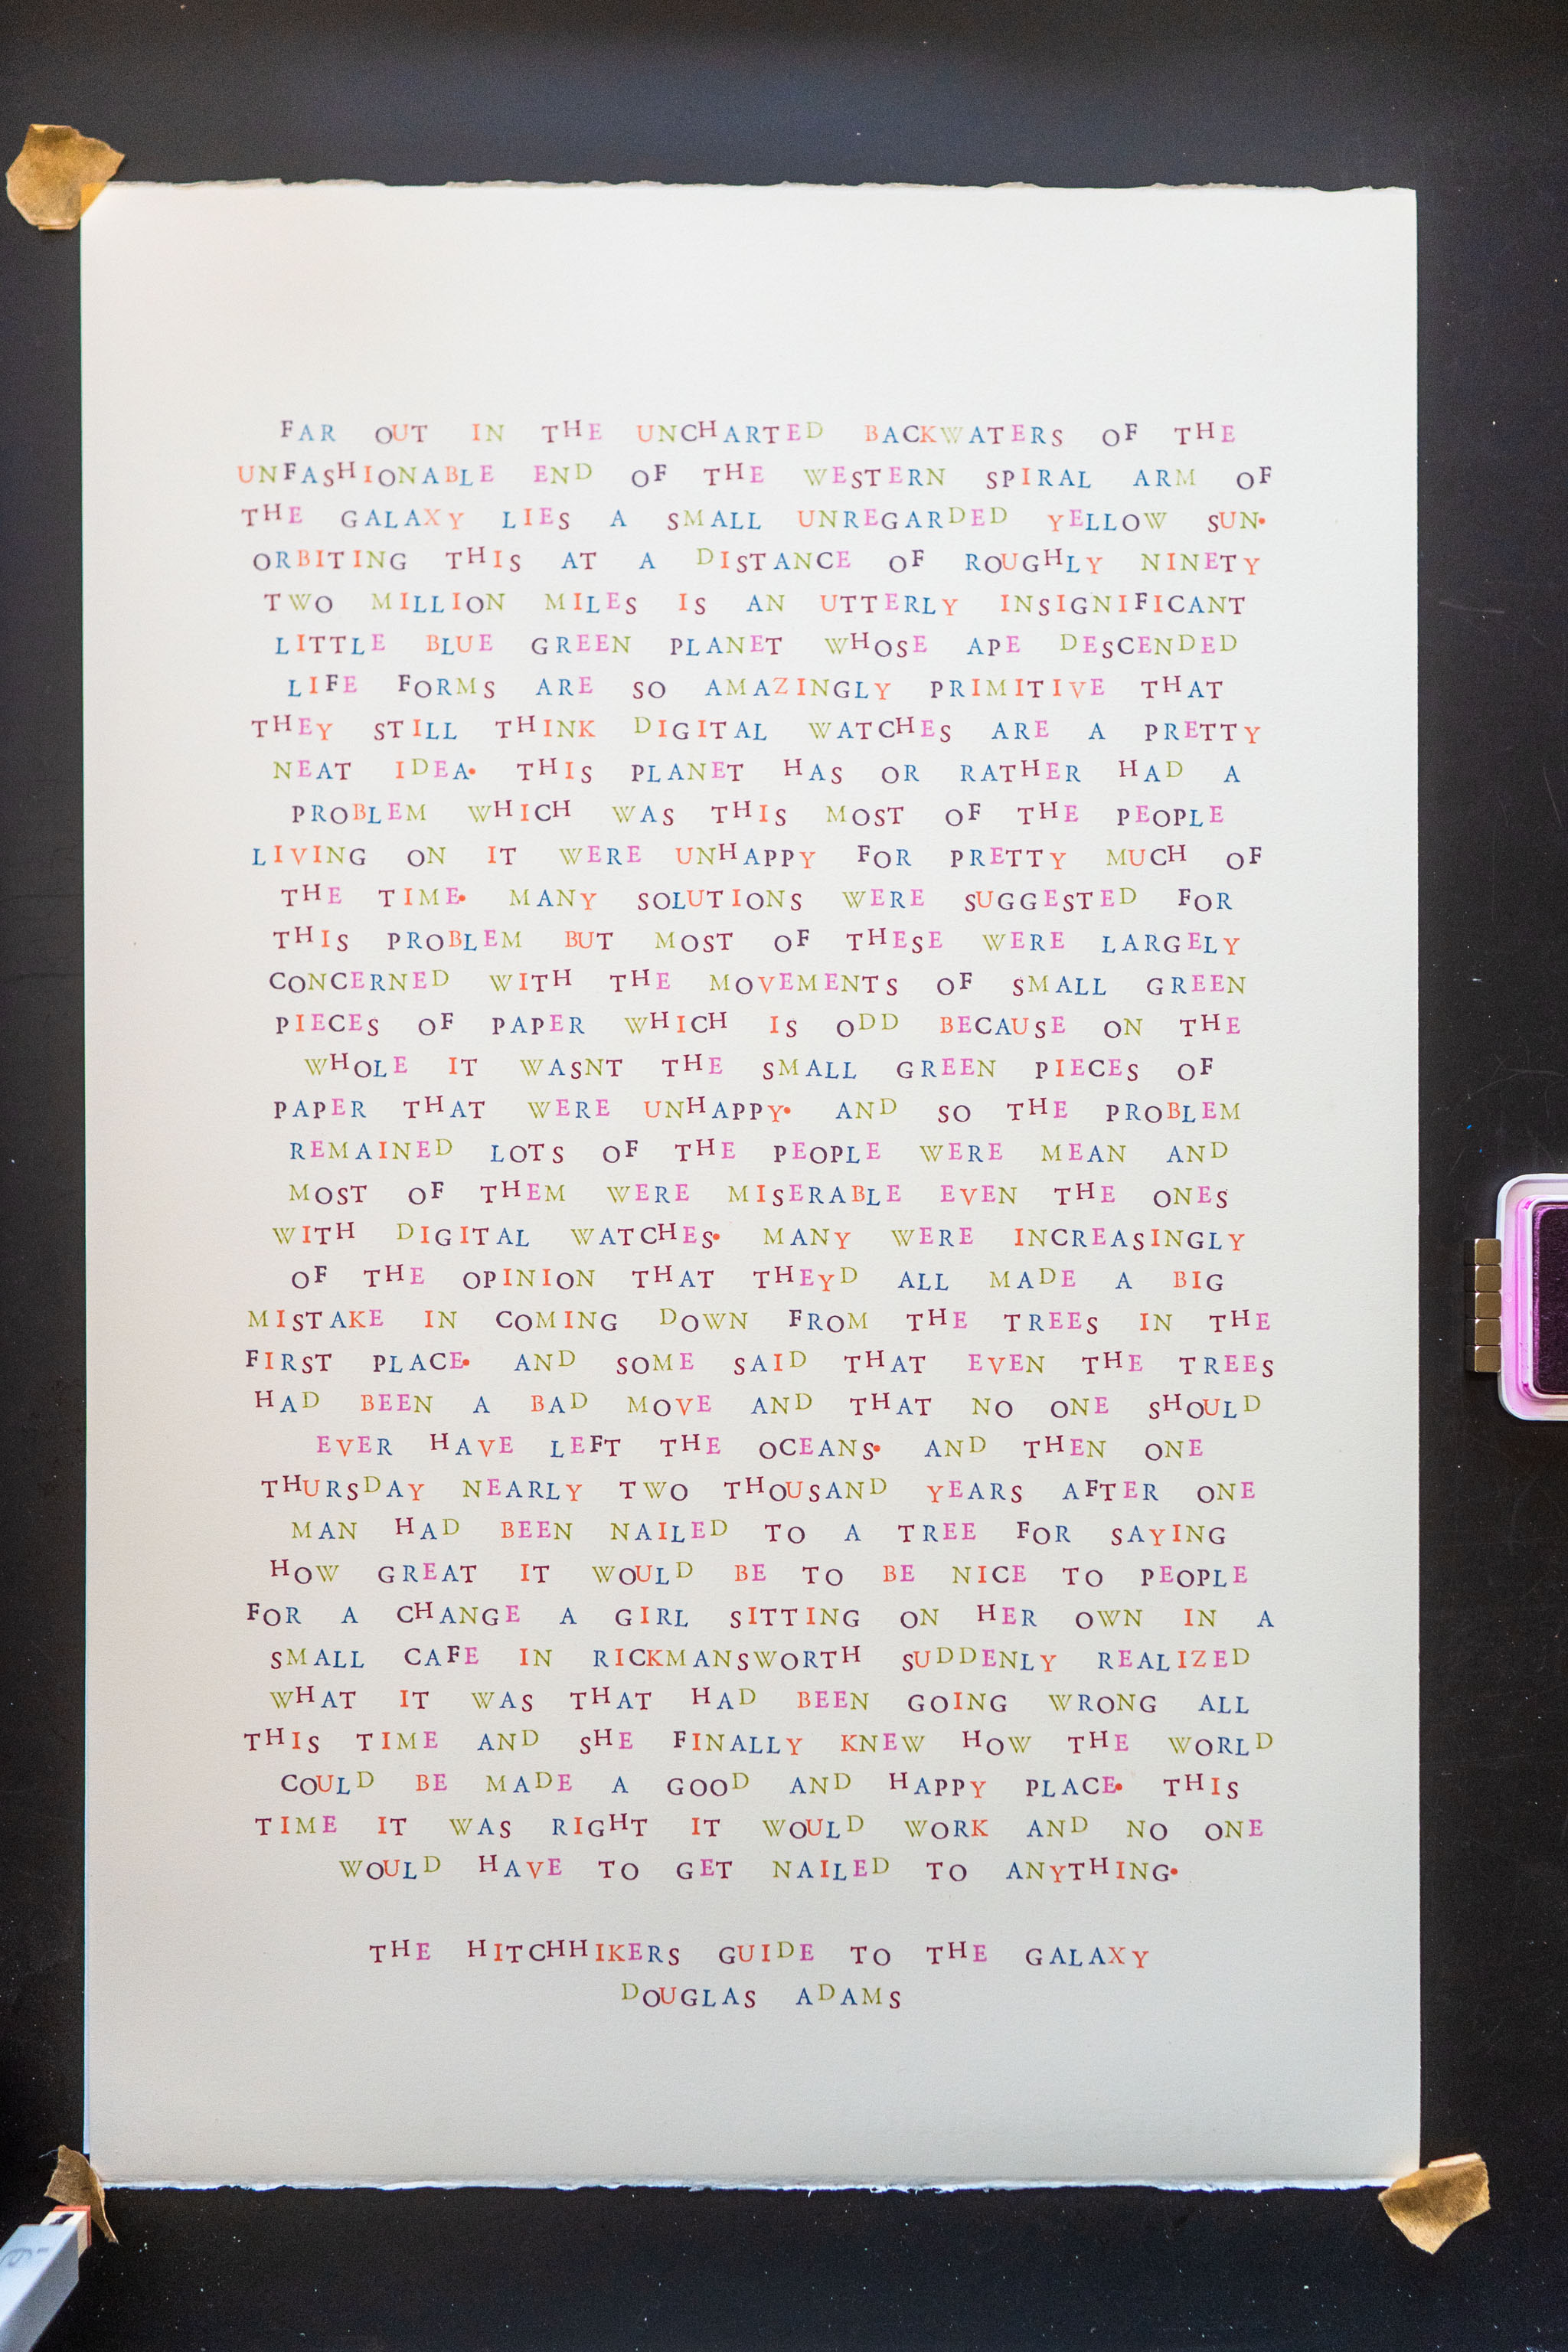
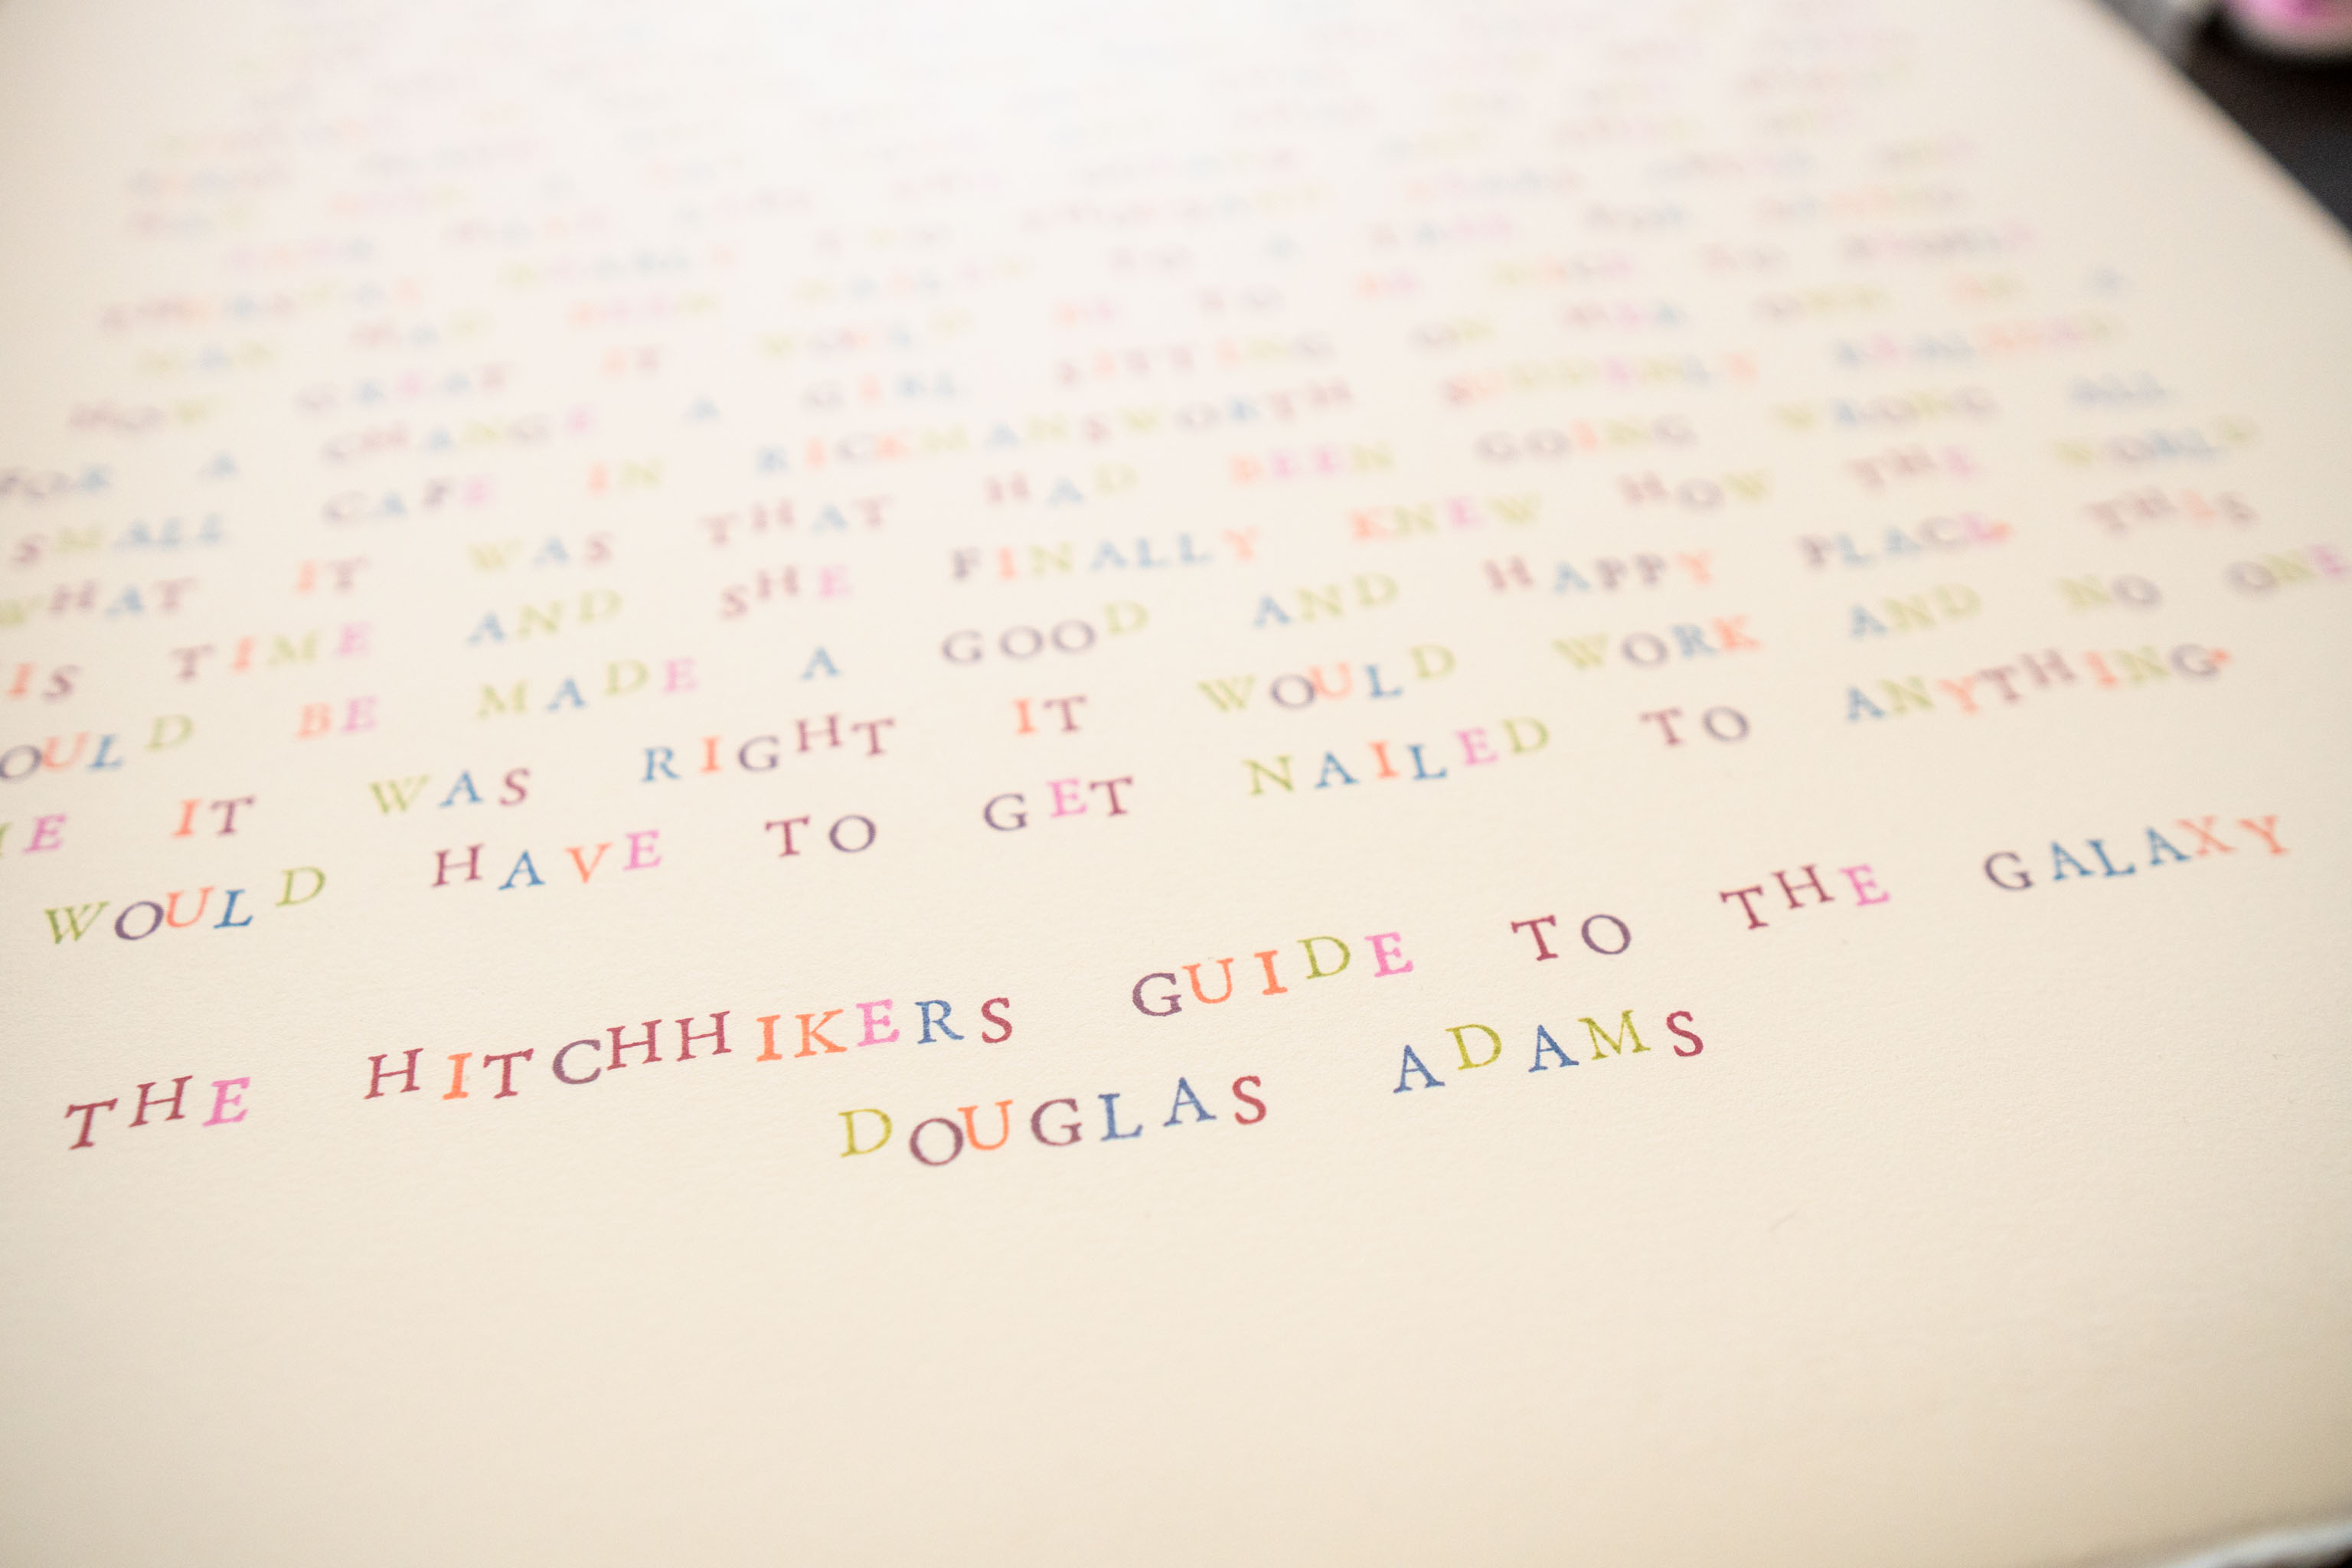
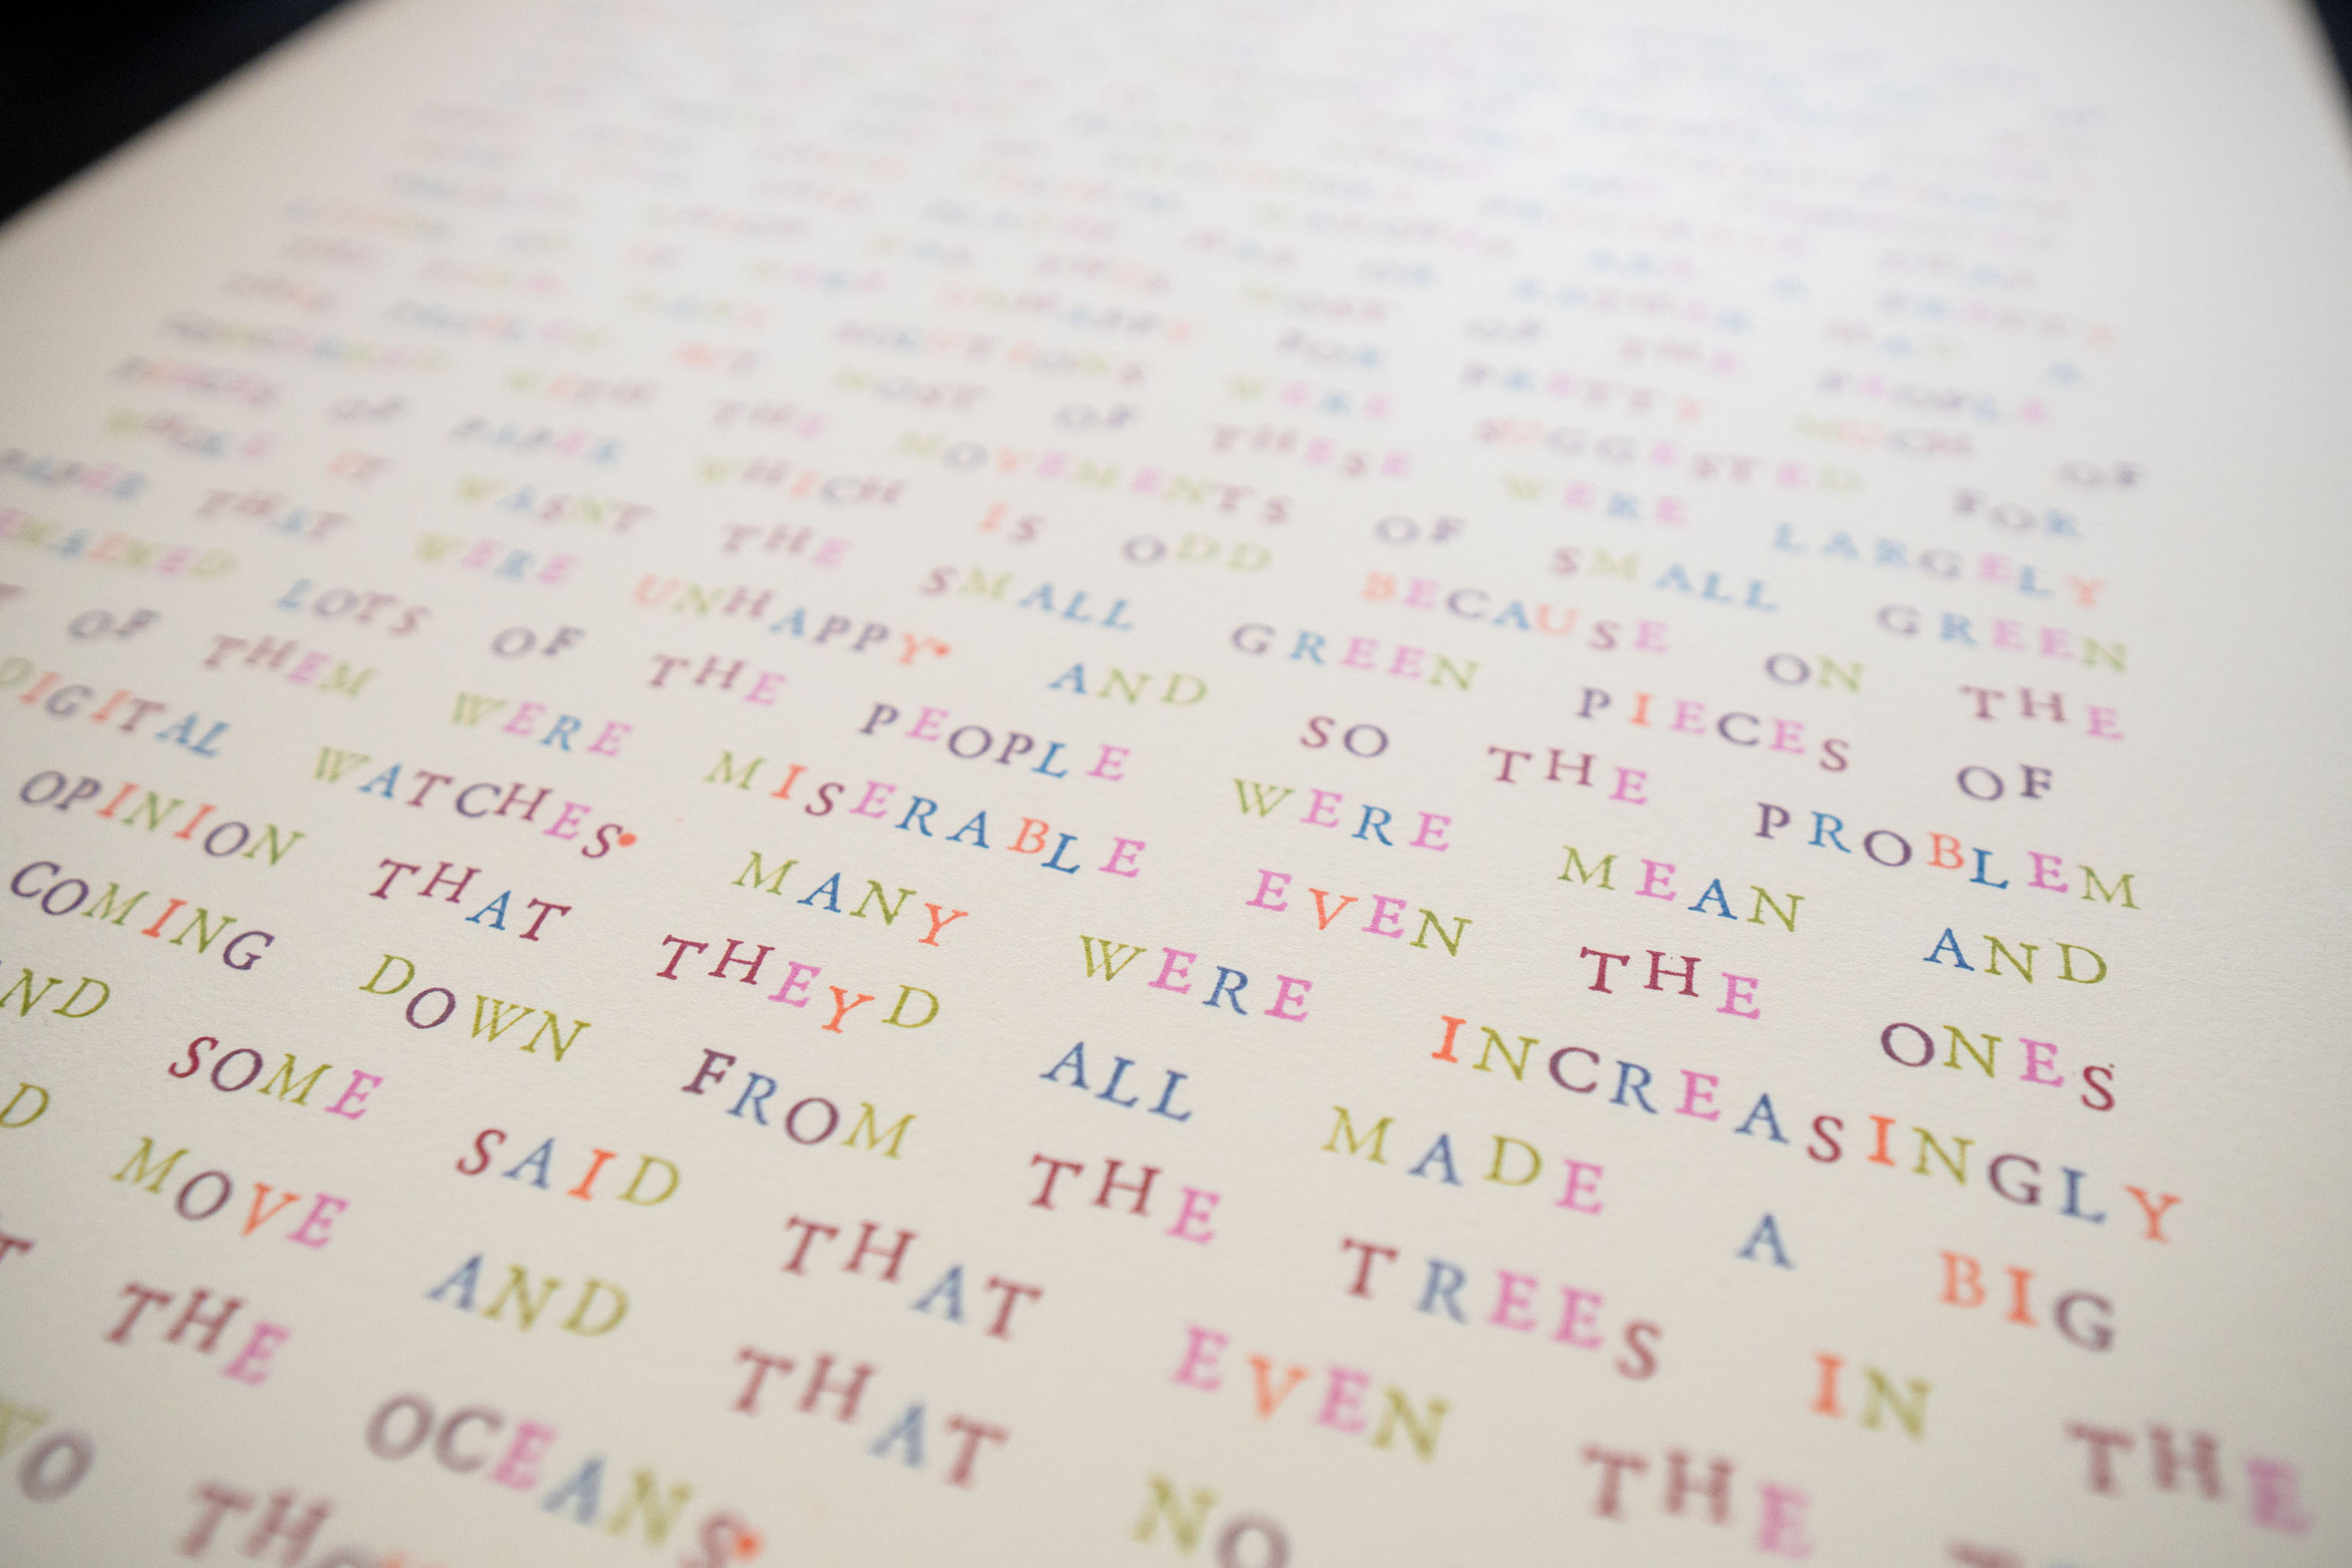
Having rubber stamped the pages I saw that there needed to be some kerning and corrections going on. Not all the stamps are level (within their own design), so probably the best thing to do is correct that in code, adding small "nudges" to the position of each letter.
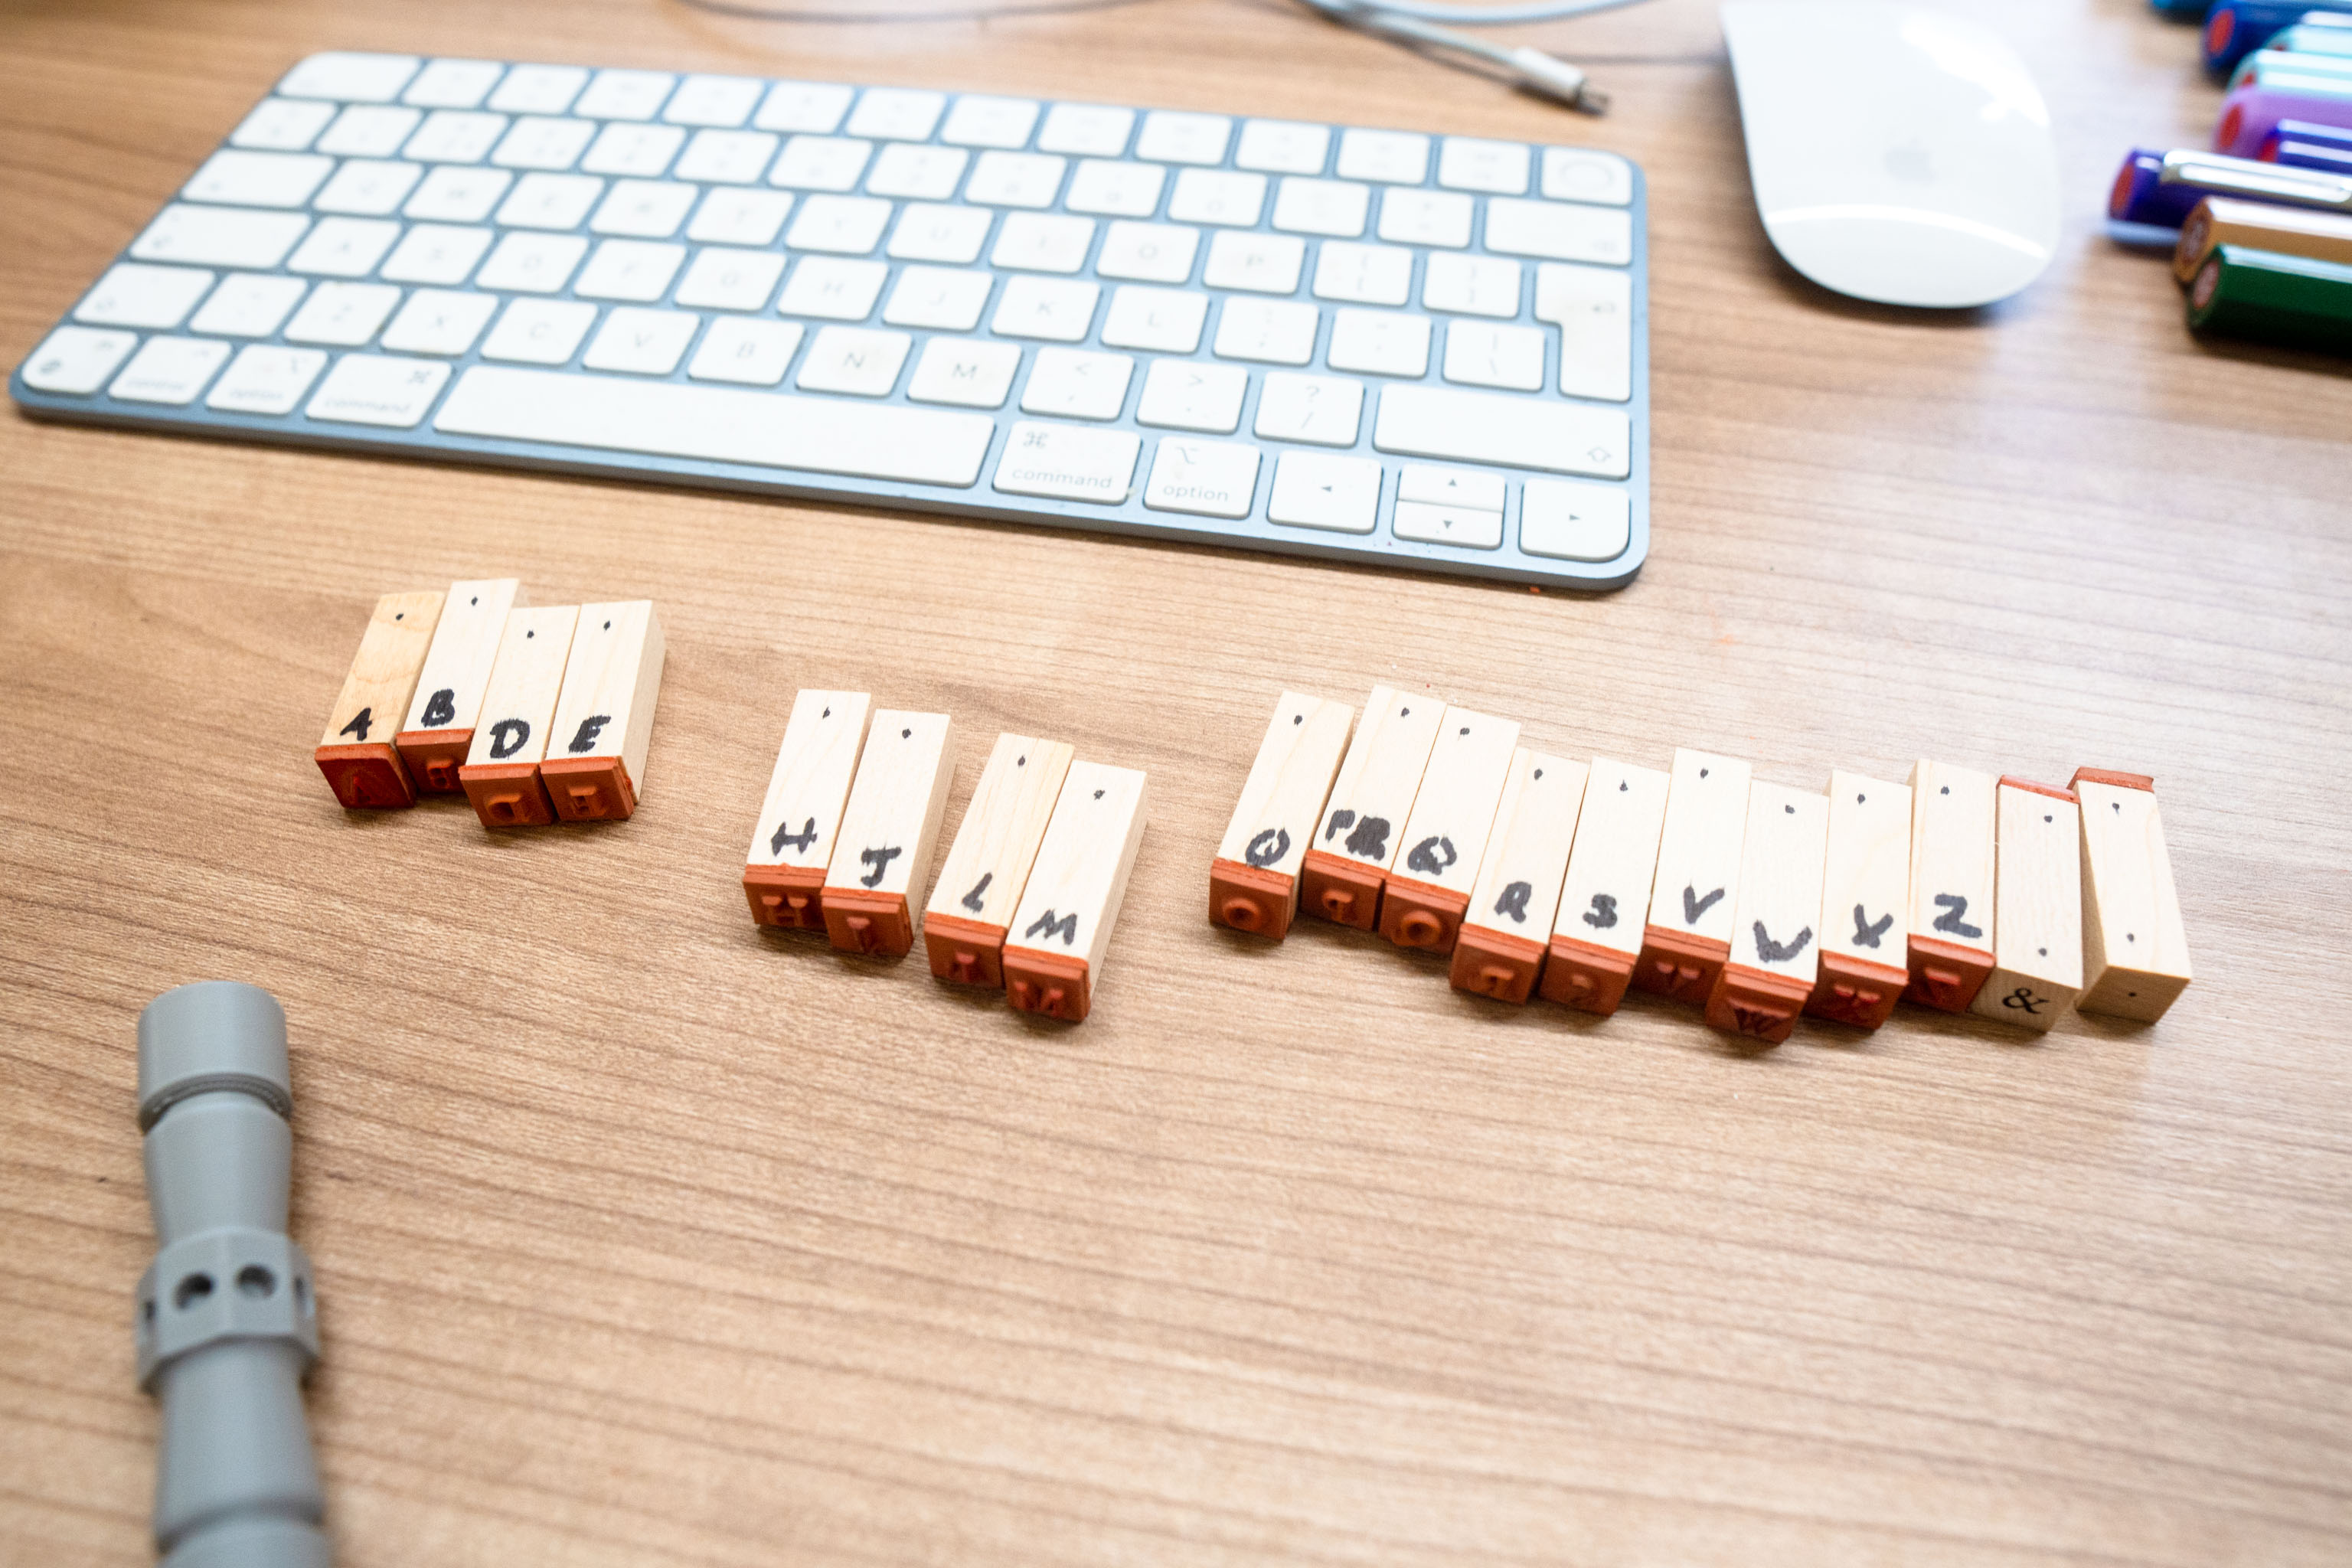
Which left me with the question of what to do with the large sheets I'd just stamped. And the normal solution, cut them up into postcards to I can send them to people.
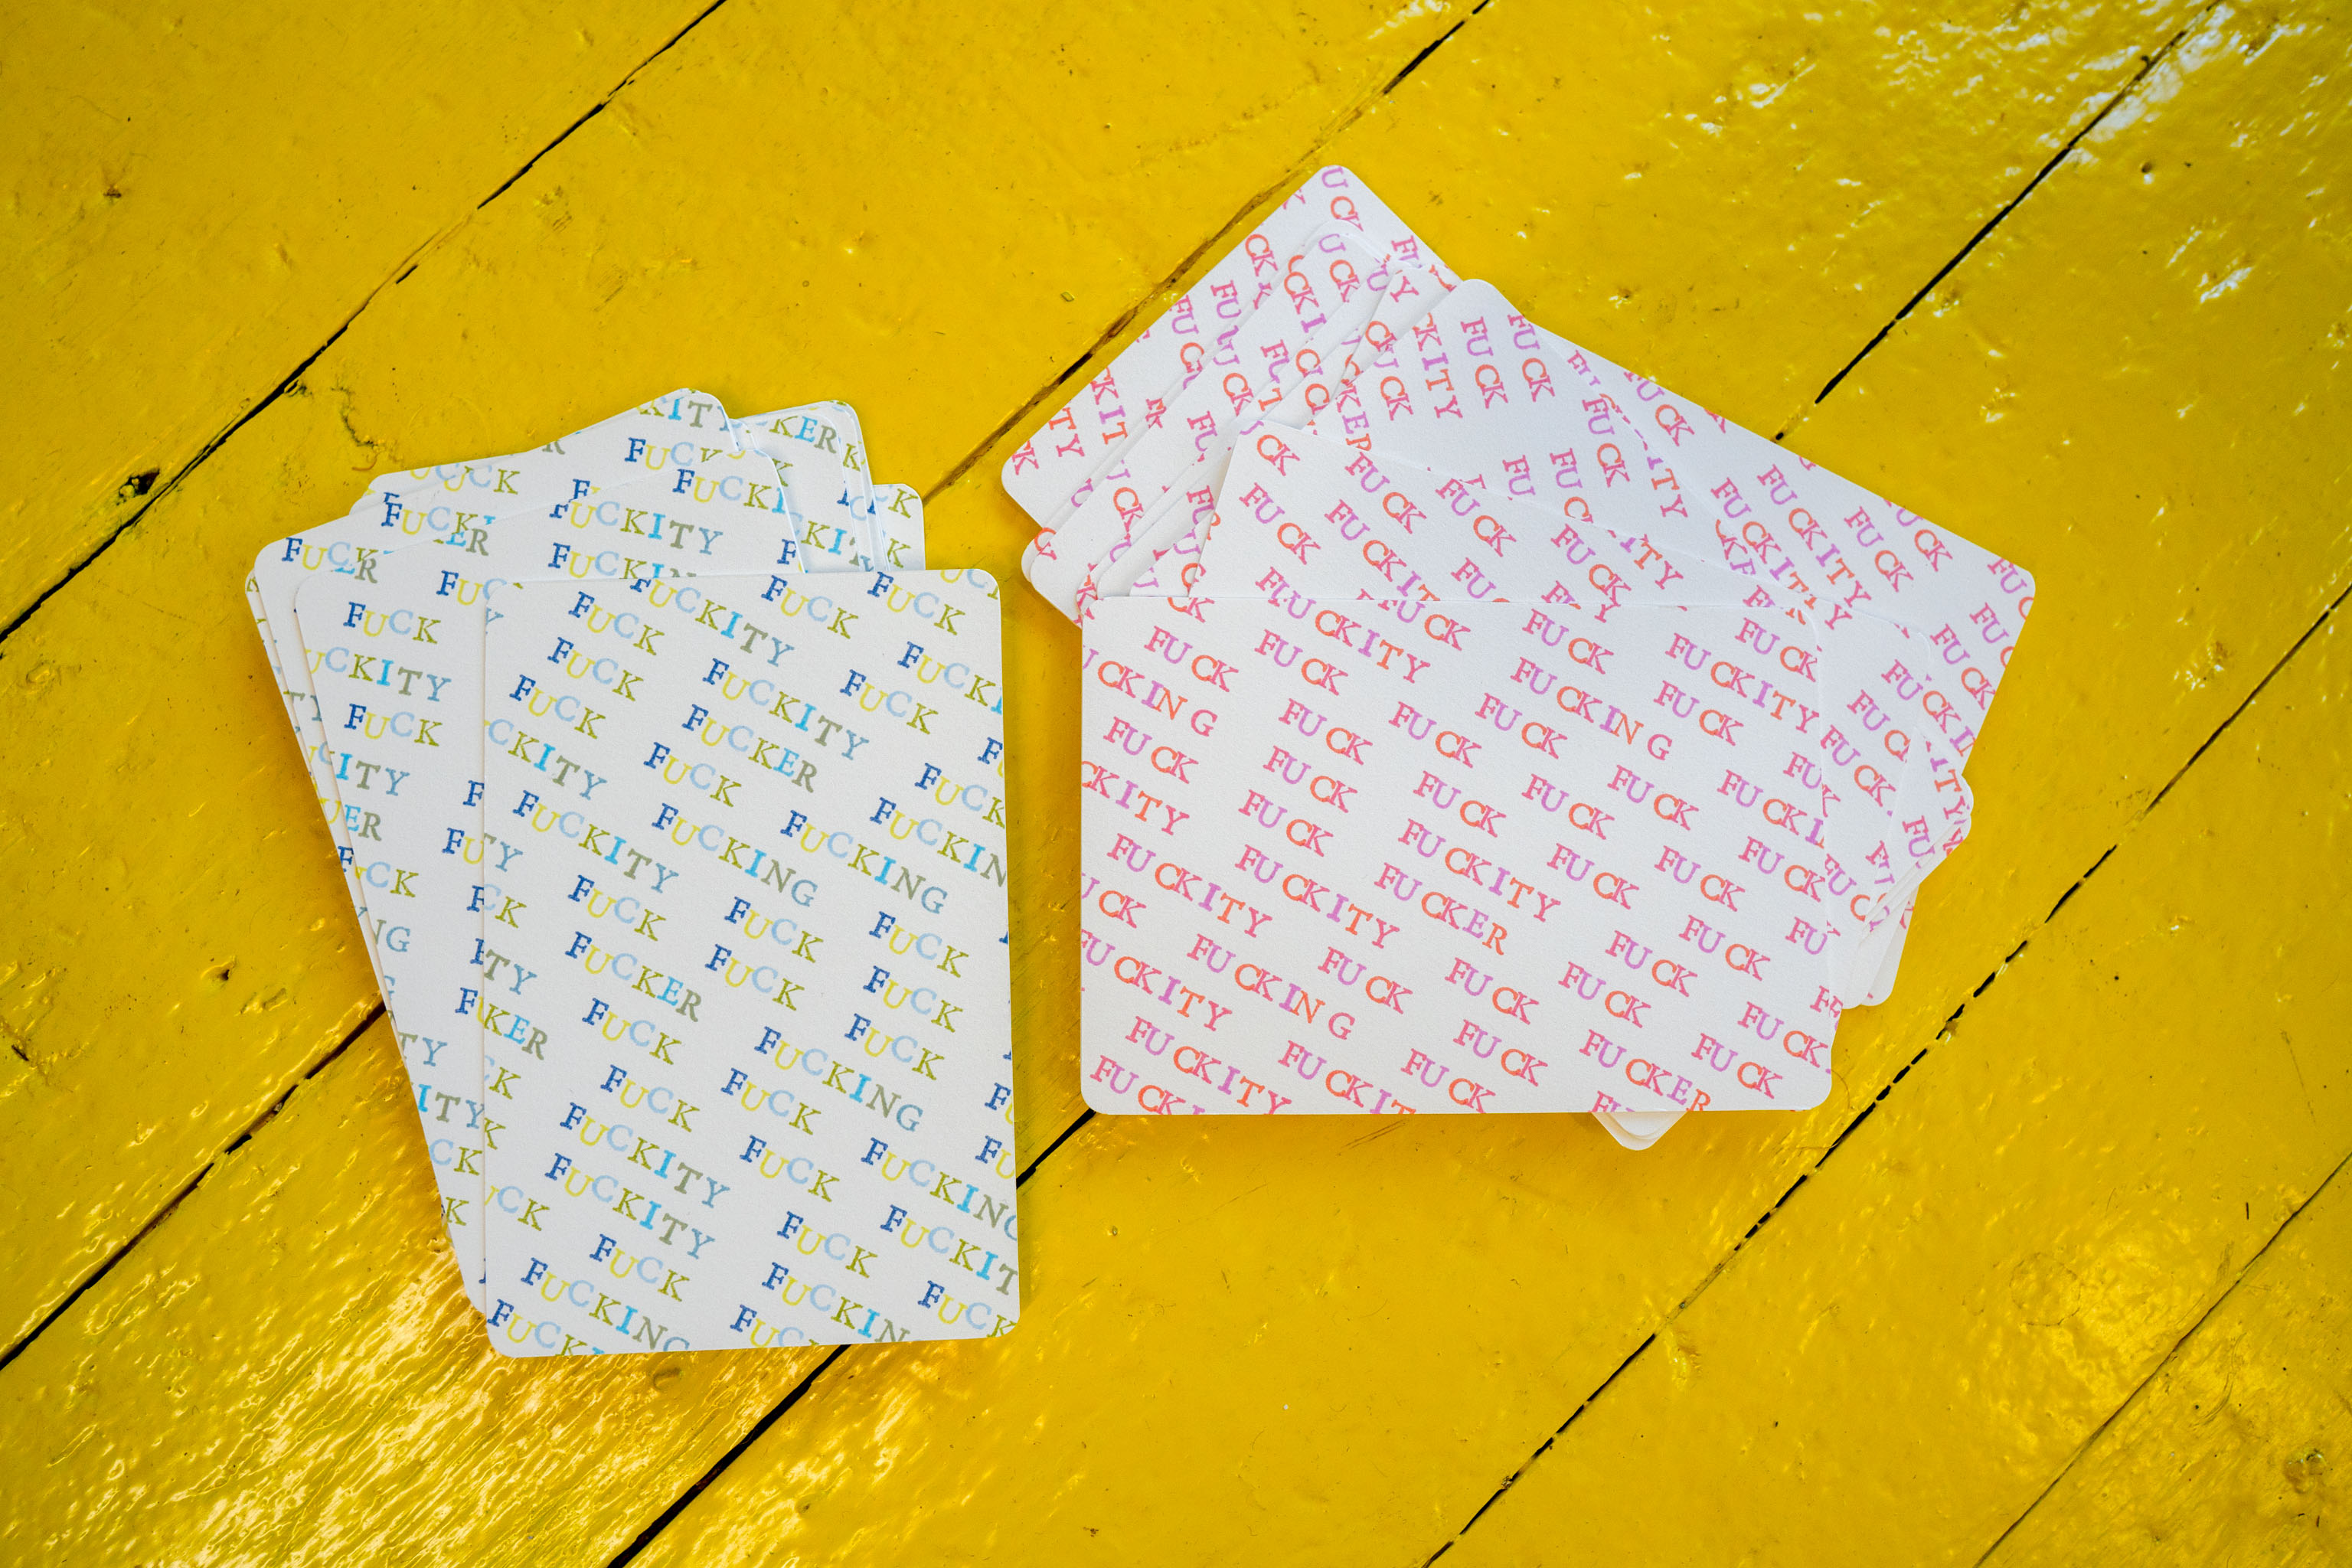
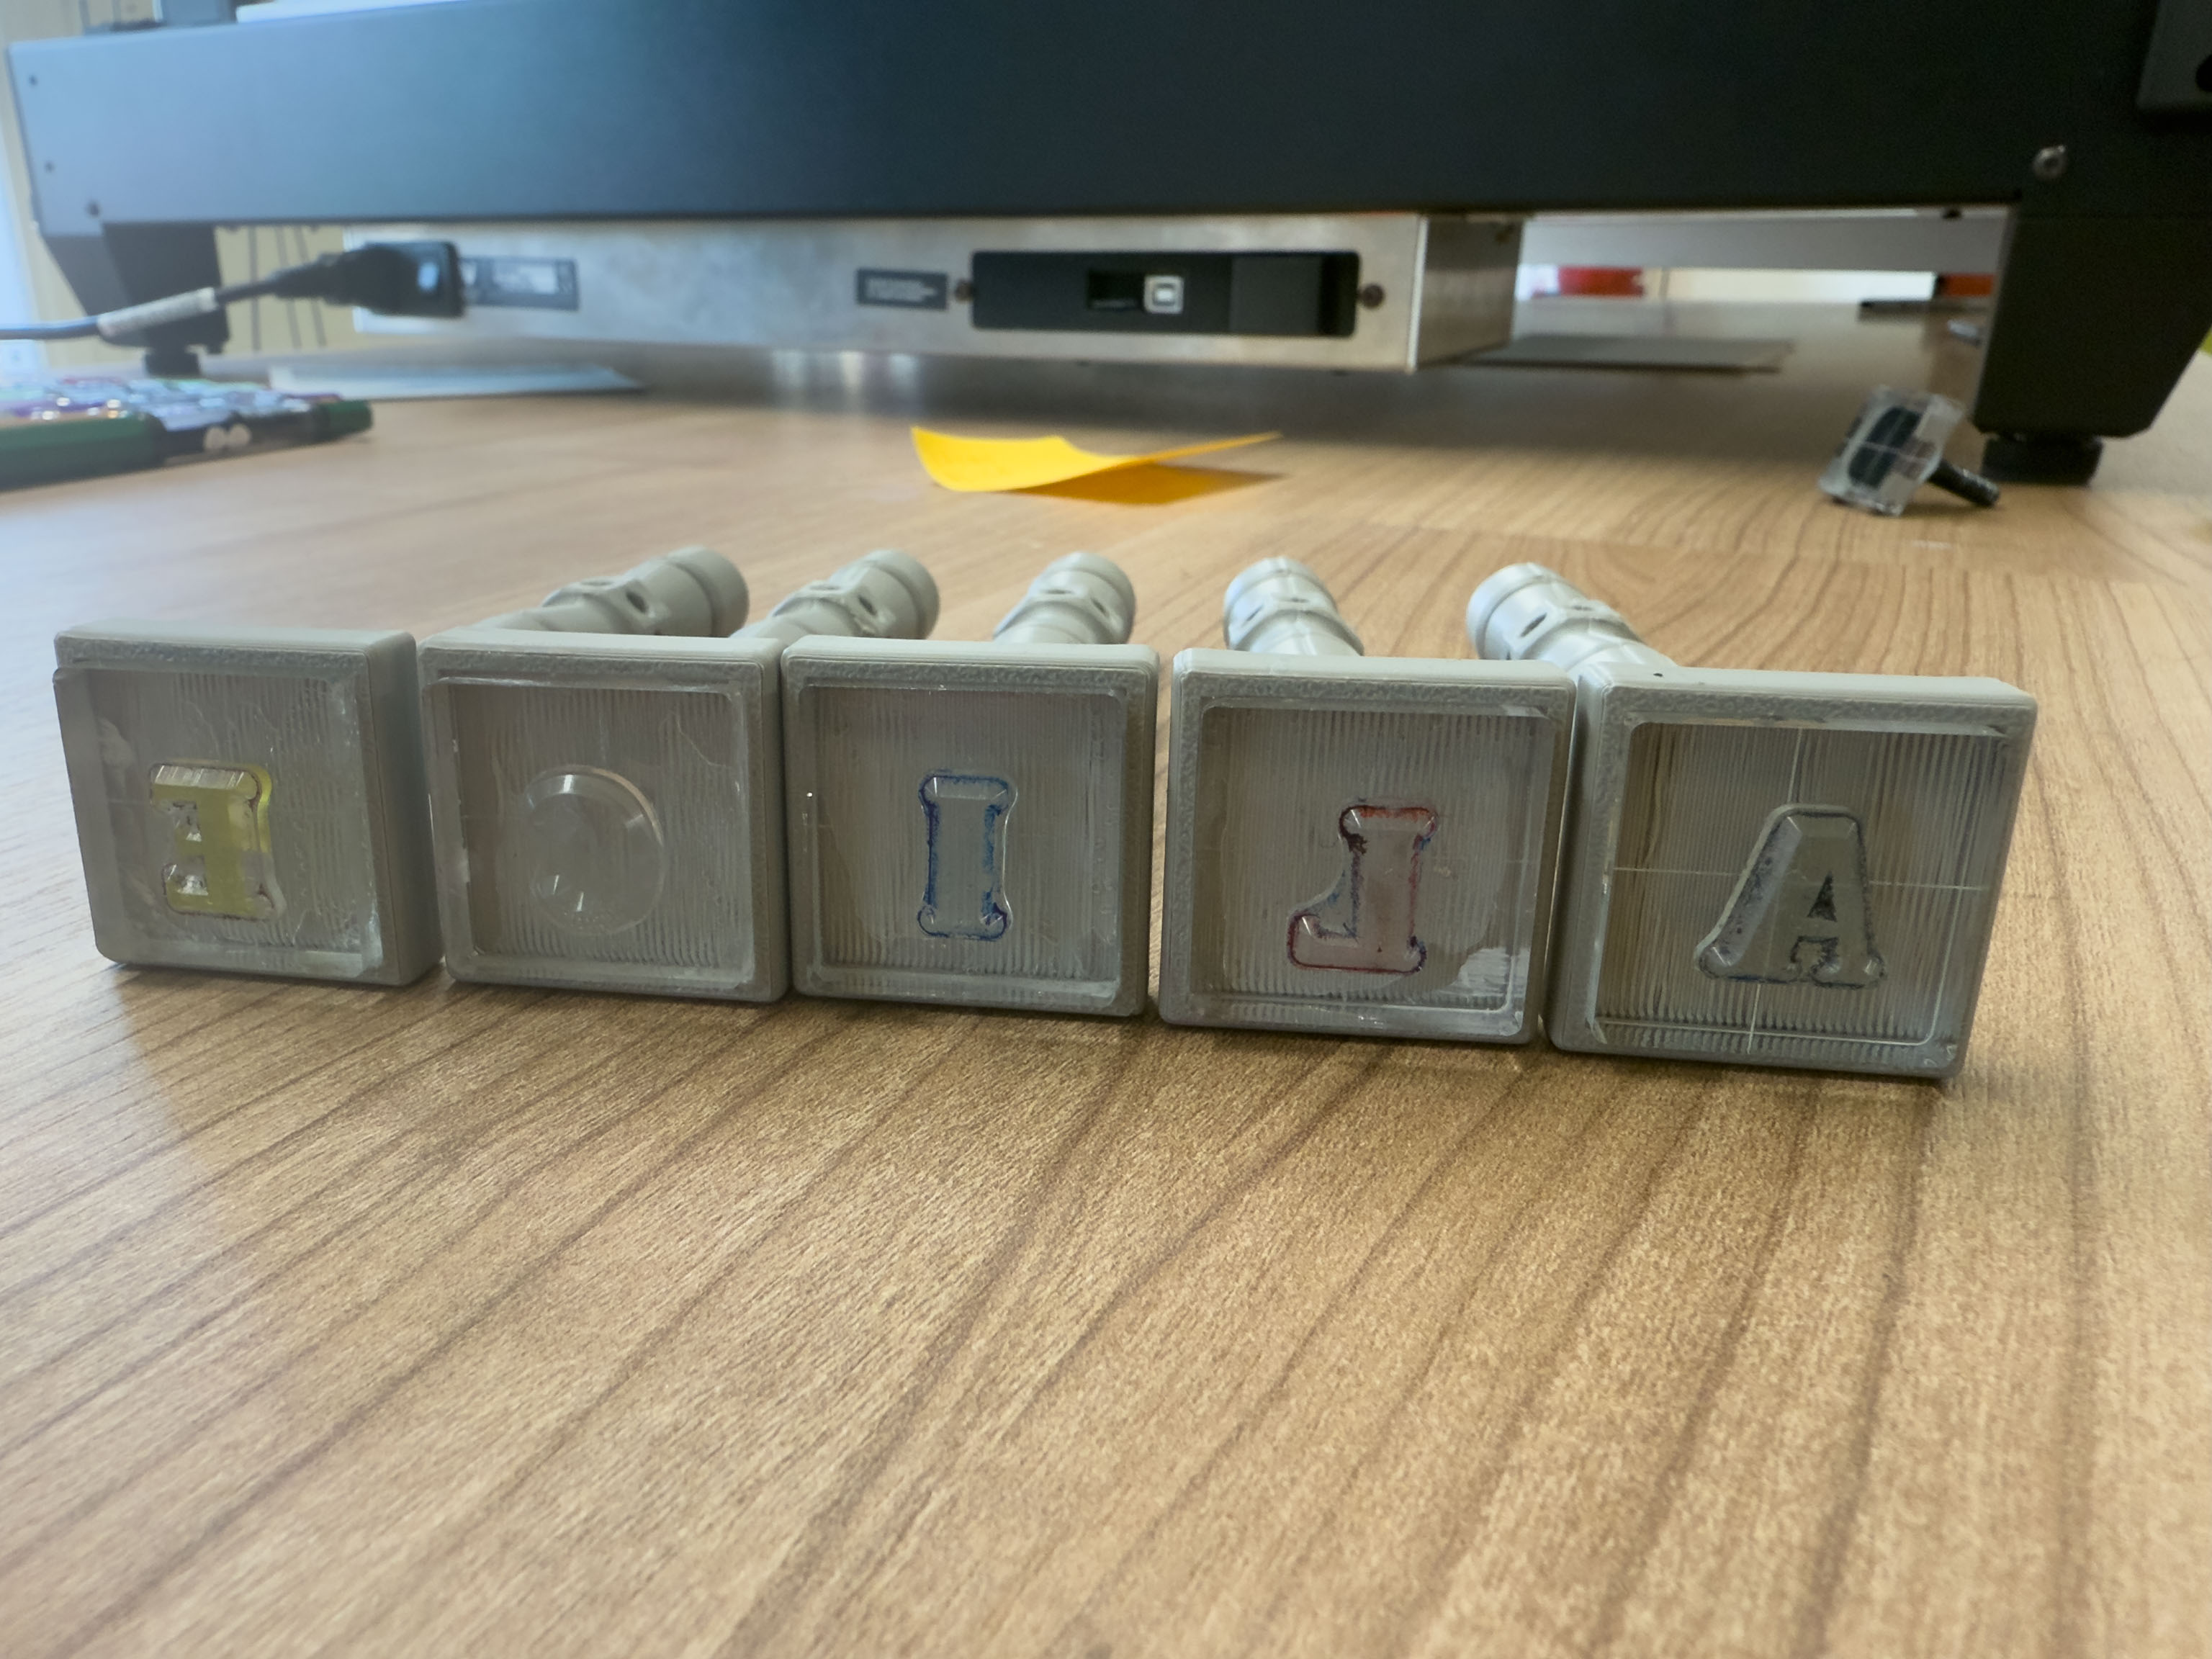
The problem with the letter stamps is once you separate them, they become very unruly and hard to control.
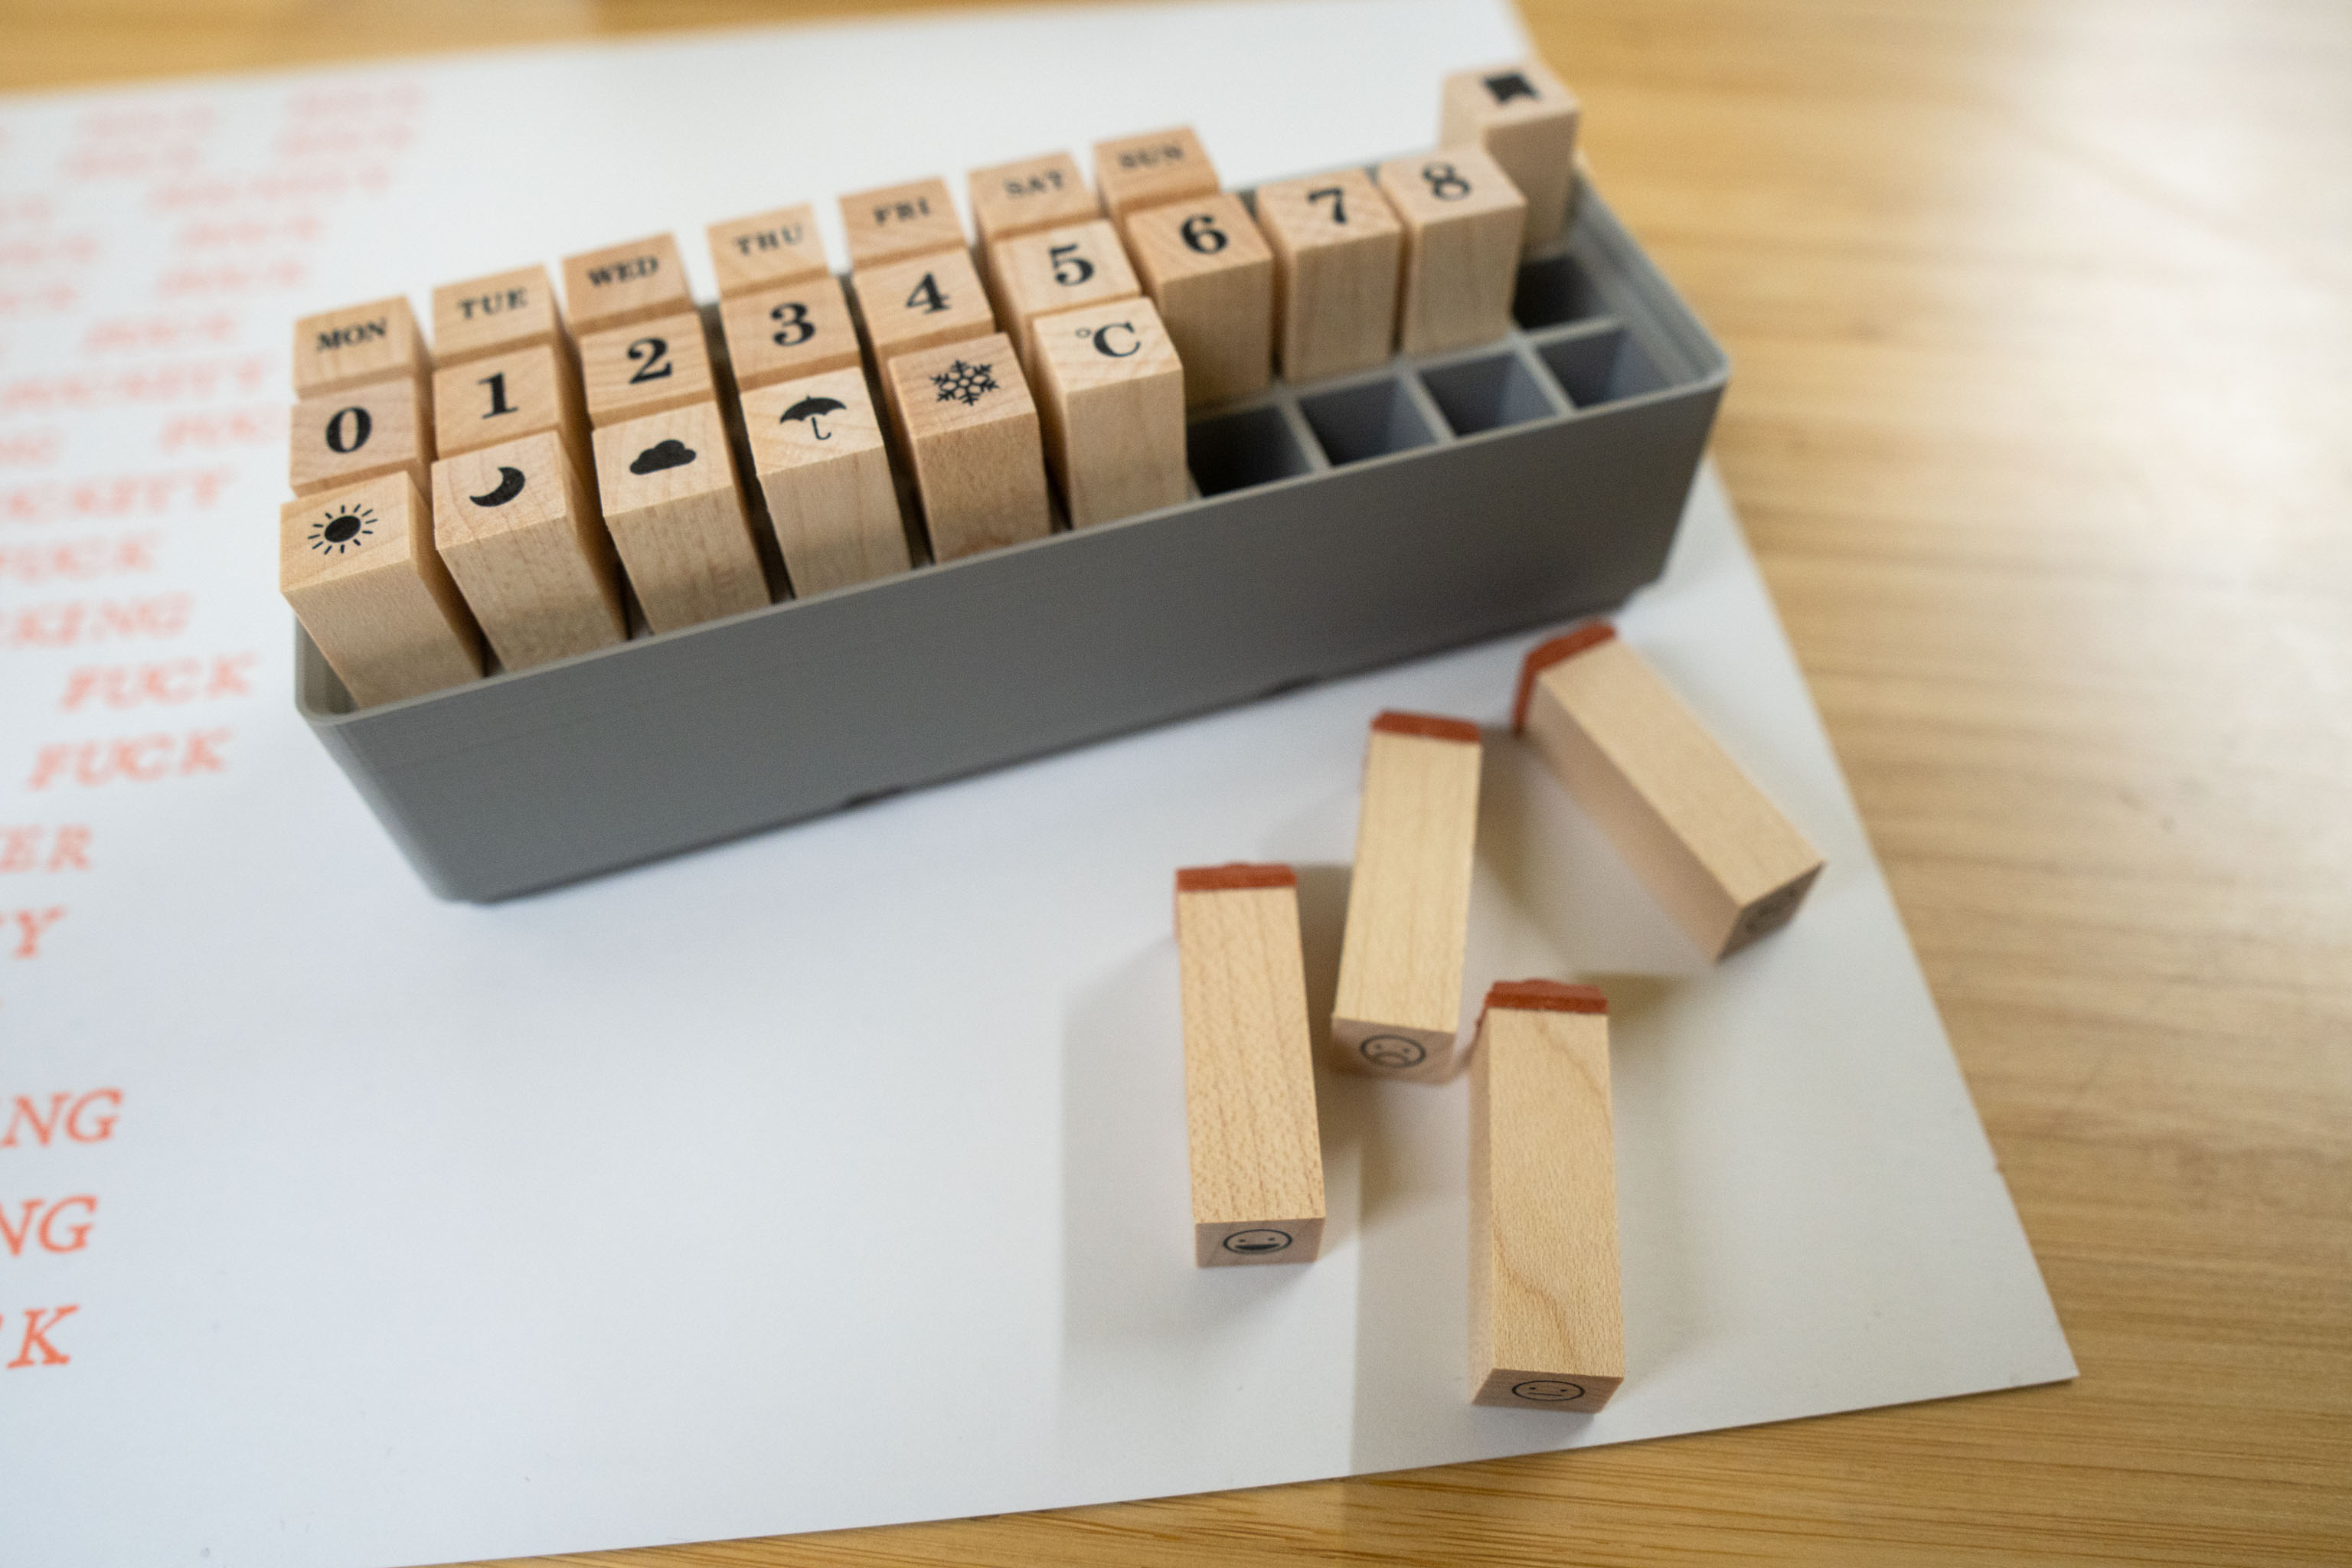
Back to the 3d printer again had a workable solution which keeps them nice and tidy in the draw.
Trying different colours and a different orientation portrait rather than landscape.
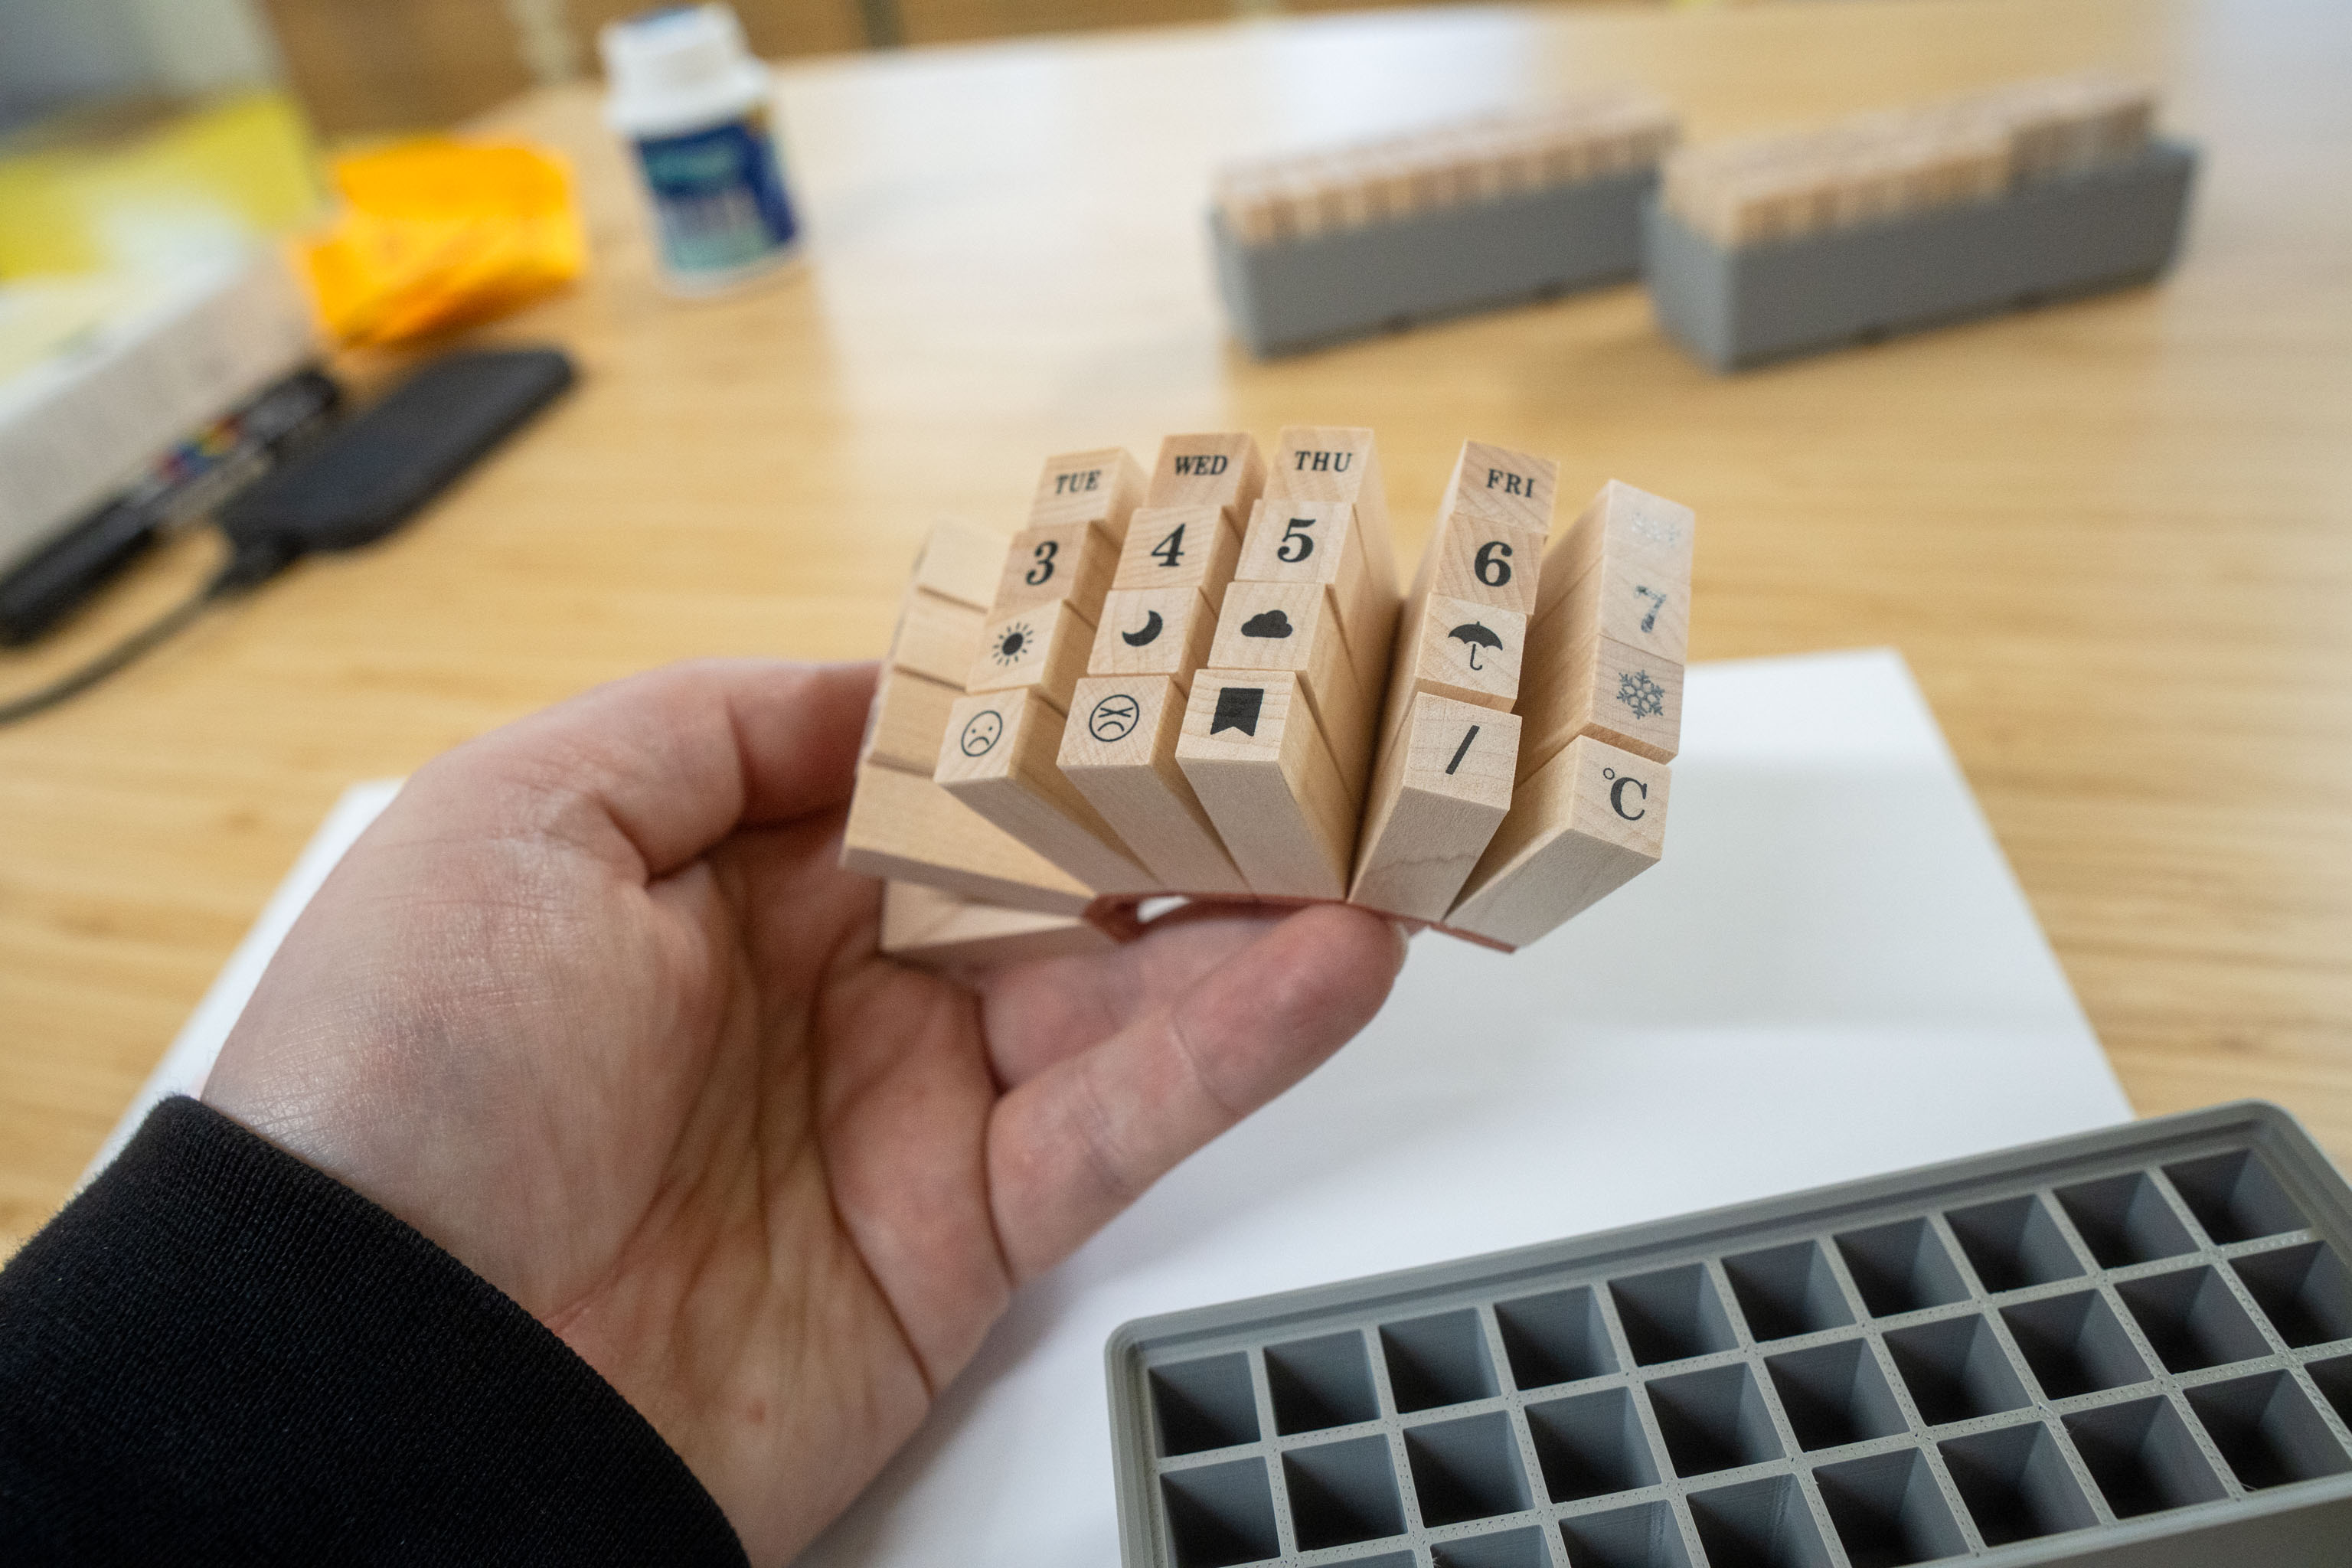
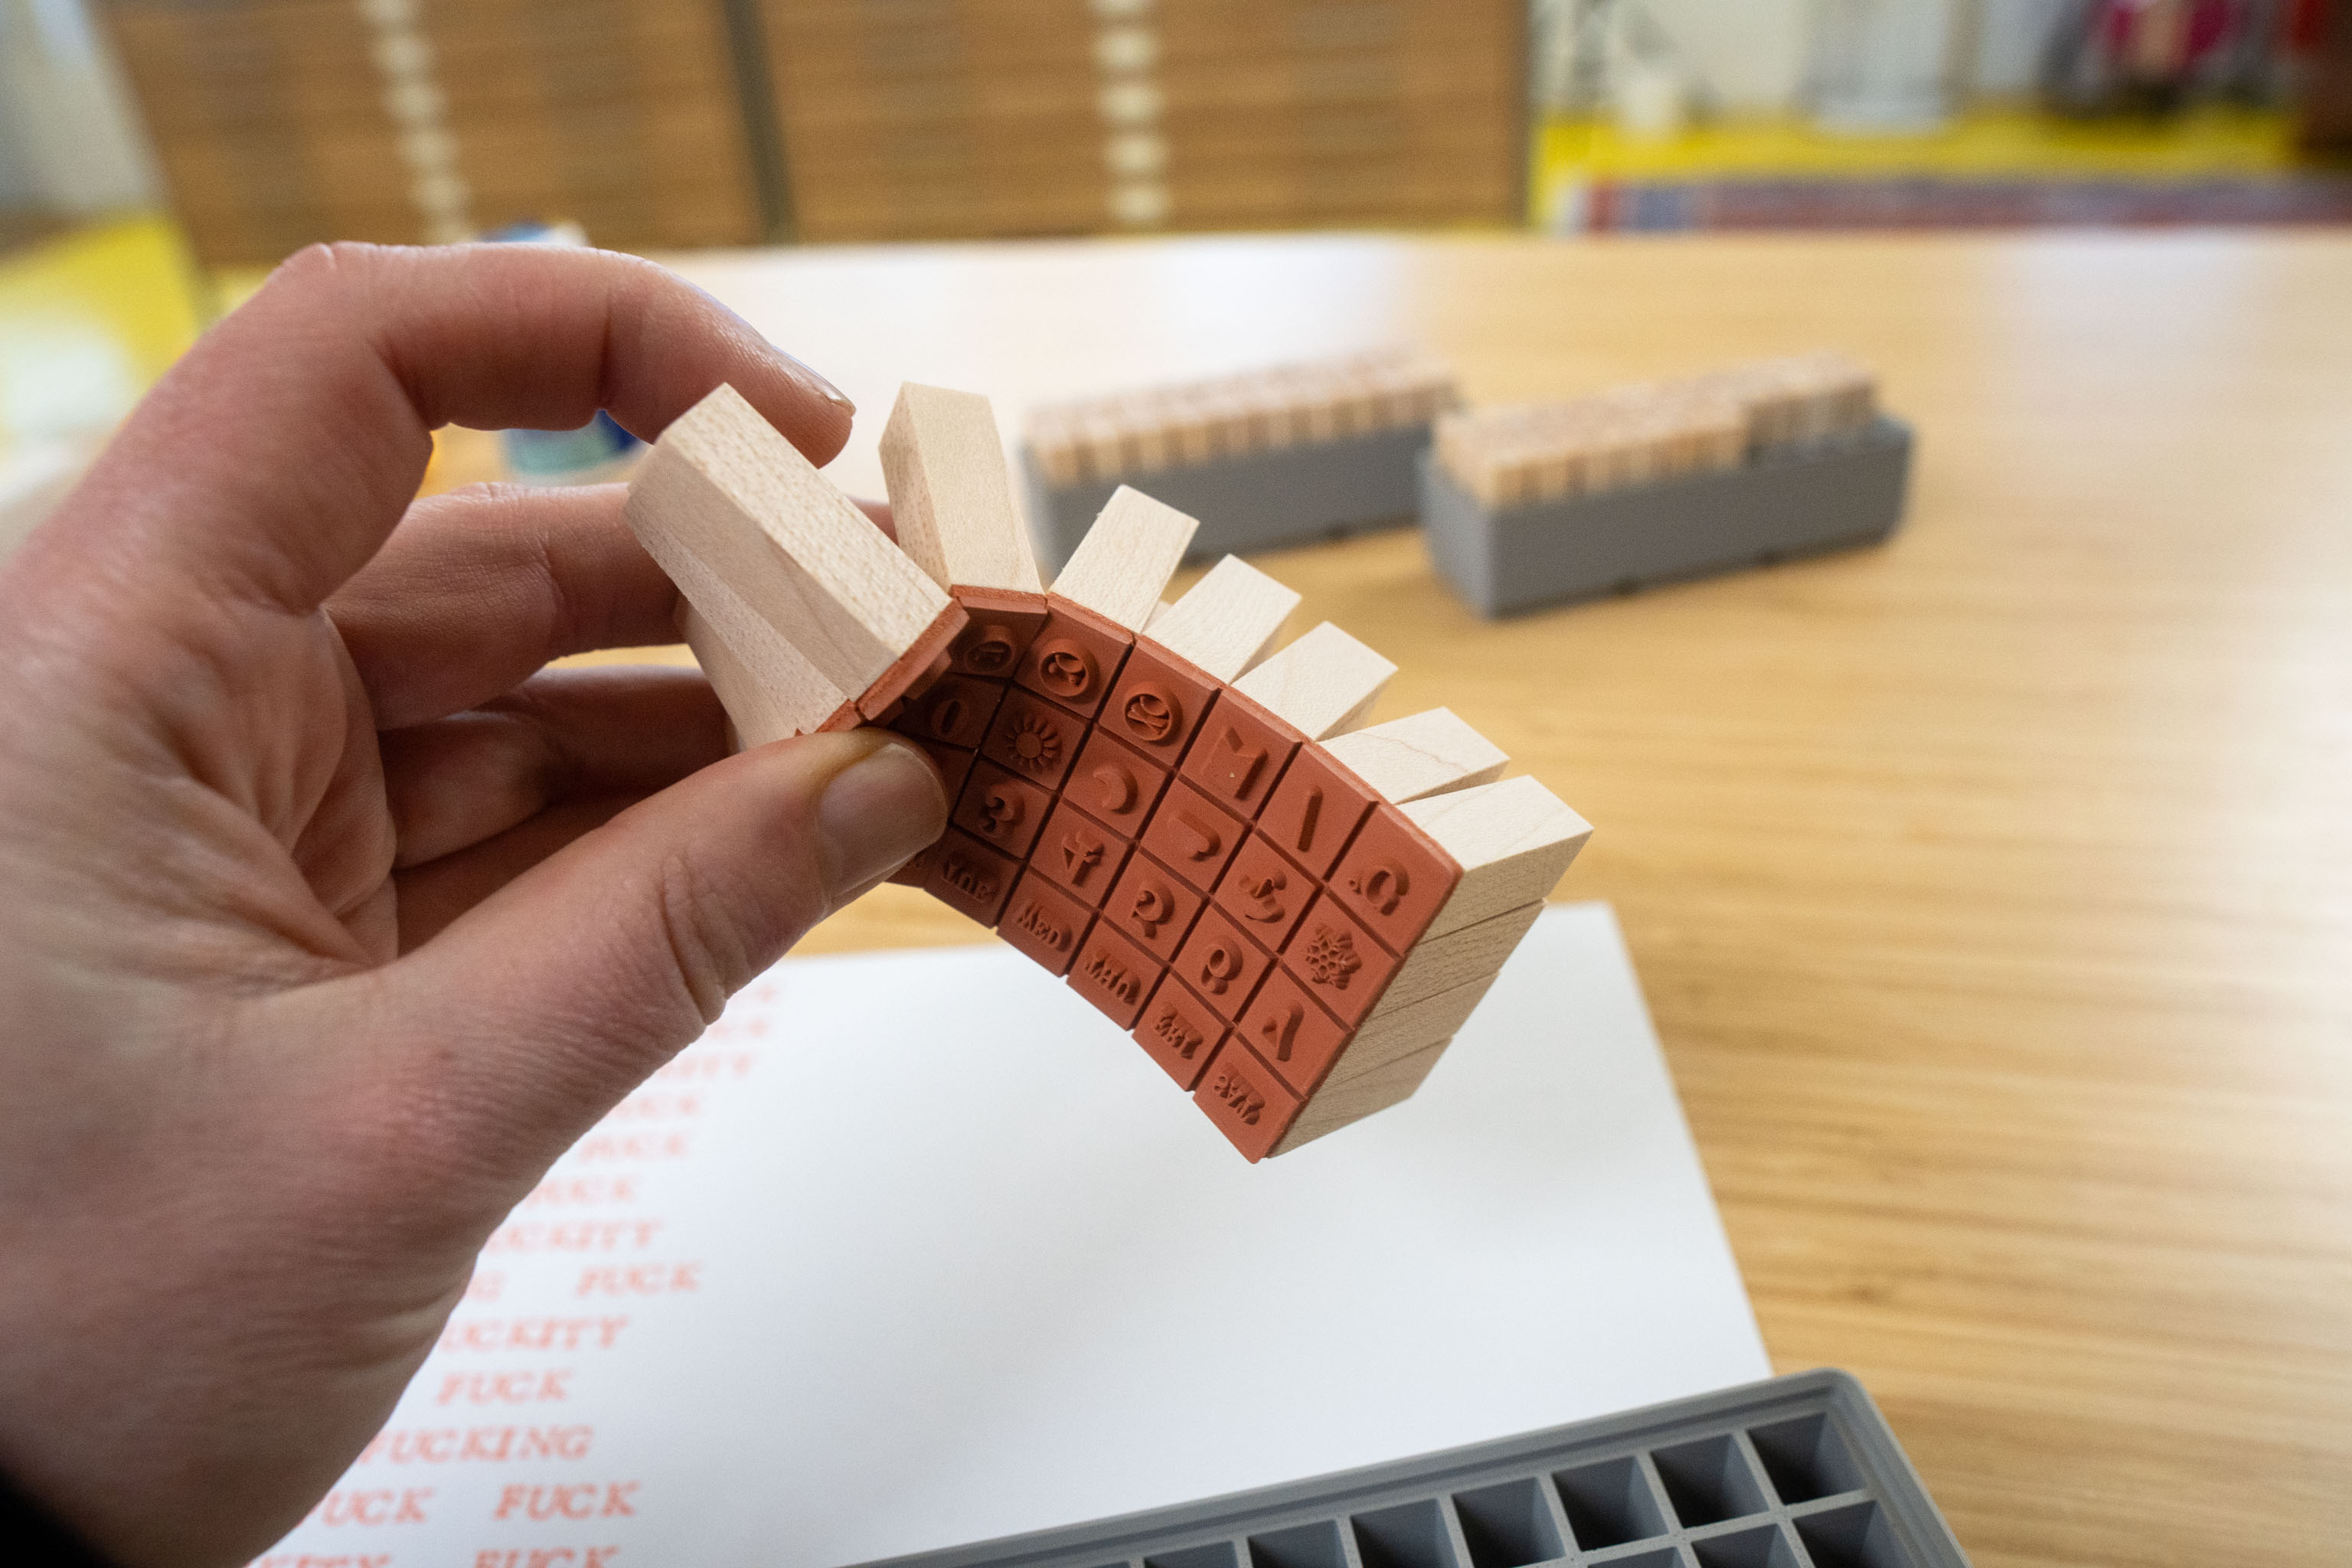
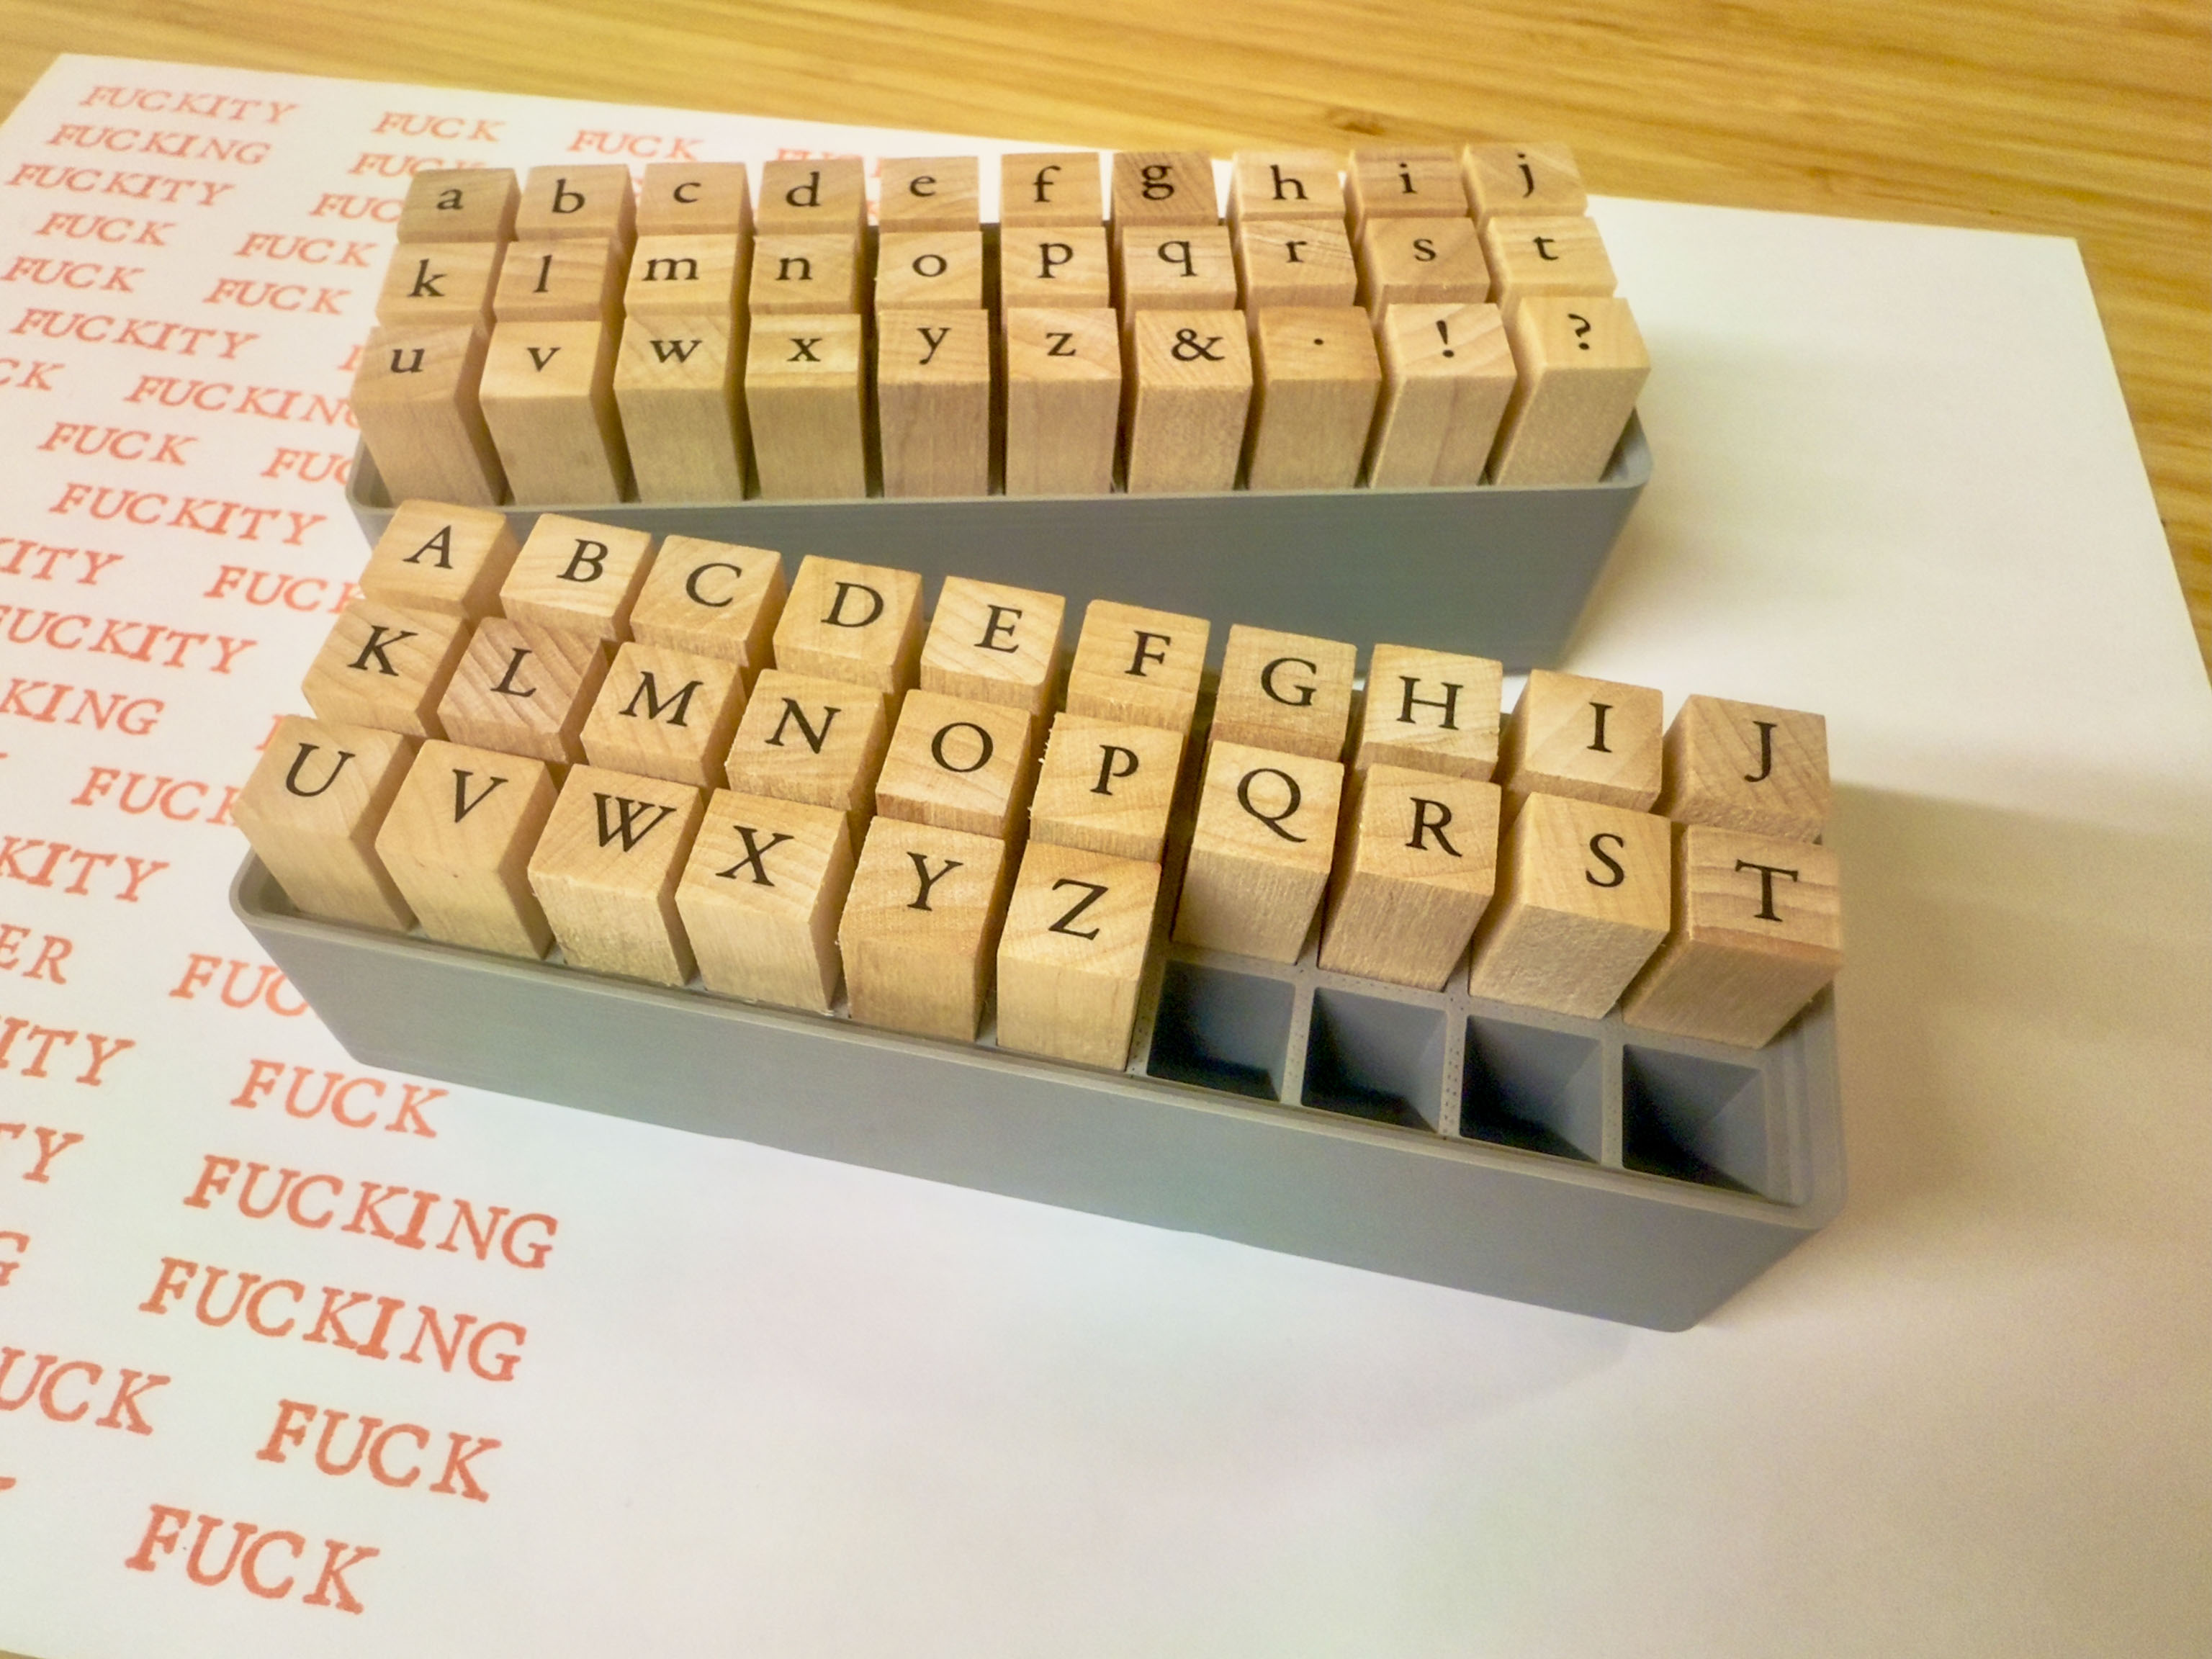
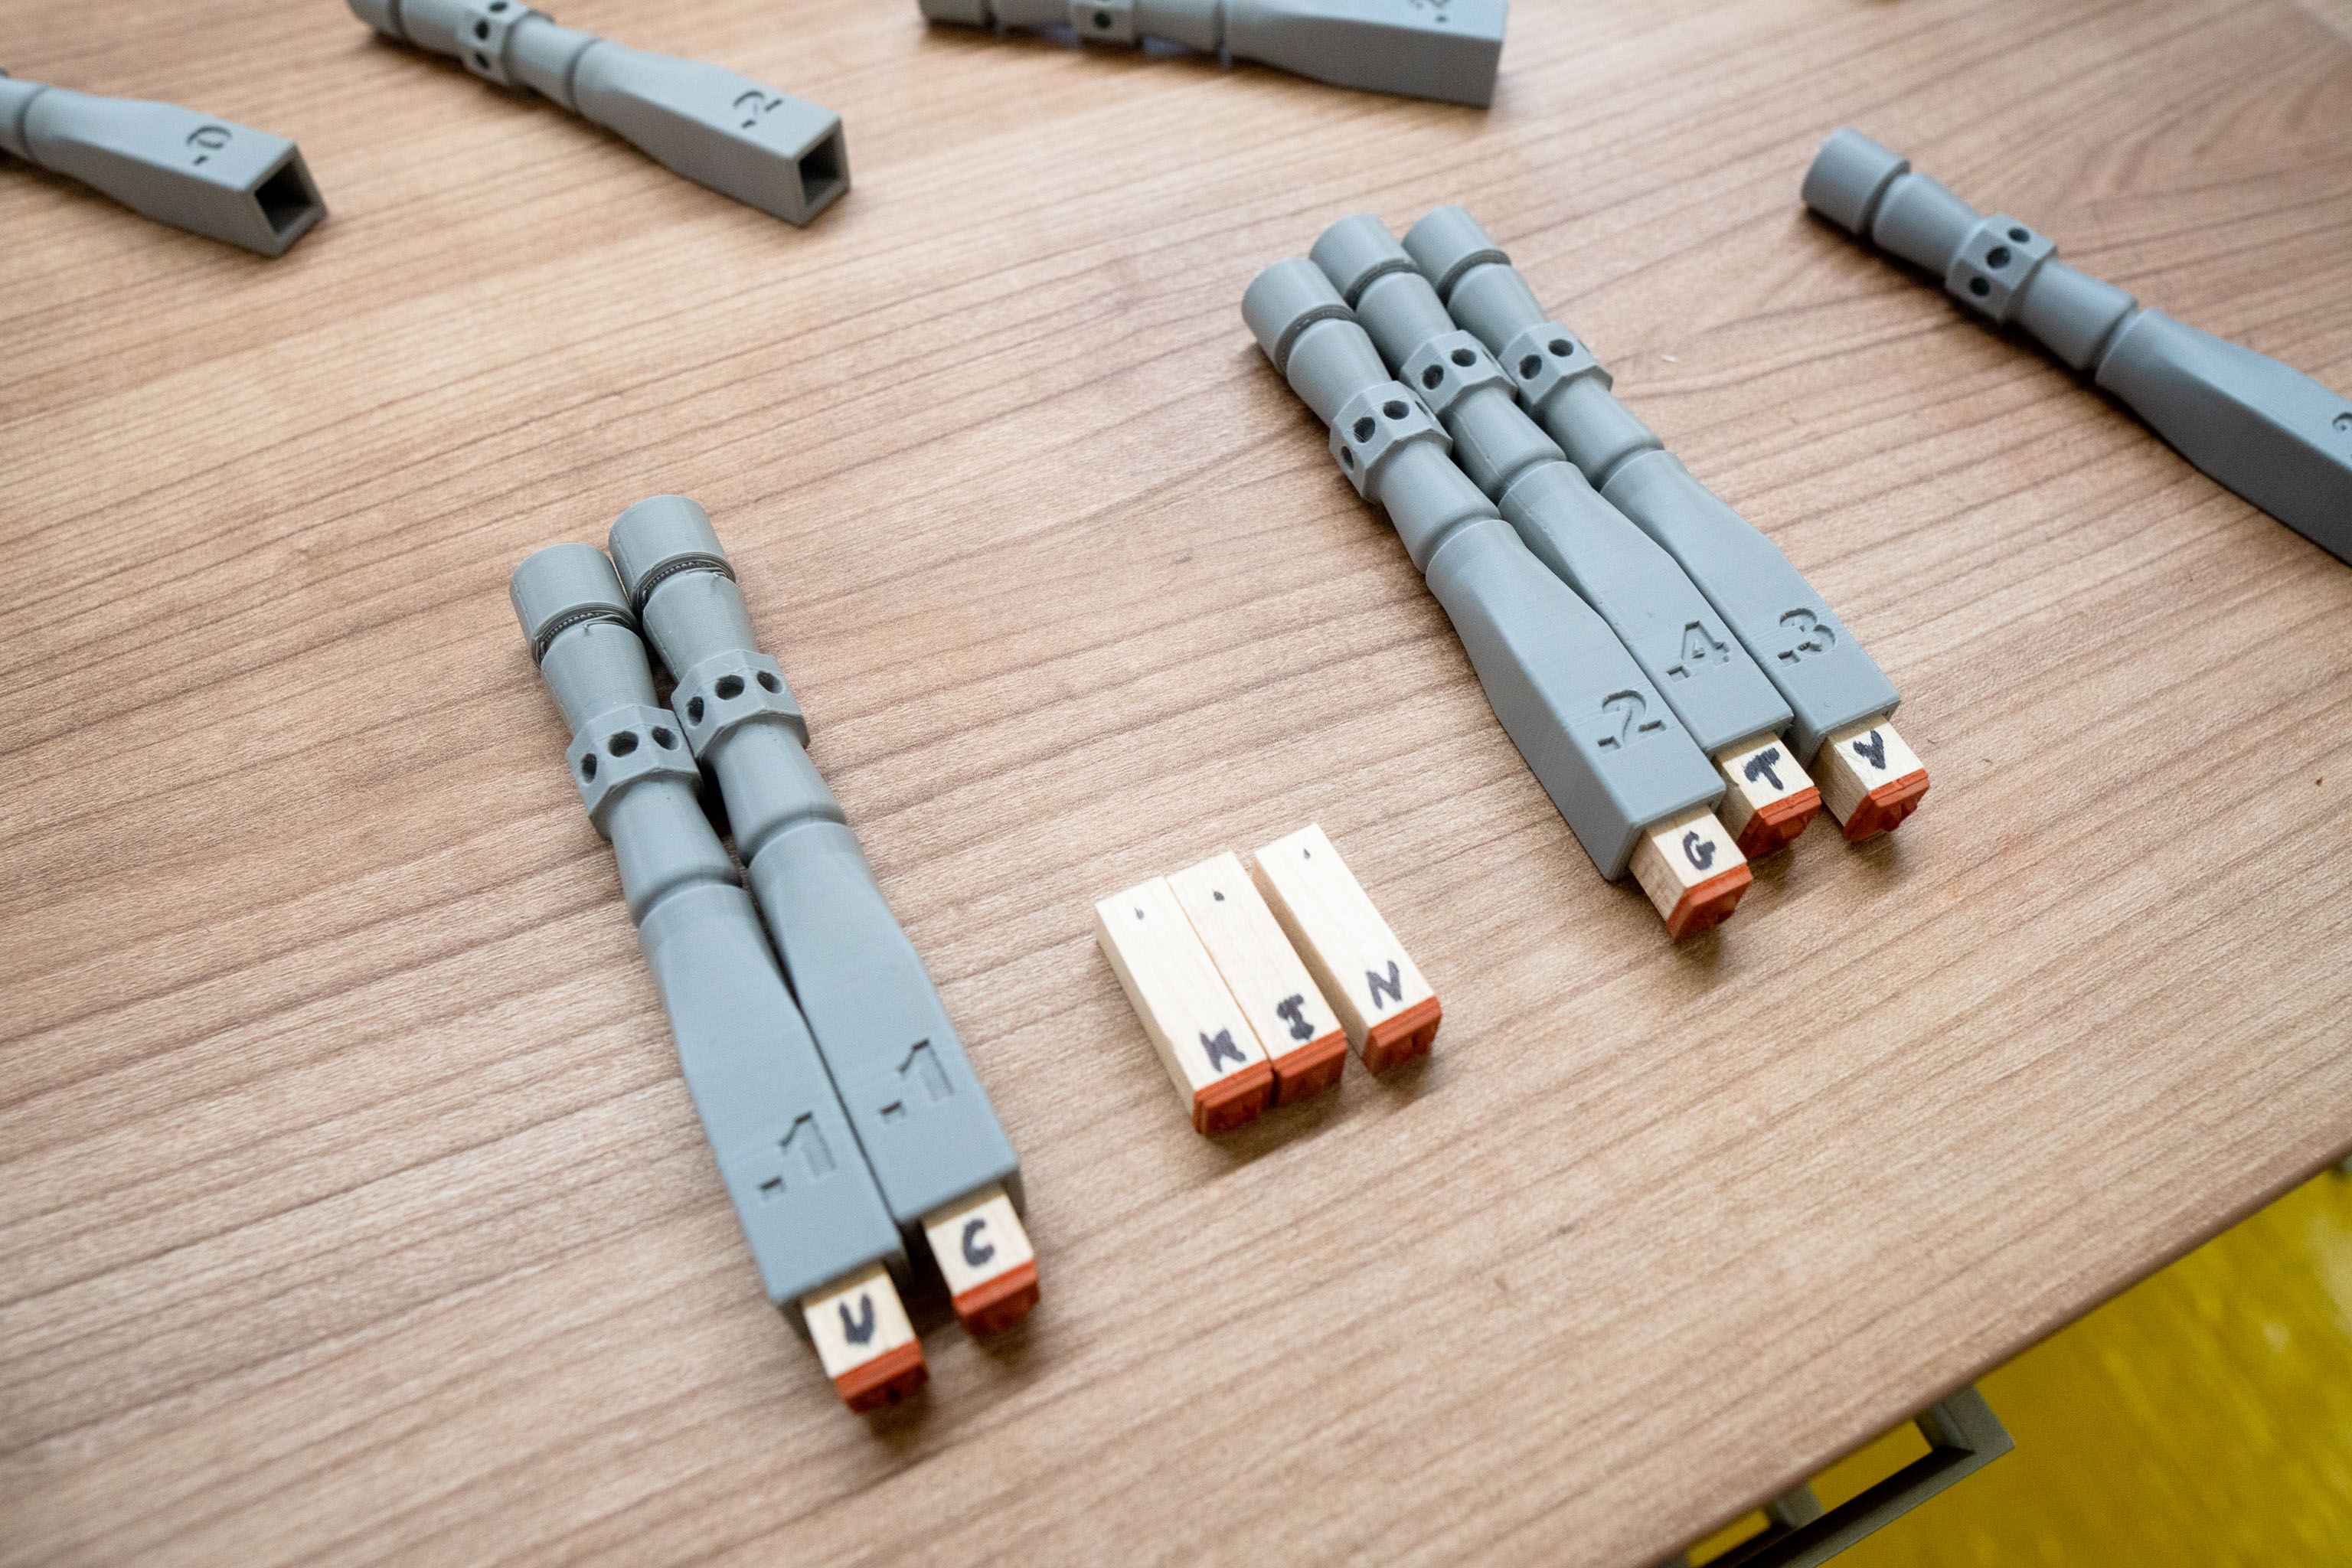
So I decided I wanted to start using these small little square stamps just as a change from the ones that are stuck on the acrylic blocks. It reminded me a lot of a letterpress machine where you have to lay out all the letters first and then you stamp it, but in this case, I only have one of each letter, and it stamps them out one at a time, which, because I'm controlling the code, takes less time to set up but more time to print individual ones. But then I need less of each letter.
So I 3D modelled these little holders and went through a couple of iterations until I found something that I could slot into the drawing machine and then I've also got these little holes on the stem that allow me to rotate it 45 degrees and lock it into place.
Not all the stamps are quite the same size, so I had to print subtle variations that were each a mm difference. Marked by the .1, .2, .3 & .4 which are fractions of mm larger. The wood will expand and contract throughout the year too, so it's not a one size fits all solution.
Am I childish? Yes.
Did it test the code worked? Also yes, so I'd count that as a win.


When the sun hits just right.
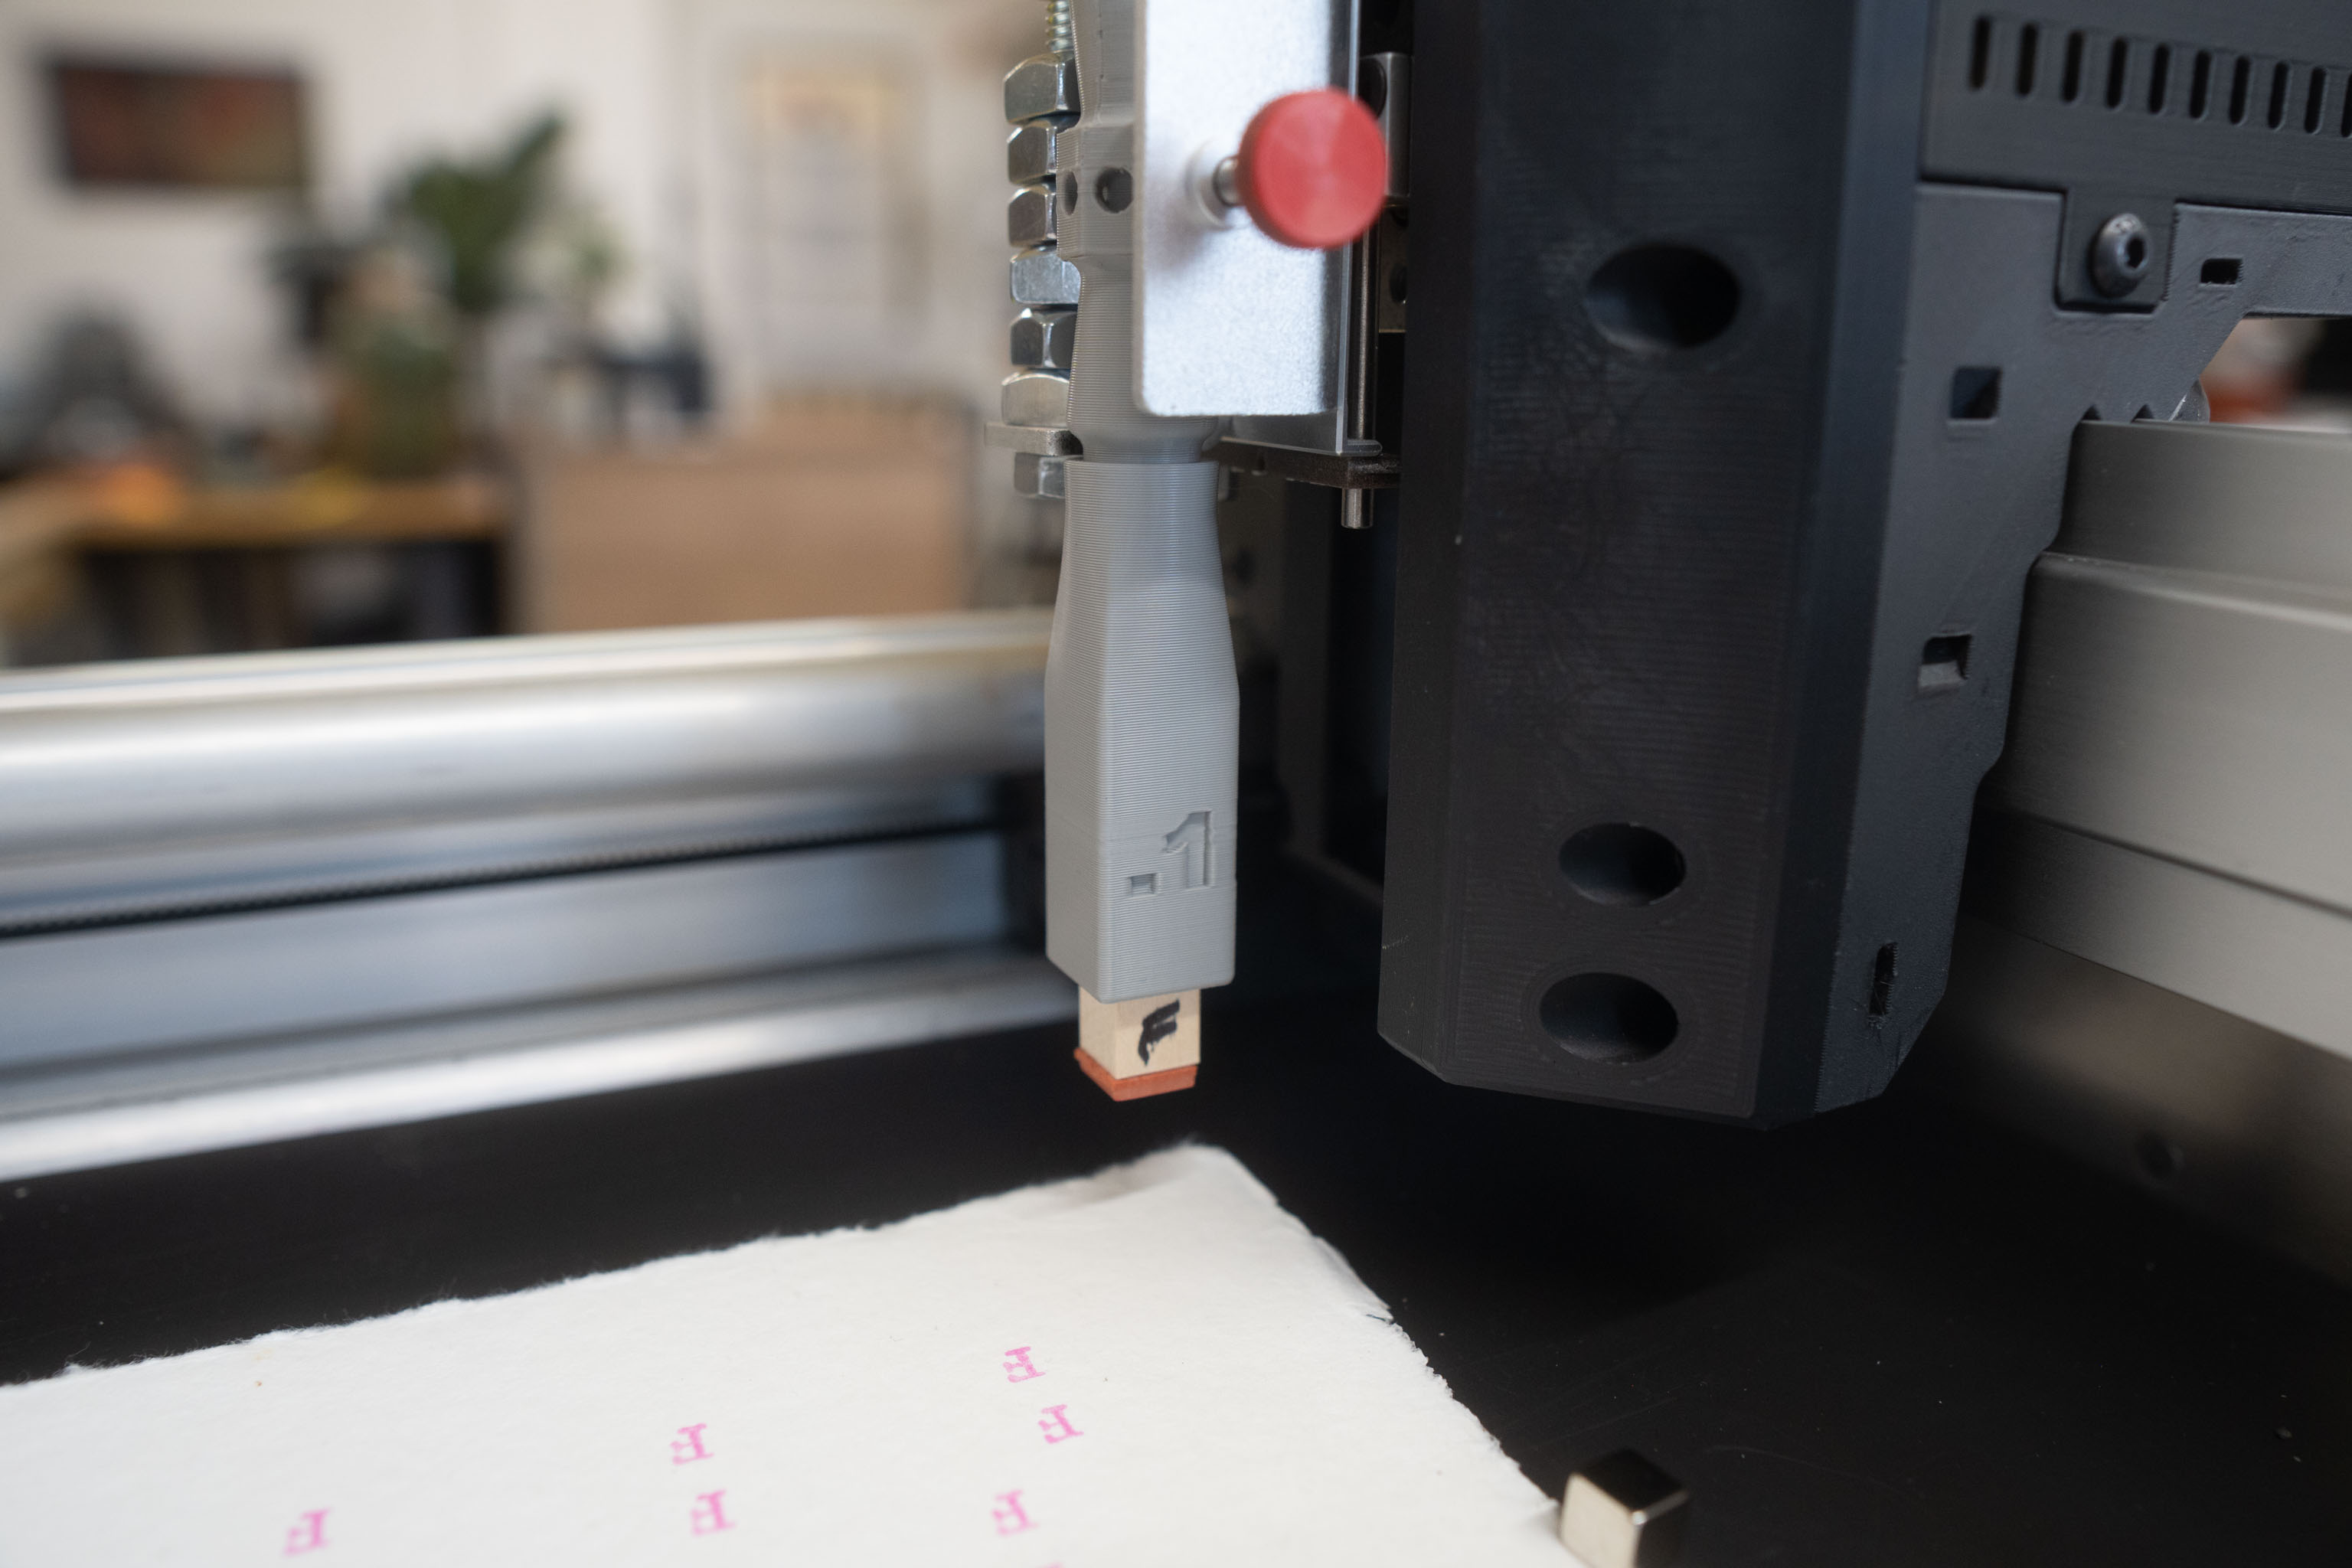
I should have gotten better photos, anyway, I designed and 3d printed (I have a 3d printer now btw) some better "pens" to go in the machine that have bases that snugly hold the acrylic squares that in turn hold the rubber stamps.
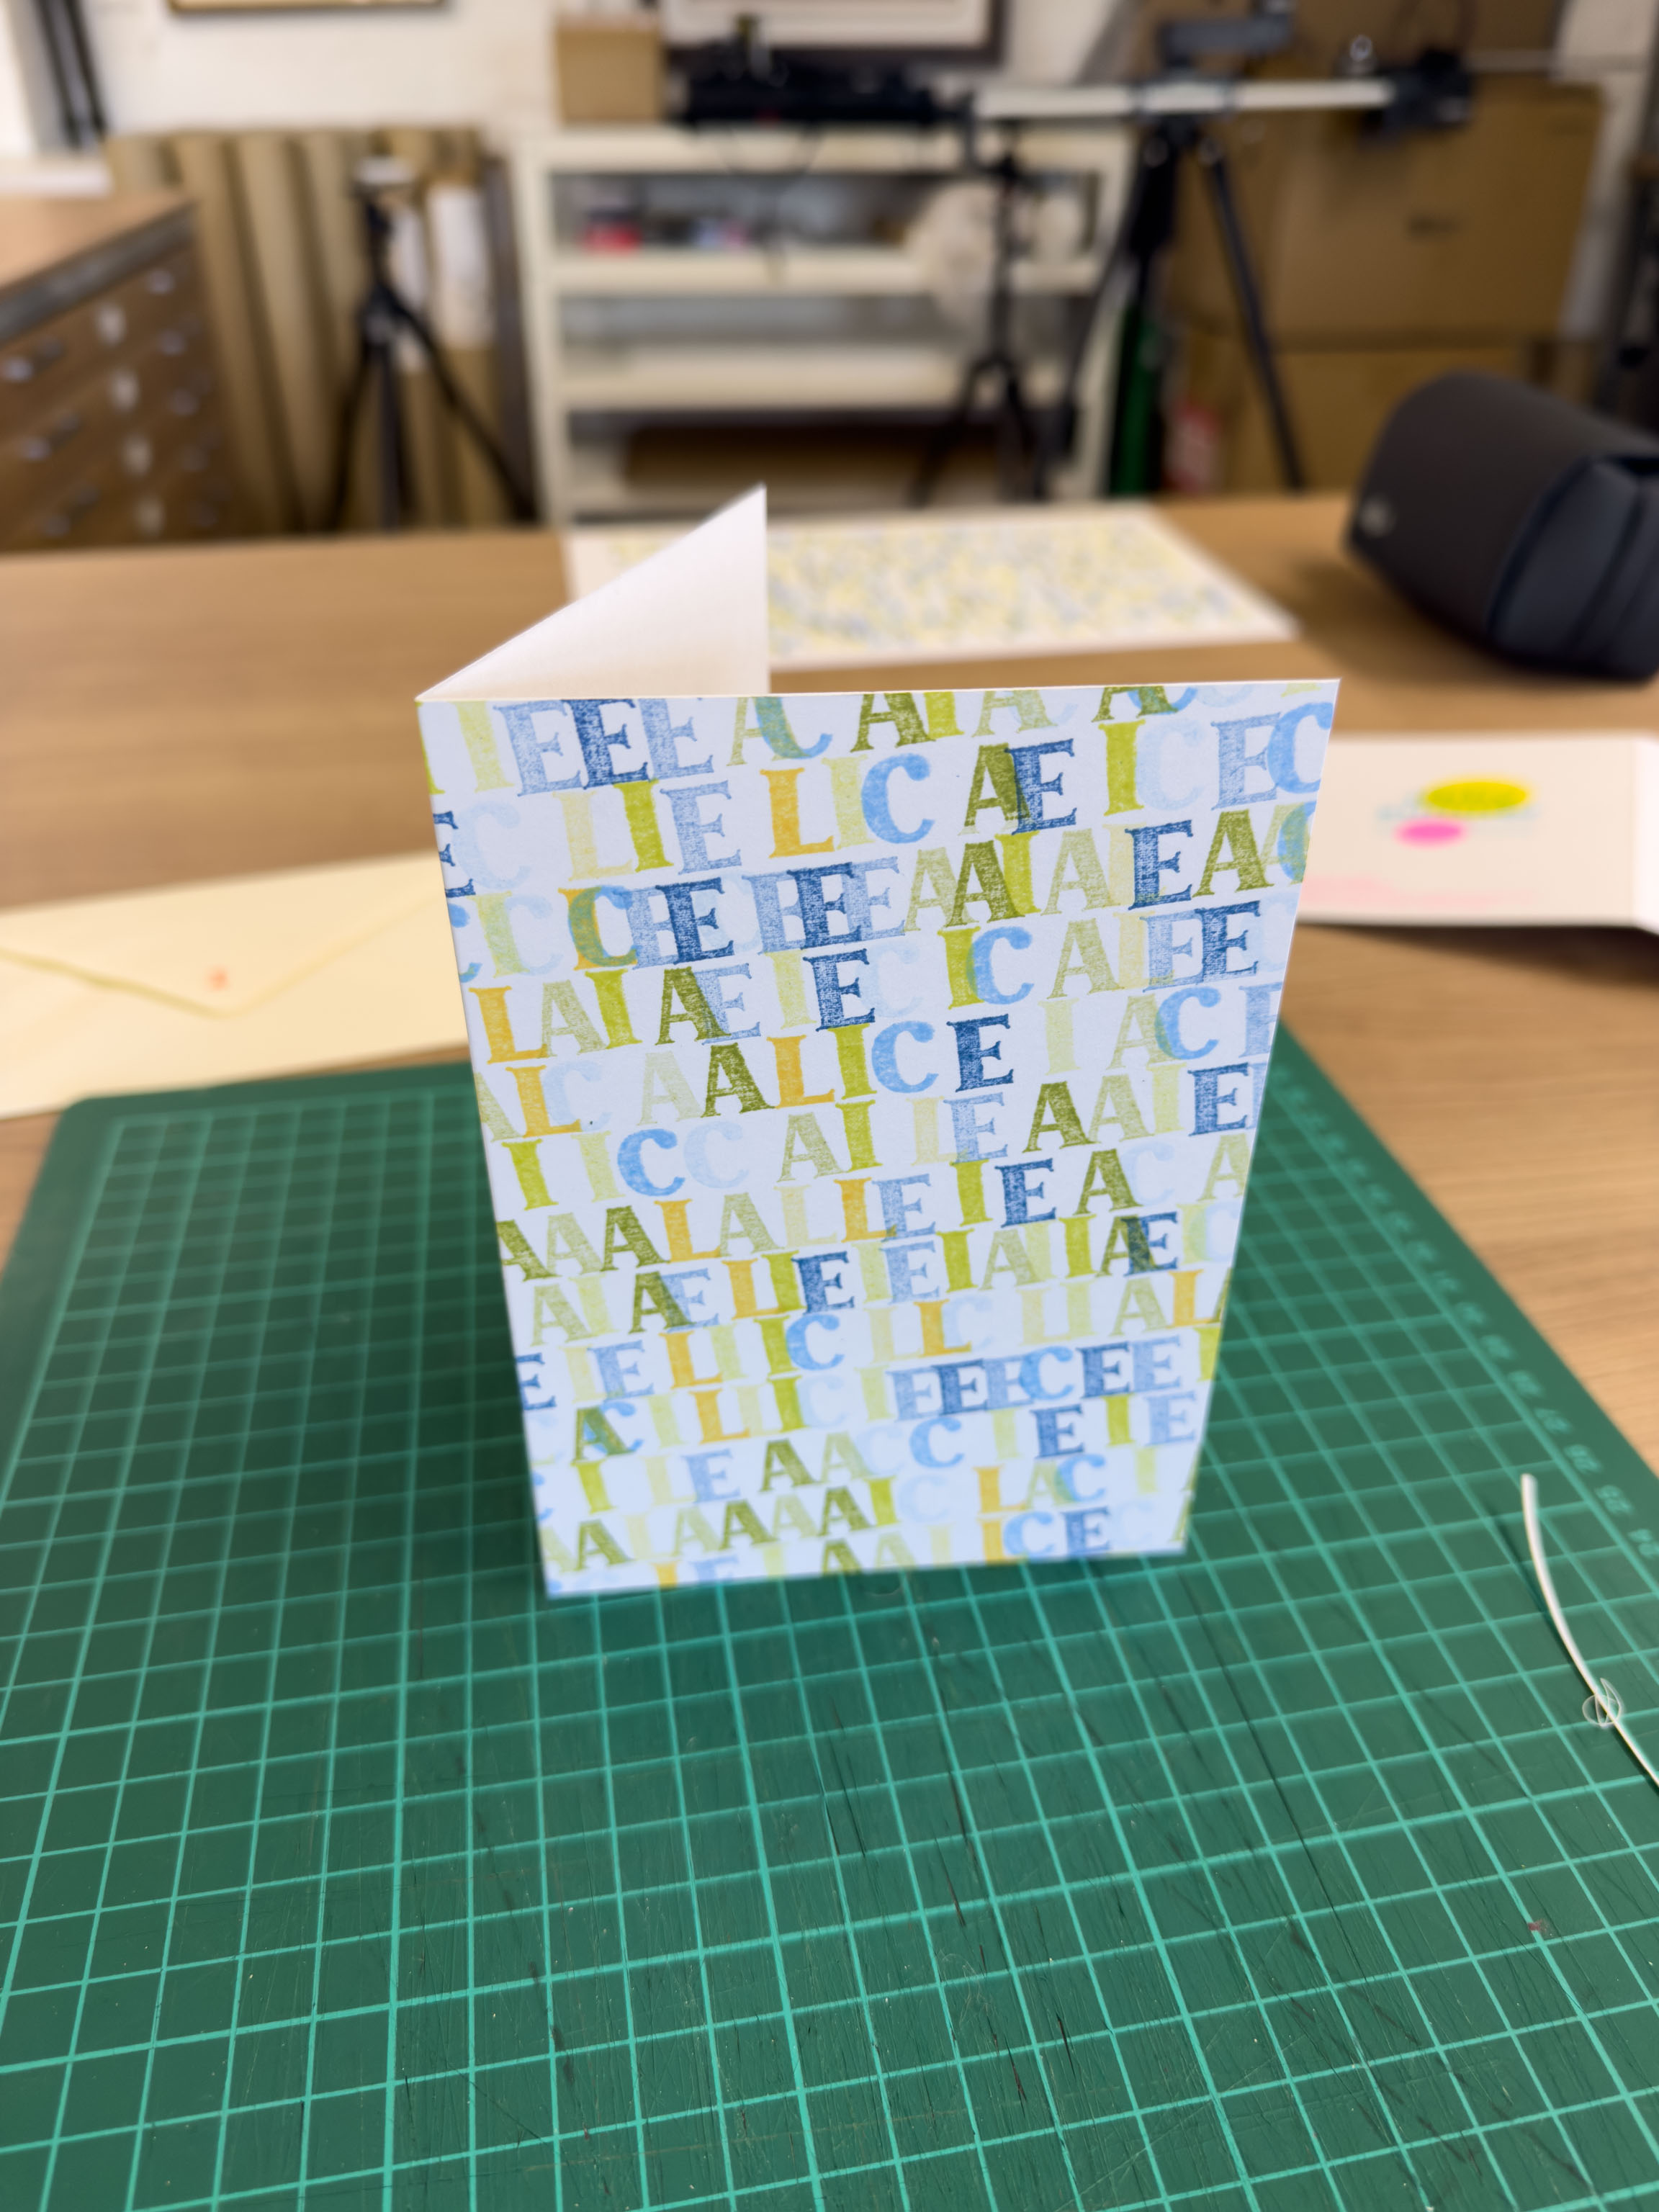
I made two birthday cards for my friends Alice and Russell. You can see the finished Alice hard and the uncut Russell sheet.
Pretty fun way to make birthday cards.
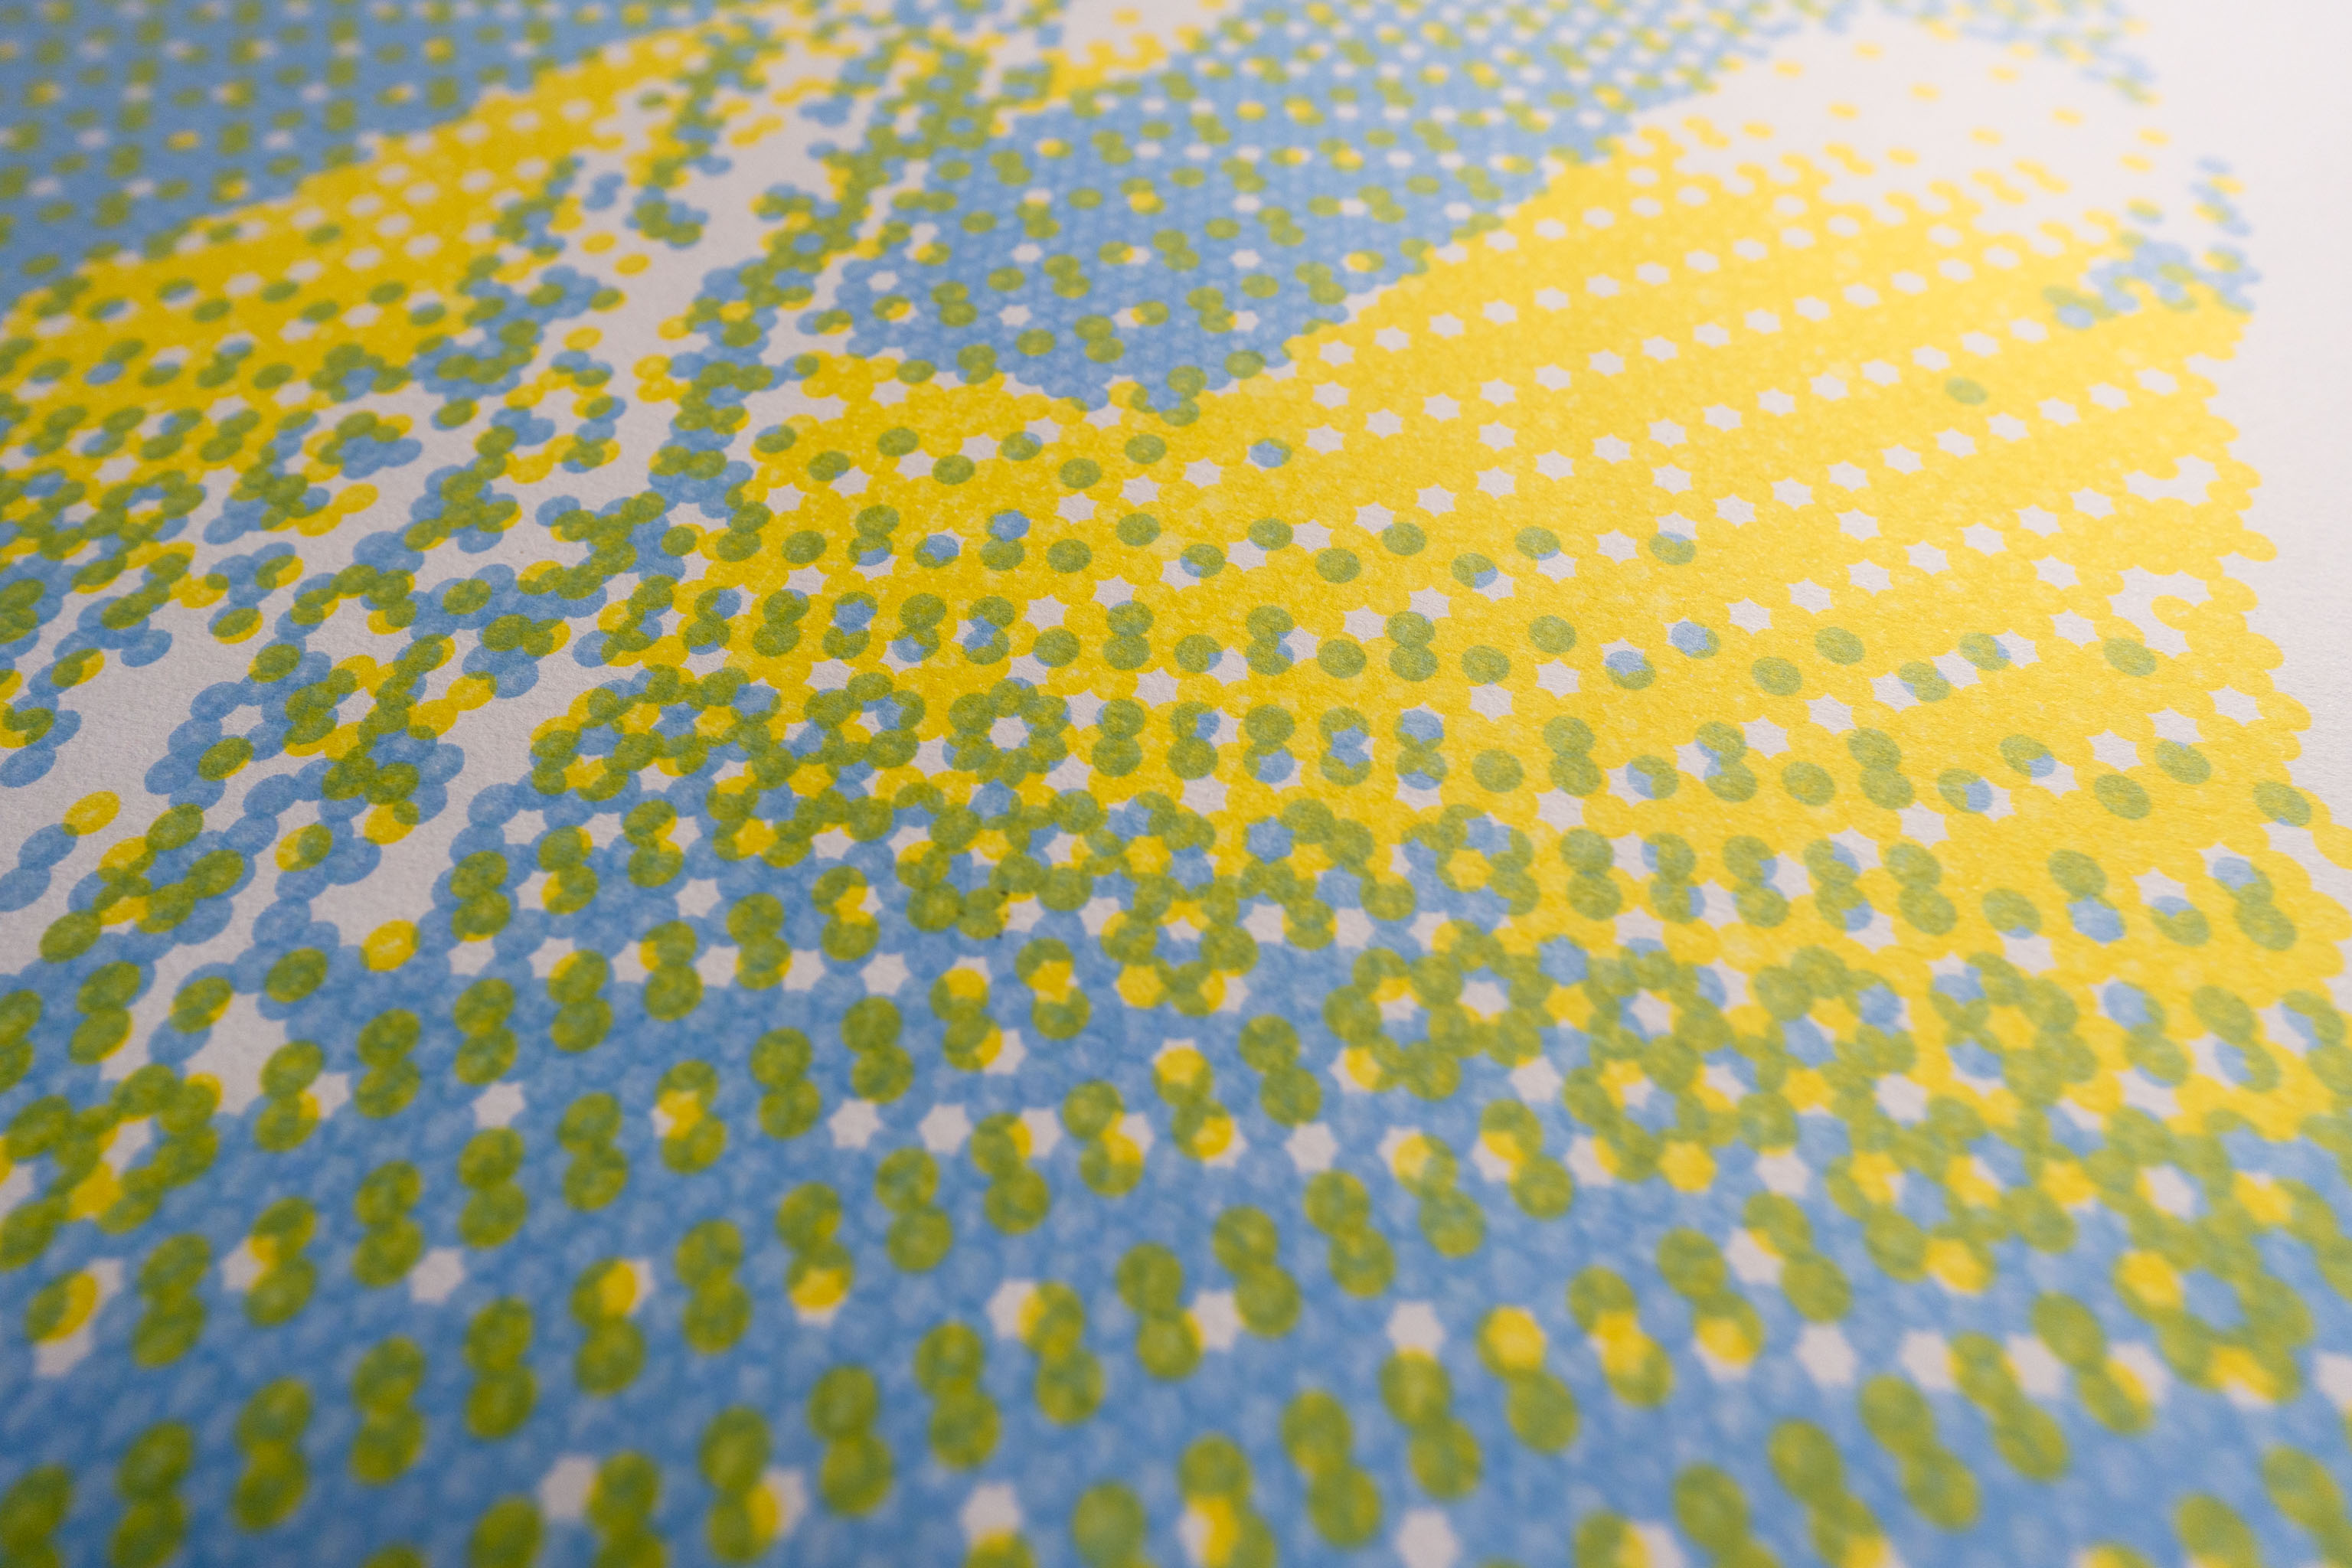
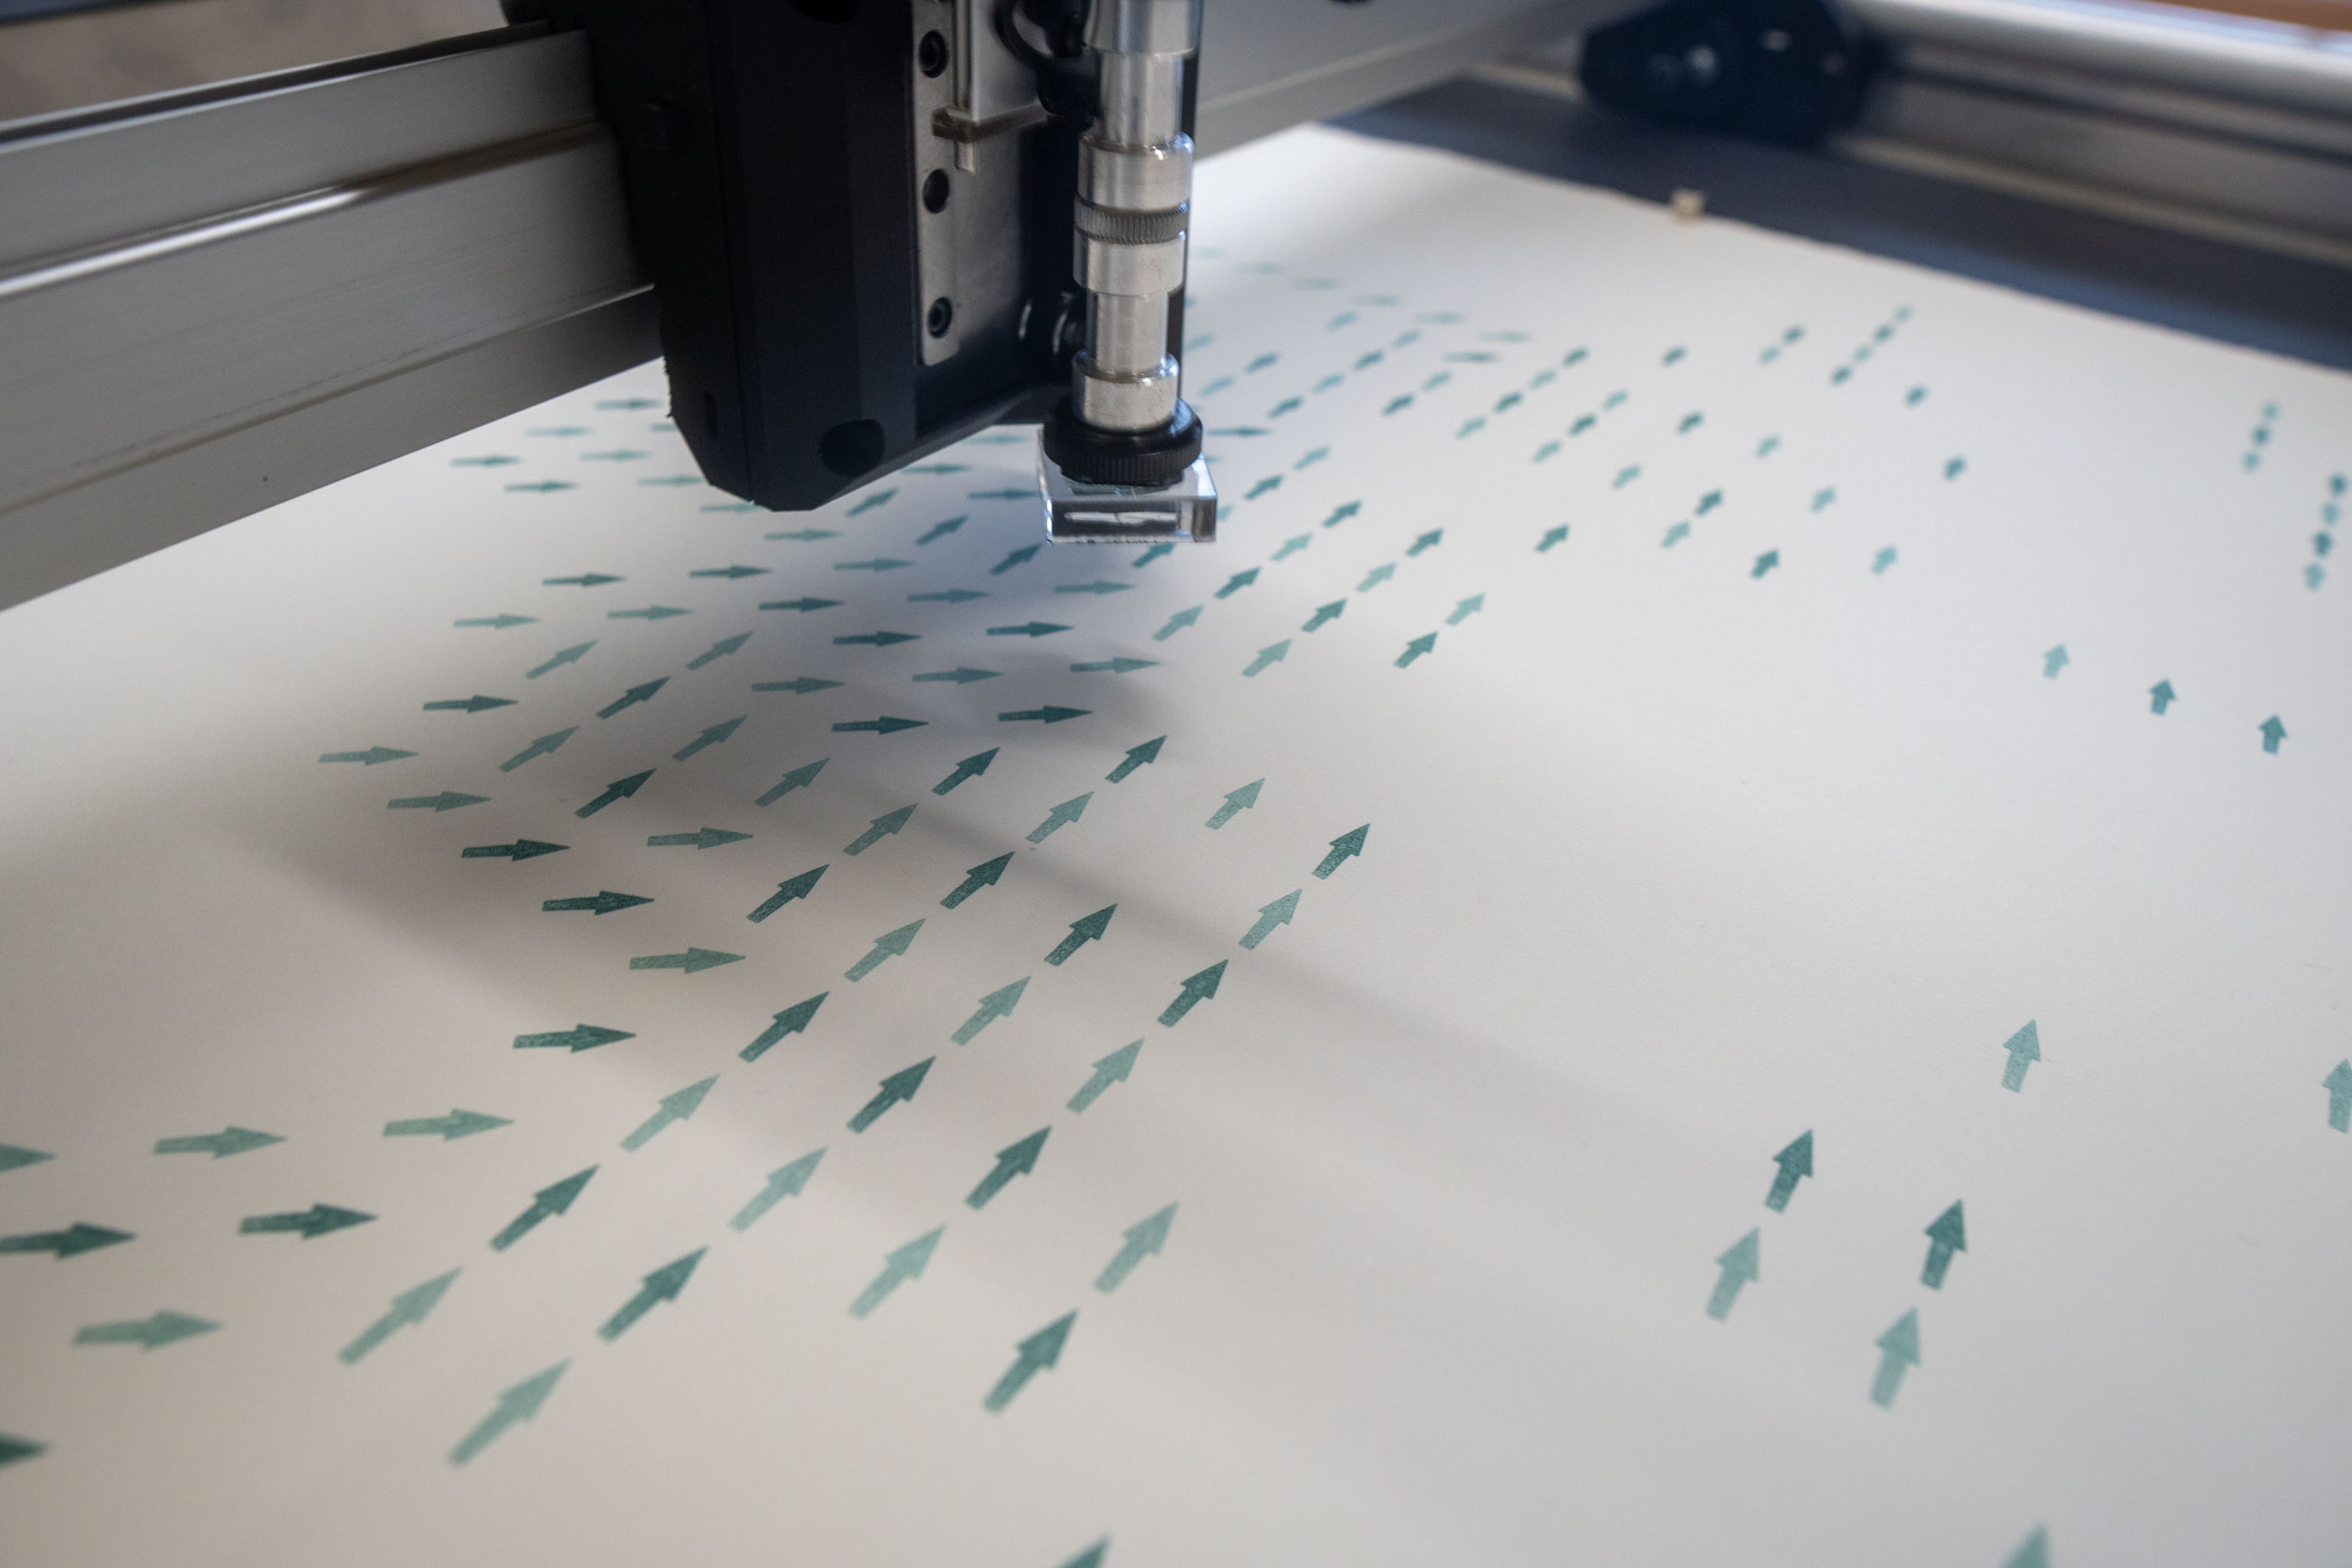
This time I went for dividing the 360 degrees into a whole bunch of different rubber stamps.
The advantage of using a flow field as the underlaying structure rather than randomness is you get these nice "logical" but not predictable groupings to the rubber stamps.
It has some logic to what's happening that looks intentional, which it is, but it's intentional with code rather than me doing it all by hand.
Different stamps, and different colours. Each colour is it's own flow field.
In the end though I didn't really think this worked very well, so I expect it'll get cut up into postcards at some point.
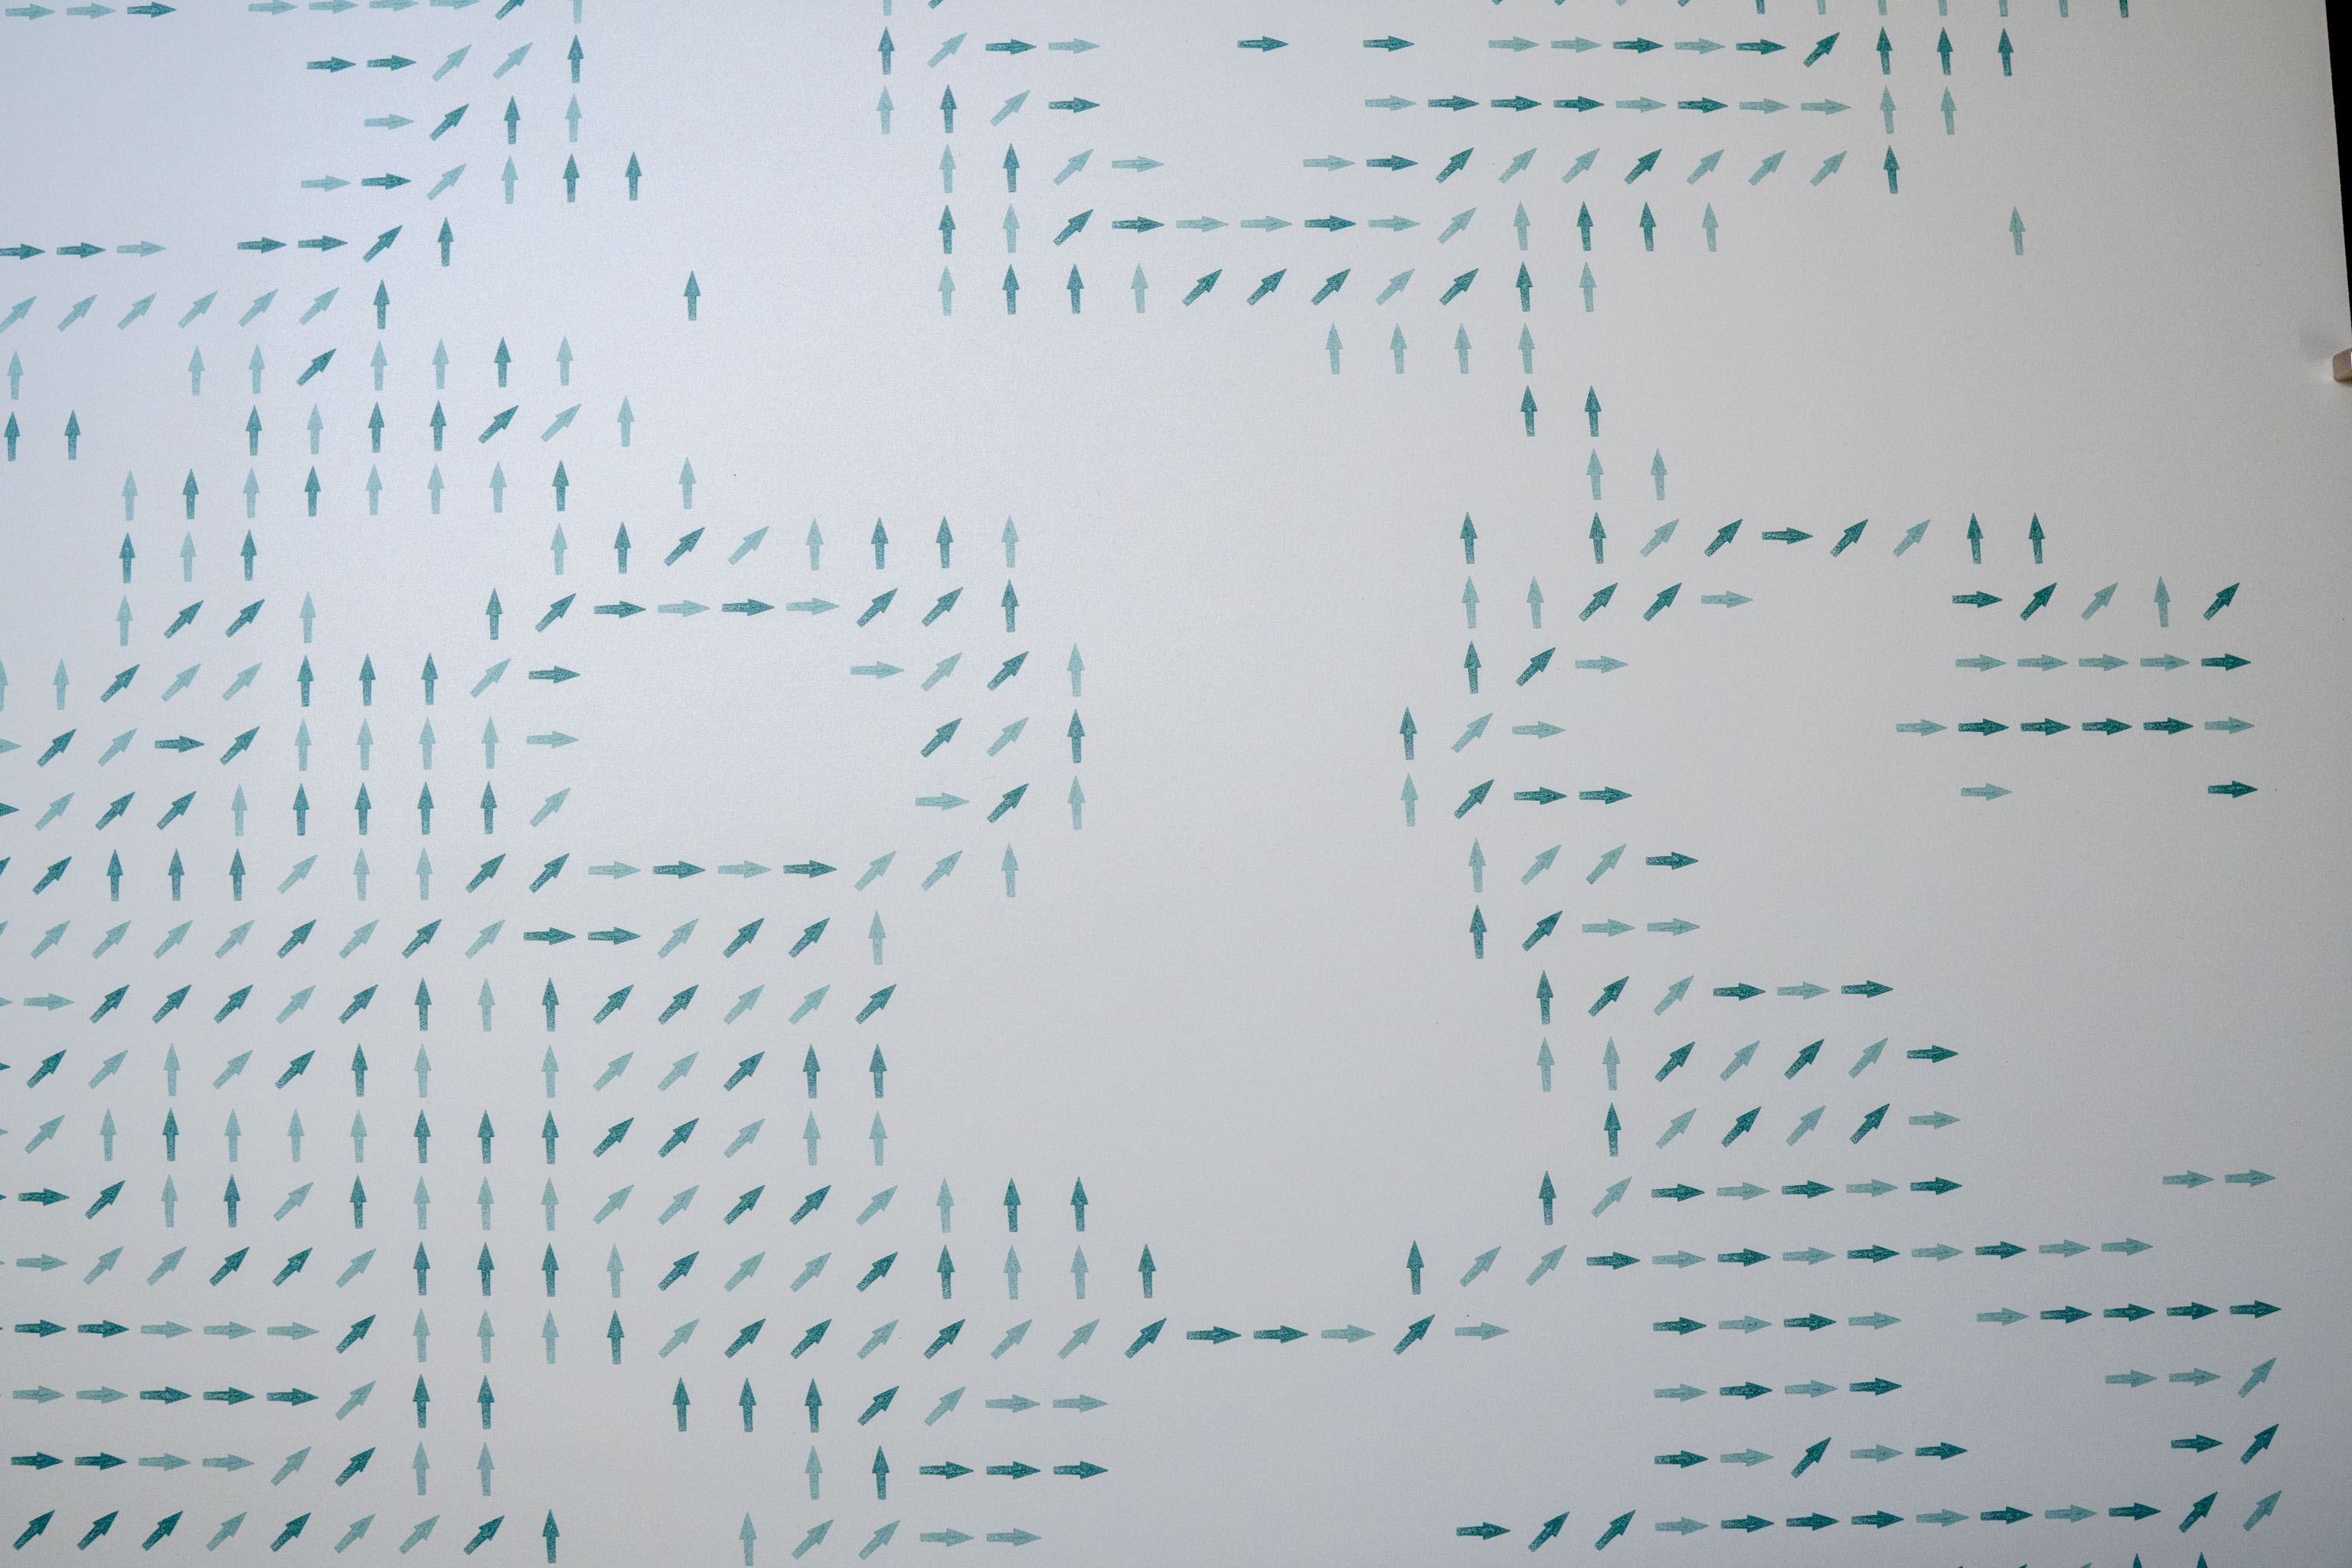
Hear me out, what if instead of the eight compass points we had just 6 points, or maybe more.
I mean, it's simple really, 'cause what I actually have is each point on the paper having a direction somewhere between 1 to 360 degrees, and I can divide those up into 8 segments (actually sectors, but who's keeping track), or just four, maybe 26!
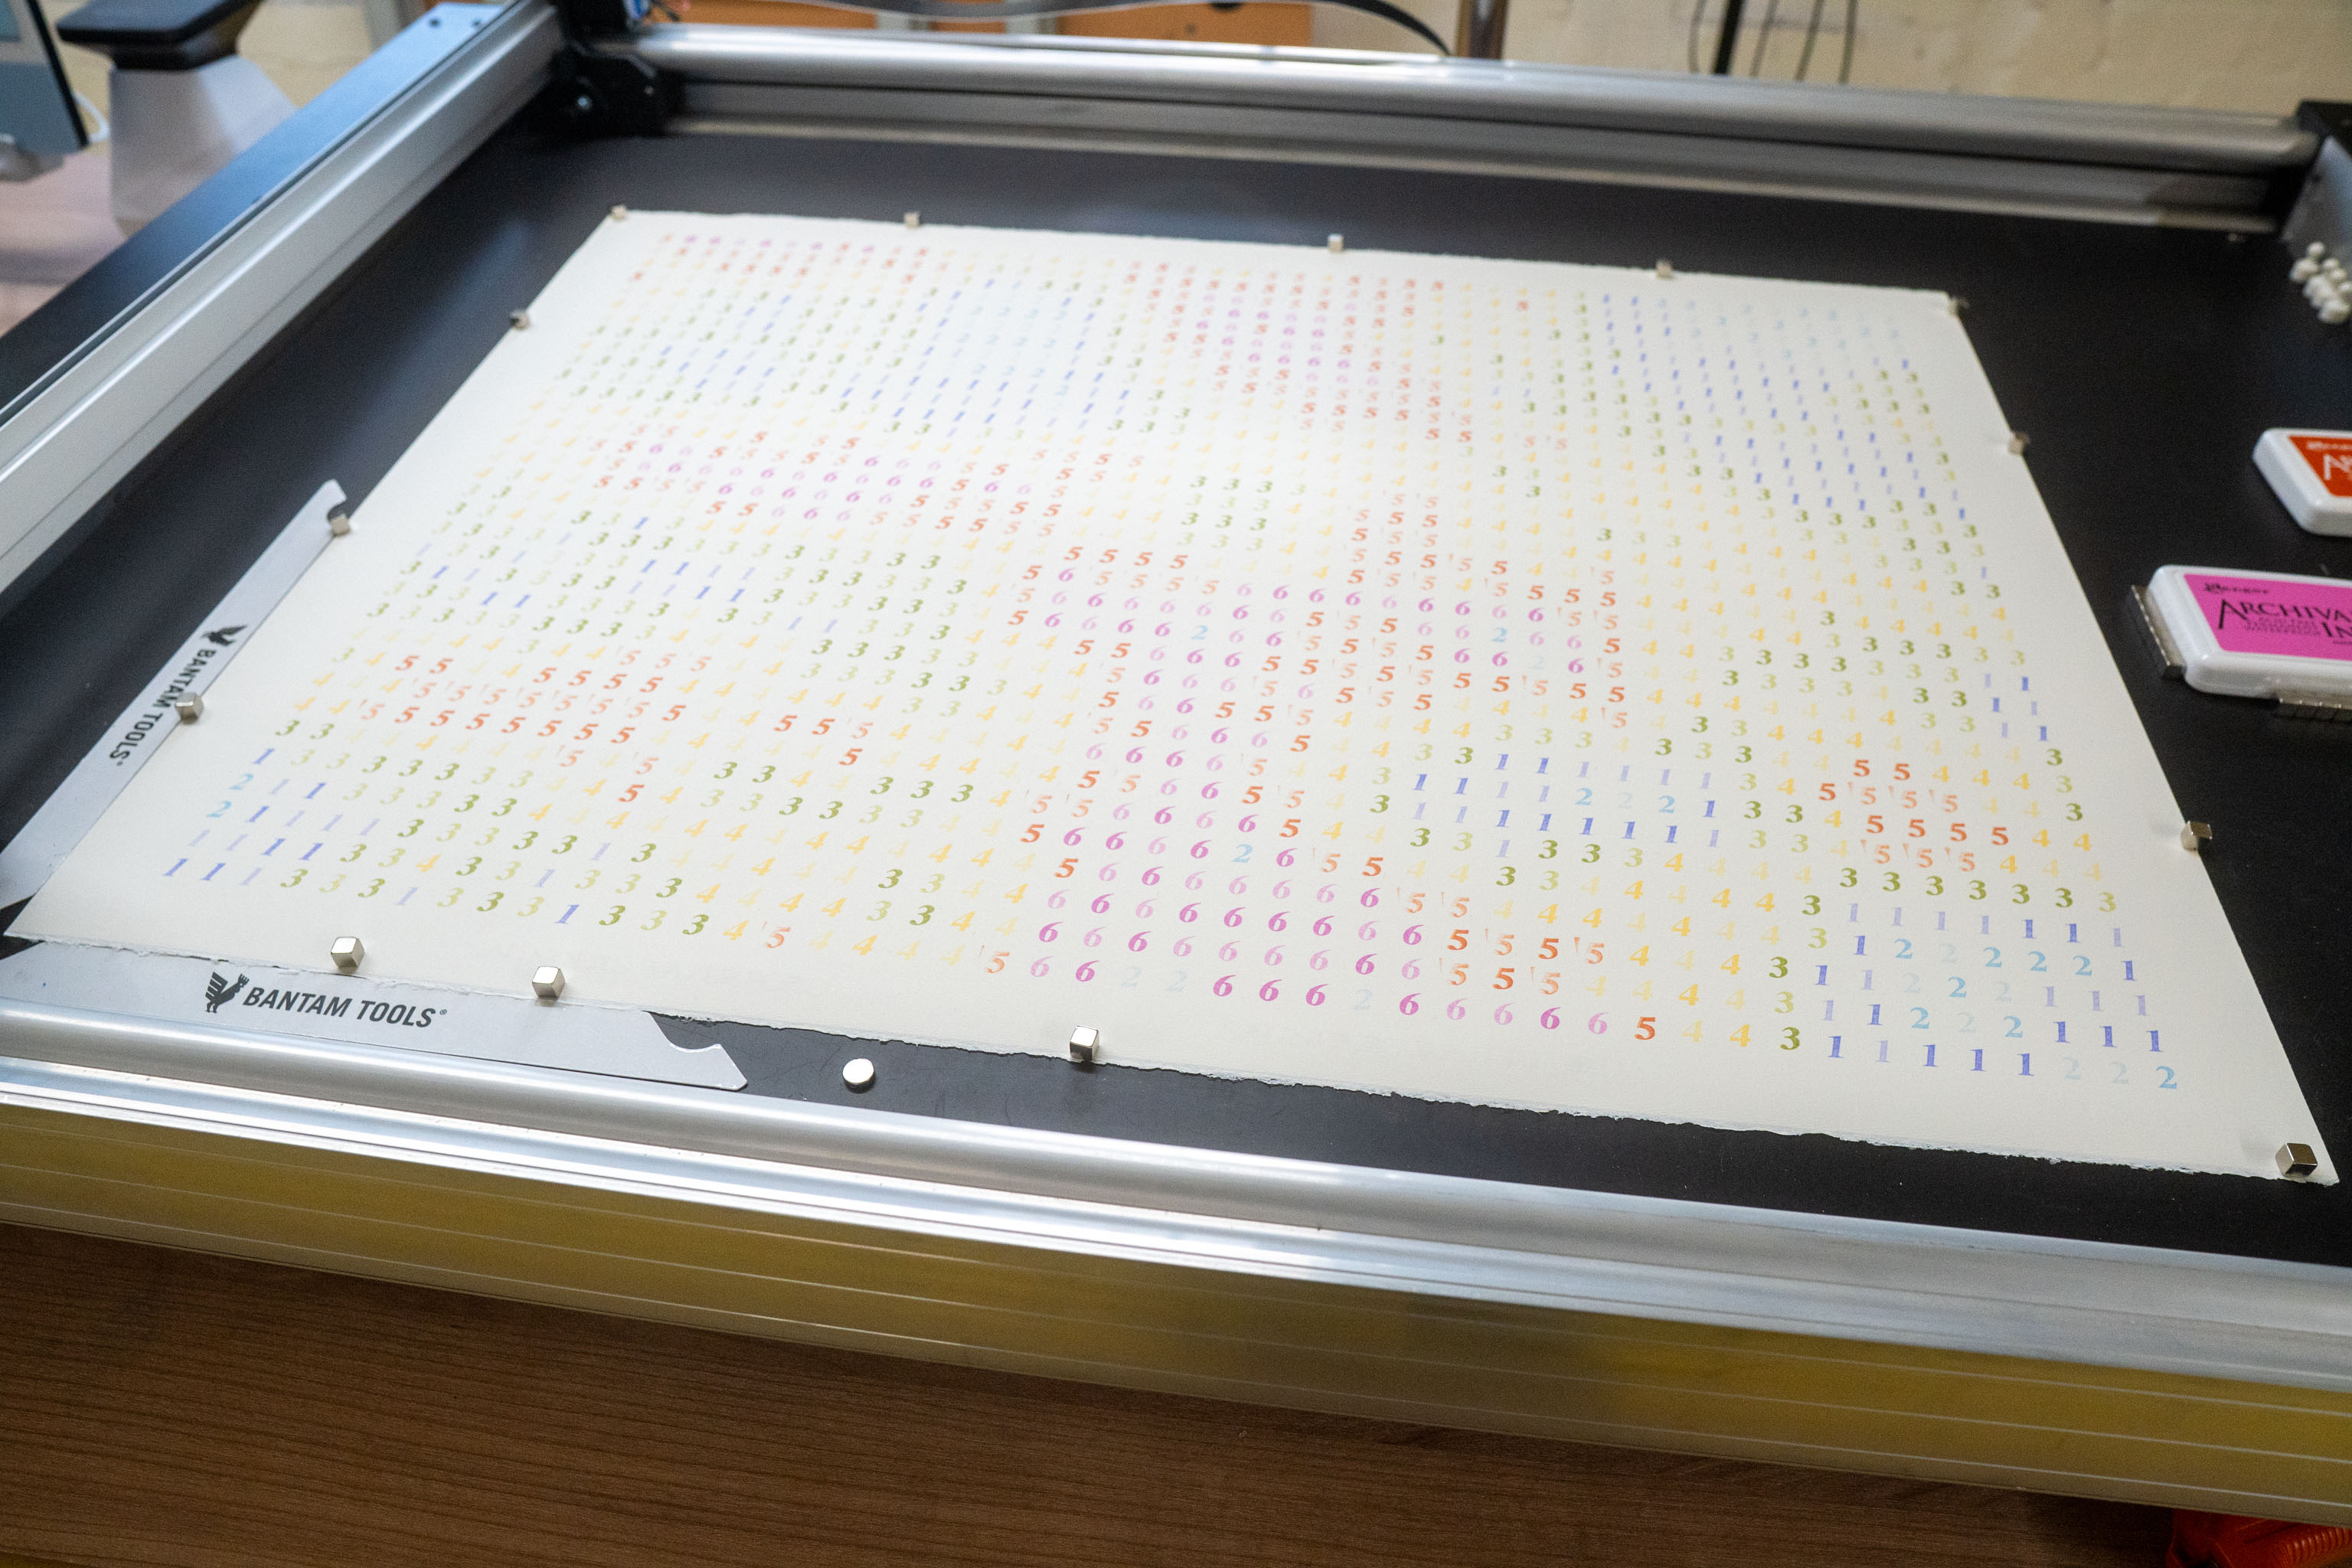
To test the code I split the directions up into 6, and instead of an arrow, I just used the numbers 1-6, best to keep things simple.
Which is how I ended up with a page full of numbers.
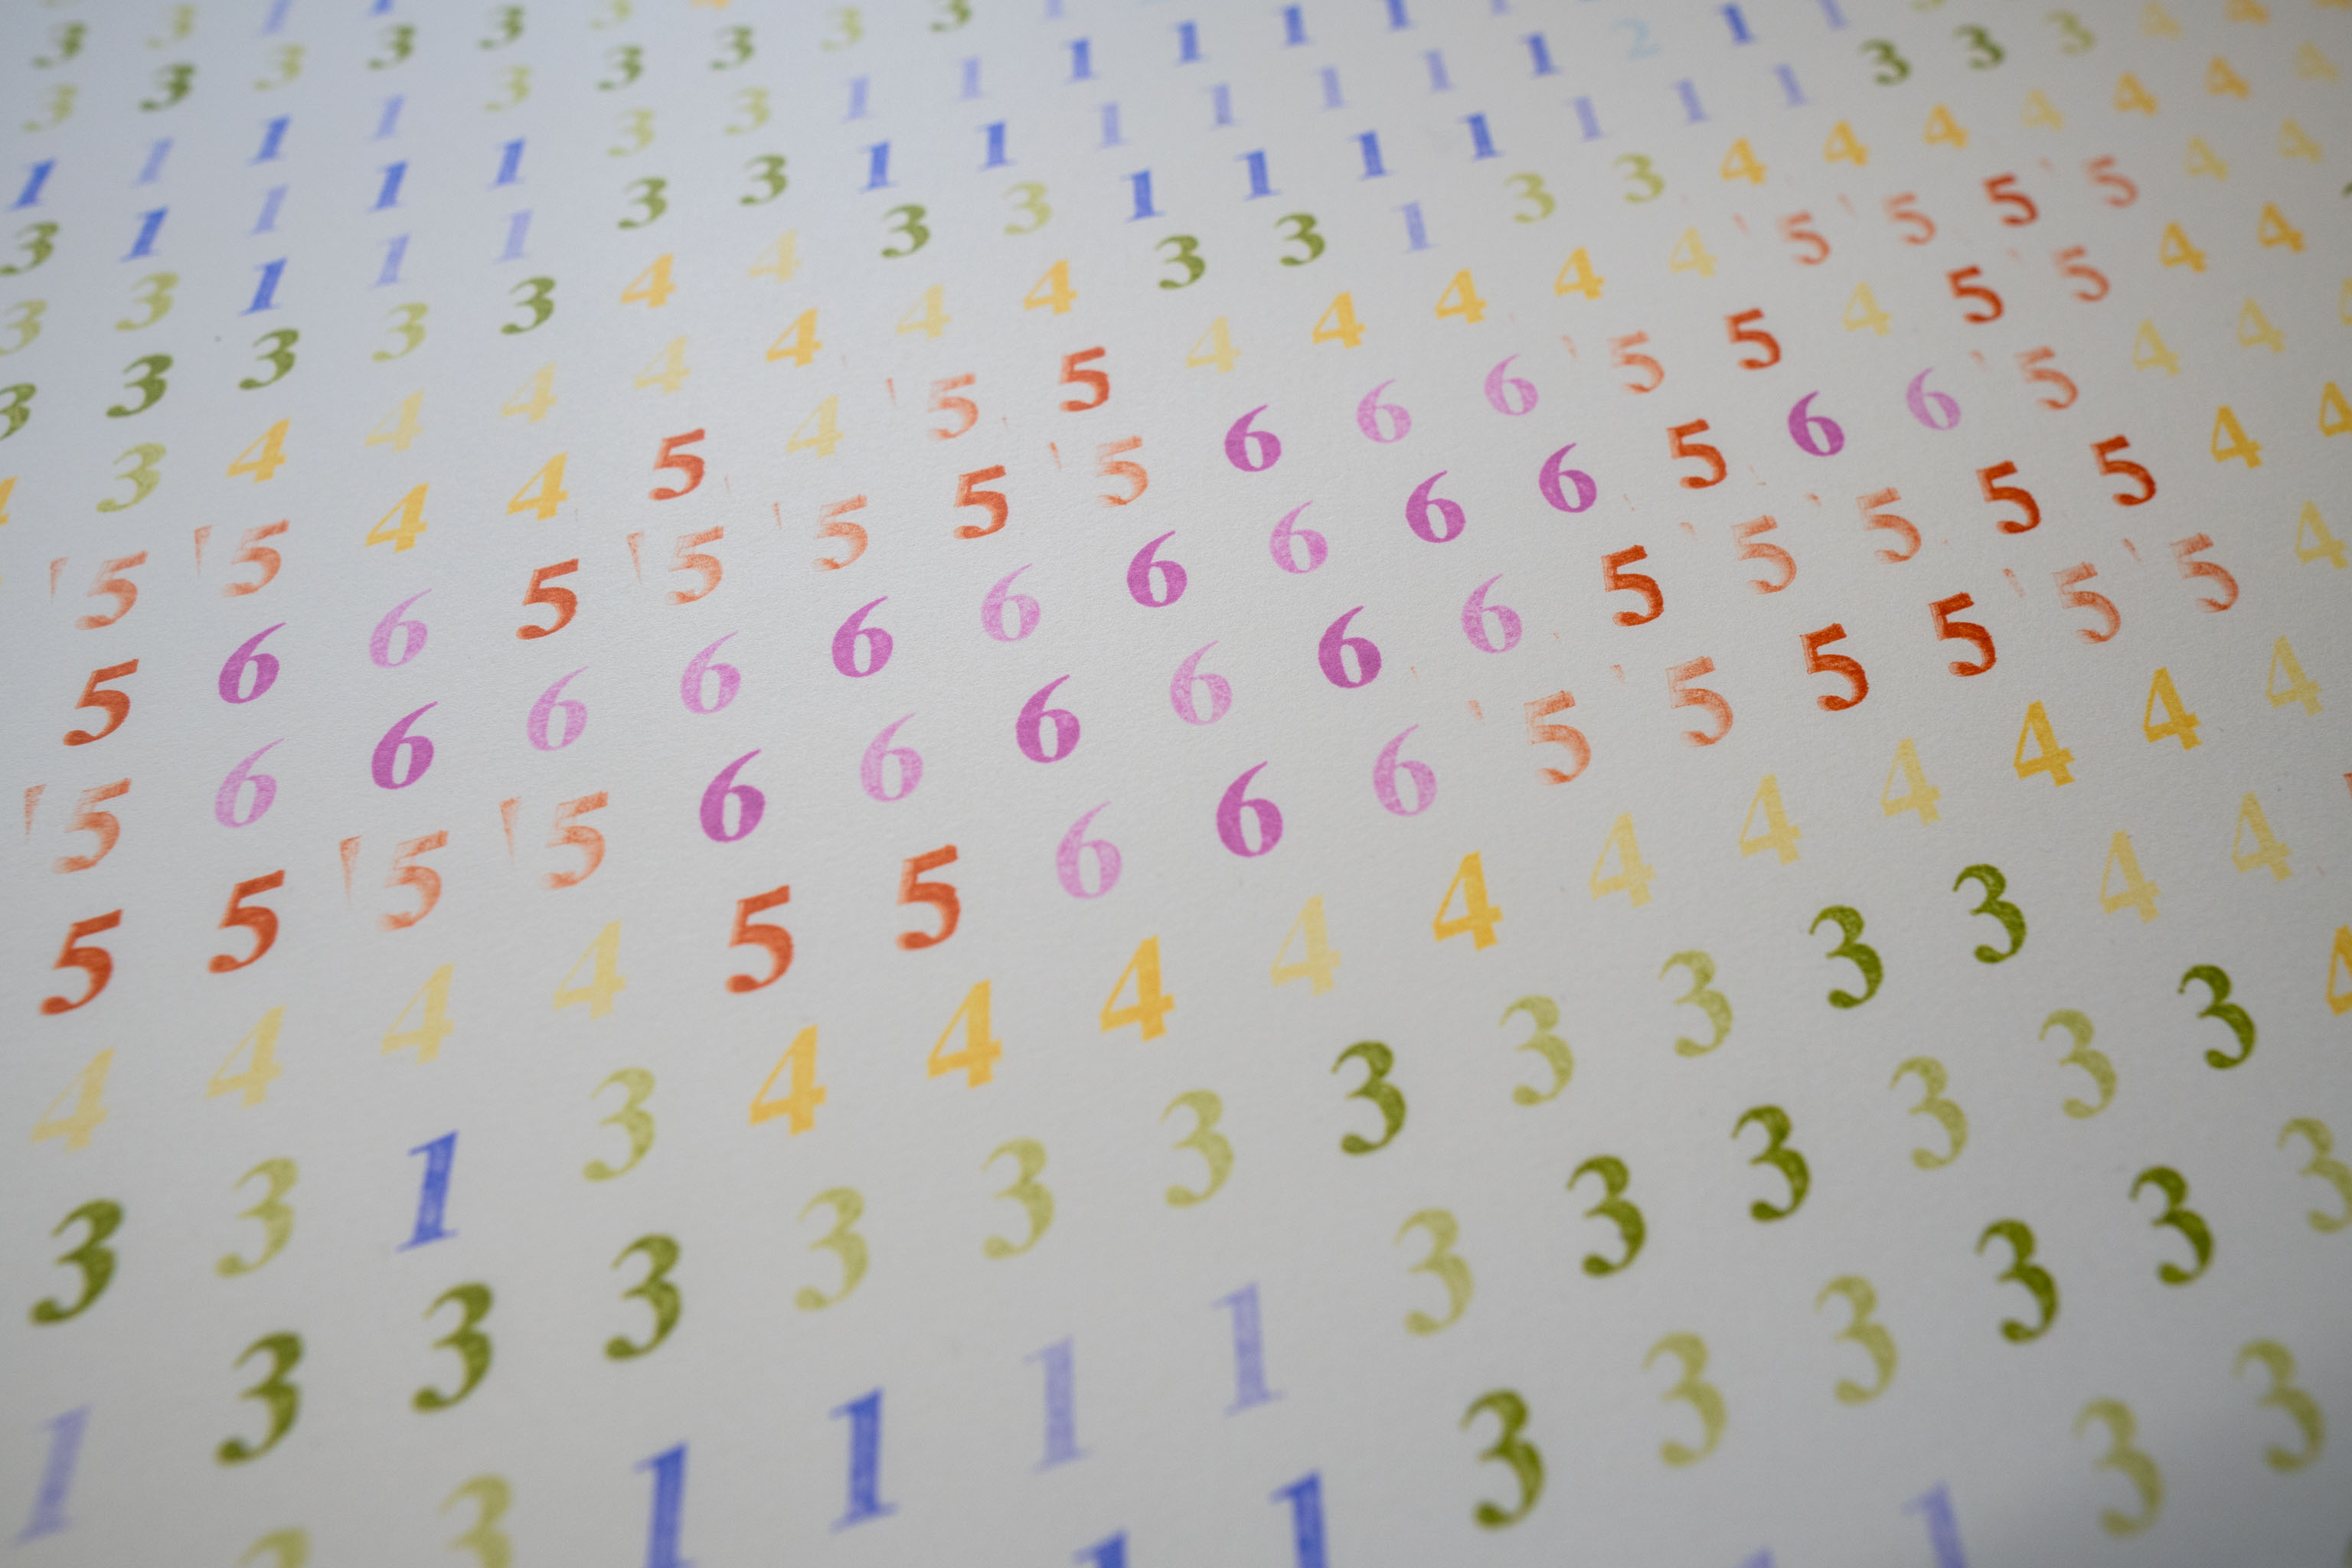
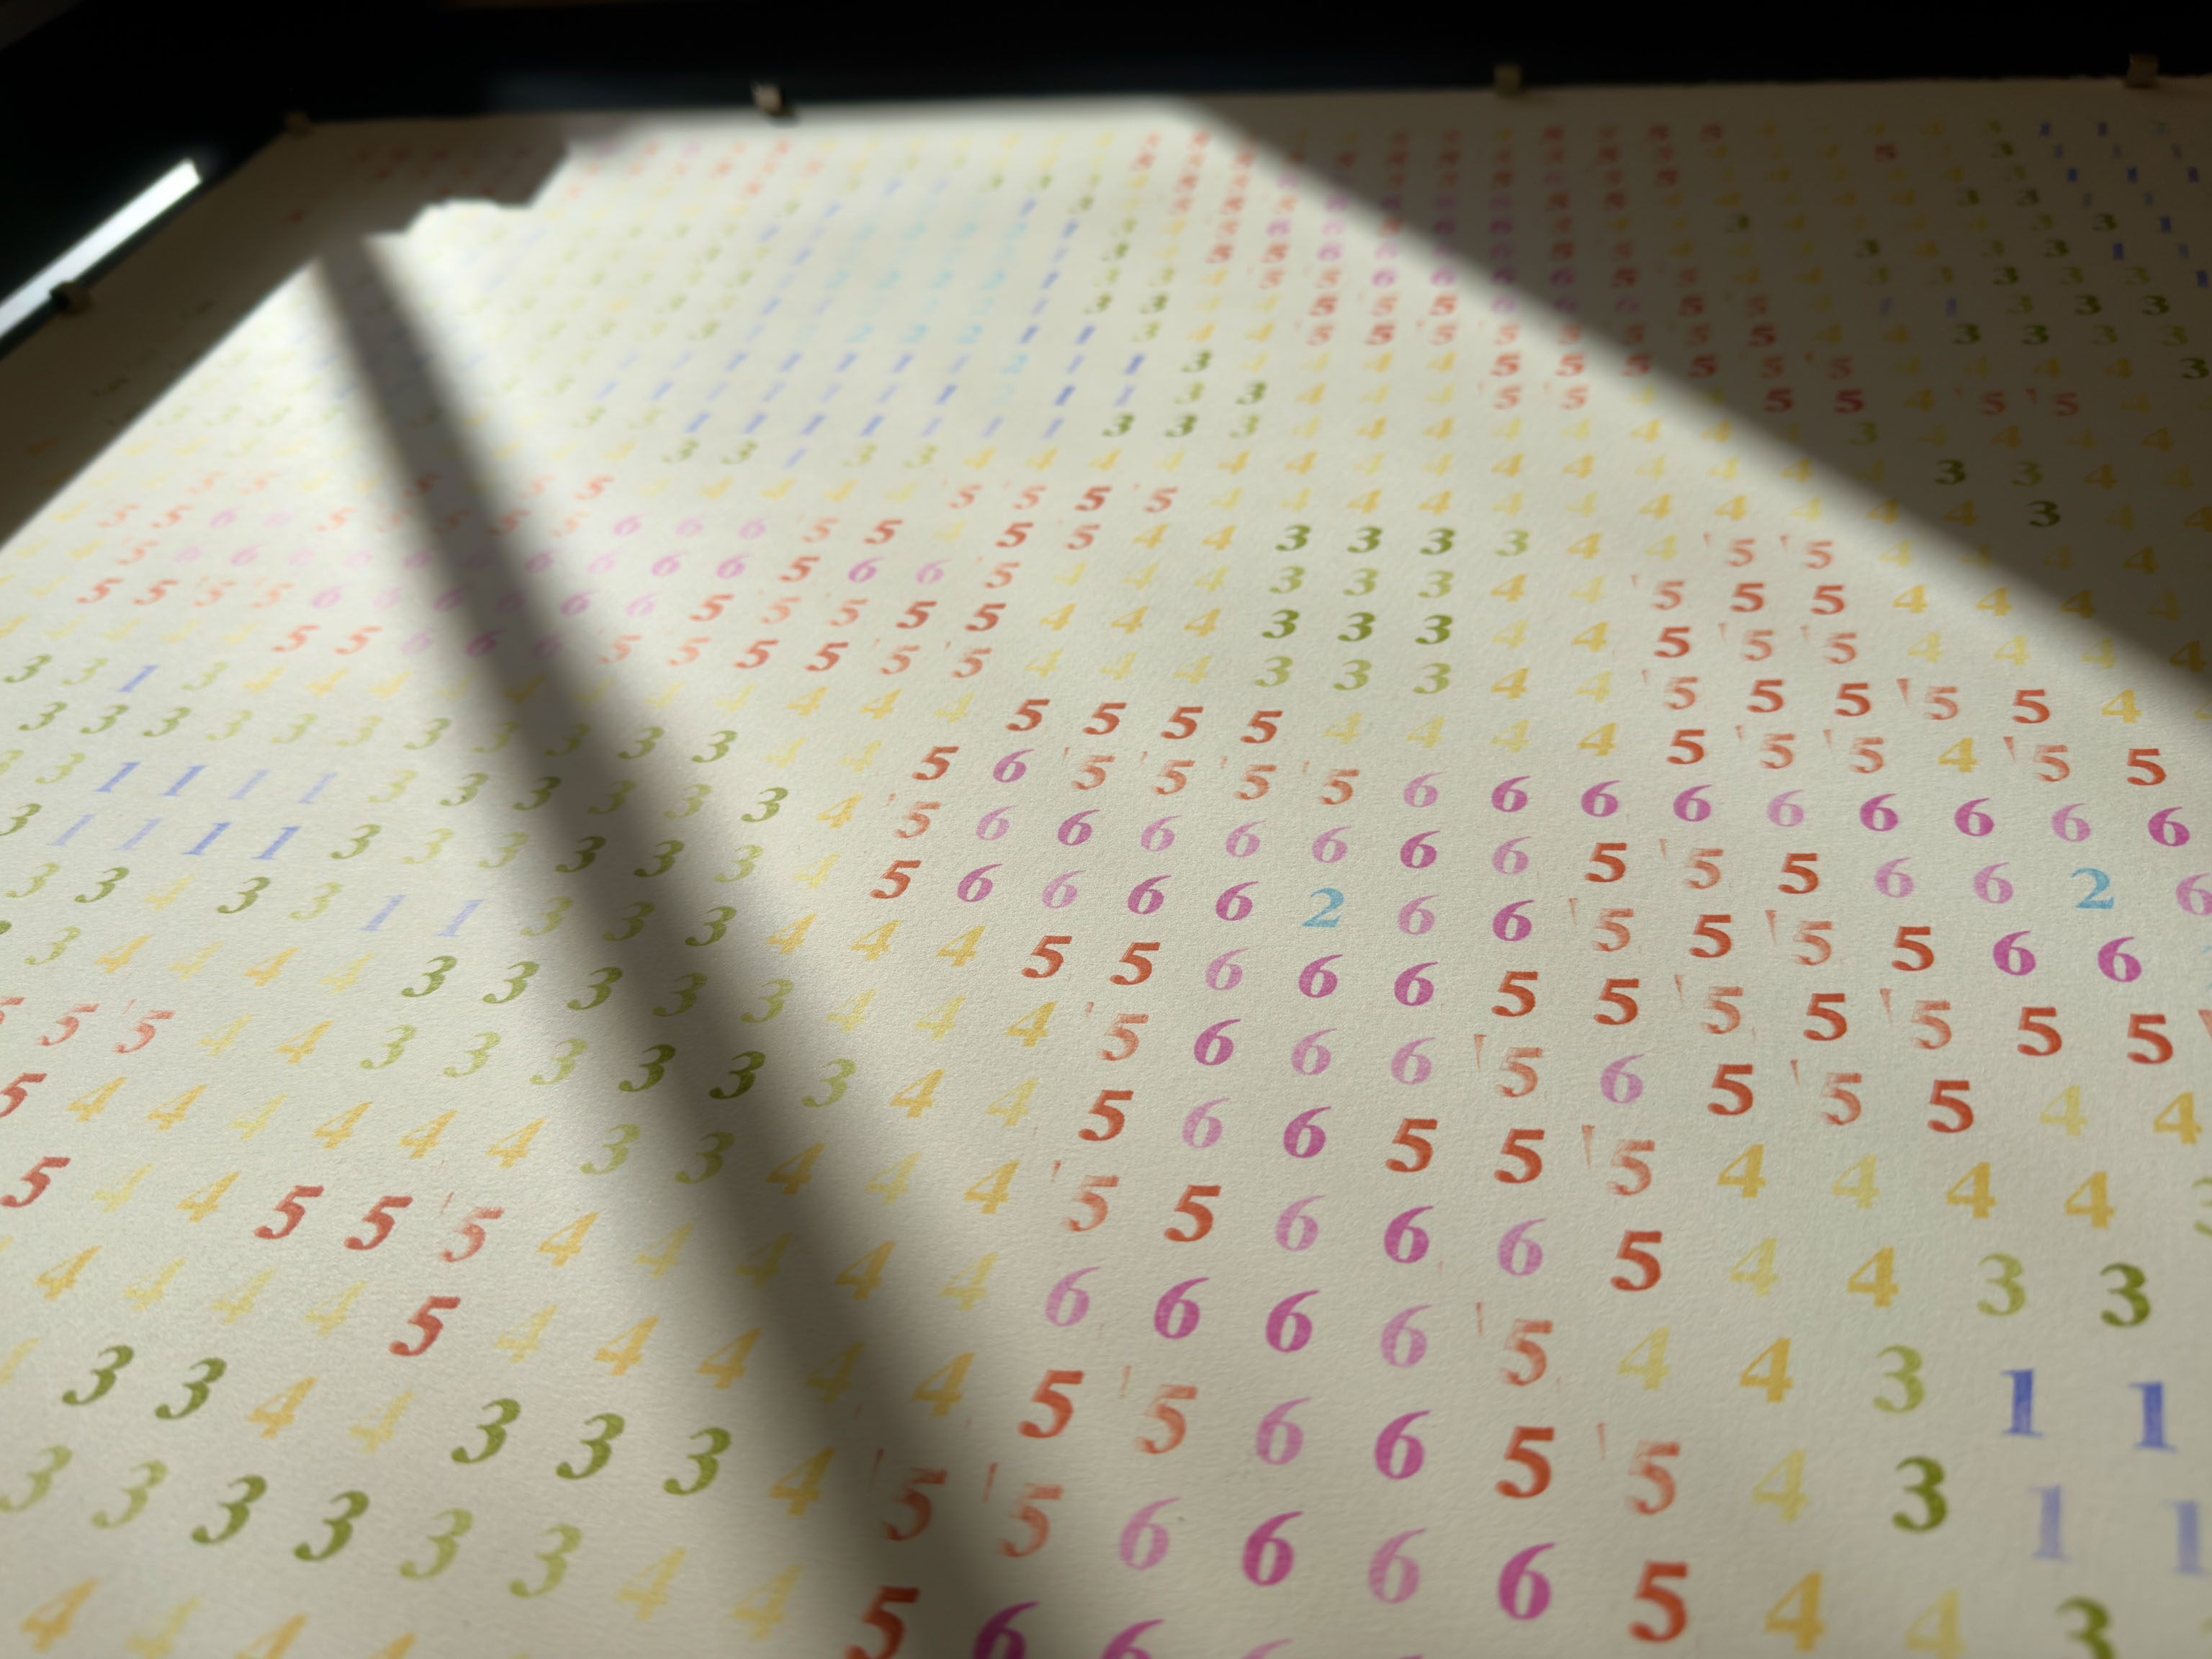
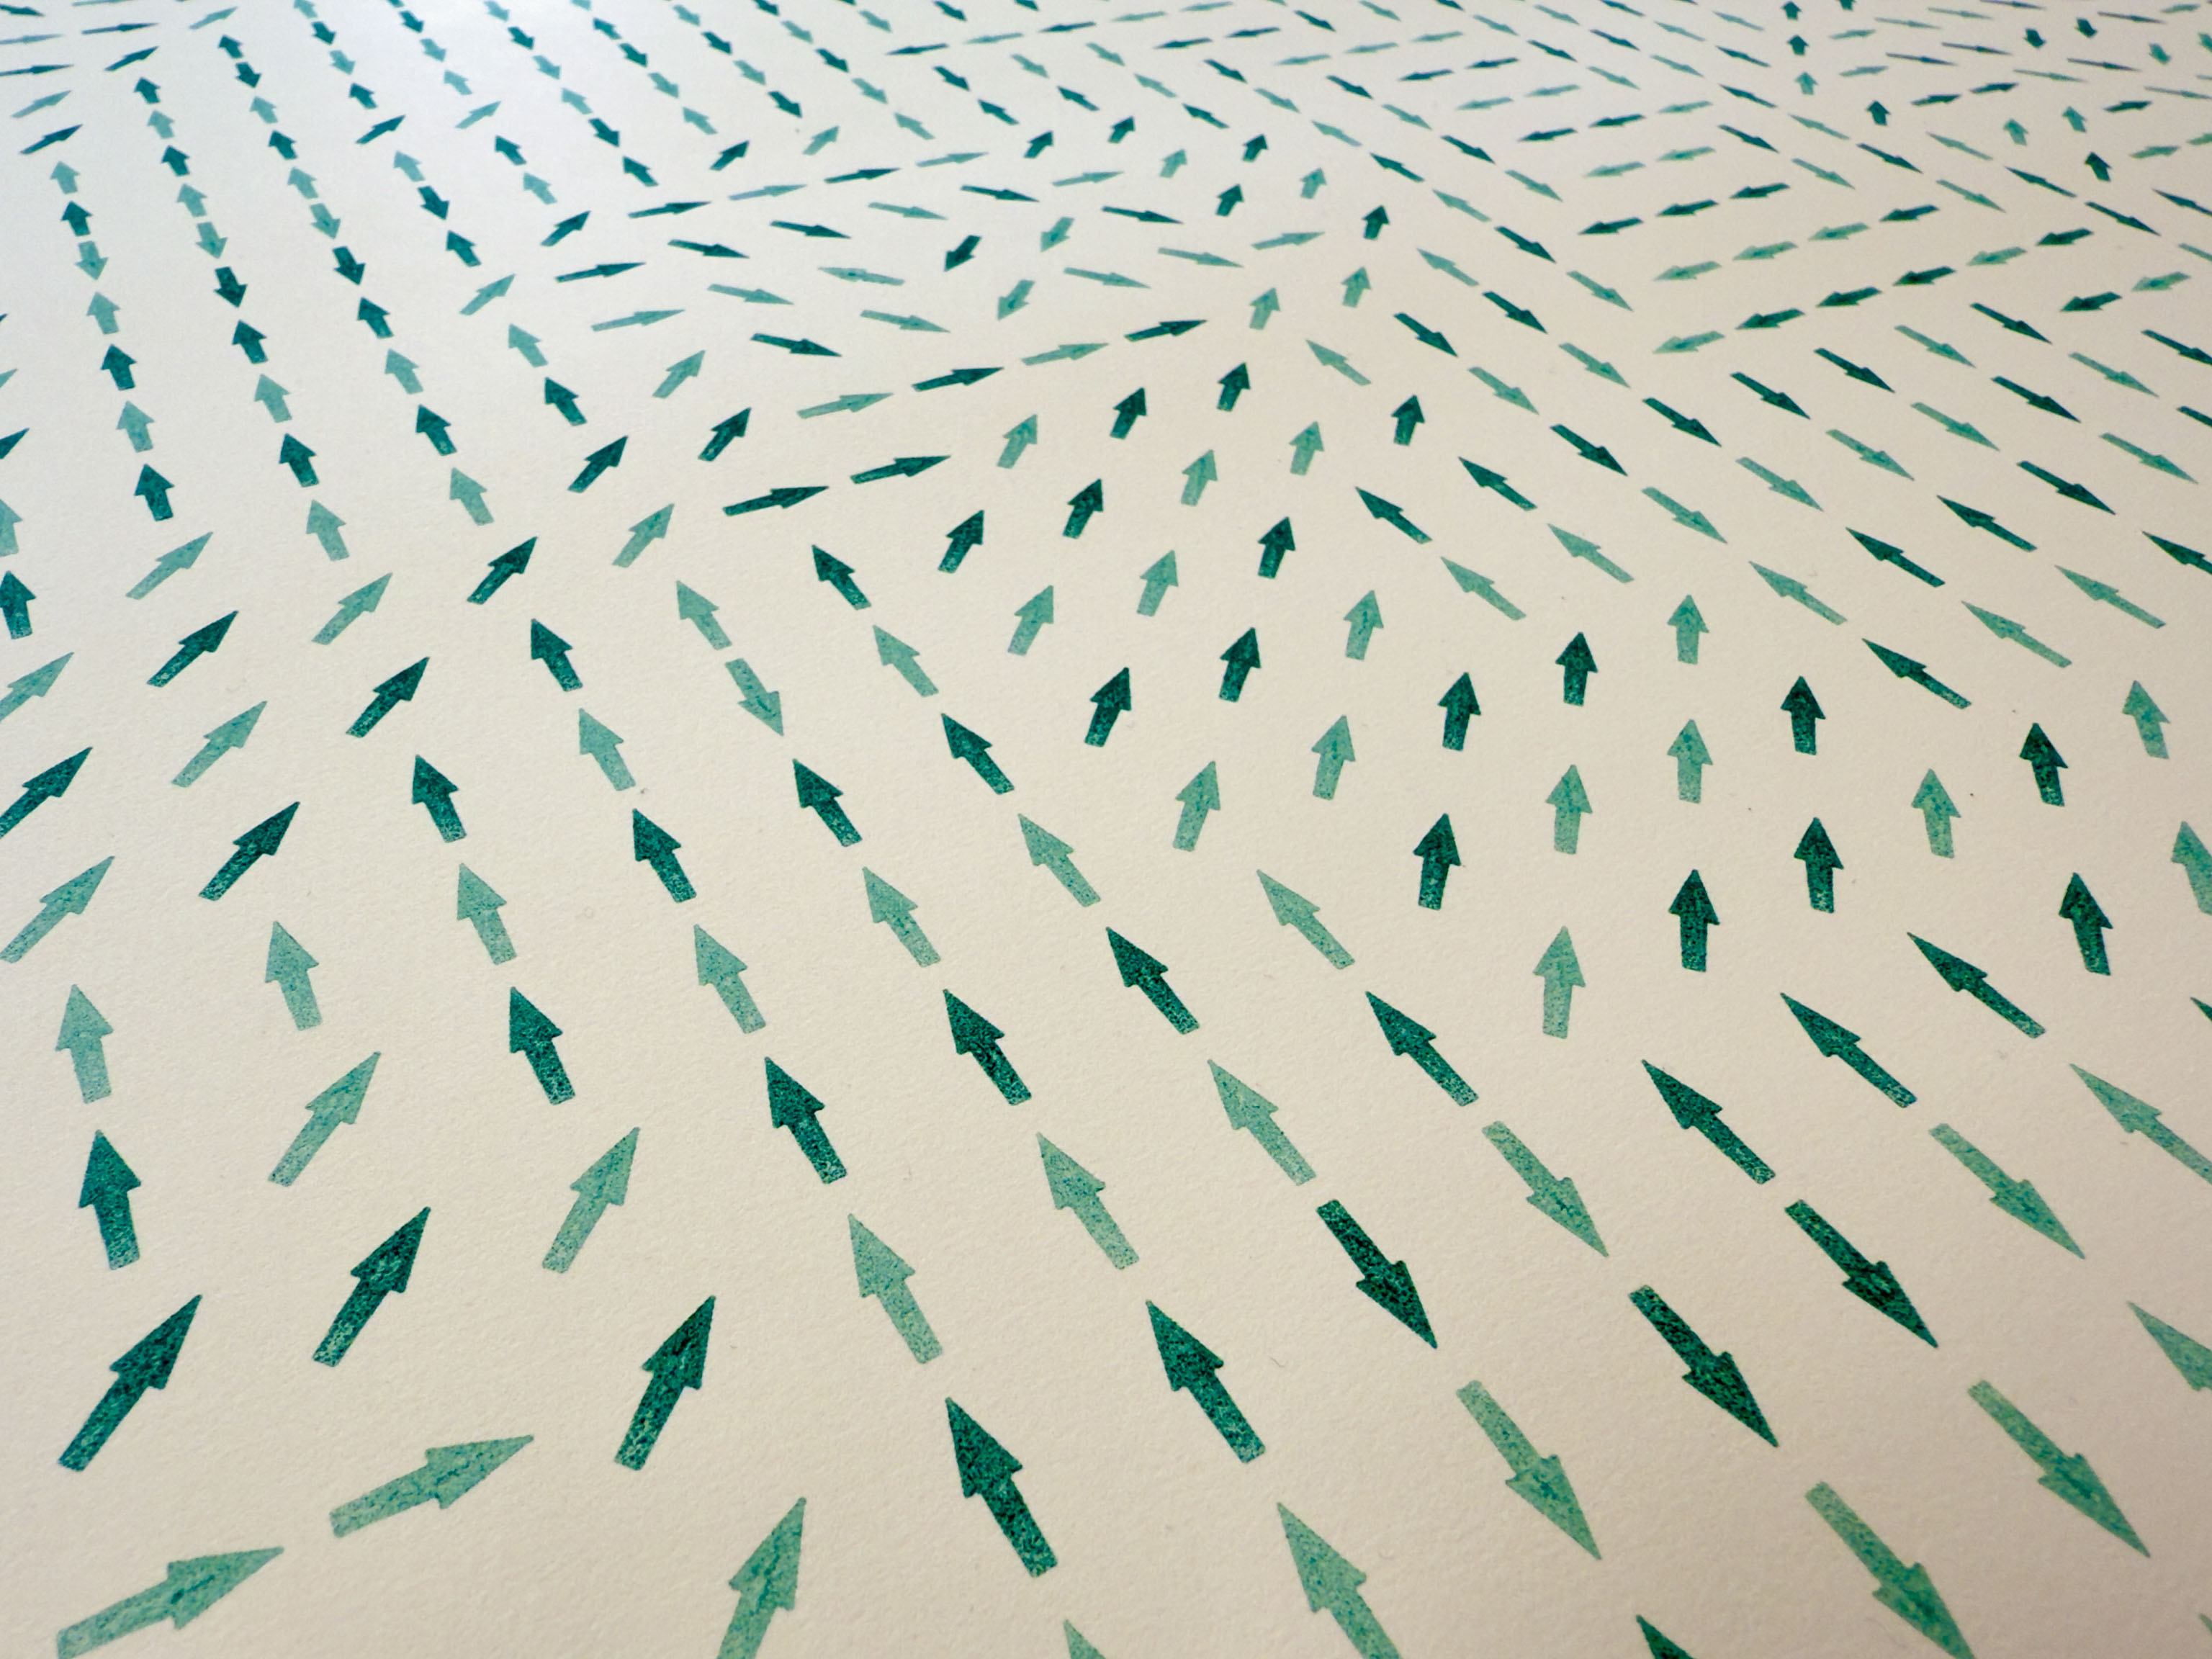
I was playing with flow fields. Very basically it's a way to turn any x,y point on a surface into a direction (vector), but instead of all the vectors pointing the same way, or being random and pointing in different directions, a flow field means adjacent points on the surface will point in roughly the same direction as those near them.
It's a neat way of getting natural-ish looking "flows". And because I've been thinking about stamping letters onto a page to make up pattern, and also rotating them, so I can get more dynamic "flow" into the design, I thought I'd have a look at how that may turn out.
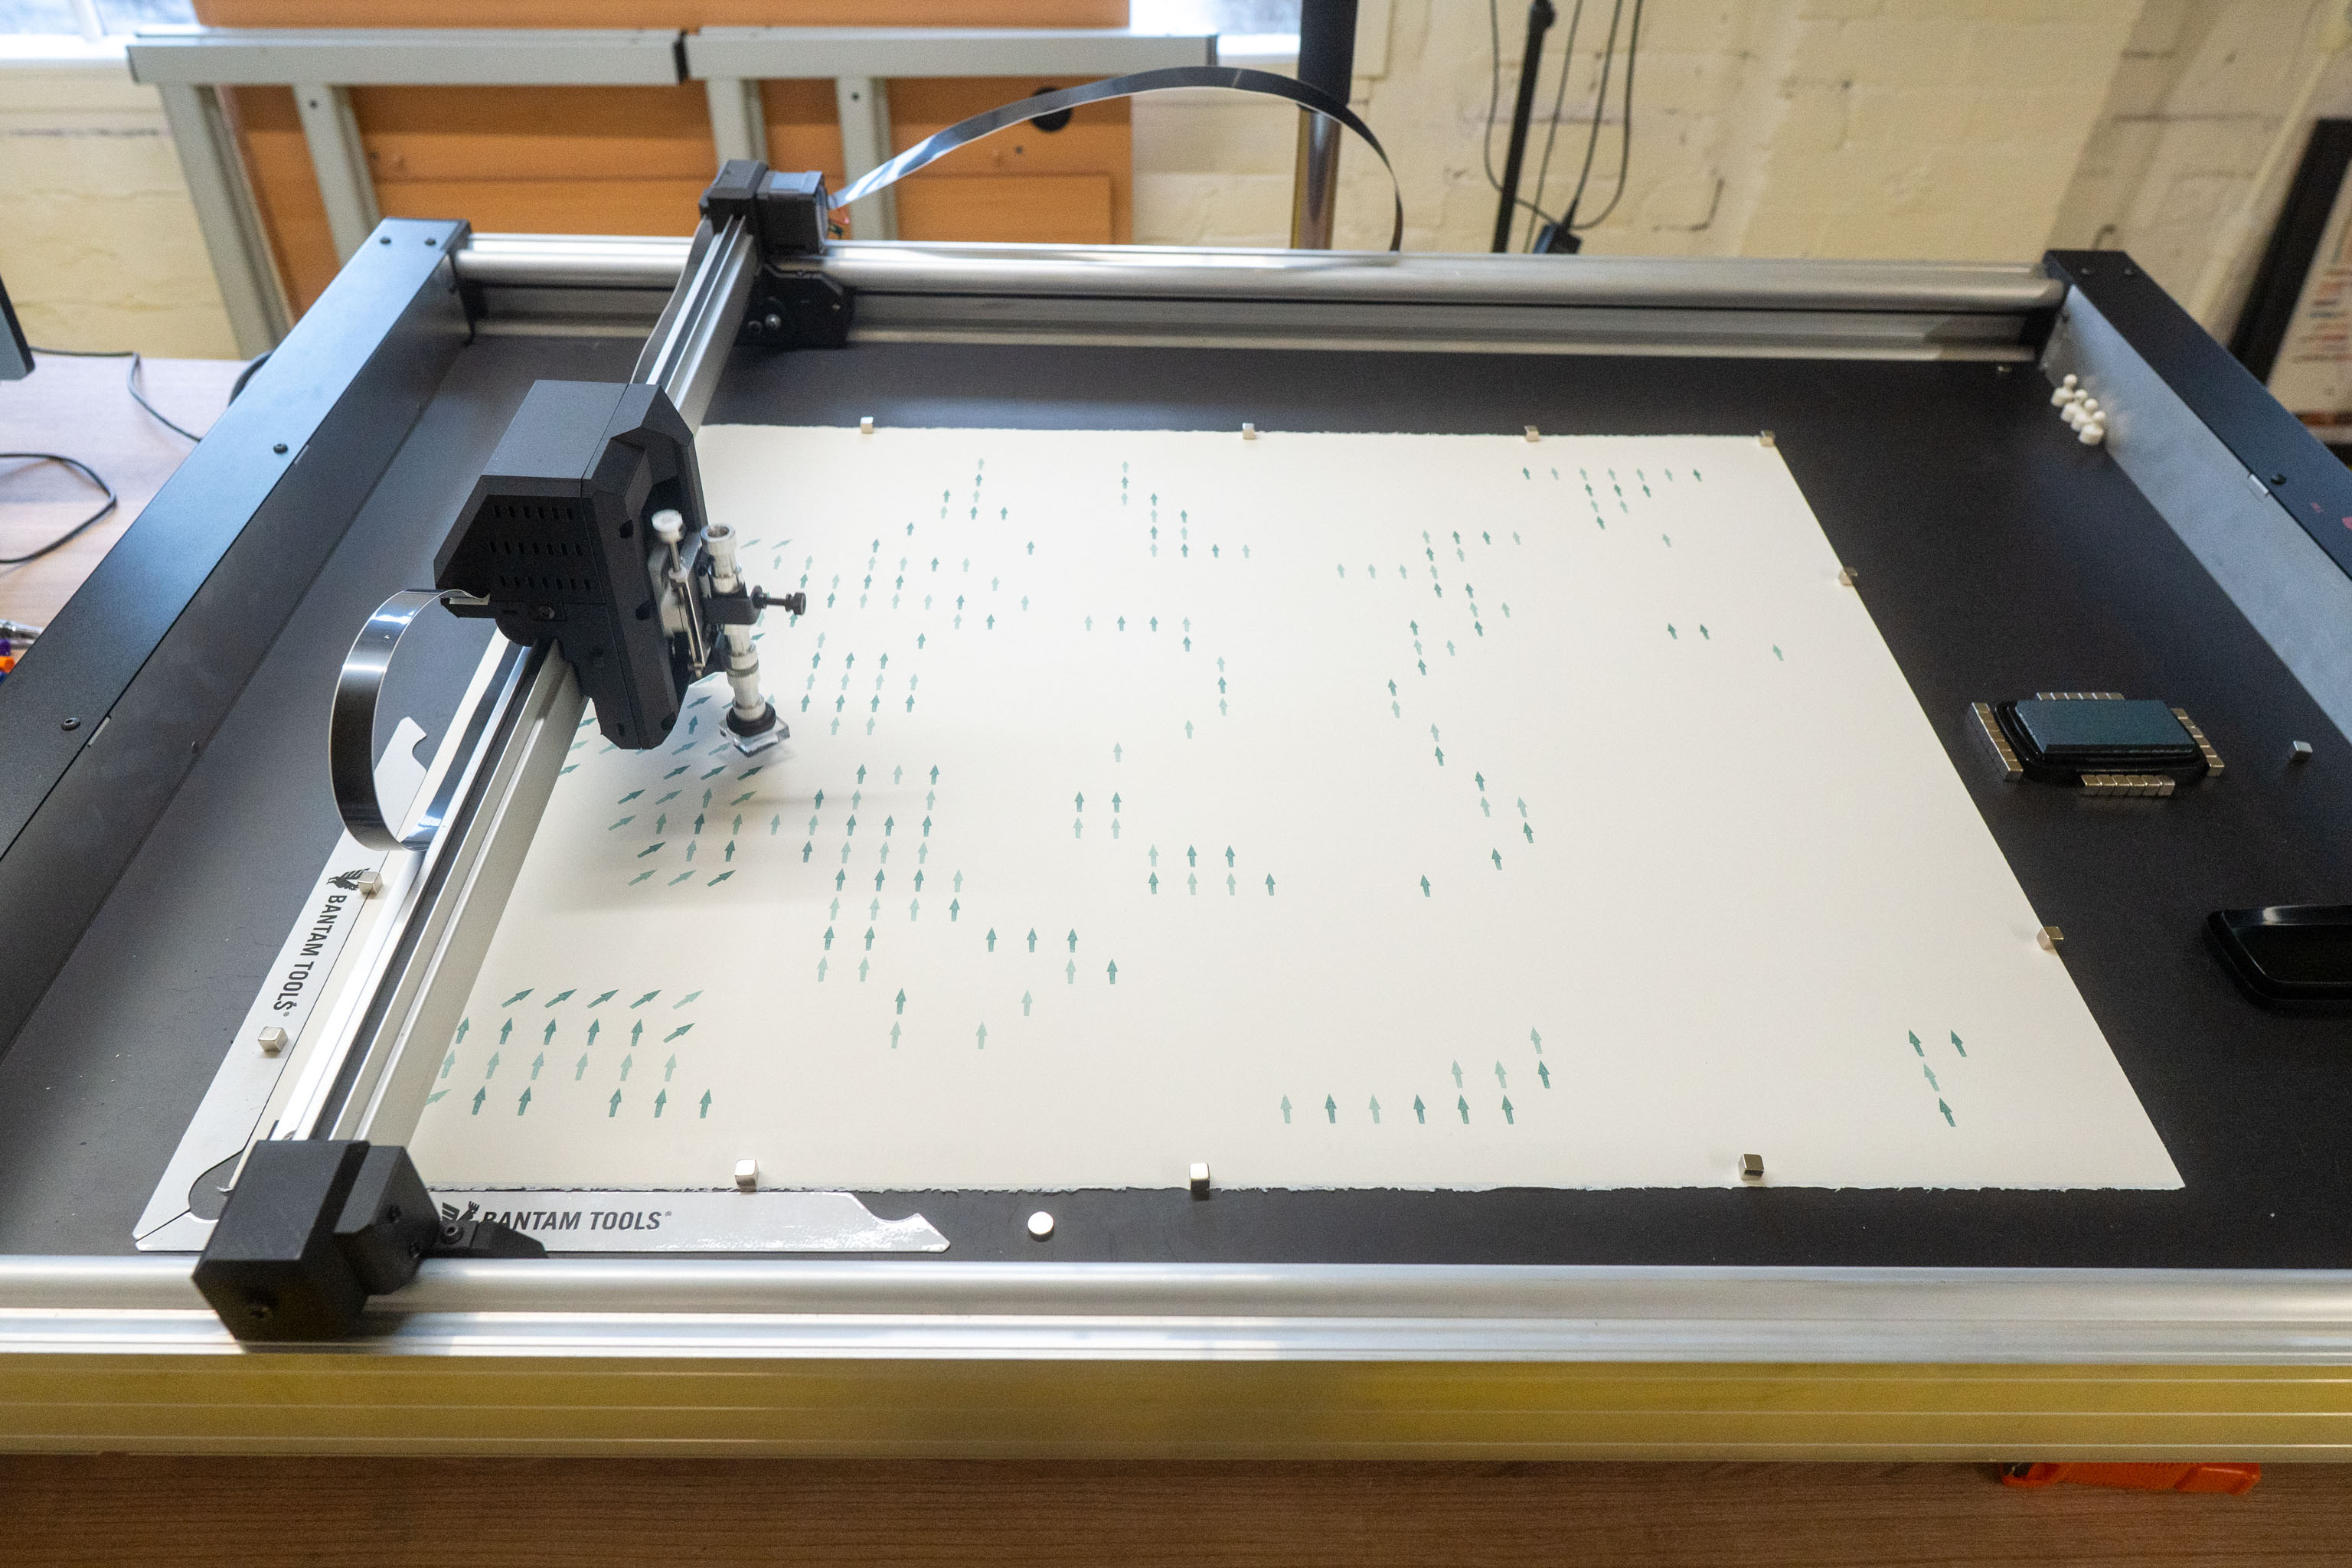
So I made a fairly low resolution flow field, where each point was round up/down to the nearest compass point; N, NE, E, SE, S, SW, W and NW.
Load up an arrow rubber stamp and stamp all the N directions first, then NE, and so on until the whole page is done.
Then you have a rubber stamped flow field, nice!
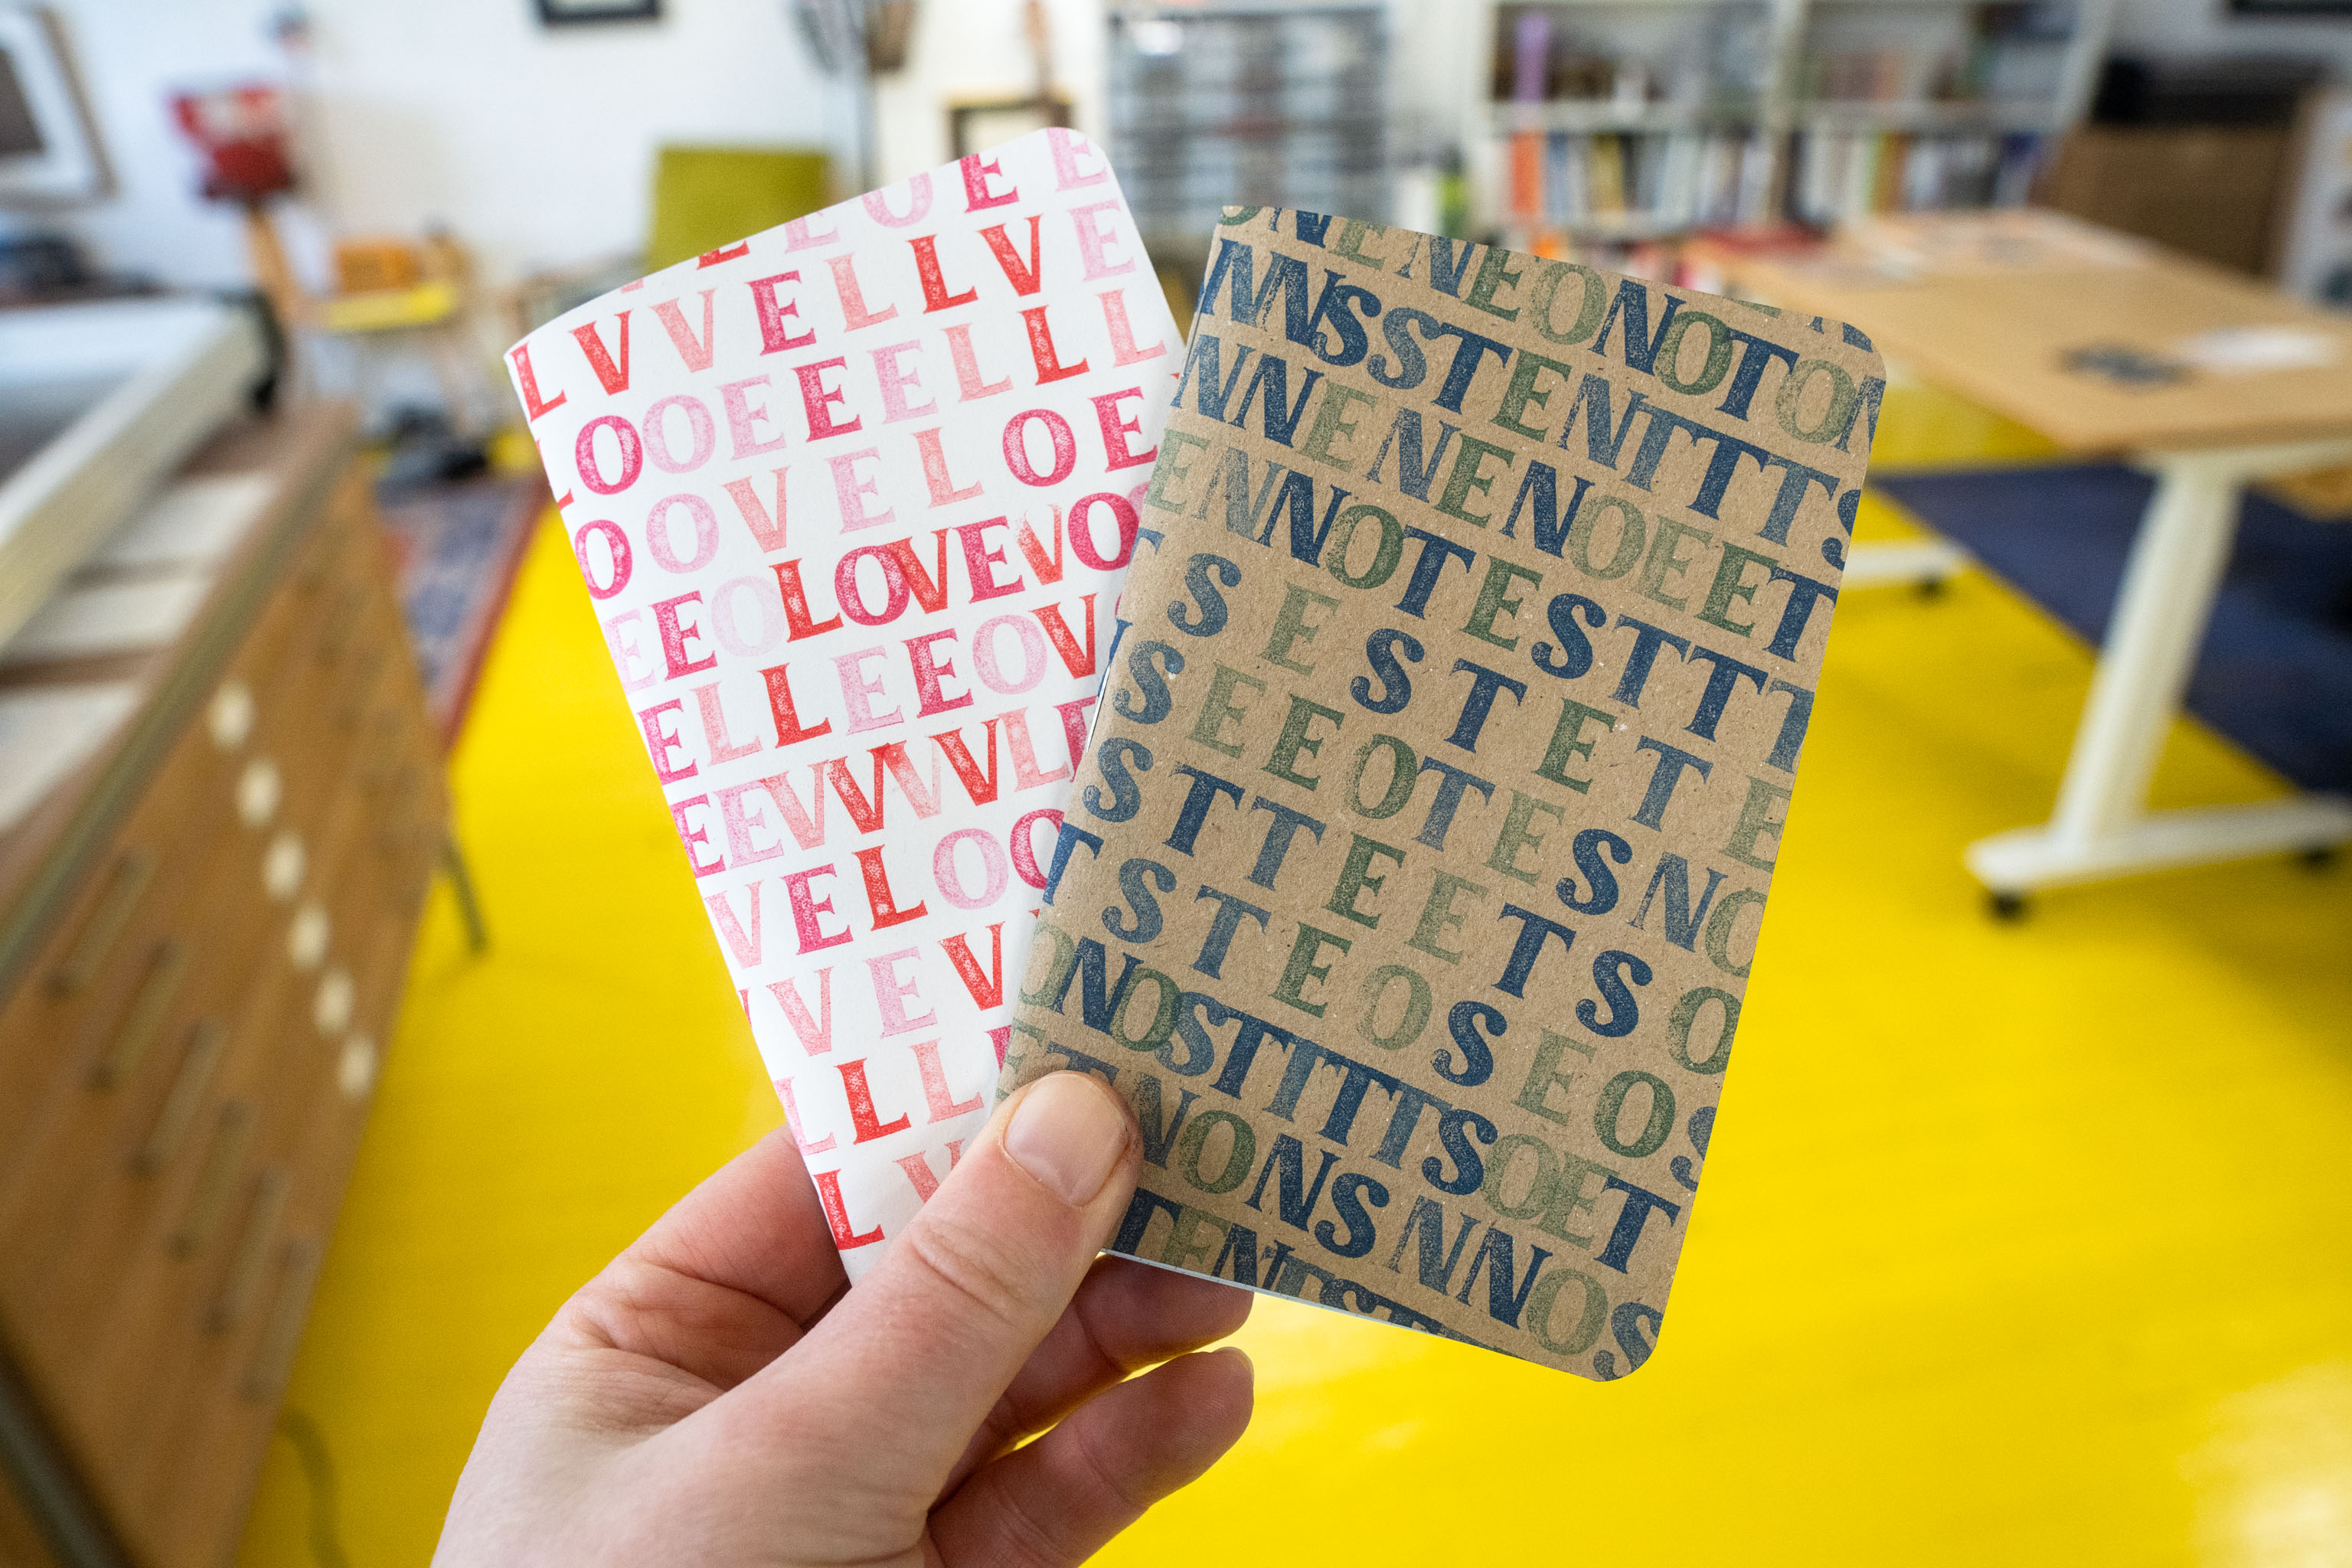
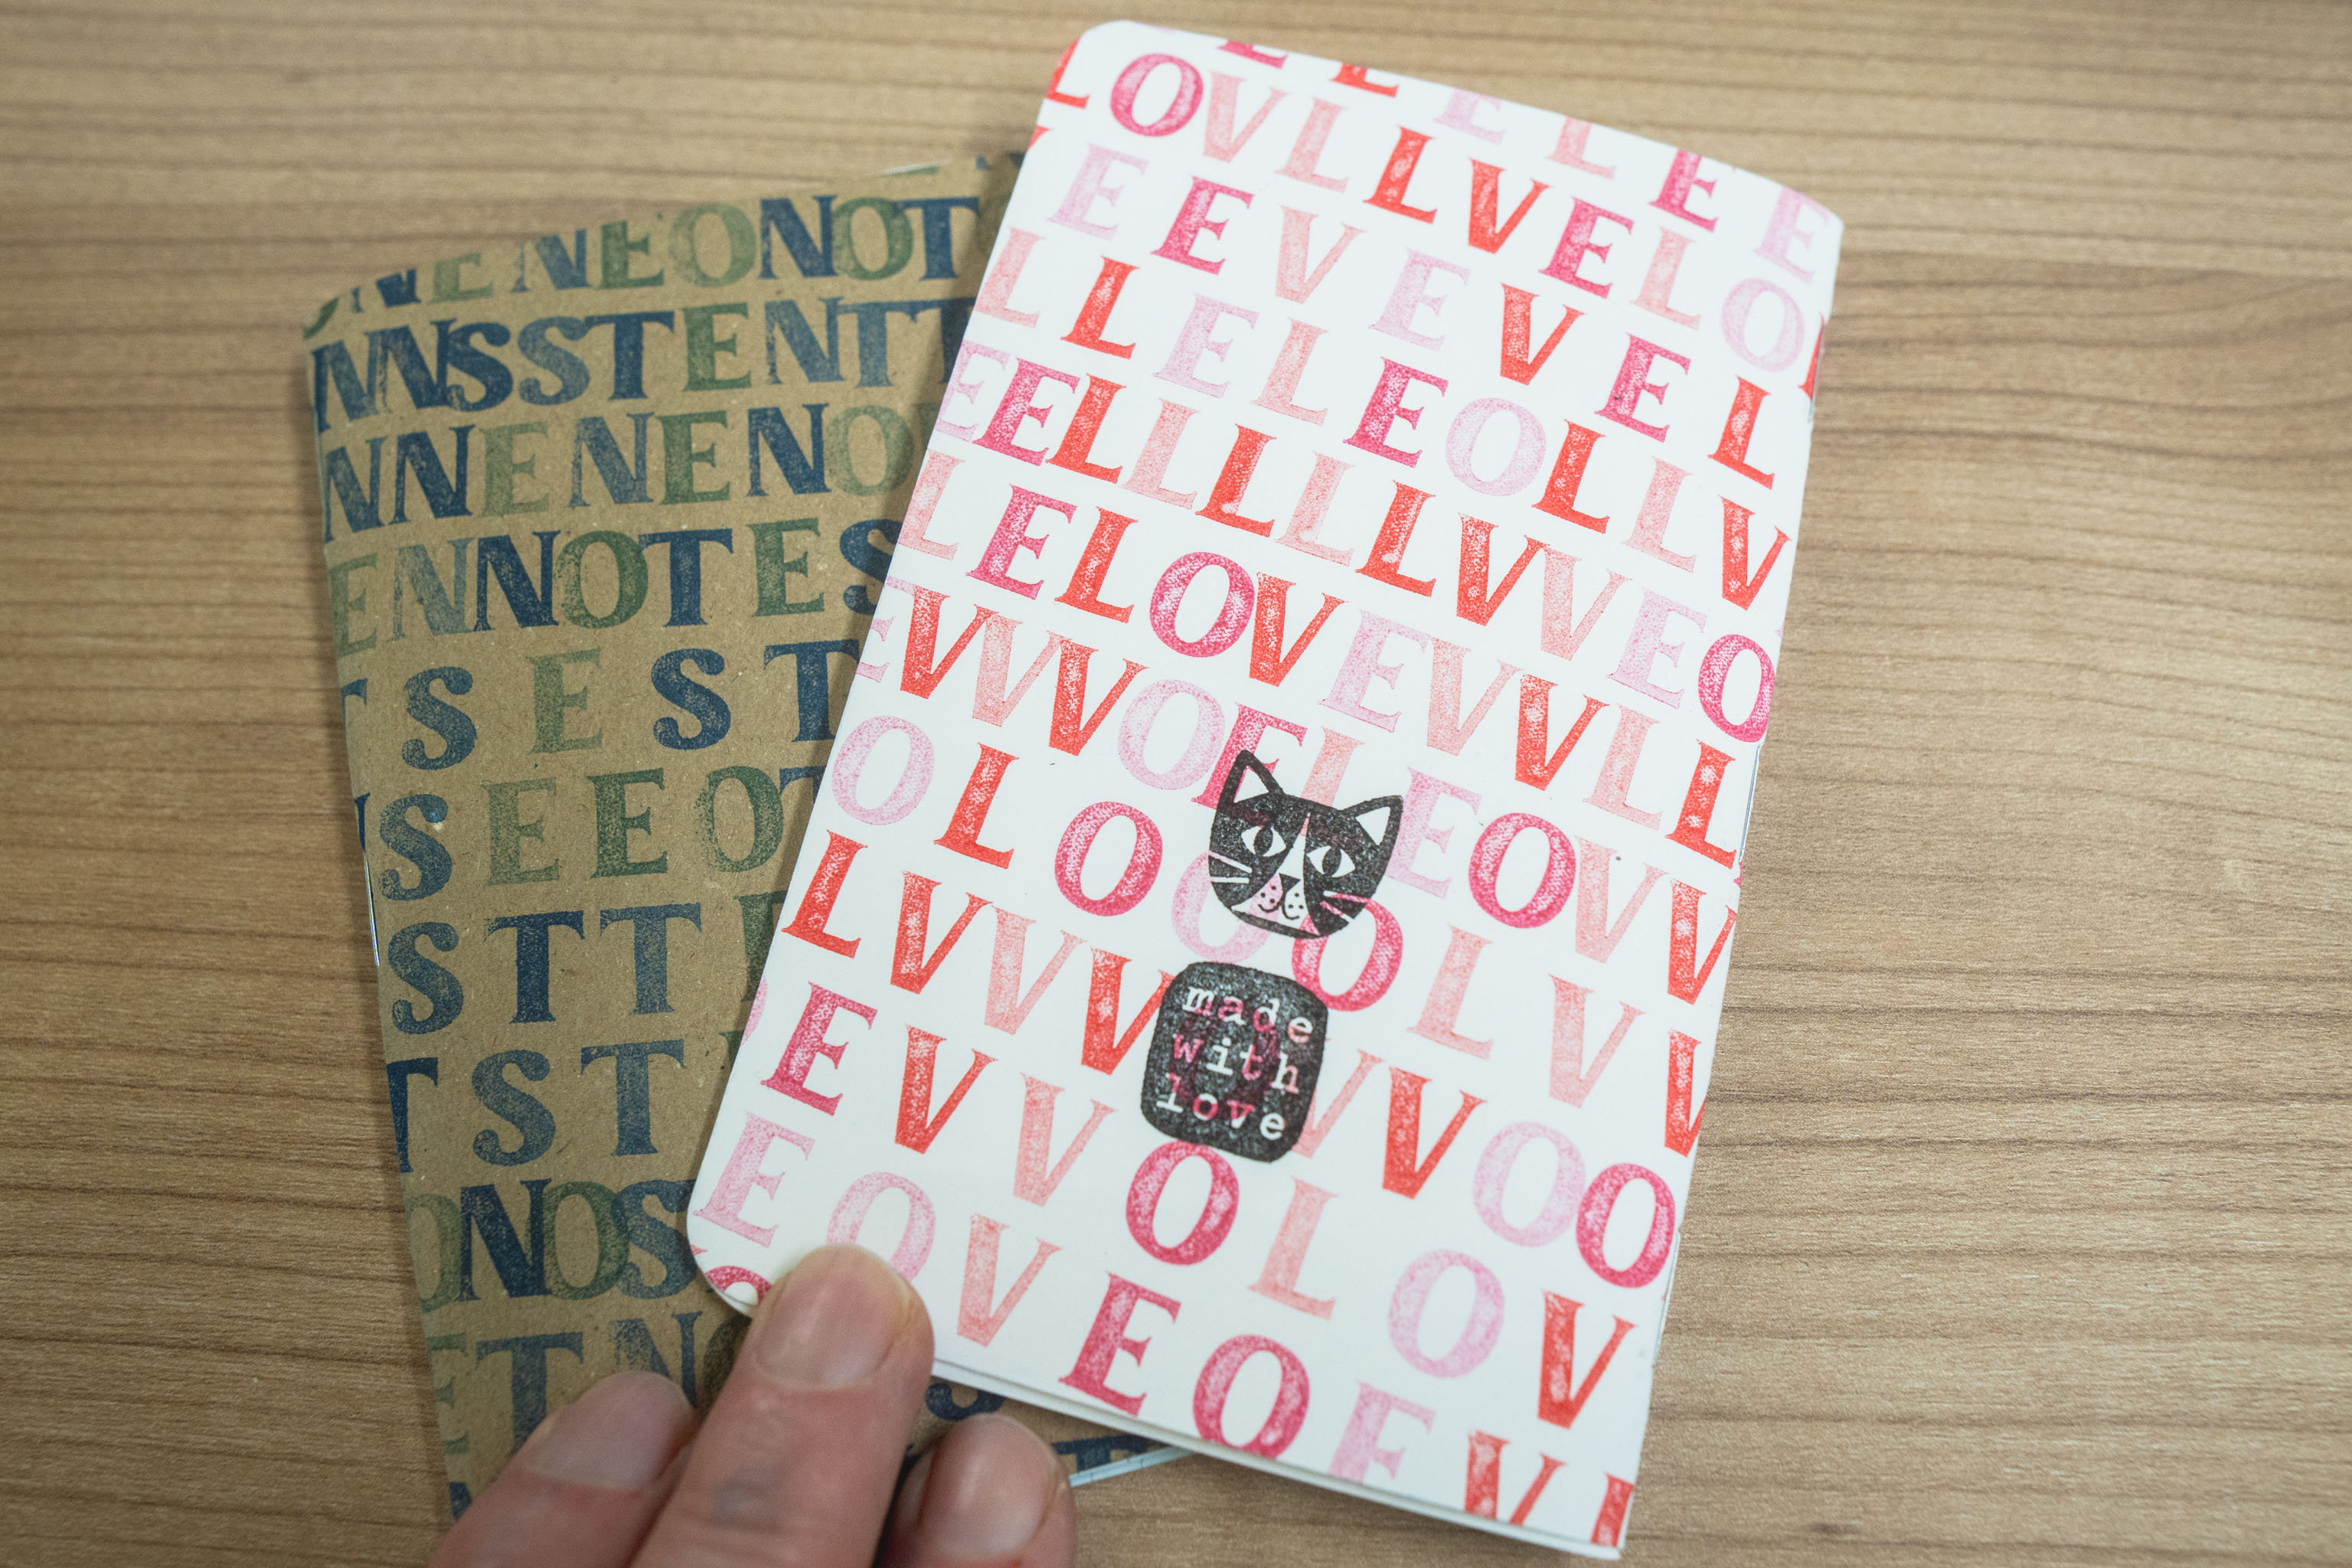
Love Notes
I should have take more photos, and there's been a bit of code going on between this and the last post. In that I now have some code that I can feed a word to and it'll stamp the letters from that word in random order onto the page.
Except 1/3rd of the way down, about 5-6 letters from the right edge it'll place the letters in order to spell the word.
This way I can cut out the a notebook cover bit from the print and the word will appear on the cover in roughly the right place.
I deconstructed a FIELD NOTES notebook, replaced the cover with these and stapled them back up together.
And so for Valentines Day we have some LOVE NOTES
I guess this is the start of making Handmade Notebooks
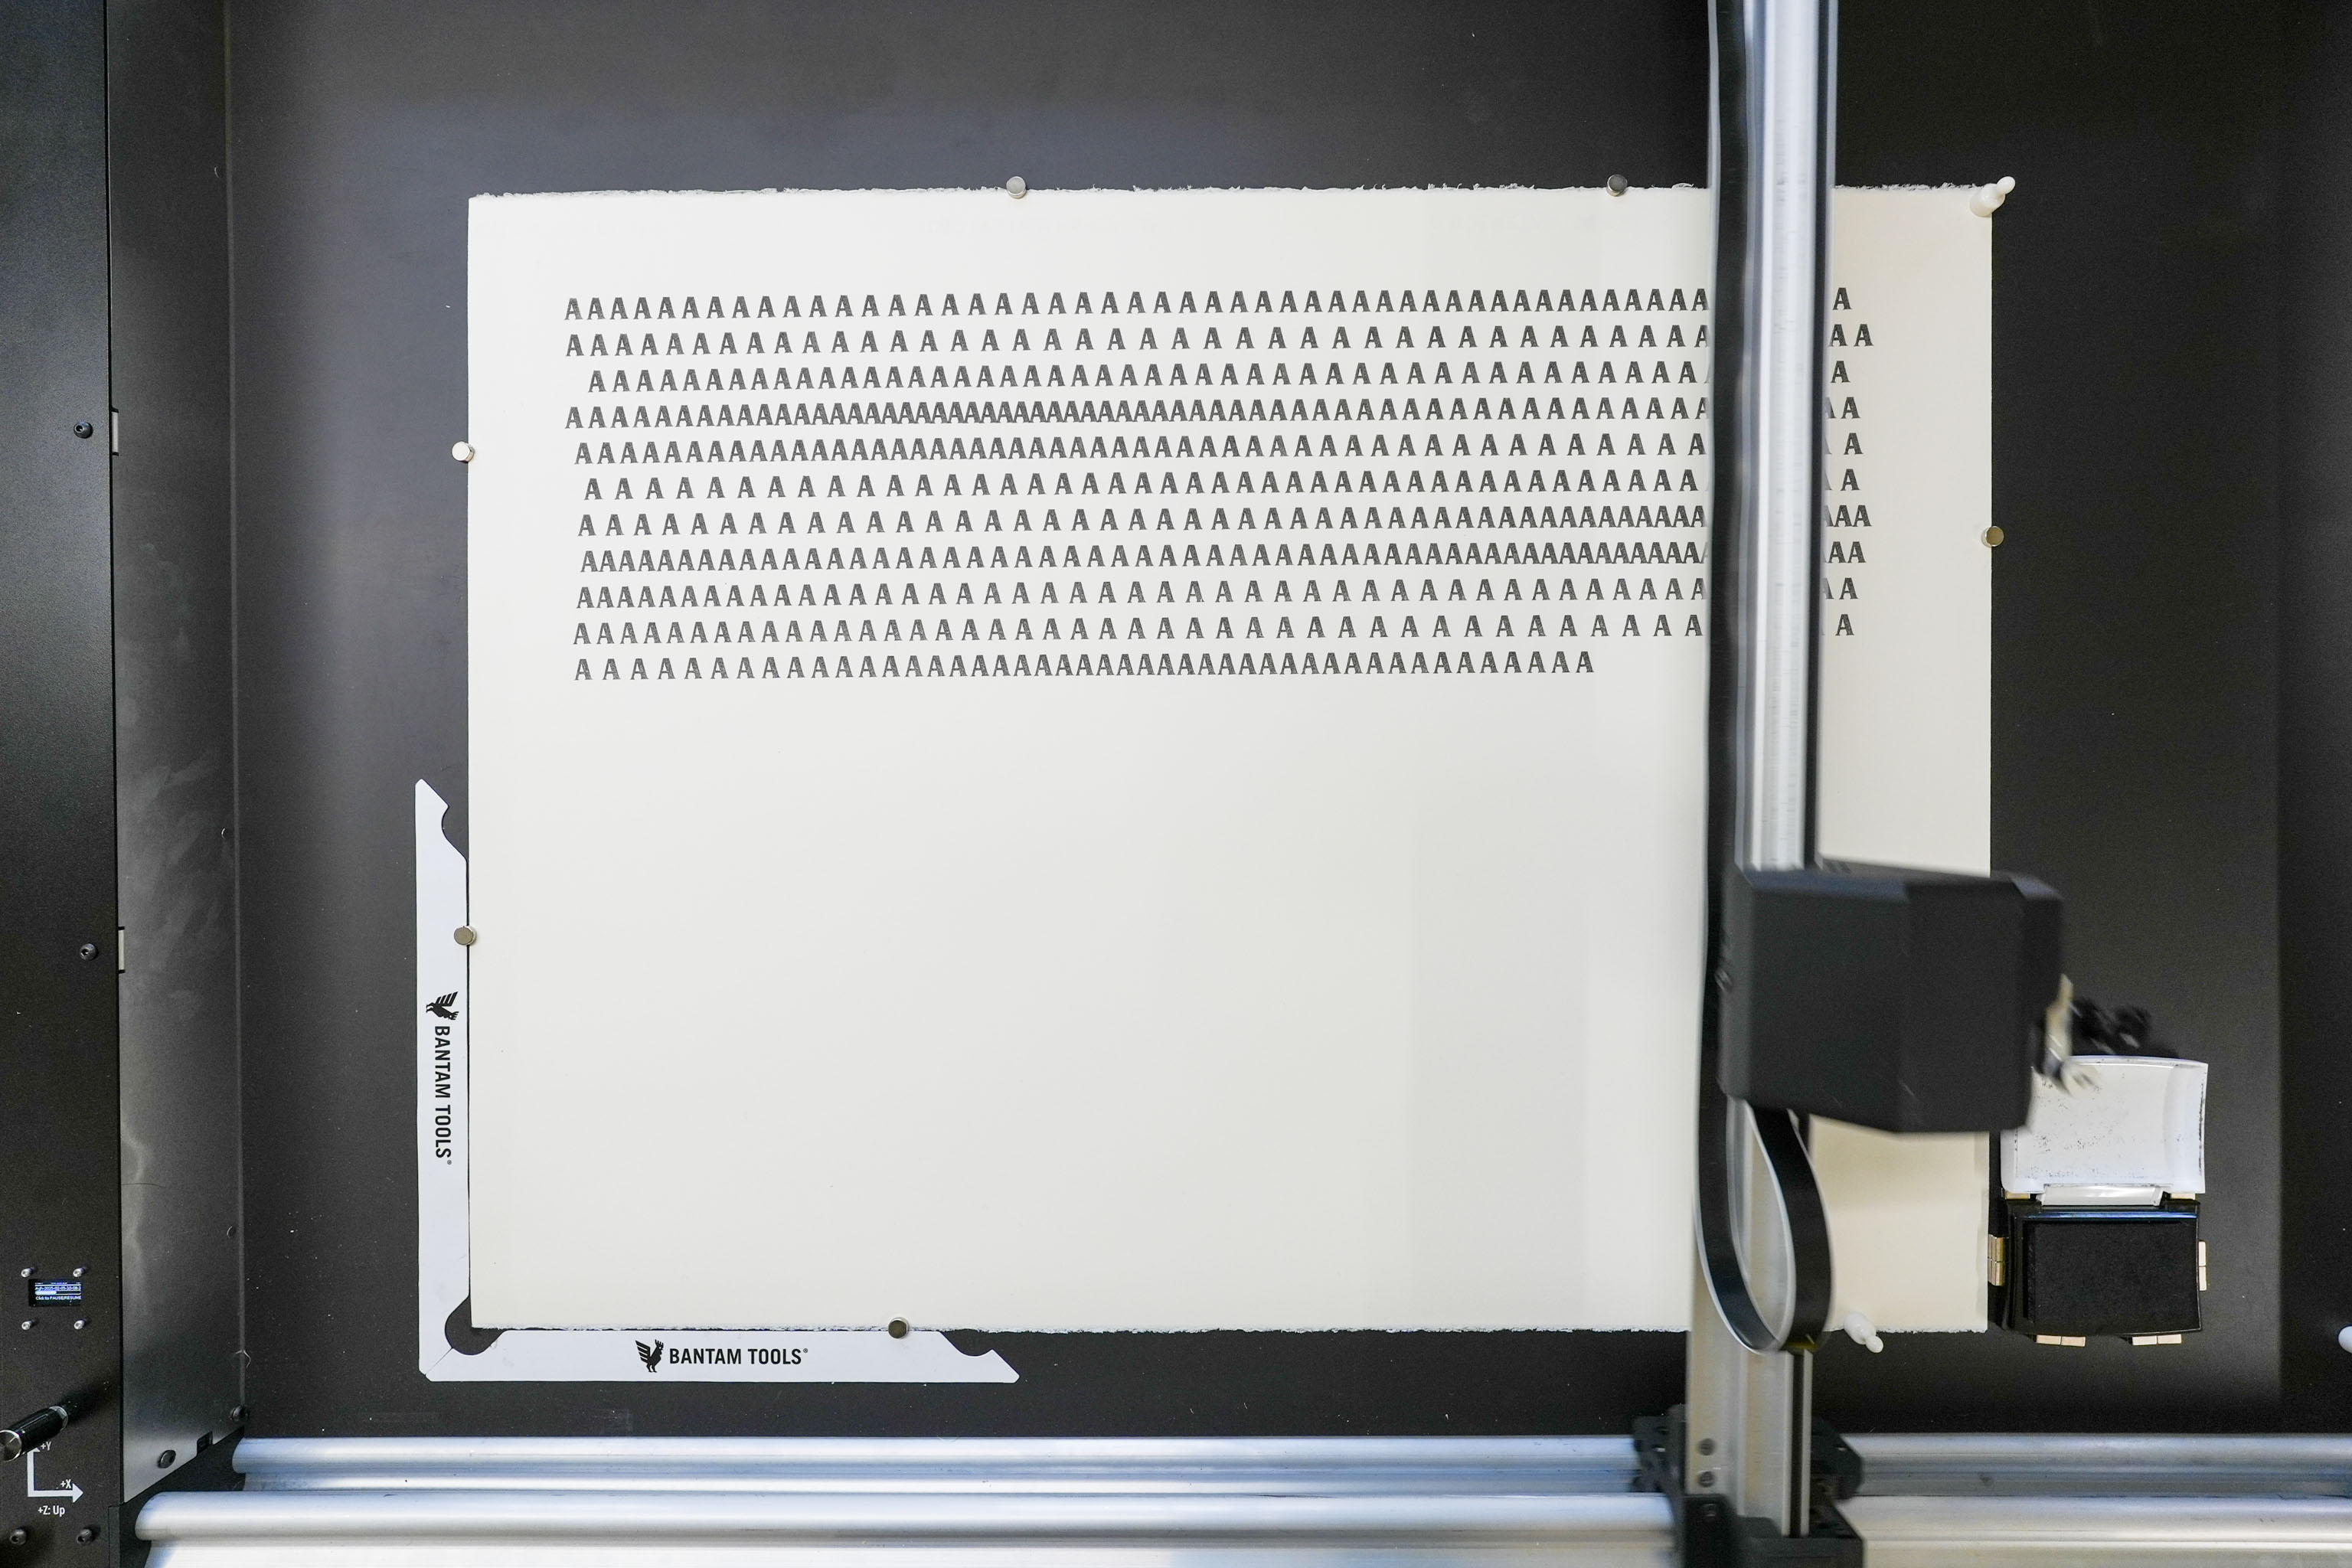
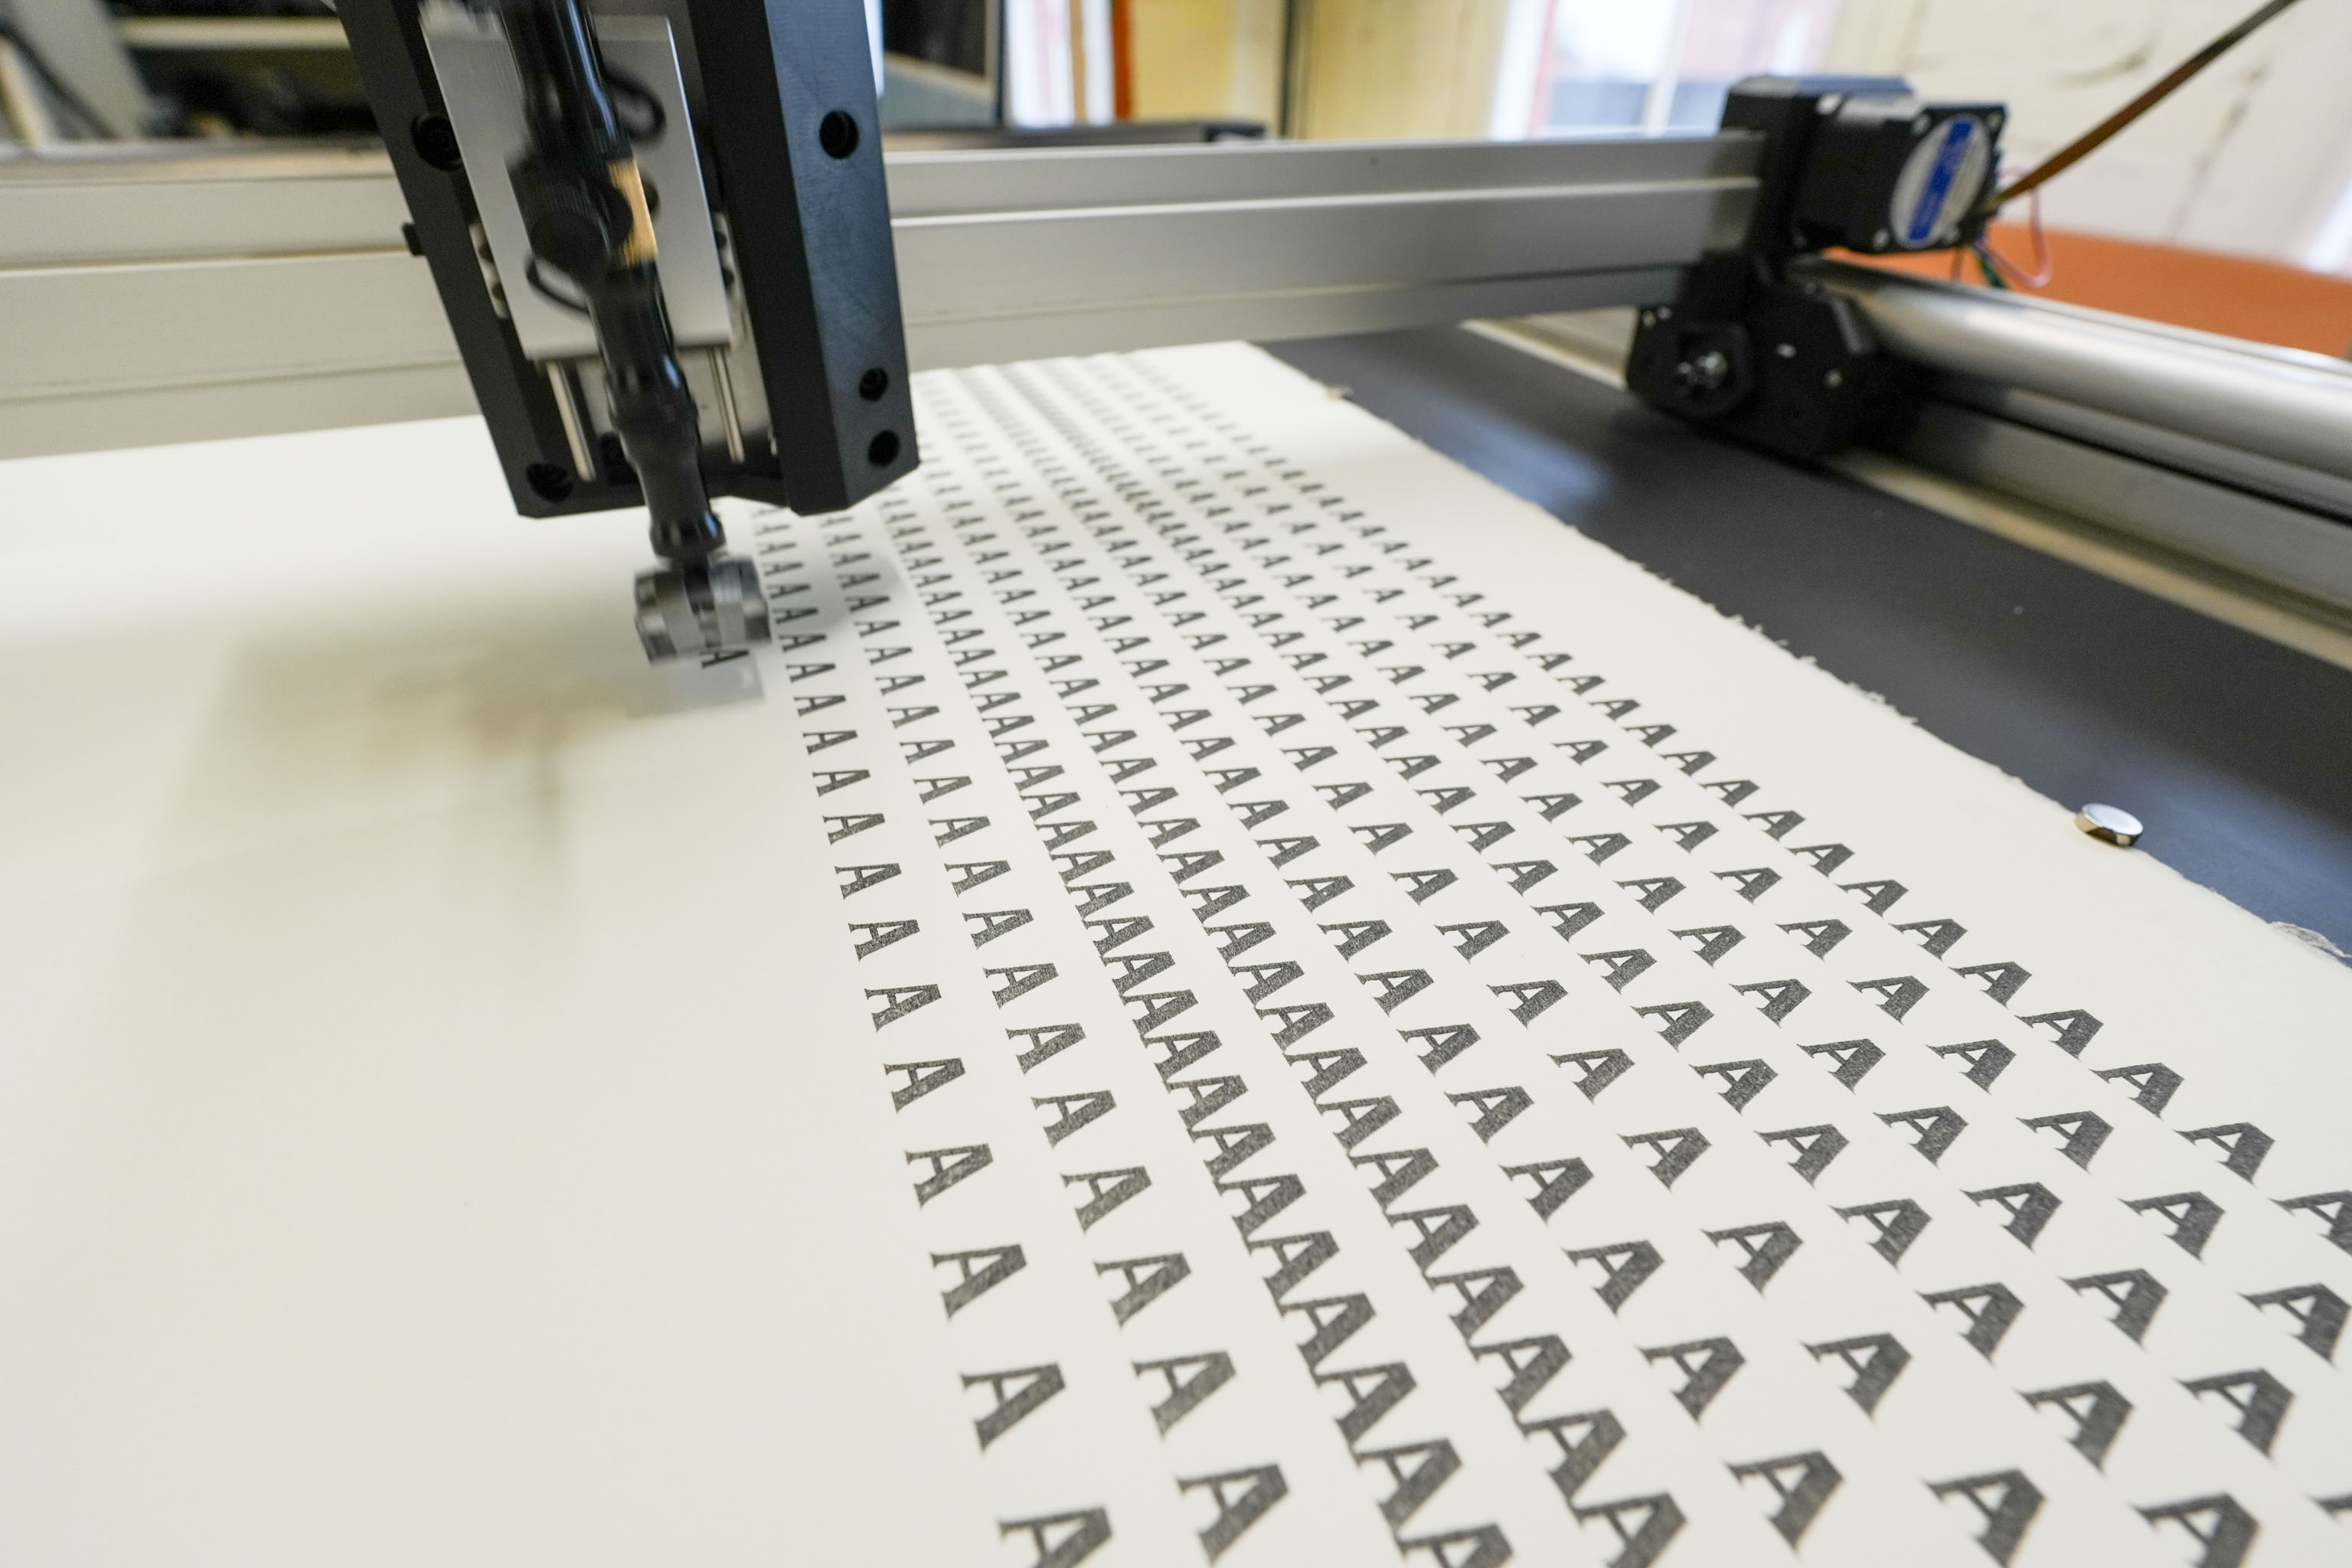
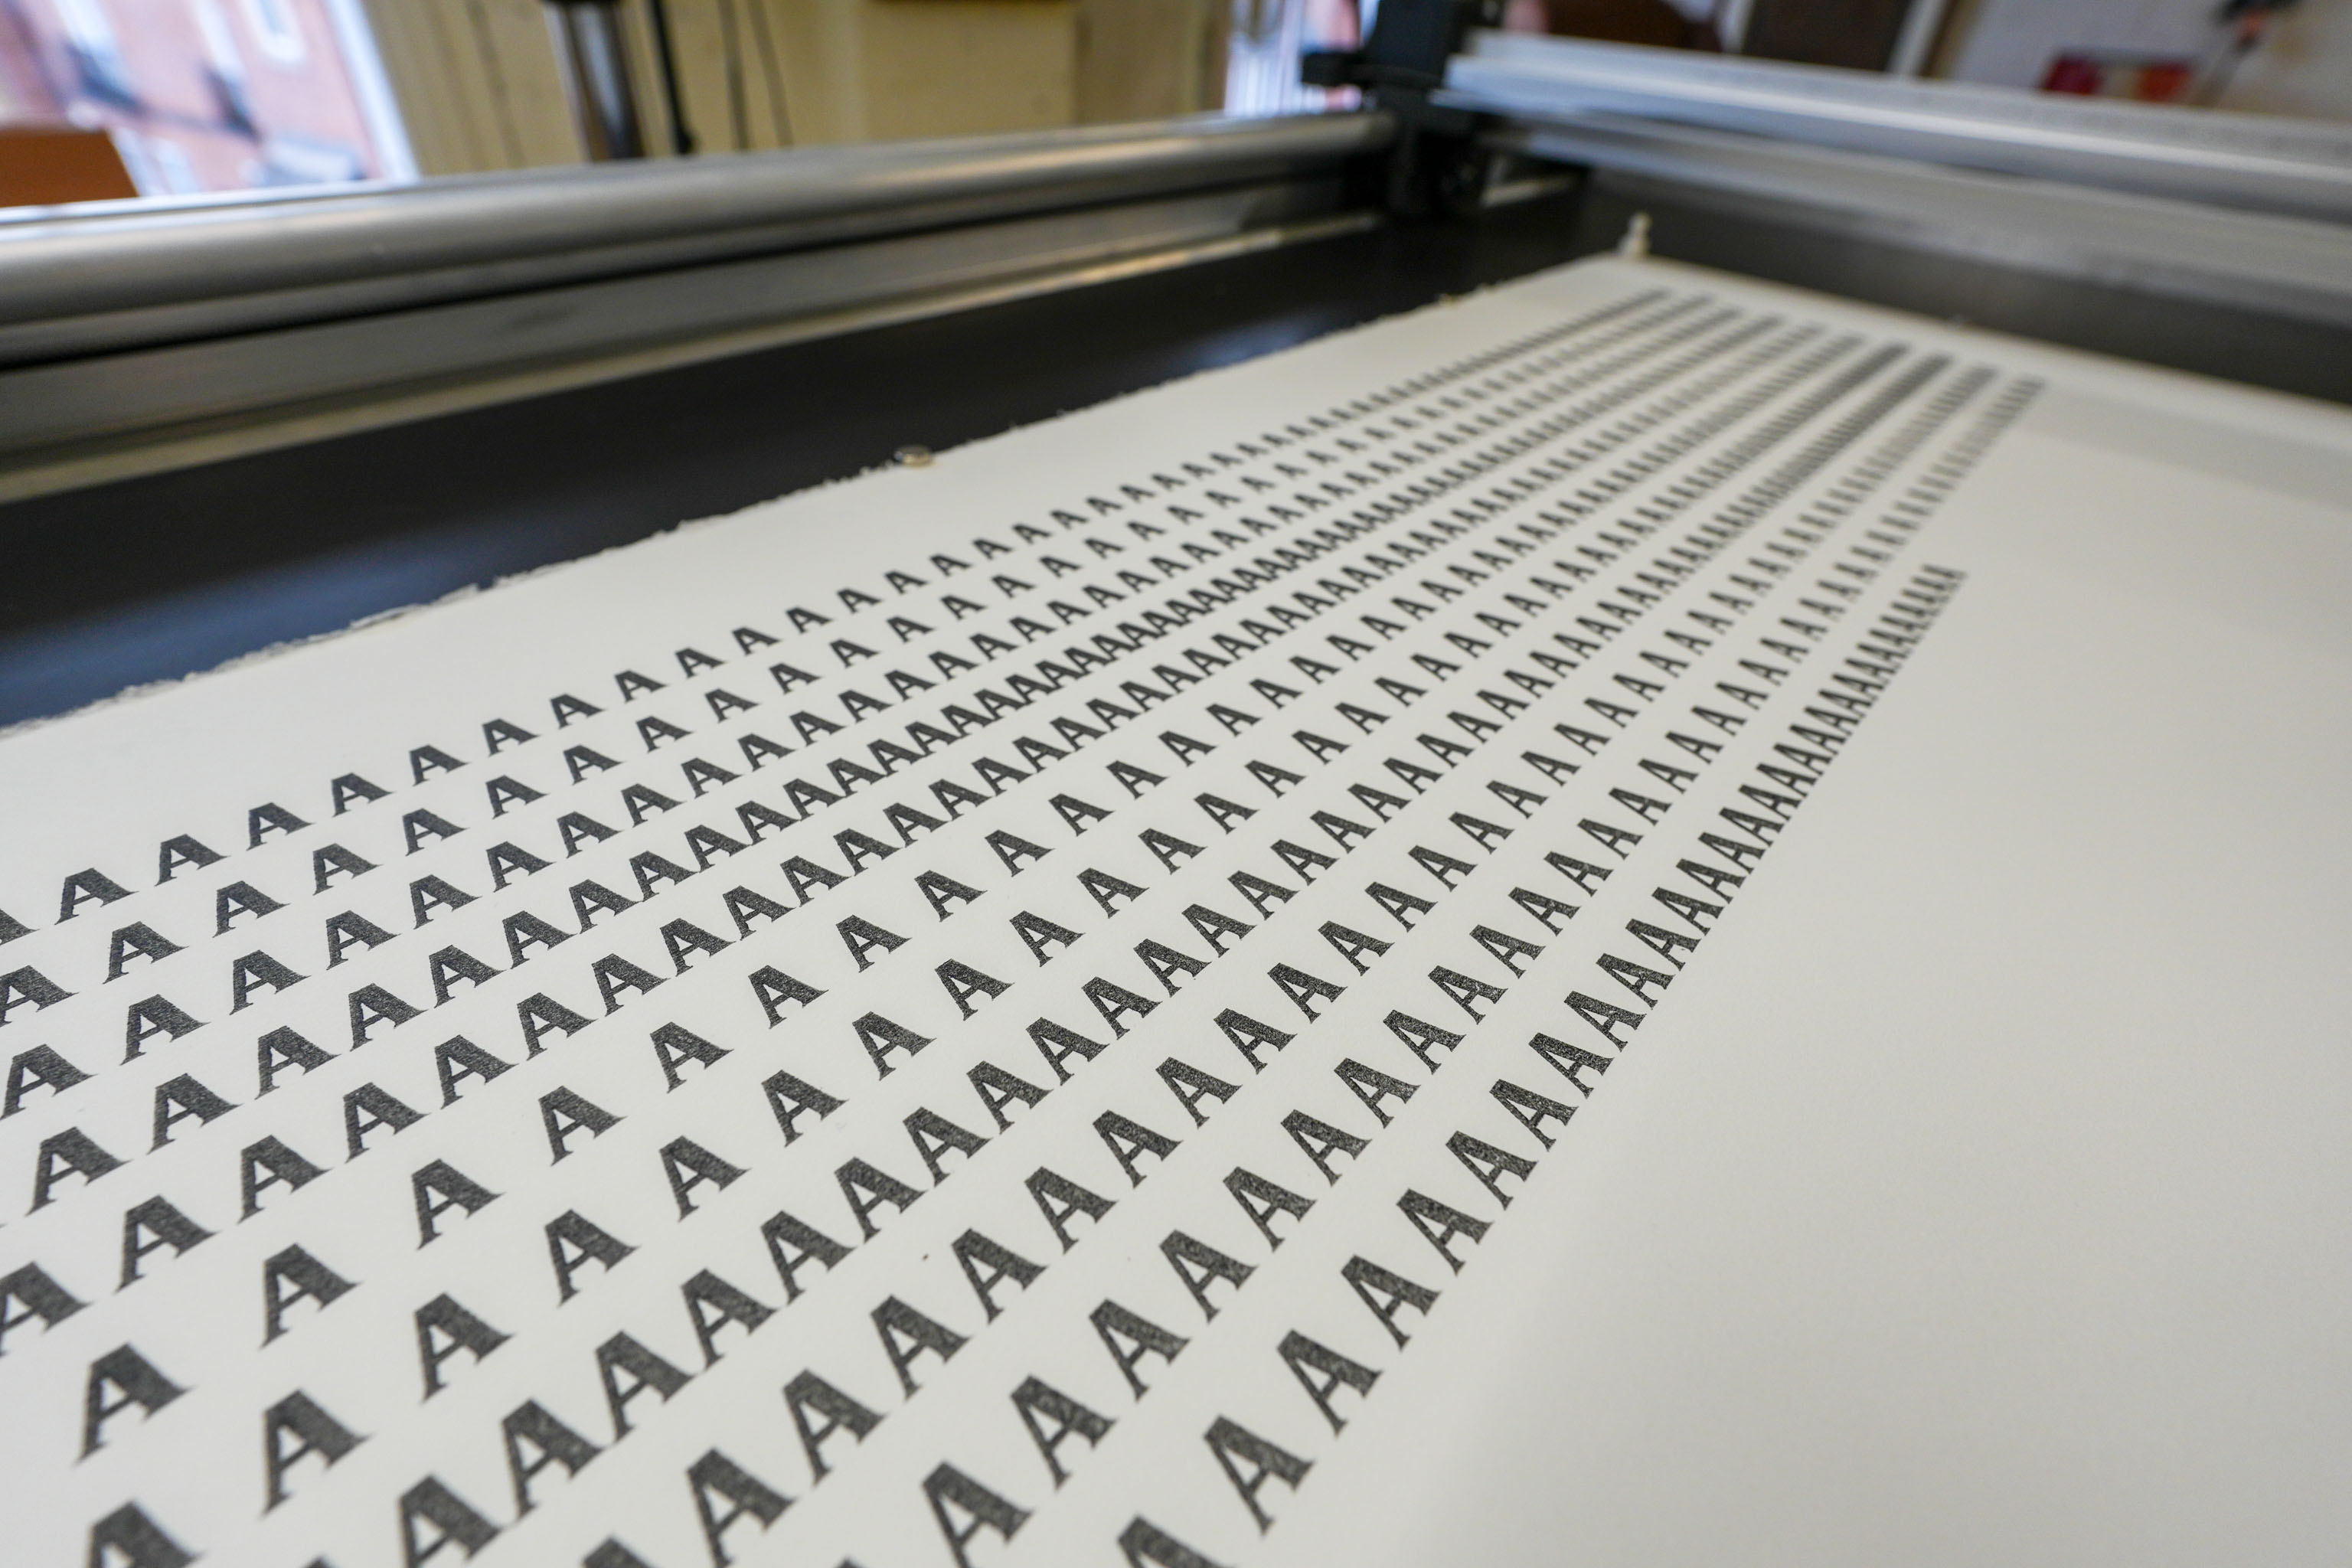
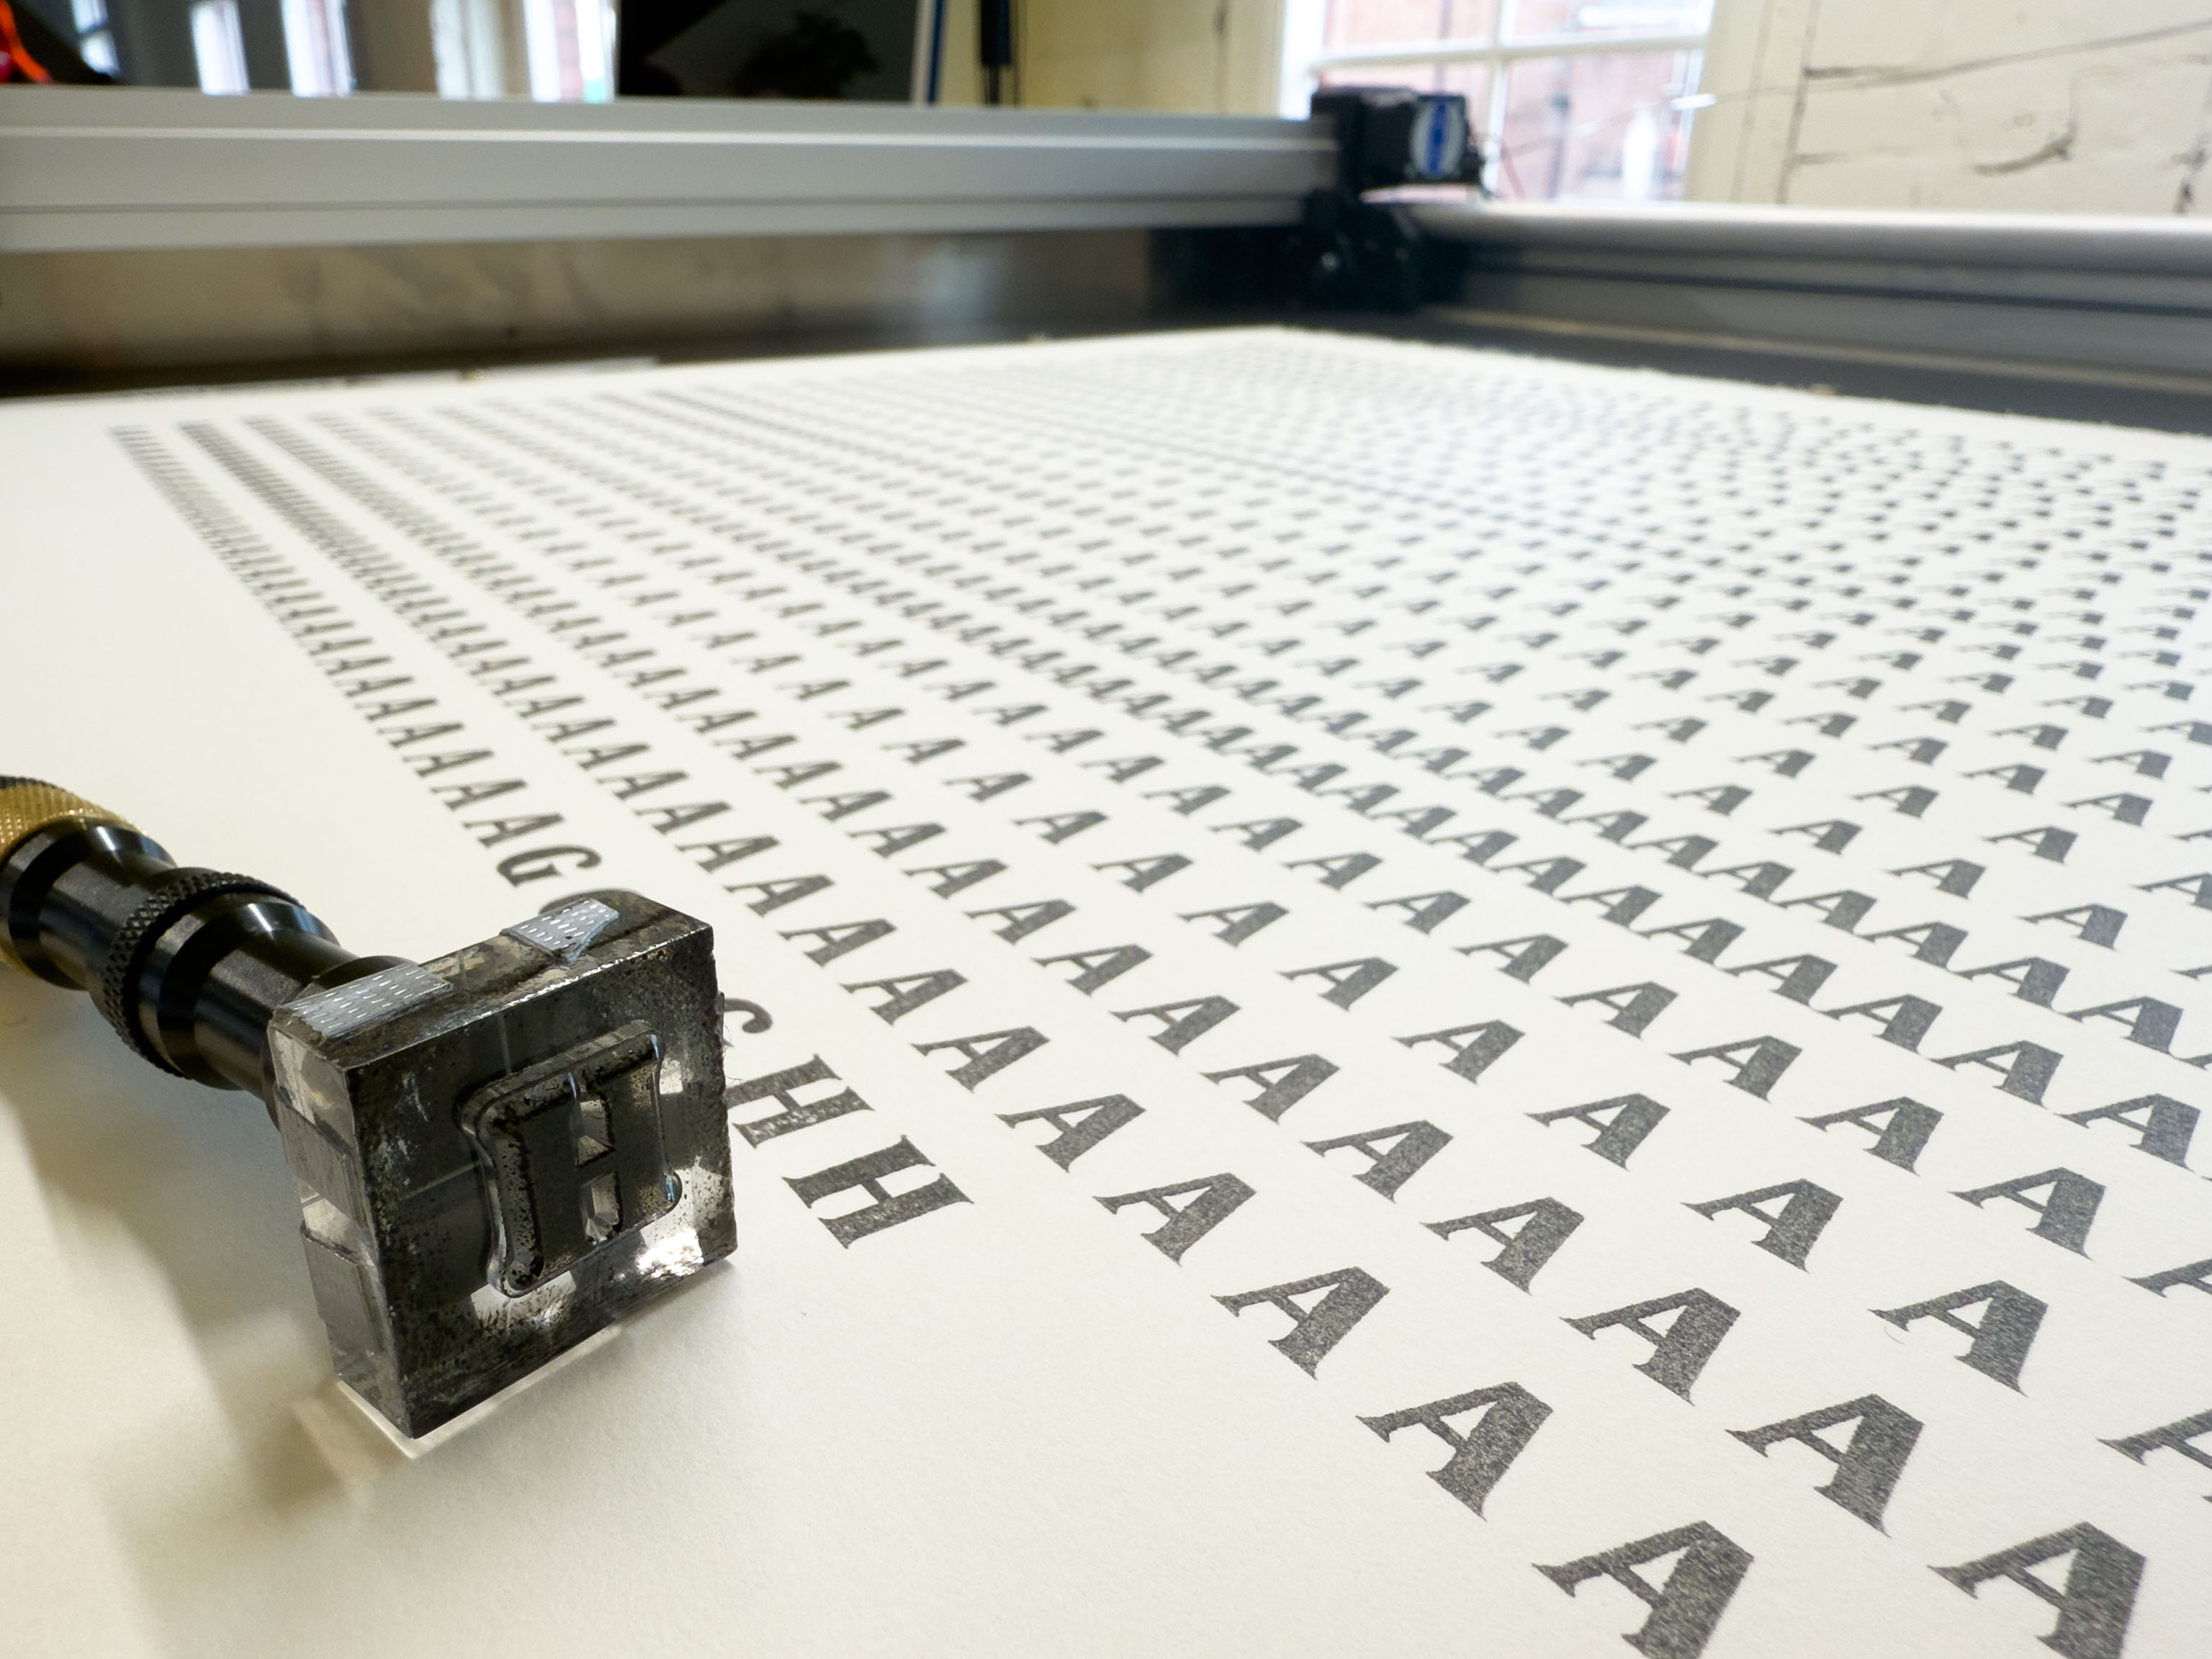
Today I wanted to try something larger, I think this is half imperial paper, proper fancy printmakers stuff 🎩
Decided to make printing out the letter AAAAA a bit more interesting by not doing it on a grid but by moving the x position by an amount controlled by a couple of sine waves. That way they bunch up and spread out to make it visually a bit more interesting than a grid they'd be in otherwise.
These rubber stamps are made from silicone that "sticks" to an acrylic block, surface tension I guess. Anyway, I rigged together something with bits and bobs I had laying around and some tape. That allows me to put it into the ArtFrame and easily-ish swap the stamp out, which explains the AAGGGGHH at the end!